Three Core Book Folding Techniques
Every book folding pattern uses one of three techniques (or occasionally a combination). Understanding these is essential before you pick up a pattern.
1. Measure, Mark, and Fold (MMF)
This is the technique most beginners start with, and for good reason — it's straightforward and produces clean results.
How it works: You measure from the top edge of the page to a specific point, make a small pencil mark, then fold the page corner to that mark. Every fold is either a top-down fold (measuring from the top of the page) or a bottom-up fold (measuring from the bottom).
Pros: Most pattern options available, easy to learn, very precise when done carefully.
Cons: Time-consuming for large patterns (each fold requires two measurements).
When to use it: Your first project, detailed designs, and any pattern with many data points per page.
The basic fold:
- Measure the distance from the top of the page to the point specified in your pattern
- Mark lightly with pencil
- Fold the top outer corner of the page down to meet that mark, creating a diagonal crease
- Press firmly along the crease with your fingernail or a bone folder
- Fold the bottom outer corner up to the same mark, creating a second diagonal crease that meets the first
The result is a page with two neat triangular folds pointing toward the spine. When hundreds of these folds stack together at the right positions, they form the image.
2. Cut and Fold
Cut and Fold adds a cutting step before folding. Instead of folding the entire page, you cut along a line and fold only the portion that creates the design, leaving a clean uncut section visible in the background.
How it works: Each page has two measurements — one for the fold position and one for the cut line. You cut from the outer edge of the page to the cut-line measurement, then fold the resulting strip to the fold-line measurement.
Pros: Produces sharper, more detailed images; works well for intricate designs like animals and portraits.
Cons: Requires a craft knife; one wrong cut can ruin the page; more time per fold.
When to use it: Detailed animal designs, portrait patterns, and any pattern specifically designed for the cut-and-fold method.
Important: Use a sharp craft knife and a self-healing cutting mat. Dull blades tear the paper instead of cutting cleanly. Replace the blade after every 30-40 cuts.
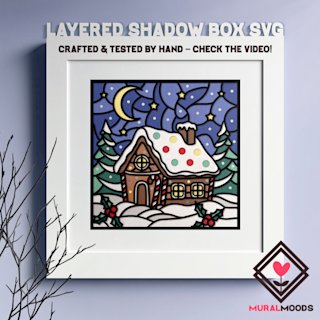
3. Shadow Fold
Shadow folding is the newest technique and creates a three-dimensional effect where the design appears to float in relief against the folded background.
How it works: You fold pages to create a shadow background (typically uniform folds at a consistent depth), then fold additional pages at varying depths to create the design. The contrast between the background depth and the design depth creates the "shadow" effect.
Pros: Stunning 3D appearance, very popular at craft fairs, commands higher prices.
Cons: More complex patterns, requires precise measurement consistency, fewer free patterns available.
When to use it: Showcase pieces, gifts, items for sale, and any pattern labelled "shadow fold."
Which technique should beginners start with?
Start with Measure, Mark, and Fold (MMF). It's the foundation. Once you can consistently produce clean MMF folds, Cut and Fold and Shadow Fold become natural extensions of the same skills. Don't skip ahead — the time spent perfecting MMF folds pays off in every future project.