5 Papercut Mistakes You're Probably Making (And How to Fix Them)

Papercutting is all about precision, but even the most experienced crafters make mistakes. Avoid common papercut blunders and craft like a pro with these expert tips.

Ever spent hours on a papercut project, only to end up with jagged edges, torn paper, or a design that just doesn’t look right? You’re not alone. Papercutting is a stunning art form, but even the smallest mistakes can ruin your masterpiece. The good news? These blunders are easy to fix - and we’re here to help.

Why Mistakes Happen.

Papercutting is all about precision, but even the most experienced crafters make mistakes. Whether it’s using the wrong paper or rushing through the details, these errors can turn a dream project into a disaster. But don’t worry - we’ve got the fixes you need to craft like a pro.

From jagged edges to unbalanced designs, small errors can make your papercuts look amateurish. But with the right techniques, you can create clean, professional results every time.

1. Using Low-Quality Paper

Mistake: Cheap paper might save you a few dollars, but it can cost you your entire project. Thin, flimsy paper tears easily and doesn’t hold its shape, leaving you with a messy final product.

How to Fix It: Use high-quality paper with a thickness of 150-250gsm for the best results. The stronger the paper, the cleaner and sharper your cuts will be. Don’t forget to pick a smooth surface for your designs to ensure your blades glide effortlessly.

2. Using Dull Blades

Mistake: A dull blade is the enemy of precision. Jagged edges and uneven lines are often the result of a blade that’s past its prime.

How to Fix It: Always use sharp, high-quality blades. A fresh blade ensures smooth, clean cuts with no ragged edges. Consider changing your blade regularly if you’re working on larger projects or cutting intricate details.

3. Improper Cutting Mat Setup

Mistake: A shifting paper can ruin your design in seconds. Without a proper cutting mat, your paper won’t stay in place, leading to uneven cuts and misplaced details.

How to Fix It: Make sure you use a good cutting mat with adhesive properties to keep your paper in place while cutting. Additionally, always make sure your mat is large enough for your design to ensure a stable workspace.

Blooms That Wow
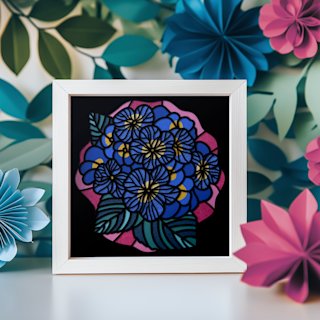
Explore our collection of papercut flower SVG templates for Cricut and other cutting machines and bring your projects to life with just a click!

4. Not Planning Your Design Layout

Mistake: Jumping straight into cutting without a plan is like driving without a map - you’re bound to get lost. Poor layout planning can result in unbalanced designs and wasted materials.

How to Fix It: Take time to plan your design layout first. Sketch the pattern lightly with a pencil or trace it on your paper before cutting. This helps you visualize the design before committing to cuts and avoids costly mistakes.

5. Not Paying Attention to Details

Mistake: A common error when starting with papercuts is ignoring the small details. These details can make or break a design, especially when cutting intricate patterns.

How to Fix It: Take your time with each cut and focus on the tiny details. Use fine-tipped tools for intricate parts, and if necessary, zoom in on the design to avoid missing small sections. The details are where the magic happens!

Conclusion

Avoiding these common mistakes will help you achieve beautiful, professional-looking papercuts. With the right tools, careful preparation, and a bit of patience, you’ll be crafting like a pro in no time! Remember, the key is to practice, learn from any errors, and enjoy the process. Happy cutting!