Articles 23 min read

Cricut Mat Guide: Choose the Right Grip for Cardstock

Your comprehensive guide to cricut mat for cardstock.

Comparison of Cricut mat grip levels for cardstock

Cricut Mat Guide: Choose the Right Grip for Cardstock

You grab your favorite cardstock, place it on your Cricut mat, and hit "Go"—only to watch your beautiful paper tear as you try to remove it. Or worse, the cardstock shifts mid-cut, ruining intricate shadow box layers you spent hours designing. Sound painfully familiar?

Choosing the right Cricut mat for cardstock isn't just about color preference—it's the difference between flawless cuts and frustrating failures. Using a mat with too much grip will tear your cardstock during removal, while too little grip causes shifting and misaligned cuts that waste materials and time.

In this comprehensive guide, you'll learn exactly which Cricut mat grip level to use for every cardstock weight, how to troubleshoot common mat problems, and the maintenance techniques that extend mat life. By the end, you'll confidently select the perfect mat for any cardstock project—from delicate vellum to heavy specialty glitter cardstock—and never waste another sheet to mat-related problems.

Understanding Cricut Mat Grip Levels: What "Grip" Really Means

Comparison of Cricut mat grip levels for cardstock

For more details on troubleshooting cutting issues, see our comprehensive cardstock troubleshooting guide.

Before diving into specific mat recommendations, it's critical to understand what "grip strength" actually means and why it matters so much for cardstock cutting success.

What Is Mat Grip?

Cricut cutting mats feature a specialized adhesive coating that temporarily holds your material in place while the blade cuts. Grip strength refers to how sticky this adhesive is—essentially, how firmly the mat holds your material.

Think of it like tape: masking tape has light grip, painter's tape has medium grip, and duct tape has strong grip. Using duct tape on delicate paper would tear it, just as using masking tape on heavy cardboard wouldn't hold it securely.

Why Grip Level Is Critical for Cardstock

The grip level directly affects two crucial aspects of your project:

  1. Cutting precision: Material must stay perfectly still during cutting. Any shift—even microscopic—causes alignment issues, especially in intricate shadow box designs with multiple layers. Insufficient grip allows cardstock to slide, creating misaligned cuts and ruined projects.

  2. Material removal: After cutting, you need to peel your cardstock off the mat without tearing delicate details or curling the paper. Too much grip tears intricate cuts, damages paper fibers, and destroys hours of work in seconds.

The heavier and stiffer your cardstock, the more grip you need to prevent movement. Conversely, lightweight cardstock requires gentle grip to prevent tearing during removal.

The Four Cricut Mat Types

Cricut produces four mat types, each color-coded for easy identification:

  • LightGrip (Blue): Gentlest adhesive for delicate materials
  • StandardGrip (Green): Medium adhesive for everyday crafting
  • StrongGrip (Purple): Maximum adhesive for heavy materials
  • FabricGrip (Pink): Specialized for fabric cutting (not for cardstock)

Each mat type is engineered for specific material weights and textures. Let's explore exactly which cardstock weights work best with each grip level.

LightGrip Mat (Blue): Best for Lightweight Cardstock

The LightGrip mat is your go-to choice for delicate papers and lightweight cardstock that tear easily or require gentle handling.

Ideal Cardstock Weight Range

50-65 lb / 135-176 gsm cardstock works perfectly with LightGrip mats. This includes:

  • Text weight cardstock (50-60 lb)
  • Lightweight scrapbook cardstock (65 lb)
  • Vellum and translucent papers
  • Delicate specialty papers with foil or metallic finishes
  • Standard printer paper (20-24 lb bond weight)

Best Project Uses

LightGrip mats excel for projects requiring:

  • Paper flowers and origami: Delicate cuts that would tear on stickier mats
  • Scrapbook elements: Lightweight embellishments and die-cuts
  • Card inserts: Thin cardstock for card interiors and inserts
  • Fine detail work: Intricate lace patterns that need gentle removal
  • Layered shadow box backgrounds: Thin backing layers where detail preservation is critical

When to Choose LightGrip

Select the blue LightGrip mat when:

  • Your cardstock feels thin and flexible (bends easily)
  • You're cutting intricate designs with delicate connection points
  • Previous cuts on StandardGrip resulted in torn edges when removing
  • You're working with expensive specialty papers and can't risk damage
  • The cardstock package specifically lists 65 lb or lighter

Pros and Cons

Advantages:

  • Gentle removal prevents tearing delicate designs
  • Perfect for fine details and intricate cuts
  • Minimal adhesive transfer to paper
  • Excellent for beginners learning proper removal technique

Limitations:

  • May not hold heavier cardstock securely (80 lb+)
  • Can allow shifting with thick specialty cardstock
  • Wears out faster with frequent use on medium-weight materials
  • Not ideal for glitter or textured cardstock

Pro Tip: If you're unsure whether to use LightGrip or StandardGrip, start with LightGrip. It's easier to switch to a stickier mat than to repair torn cardstock from a mat that was too grippy.

StandardGrip Mat (Green): The Cardstock Workhorse

StandardGrip mat with brayer tool demonstrating proper burnishing

The StandardGrip mat is the most versatile option and the one you'll reach for most frequently when cutting cardstock. It's the Goldilocks of Cricut mats—not too sticky, not too gentle, but just right for the majority of cardstock projects.

Ideal Cardstock Weight Range

65-110 lb / 176-300 gsm cardstock is the sweet spot for StandardGrip mats. This covers:

  • Medium cardstock (80 lb) - most common weight for card-making
  • Heavy cardstock (100-110 lb) - sturdy card bases and shadow box layers
  • Cricut-branded cardstock (typically 80 lb)
  • Most scrapbook cardstock
  • Poster board (lightweight varieties)

Why StandardGrip Is the Most Versatile

The green StandardGrip mat handles an impressive range of cardstock weights, making it the most economical choice for crafters who work with varied materials. Here's why it's considered the "workhorse" mat:

Balanced adhesion: Provides enough grip to prevent shifting during cutting, yet releases cleanly when you peel off finished cuts. This balance is perfect for the 80 lb cardstock weight used in 90% of cardstock projects.

Forgiving performance: Unlike LightGrip (which can allow shifting) or StrongGrip (which can tear delicate cuts), StandardGrip tolerates minor technique variations. It's the most beginner-friendly option.

Broad compatibility: Works with smooth, textured, matte, and slightly glossy cardstock finishes. Only extreme specialty finishes (ultra-glossy metallic or heavily glittered) require different grip levels.

Best Project Uses

StandardGrip mats are ideal for:

  • Greeting cards: 80 lb cardstock card bases and layers
  • Shadow box layers: Medium-weight decorative layers with intricate designs
  • Invitations and stationery: Professional-weight cardstock (80-100 lb)
  • Scrapbook layouts: Most patterned cardstock falls in this range
  • 3D paper crafts: Dimensional projects requiring sturdy cardstock
  • Batch cutting: Cutting multiple card bases or elements in one session

When to Choose StandardGrip

Select the green StandardGrip mat when:

  • Your cardstock feels moderately stiff and holds its shape
  • The package lists 80 lb or "medium weight" cardstock
  • You're cutting Cricut-branded or major craft store cardstock
  • Your project includes both cutting and scoring (typical for cards)
  • You need reliable performance across different cardstock brands

Pros and Cons

Advantages:

  • Works with the widest range of cardstock weights
  • Most cost-effective for general crafting
  • Readily available and frequently sold in multipacks
  • Balances cutting precision with easy removal
  • Longest lifespan when properly maintained

Limitations:

  • May not provide enough grip for 110+ lb specialty cardstock
  • Can be too sticky for ultra-lightweight 50 lb cardstock
  • Glitter cardstock sometimes requires stronger grip
  • Very textured cardstock may not adhere as securely

Pro Tip: Buy StandardGrip mats in multipacks. They're the mats you'll use most frequently, and having backup mats means you can rotate them—extending the life of each mat significantly.

StrongGrip Mat (Purple): For Heavy & Specialty Cardstock

The StrongGrip mat is your solution for heavyweight cardstock and specialty materials that would shift or lift on gentler mats. This mat means business, with the most aggressive adhesive in the Cricut lineup.

Ideal Cardstock Weight Range

100+ lb / 270+ gsm cardstock and specialty papers benefit from StrongGrip adhesion. This includes:

  • Heavy cover stock (100-110 lb)
  • Chipboard and heavy poster board
  • Glitter cardstock (all weights)
  • Metallic and foil cardstock
  • Pearl and shimmer cardstock
  • Thick specialty cardstock with texture
  • Corrugated cardstock
  • Magnet sheets with cardstock backing

Why Specialty Cardstock Needs StrongGrip

You might wonder why glitter cardstock requires StrongGrip even when it's only 80 lb weight. The answer lies in surface texture and cutting resistance:

Texture creates gaps: Glitter, metallic flakes, and embossed textures create microscopic gaps between the cardstock and mat adhesive. These gaps reduce effective contact area, allowing the material to shift even though the adhesive is sticky.

Increased cutting resistance: When the blade cuts through glitter or metallic coating, it encounters more resistance than smooth cardstock. This extra resistance can push or drag the material if grip isn't sufficient.

Heavier blade pressure: Specialty cardstock often requires higher blade pressure settings, which increases lateral force on the material. StrongGrip prevents the paper from sliding under this pressure.

Best Project Uses

StrongGrip mats excel for:

  • Glitter shadow box layers: Prevents shifting of sparkly cardstock during intricate cuts
  • Metallic cards: Holds slippery foil and metallic papers securely
  • Chipboard letters and shapes: Cuts heavyweight materials for dimensional projects
  • Specialty card bases: Heavy cover stock that won't lay flat on gentler mats
  • Thick poster board: Large decorative elements and signs
  • Corrugated cardstock: Textured materials for rustic projects

When to Choose StrongGrip

Select the purple StrongGrip mat when:

  • Your cardstock has visible glitter, metallic flakes, or heavy texture
  • The material is 100 lb or heavier
  • Cardstock feels stiff and doesn't bend easily
  • You've experienced shifting or incomplete cuts on StandardGrip
  • You're cutting materials like chipboard or thick poster board
  • The packaging specifically recommends "strong grip" or "heavy duty" mats

Pros and Cons

Advantages:

  • Prevents shifting even with heavy blade pressure
  • Essential for glitter and metallic specialty cardstock
  • Holds materials that won't adhere to gentler mats
  • Enables cutting of borderline "non-paper" materials like chipboard
  • Excellent for batch cutting heavy cardstock

Limitations:

  • Risk of tearing: Can damage lightweight or medium cardstock during removal
  • Difficult removal: Requires careful technique to avoid curling edges
  • Adhesive transfer: May leave slight residue on some materials
  • Shorter lifespan: Strong adhesive degrades faster than gentler options
  • More expensive: Typically costs more per mat than StandardGrip

Critical Removal Technique for StrongGrip

Demonstrating the mat-flip removal technique for StrongGrip mat

Because StrongGrip adhesive is so aggressive, improper removal will tear your cardstock. Follow this technique religiously:

  1. Flip the mat over: Turn the entire mat upside down onto your work surface so the cardstock is underneath
  2. Peel the mat away: Bend the mat backward and peel it away from the cardstock (not cardstock away from mat)
  3. Go slowly: Peel gradually at a low angle, supporting the cardstock with your other hand
  4. Use a scraper: For intricate cuts, use a Cricut spatula or scraper to gently lift delicate sections

Pro Tip: Reserve StrongGrip mats exclusively for heavy and specialty cardstock. Using them for regular 80 lb cardstock wears out the adhesive prematurely and creates unnecessary removal challenges.

FabricGrip Mat (Pink): Skip for Cardstock Projects

The pink FabricGrip mat is specifically engineered for cutting fabric and should never be used for cardstock despite having similar grip strength to the purple StrongGrip mat.

Why FabricGrip Doesn't Work for Cardstock

FabricGrip mats feature a different adhesive formula designed for fabric's unique properties:

  • Fabric-specific adhesive: Formulated to grip woven and knit fabrics without leaving residue on fibers
  • Rotary blade compatibility: Optimized for rotary blade cutting motion, not fine-point blade stabbing
  • Texture design: Mat surface texture prevents fabric stretching but can interfere with paper adhesion
  • Machine compatibility: Only works with Cricut Maker (which has rotary blade capability)

Using FabricGrip for cardstock typically results in inconsistent adhesion, residue on paper, and poor cutting results. Stick with the blue, green, or purple mats for all cardstock projects.

Mat Size Selection: 12x12 vs 12x24

Once you've determined the correct grip level, you need to choose the right mat size for your projects and machine.

Available Sizes

Cricut mats come in two standard sizes:

  • 12" x 12" (12 inch square)
  • 12" x 24" (12 inch wide by 24 inch long)

Both sizes are available in LightGrip, StandardGrip, and StrongGrip varieties.

When to Choose 12x12 Mats

The 12x12 mat is ideal when:

  • Standard cardstock sheets: Most cardstock is sold in 12x12 sheets, making this size perfectly matched
  • Scrapbooking projects: 12x12 scrapbook layouts fit exactly
  • Limited storage space: Smaller mats are easier to store
  • Budget-conscious: 12x12 mats are typically less expensive
  • Beginner crafter: Smaller surface area is less intimidating for learning

Storage benefit: 12x12 mats fit perfectly in standard scrapbook storage systems, making organization simple.

When to Choose 12x24 Mats

The 12x24 mat is essential for:

  • Long shadow box elements: Cutting lengthy decorative borders or layered elements
  • Batch cutting: Cut multiple card bases or elements in one run
  • Larger designs: Banners, signs, and oversized card designs
  • Pattern paper efficiency: Cut multiple pieces from 12x12 cardstock without repositioning
  • Production crafting: If you sell cards or crafts, larger mats increase efficiency

Efficiency advantage: A 12x24 mat effectively doubles your cutting area, allowing you to cut two 12x12 designs simultaneously or create extra-long continuous designs without tiling.

Machine Compatibility

Check your Cricut model's maximum mat size:

  • Cricut Joy: Uses specialized 4.5" x 6.5" and 4.5" x 12" mats (not standard sizes)
  • Cricut Explore series: Compatible with both 12x12 and 12x24 mats
  • Cricut Maker series: Compatible with both 12x12 and 12x24 mats

Cost vs Value Analysis

12x12 mats: Lower upfront cost, but you may need to make multiple cuts for larger projects

12x24 mats: Higher initial investment, but doubles cutting capacity and reduces project time

Recommendation: Buy at least one 12x24 mat in StandardGrip for efficiency, plus 12x12 mats in LightGrip and StrongGrip for specialty materials. This combination handles 95% of cardstock projects cost-effectively.

Common Mat Problems and Solutions

Even with the correct mat selection, you'll encounter problems as mats age or if your technique needs refinement. Here's how to troubleshoot the most common cardstock mat issues.

Problem 1: Cardstock Tears When Removing from Mat

Symptoms: Paper rips, intricate details break off, edges curl or tear when peeling from mat

Root Causes:

  • Mat grip too strong for cardstock weight
  • Incorrect removal technique
  • Mat over-sticky (brand new or recently cleaned)
  • Cardstock too lightweight for mat type

Solutions:

  1. Switch to gentler mat: If using StandardGrip, try LightGrip. If using StrongGrip, switch to StandardGrip.

  2. Flip and peel technique: Turn the mat upside down and peel the mat away from the cardstock instead of cardstock away from mat. This prevents curling and tearing.

  3. Break in new mats: Brand new mats are extra sticky. Before cutting important projects, press a mat several times onto clean fabric (like a t-shirt) to reduce initial stickiness.

  4. Use a scraper tool: Gently lift delicate cuts with a Cricut spatula, weeding tool, or plastic scraper before attempting to peel the entire sheet.

  5. Reduce pressure slightly: If cardstock tears consistently, try decreasing cutting pressure by 1-2 levels in Design Space. This creates shallower cuts that release more easily.

Problem 2: Cardstock Slips or Shifts During Cutting

Symptoms: Misaligned cuts, design elements don't line up, registration marks fail, cuts appear in wrong positions

Root Causes:

  • Insufficient mat grip for cardstock weight
  • Cardstock not pressed firmly to mat
  • Mat adhesive worn out
  • Environmental factors (humidity, temperature)

Solutions:

  1. Switch to stronger mat: If using LightGrip, try StandardGrip. If using StandardGrip, try StrongGrip.

  2. Use a brayer tool: After placing cardstock on mat, roll a brayer tool or plastic scraper firmly across entire surface to ensure complete contact.

  3. Check cardstock flatness: Curled or warped cardstock won't adhere properly. Store cardstock flat and allow curled sheets to acclimate to room temperature before cutting.

  4. Clean or replace mat: If adhesive is covered in debris or lint, clean the mat following the maintenance instructions below. If cleaning doesn't restore grip, replace the mat.

  5. Address environmental factors: High humidity causes cardstock to warp and not lay flat. Run a dehumidifier in your craft room or store cardstock in a climate-controlled area.

Problem 3: Mat Too Sticky (Difficult to Remove)

Symptoms: Cardstock curls when removing, excessive adhesive transfer to paper, requires significant force to remove

Root Causes:

  • Mat too strong for cardstock weight
  • Brand new mat at maximum stickiness
  • Over-cleaning with harsh chemicals

Solutions:

  1. Break in new mats: Press new mat onto clean cotton fabric 5-10 times before first use.

  2. "Season" the mat: Cut scrap cardstock on the mat before cutting your important project to reduce initial stickiness.

  3. Store with protective cover: Keep the clear protective sheet on the mat when not in use to prevent adhesive from becoming overly tacky.

  4. Don't over-clean: Cleaning mats more frequently than necessary or using harsh chemicals can alter adhesive properties.

Problem 4: Mat Not Sticky Enough (Won't Hold Material)

Symptoms: Cardstock falls off mat before cutting starts, material lifts during cutting, poor adhesion even with brayer

Root Causes:

  • Mat worn out and adhesive depleted
  • Mat contaminated with lint, dust, or debris
  • Wrong mat type for material weight
  • Mat not stored properly

Solutions:

  1. Deep clean the mat: Follow the cleaning instructions in the next section to remove debris and restore tackiness.

  2. Try lint roller: Before cleaning, try rolling a lint roller across the mat surface to pick up surface debris quickly.

  3. Check mat age: Mats are consumables with limited lifespan. If you've used a mat heavily for 6+ months, it may be time to replace.

  4. Switch grip levels: If even a clean mat won't hold material, try the next stronger grip level.

  5. Storage matters: Mats stored without protective covers or in dusty environments lose stickiness rapidly.

Quick Troubleshooting Matrix

Problem Likely Cause Quick Fix
Cardstock tears removing Mat too sticky Use gentler mat or flip-peel technique
Cuts shift or misalign Mat not sticky enough Use stronger mat or clean current mat
Glitter cardstock lifts Wrong grip level Switch to StrongGrip purple mat
Lightweight paper tears Wrong grip level Switch to LightGrip blue mat
New mat too aggressive Over-sticky adhesive Press onto fabric 5-10 times first
Mat won't hold anything Worn adhesive Deep clean or replace mat

Mat Care and Maintenance: Extend Mat Life Significantly

Proper mat maintenance can triple the useful life of your Cricut mats, saving hundreds of dollars over time. Here's the complete care system.

Daily Maintenance (After Each Use)

Immediate debris removal is the single most important maintenance habit:

  1. Scrape large debris: Use a Cricut scraper or plastic gift card to gently scrape off visible paper fibers, dust, and cardstock scraps immediately after removing your project.

  2. Lint roller quick-clean: Roll a medium-tack lint roller (like for pet hair removal) across the mat surface to pick up tiny fibers and dust particles.

  3. Replace protective cover: As soon as you finish a cut, replace the clear plastic protective sheet that came with your mat. This prevents dust accumulation between uses.

Time investment: 30 seconds per cutting session

Impact: Reduces deep cleaning frequency by 50% and extends mat life by months

Weekly Maintenance (Every 3-5 Uses)

Light cleaning removes accumulated buildup:

  1. Alcohol-free baby wipes: Gently wipe the entire mat surface with alcohol-free baby wipes using circular motions. Avoid excessive pressure that could scratch or remove adhesive.

  2. Air dry completely: Allow the mat to air dry for at least 30 minutes before using. Never wipe dry with towels or paper towels, which deposit lint.

  3. Inspect for damage: Check for deep scratches, adhesive patches, or areas where stickiness seems inconsistent.

Time investment: 3-5 minutes

Frequency: After every 3-5 cutting sessions or when you notice reduced stickiness

Deep Cleaning (Every 2-4 Weeks)

Restore stickiness when light cleaning isn't sufficient:

Method 1: Baby Wipe Method (Gentlest)

  1. Use 2-3 alcohol-free baby wipes
  2. Wipe entire surface in gentle circular motions
  3. Replace wipes when they become saturated with debris
  4. Air dry for 1 hour

Best for: Lightly soiled mats, gentle restoration

Method 2: Dish Soap Method (Most Effective)

  1. Run mat under warm (not hot) water
  2. Apply 2-3 drops of gentle dish soap (like Dawn) directly to mat surface
  3. Use a soft-bristle brush or clean fingertips to gently scrub in circular motions
  4. Focus on areas with visible debris or reduced stickiness
  5. Rinse thoroughly under warm water until no soap residue remains
  6. Air dry for 2-3 hours, adhesive-side up, in a clean, dust-free area

Best for: Heavily soiled mats, maximum restoration

Method 3: Simple Green Cleaner Method

  1. Spray Simple Green or similar gentle cleaner on mat surface
  2. Let sit for 30 seconds
  3. Gently scrub with soft cloth or soft-bristle brush
  4. Rinse thoroughly under warm water
  5. Air dry for 2-3 hours

Best for: Stubborn adhesive residue or debris

Critical Maintenance Warnings

❌ Never do these:

  • Don't use rubbing alcohol or harsh solvents: These break down mat adhesive permanently
  • Don't use adhesive spray or re-stick products: Cricut explicitly states this voids warranty and can damage your machine if adhesive transfers to rollers
  • Don't use heat to dry: Heat warps mats and damages adhesive formula
  • Don't towel-dry: Towels and paper towels deposit lint and fibers on the adhesive surface
  • Don't scrub aggressively: Excessive pressure removes adhesive coating

When to Replace Your Mat

Even with perfect maintenance, mats have a finite lifespan. Replace your mat when:

  • Cleaning no longer restores adequate stickiness
  • Visible adhesive patches or bare spots appear
  • Mat surface shows deep scratches or gouges
  • Warping prevents mat from feeding smoothly through machine
  • Cardstock consistently shifts during cutting despite proper technique
  • You've used the mat heavily for 6+ months

Average mat lifespan:

  • LightGrip: 6-9 months with heavy use
  • StandardGrip: 8-12 months with heavy use
  • StrongGrip: 6-8 months with heavy use (adhesive degrades faster)

Pro Tip: Buy mats in multipacks and rotate them. Using 2-3 mats in rotation instead of one continuously can extend total lifespan by allowing adhesive to "rest" between uses.

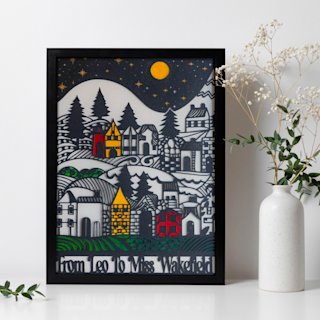
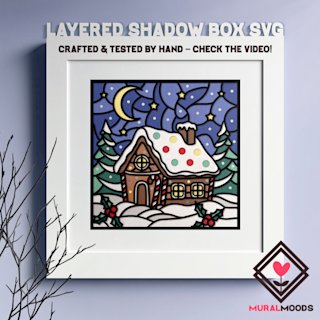
Advanced Techniques for Shadow Box Projects

Shadow box projects present unique challenges because they require precise alignment across multiple cardstock layers. Here's how to master mat usage for these intricate projects.

Multi-Layer Alignment Strategy

Challenge: Shadow boxes typically include 5-15 individual cardstock layers that must align perfectly when assembled. Even minor cutting shifts ruin the dimensional effect.

Solution: Registration Mark Method

  1. Add registration marks in Design Space: Include small alignment marks (tiny circles or crosses) in at least two corners of your design

  2. Use the same mat position: Mark your mat with a small piece of washi tape showing where you placed the first layer's cardstock

  3. Maintain consistent placement: Place each subsequent layer in exactly the same position on the mat using your washi tape guide

  4. Cut all layers on the same mat: Don't switch between mats mid-project—adhesive variations between mats can cause micro-shifts

  5. Clean between layers: Remove debris between cutting each layer to prevent buildup that causes uneven surface

Pro Tip: For critical shadow box projects, dedicate one StandardGrip mat exclusively to that project. Don't use it for other cuts until the project is complete.

Intricate Detail Preservation

Challenge: Shadow box layers often include delicate filigree, lace patterns, or fine connecting points that are difficult to remove from mats without tearing.

Solutions:

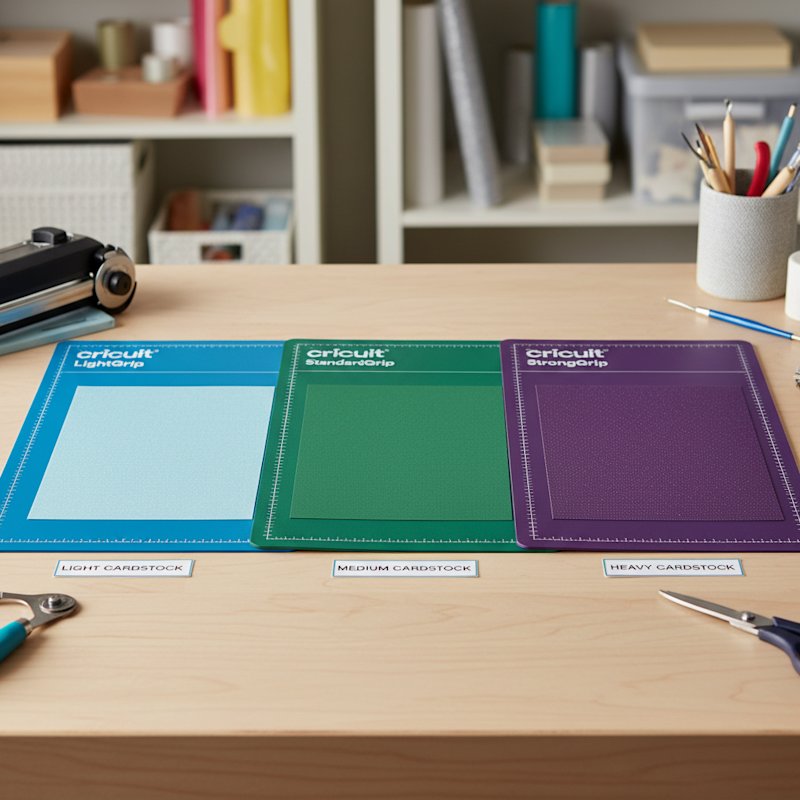
Use the gentlest mat that still prevents shifting: For 80 lb cardstock shadow box layers, try LightGrip first. Only move to StandardGrip if you experience shifting.

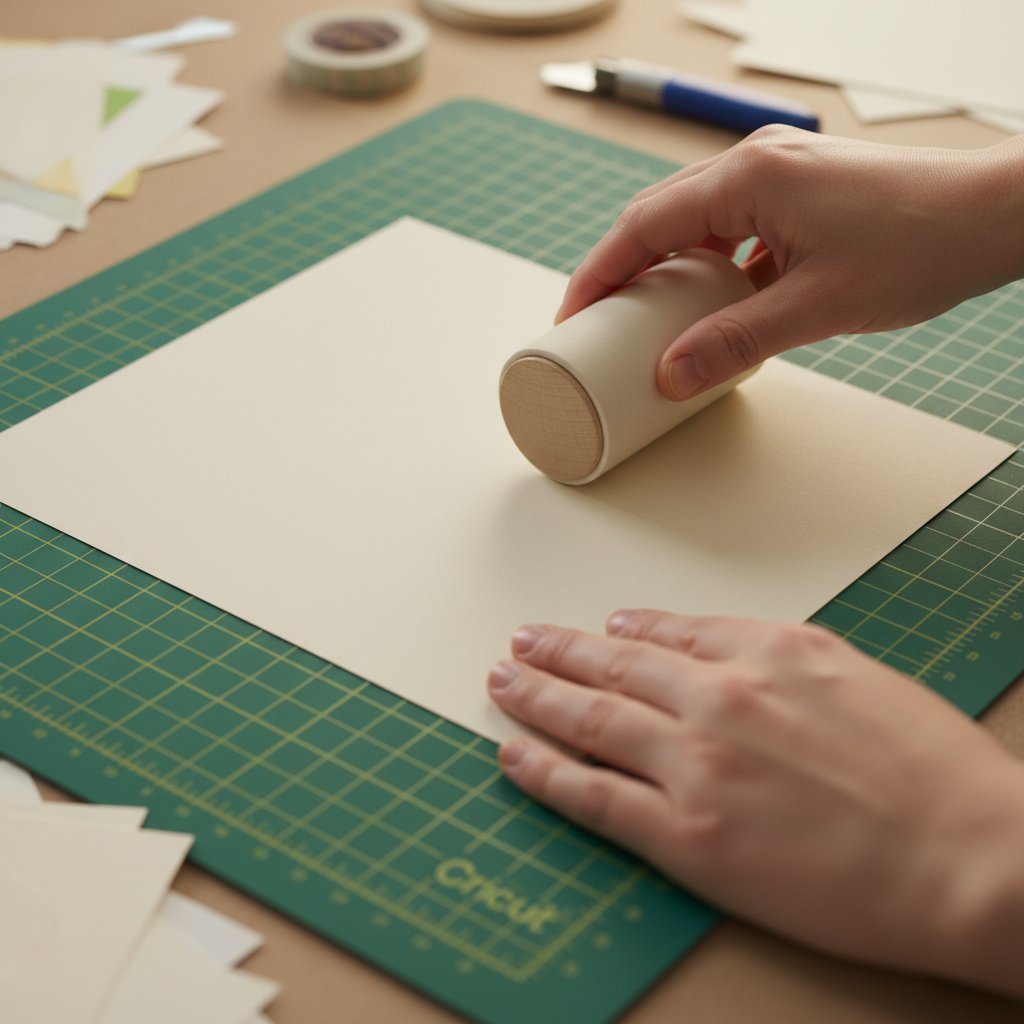
Spatula removal technique:

  1. After cutting completes, use a Cricut spatula or weeding tool to gently lift one corner
  2. Slowly work the spatula under delicate sections, supporting them as you lift
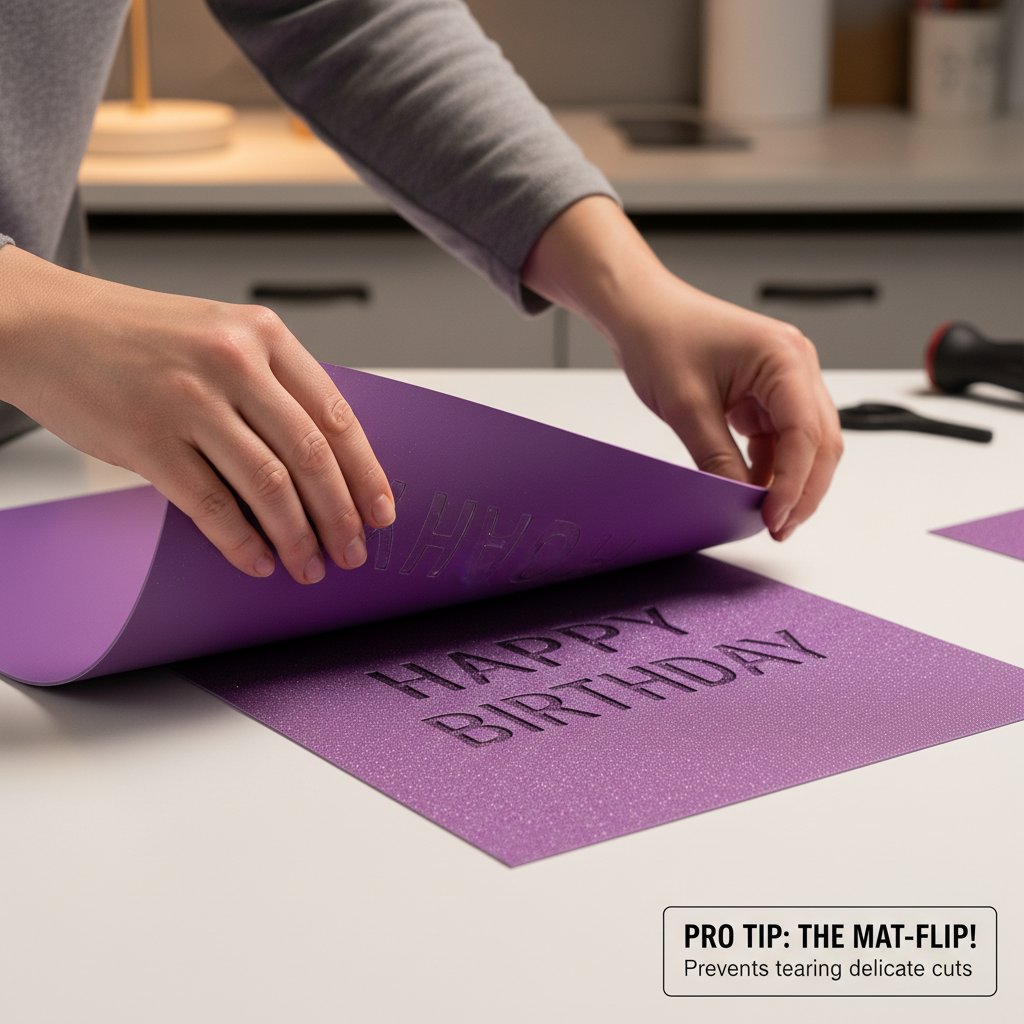
  3. Peel mat away from cardstock (flip method) once sections are loosened

Reduce cut pressure by 1-2 levels: Slightly shallower cuts (that still go through cardstock) release more easily from mats. Test this on scrap first.

Freeze method for stubborn cuts: If a particularly delicate layer won't release safely, place the entire mat in the freezer for 10 minutes. Cold temporarily reduces adhesive tackiness, making removal gentler.

Batch Cutting Multiple Layers

Challenge: Shadow box projects require cutting multiple identical or similar layers. How do you maximize efficiency while maintaining quality?

Strategy:

Use 12x24 mats for batch cutting: Cut 2-3 layers simultaneously on a single 12x24 mat rather than making separate cuts

Organize by weight: Group all layers of the same cardstock weight and cut them together on the same mat type. Don't mix weights that require different grip levels.

Sequential cutting order: Cut in this order:

  1. Heaviest cardstock first (when mat is stickiest)
  2. Medium cardstock next
  3. Lightweight cardstock last
  4. Clean mat between batches

Mark completed layers: As you remove each layer, immediately label the back with its position number (Layer 1, Layer 2, etc.) to prevent assembly confusion.

Registration Mark Backup System

Challenge: What if registration marks get cut off or you forget to add them?

Solution: Physical Mat Marking System

  1. Create a template: Use a piece of scrap cardstock the same size as your project cardstock
  2. Mark corners on mat: Place template on mat and mark the four corners with permanent marker directly on the mat (in the margin area, not the adhesive)
  3. Use marks for all cuts: Position each cardstock sheet to align with your marked corners
  4. Label the mat: Write "Shadow Box Template - 12x12" on the mat edge so you remember its purpose

This physical template system ensures perfect alignment even if digital registration marks fail.

Quick Reference: Mat Selection Decision Tree

Use this decision tree to choose the correct mat in seconds:

Step 1: What's your cardstock weight?

  • 50-65 lb (135-176 gsm) → Go to Step 2A
  • 80-100 lb (216-270 gsm) → Go to Step 2B
  • 110+ lb (300+ gsm) → Choose StrongGrip (Purple)

Step 2A (Lightweight Cardstock):

Is the cardstock specialty finish (metallic, foil, or glitter)?

  • Yes → Choose StandardGrip (Green)
  • No → Choose LightGrip (Blue)

Step 2B (Medium Cardstock):

Is the cardstock specialty finish (metallic, foil, or glitter)?

  • Yes → Choose StrongGrip (Purple)
  • No → Choose StandardGrip (Green)

Step 3: What size mat?

Are you cutting:

  • Single 12x12 sheets or smaller12x12 mat
  • Multiple elements, long designs, or batch cutting12x24 mat

Weight-to-Mat Quick Reference Chart

Cardstock Type Weight (lb) Weight (gsm) Recommended Mat Alternative Mat
Text weight paper 20-50 lb 75-135 gsm LightGrip (Blue) StandardGrip for specialty
Lightweight cardstock 50-65 lb 135-176 gsm LightGrip (Blue) StandardGrip for texture
Medium cardstock 80 lb 216 gsm StandardGrip (Green) LightGrip for delicate cuts
Heavy cardstock 100-110 lb 270-300 gsm StandardGrip (Green) StrongGrip if shifting occurs
Cover stock 110+ lb 300+ gsm StrongGrip (Purple) -
Glitter cardstock (any weight) All All StrongGrip (Purple) -
Metallic/foil cardstock All All StrongGrip (Purple) StandardGrip for 65 lb
Textured/embossed All All One level stronger than weight suggests -
Poster board 65+ lb 176+ gsm StrongGrip (Purple) -
Chipboard - - StrongGrip (Purple) -

Conclusion: Master Your Mats, Master Your Projects

Choosing the right Cricut mat for cardstock isn't complicated once you understand the relationship between cardstock weight, surface finish, and grip strength. The three essential principles are:

  1. Match grip to weight: Lightweight cardstock needs gentle LightGrip, medium cardstock works with versatile StandardGrip, and heavy or specialty cardstock requires aggressive StrongGrip

  2. Specialty finishes need stronger grip: Glitter, metallic, and textured cardstock always require one grip level stronger than their weight alone would suggest

  3. Proper maintenance extends mat life: Daily debris removal, weekly light cleaning, and proper storage can triple your mat's useful lifespan

Your next steps are straightforward:

Immediate action: Evaluate your current mat collection. Most crafters need at minimum:

  • One 12x12 StandardGrip (for 90% of cardstock projects)
  • One 12x24 StandardGrip (for batch cutting and efficiency)
  • One 12x12 StrongGrip (for glitter and specialty cardstock)
  • One 12x12 LightGrip (for delicate lightweight cardstock)

Establish habits: Start your daily mat maintenance routine today. That 30-second debris removal after each cut will save you hours of frustration and hundreds of dollars in mat replacements.

Practice technique: Master the flip-and-peel removal method, especially for StrongGrip mats. This single technique prevents 90% of cardstock tearing issues.

With the right mat selection and proper care, you'll never again waste beautiful cardstock to mat-related problems. Your shadow box layers will align perfectly, your intricate cuts will release cleanly, and your cardstock investment will go into finished projects instead of the trash bin.

Now grab the correct mat for your next project and create those stunning shadow boxes with confidence!


Sources: