Articles19 min read

DIY Stencil Art on Canvas: Complete Beginner Guide (2026)

Your complete guide to DIY stencil art canvas wall decor — from choosing materials and cutting your first stencil to painting, sealing, and hanging professional-looking canvas art.

5 Easy Paper Light Box SVG Projects Beginners Love to Make

DIY Stencil Art on Canvas: Complete Beginner Guide

Custom wall art doesn't have to cost a fortune. A trip to the craft store for $10-20 worth of supplies and a free afternoon can give you canvas pieces that look like they came from a boutique — not your kitchen table.

Stencil art is the shortcut nobody talks about enough. You don't need to draw well, mix colours like a pro, or invest in expensive tools. The stencil does the heavy lifting. You just need to know which materials to buy, how to cut a clean design, and how to apply paint without it bleeding everywhere.
Stencil cutting tools and materials on craft desk

That's exactly what this guide covers. By the time you finish reading, you'll know how to pick the right stencil material for your budget, create or find a design, cut it cleanly, paint it onto canvas, seal it for years of display, and troubleshoot the common problems every beginner hits.
Craft workspace with cutting mat and paper layers
Multi-layered papercut design showing depth

Whether you want botanical prints for your living room, geometric patterns for a modern hallway, or playful animal silhouettes for a child's room, the process is the same. Let's get into it.

Why Stencil Art Is the Easiest Way to Make Custom Wall Decor

Walk into any home décor store and you'll see canvas prints priced from $50 to $200. They're nice, but they're mass-produced — your neighbour could buy the exact same one. Stencil art gives you something different: custom pieces that match your colour scheme, your style, and your space, for a fraction of the cost.

The cost difference is dramatic

A single stencil art canvas costs $5-20 in materials, depending on the supplies you choose. Here's the breakdown:

  • Budget build ($5-10): Cardstock stencil, basic acrylic paint, discount canvas
  • Mid-range build ($15-25): Mylar stencil, quality acrylics, stretched canvas
  • Premium build ($30-50): Cutting machine stencil, professional-grade paints, gallery-wrapped canvas

Compare that to $50-200 for a single retail canvas print. You could make ten pieces for the price of one store-bought one.

No artistic talent required

This is the part that surprises people. The stencil controls the design — your only job is to apply paint evenly. If you can dab a sponge and peel off tape, you can make stencil art. The results look deliberately designed because, well, they are — you just didn't have to freehand the design.

Works everywhere, not just canvas

Stencil techniques transfer to wood signs, fabric pillows, greeting cards, and even directly onto walls. Learn the process once on canvas (where mistakes are cheap to redo) and you'll have the confidence to stencil on any surface.

Stencil Art Supplies: What You Actually Need

Craft stores are overwhelming. Here's exactly what to buy, what to skip, and how much to spend at three different price points.

Stencil materials

The material you cut your stencil from determines how many times you can reuse it and how crisp your edges will be.

  • Mylar sheets (recommended): Flexible, durable, waterproof. Can be reused 20-50 times with proper cleaning. A 12×12 sheet costs $2-4. Look for 7-10 mil thickness — thin enough to cut with a craft knife, thick enough to hold shape.
  • Acetate: Similar to Mylar but thinner and less durable. Good for one-time projects. $1-2 per sheet at office supply stores.
  • Freezer paper: Wax-coated paper that temporarily adheres to canvas when ironed. Great for simple shapes but tears after one use. Under $1 per sheet. Available at grocery stores.
  • Cardstock: Cheap and easy to cut, but absorbs paint and warps. Only suitable for single-use, simple designs.

Paint

Acrylic craft paint is the best choice for stenciling on canvas. Brands like FolkArt, Apple Barrel, and DecoArt are affordable ($1-3 per 2 oz bottle) and come in hundreds of colours. Avoid heavy-bodied tube acrylics — they're too thick for clean stenciling.

For a smoother application, thin your paint slightly with water (about 1 part water to 4 parts paint). The consistency should be like heavy cream.

Essential tools

  • Craft knife (X-Acto #11 blade) — for cutting stencils
  • Self-healing cutting mat (at least 12×18 inches)
  • Stencil brushes or sponge daubers — round, stiff-bristled brushes designed for pouncing
  • Painter's tape (blue or green, low-tack) — to secure the stencil
  • Ruler or straight edge
  • Paper towels — for offloading paint

Canvas options

  • Stretched canvas: Pre-primed, ready to use. 8×10 or 11×14 inches are ideal for first projects. $4-12 each.
  • Canvas panels: Flat, rigid boards. Easier to frame later. $2-5 each.
  • Canvas paper pads: For practice runs. $6-10 for a pad of 10 sheets.

Three supply tiers at a glance

ItemBudget ($10)Mid-range ($25)Premium ($50)
Stencil materialFreezer paperMylar sheets (5 mil)Mylar sheets (10 mil)
PaintApple Barrel (3 colours)FolkArt (6 colours)Liquitex Basics (12 colours)
BrushSponge daubers (3-pack)Stencil brush setProfessional stencil brushes
CanvasCanvas panel (8×10)Stretched canvas (11×14)Gallery-wrapped canvas (16×20)
Cutting toolScissorsCraft knife + cutting matCraft knife + cutting mat + Cricut

3 Ways to Get Your Stencil Design

You don't need to be an illustrator. There are three main approaches, each suited to a different skill level and budget.

Method 1: Freehand draw directly onto stencil material

Best for: Simple geometric shapes, bold patterns, letters and numbers.

Use a fine-tip marker to draw your design directly onto the Mylar or freezer paper. Keep shapes simple — straight lines, circles, triangles, and bold silhouettes work best. Avoid intricate details smaller than ¼ inch; they're difficult to cut and paint cleanly.

Tip: If you're not confident drawing freehand, trace around household objects (bowls for circles, books for rectangles) to create your base shapes, then add details.

Method 2: Print and trace from free online templates

Best for: Detailed designs, botanicals, mandalas, animal silhouettes.

This is the method most beginners should start with. Find a design you like, print it at the size you need, and trace it onto your stencil material.

Where to find free stencil patterns:

  • Pinterest — search "free stencil templates printable"
  • Canva — use their free shapes and silhouettes, export as PNG
  • Google Images — filter for line art, then print and trace
  • Craft blogs — many offer free downloadable stencil PDFs

How to transfer: Tape your printed design to a window (daylight makes it a light box). Tape your stencil material over it. Trace the outline with a fine-tip marker. Then cut along the lines with your craft knife.

Method 3: Use a cutting machine (Cricut or Silhouette)

Best for: Intricate designs, repeated shapes, multi-layer stencils, professional precision.

If you own (or can borrow) a Cricut or Silhouette machine, this is the fastest and most accurate way to make stencils. Upload your design to the software, set the material to "stencil film" or "Mylar," and let the machine cut it.

Advantages:

  • Perfectly clean edges every time
  • Can cut designs that would be nearly impossible by hand
  • Easy to make multiple identical stencils
  • Registration marks align perfectly for multi-colour designs

Tip: If you enjoy this kind of precision work, the same cutting machine opens up a whole world of papercraft projects like layered paper-cut shadow boxes.

Which method should you choose?

  • First project, zero budget? Go with Method 1 or 2 using freezer paper.
  • Want cleaner results? Use Method 2 with Mylar sheets.
  • Have a cutting machine? Method 3 gives you the best results with the least effort.
Stencil Skills Transfer Directly to Papercut Art
If you can trace and cut a stencil, you can assemble a layered shadow box. These templates use the same cutting precision you have been practicing on canvas.

How to Cut and Prepare Your Stencil

The quality of your cut directly affects the quality of your final piece. Take your time here — a clean stencil makes everything else easier.

Step-by-step cutting technique

  1. Secure your work surface. Place your cutting mat on a flat, stable surface. Good lighting matters — you need to see the lines clearly.

  2. Tape down the stencil material. Use painter's tape at the corners to keep it from shifting while you cut.

  3. Start with interior cuts first. Cut the small inside shapes (like the centre of a letter O) before cutting the outer edges. This keeps the material stable.

  4. Use a fresh blade. A dull blade tears instead of cuts. Replace your blade after every 2-3 stencils, or whenever you notice dragging.

  5. Cut at a 45-degree angle. Hold the knife at a consistent angle and pull toward you. Rotate the material, not the knife. Make multiple light passes rather than pressing hard.

  6. Cut on the outside of your traced line. This keeps the painted shape at the exact size you drew. Cutting on the inside makes the final painted shape slightly smaller.

Creating bridges in your design

Bridges are the thin connecting strips that hold interior parts of your stencil in place. Without them, the centre of an "A" or "O" would fall out.

  • Plan bridges when you draw the design. A ⅛-inch strip is usually enough to hold the piece while allowing paint to flow around it.
  • Place bridges where they look natural — at the narrowest point of a shape, or where a thin line in the design already exists.
  • You can touch up bridges later with a small brush after painting if they bother you.

Common cutting mistakes (and how to avoid them)

  • Cutting too fast: Leads to jagged edges and accidental cuts. Slow down, especially on curves.
  • Using too much pressure: Bends the material and creates uneven cuts. Let the blade do the work with light, repeated passes.
  • Forgetting bridges: Interior pieces fall out and your design loses detail. Always plan connections before cutting.

Cleaning and storing stencils for reuse

Mylar stencils can last through dozens of projects with proper care:

  • Rinse immediately after use with warm soapy water. Dried acrylic is much harder to remove.
  • Pat dry with a paper towel — don't scrub, or you'll bend the fine details.
  • Store flat between sheets of wax paper or in a large zip-top bag. Rolling bends the material and distorts future designs.
  • For stubborn paint: Soak in warm water for 10 minutes, then gently rub with a soft cloth.

Stenciling on Canvas: Step-by-Step Painting Guide

This is where your design comes to life. Follow these steps for clean, professional-looking results.

Step 1: Prepare your canvas

Most pre-stretched canvases come pre-primed with gesso and are ready to paint. If yours feels rough or you're using a raw canvas:

  • Apply one thin coat of gesso with a wide brush
  • Let it dry completely (about 30 minutes)
  • Lightly sand with fine-grit sandpaper if needed

For a coloured background: Paint your entire canvas with a base colour and let it dry fully before stenciling. A solid background colour adds depth and makes the stencil design stand out.

Step 2: Secure the stencil

A stencil that shifts mid-paint is the number one cause of blurred lines. Secure it properly:

  • Painter's tape: Tape all four edges. Simple, effective, and won't damage the canvas.
  • Repositionable adhesive spray: Spray a light coat on the back of the stencil, wait 30 seconds for it to become tacky, then press it onto the canvas. This creates a seal that prevents paint from creeping underneath.
  • Contact method (freezer paper): Iron the waxy side of freezer paper directly onto the canvas. It temporarily bonds, creating a perfect seal. Peel off after painting.

Step 3: Load your brush the right way

The biggest beginner mistake is using too much paint. Here's the correct technique:

  1. Dip your stencil brush or sponge dauber into the paint
  2. Offload most of it by pouncing (dabbing repeatedly) onto a paper towel
  3. The brush should look almost dry — this is the "dry brush" technique
  4. You'll build up colour with multiple light layers rather than one heavy coat

This is called the pouncing technique, and it's the single most important skill in stencil art.

Step 4: Apply paint with the pouncing technique

Hold the brush perpendicular to the canvas and dab straight up and down. Don't sweep or brush side-to-side — that pushes paint under the stencil edges.

  • Start from the stencil edges and work inward. This creates a natural seal as you go.
  • Build colour gradually. Two or three light coats look better than one heavy one.
  • Pay attention to corners and details — they need the same light, consistent pressure.

Step 5: Multiple colours with registration marks

For designs with more than one colour:

  1. Cut a separate stencil for each colour layer
  2. Add registration marks (small triangles or circles at the corners) to each stencil so you can line them up precisely
  3. Paint the lightest colour first, let it dry, then align the next stencil using the registration marks
  4. Repeat for each additional colour

Step 6: Lift the stencil cleanly

Wait until the paint is tacky but not wet (about 2-5 minutes with acrylics) before removing the stencil. This prevents smudging.

  • Peel slowly from one corner, pulling back at a low angle
  • Don't let the lifted stencil touch the painted area — wet paint transfers easily
  • If any edges bled slightly, touch them up with a small detail brush while the paint is still damp

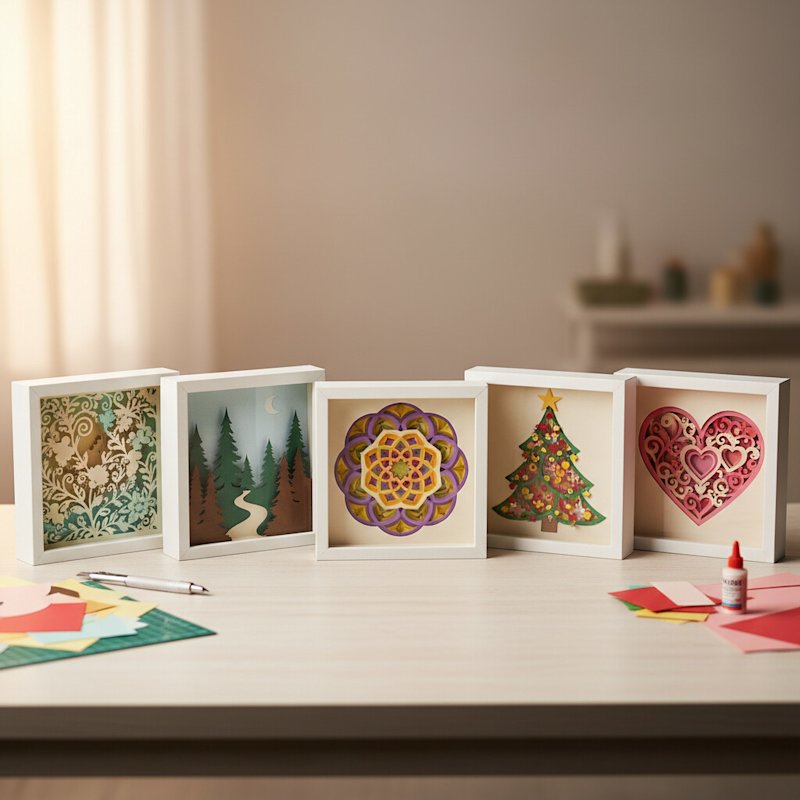
5 Stencil Art Project Ideas for Every Room

Need inspiration? Here are five projects you can complete this weekend, each designed for a different room in your home.

1. Botanical prints for the living room

Monstera leaves, eucalyptus sprigs, and fern fronds are among the most popular stencil art subjects — and for good reason. They look sophisticated, work with almost any colour palette, and are easy to cut as stencils because of their bold, flowing shapes.

How to do it: Create three separate stencils (one for each plant). Paint each on its own 8×10 canvas using soft sage green, dusty blue, and warm terracotta. Hang them as a triptych with 2-3 inches of space between each.

Design tip: Leave plenty of white space. A single leaf on a blank canvas looks more expensive than a crowded composition.

2. Geometric patterns for modern spaces

Clean lines and repeating shapes — think chevrons, triangles, diamonds, and hexagons — suit Scandinavian, minimalist, and mid-century modern interiors.

How to do it: Cut a single repeating shape (a triangle, for example) and use it to build a larger pattern. Vary the orientation and colour of each stamp to create visual interest. A single stencil shape can produce dozens of different patterns depending on how you arrange it.

Colour idea: Stick to two or three colours maximum. Black and white with one accent colour (mustard yellow, dusty rose, or forest green) reads as intentional and modern.

3. Boho mandala designs for the bedroom

Mandalas are circular geometric patterns that look complex but are surprisingly easy to stencil. The symmetry does the aesthetic work for you.

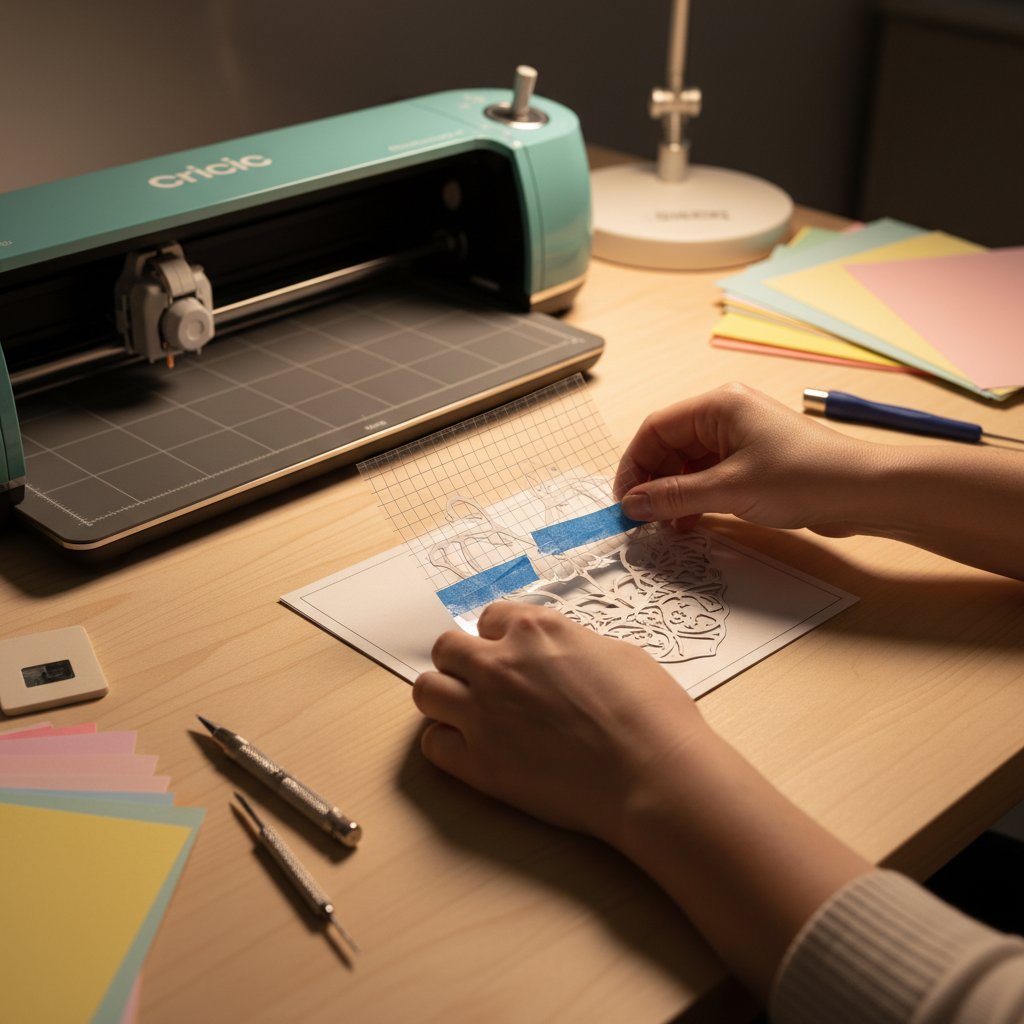
How to do it: Find a mandala template online (Pinterest has hundreds of free ones). Trace and cut it from Mylar. Paint it in warm, muted tones — terracotta, sage, cream, or dusty pink — on a large 16×20 canvas. One large mandala makes a beautiful statement piece above a bed.

Tip: Metallic acrylic paint (gold or copper) adds an elegant touch. Use it for the outermost ring of the mandala.

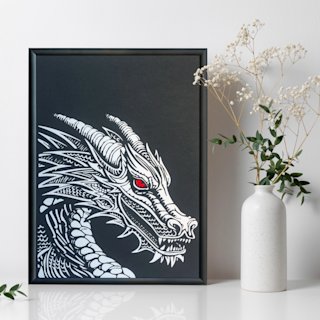
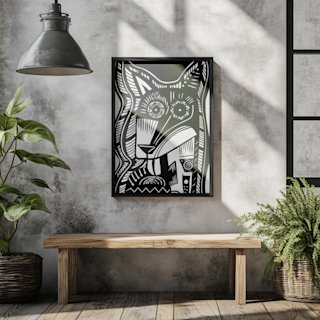
4. Animal silhouettes for a child's room

Bold animal shapes — elephants, foxes, deer, owls, whales — are perfect for nursery and kids' room decor. They're simple to cut as stencils because they're solid silhouettes with no interior detail needed.

How to do it: Choose 3-5 animals. Paint each on a small canvas (6×6 or 8×8 inches) in a coordinating colour palette. Pastels work well for nurseries; brighter colours suit toddler and big-kid rooms.

Bonus idea: Add the animal's name below the silhouette in a simple block letter stencil. It doubles as room decor and a learning tool.

5. Herb and food-themed triptych for the kitchen

Kitchen art should feel warm and inviting. Three small canvases featuring herb illustrations (basil, rosemary, thyme) or kitchen icons (a whisk, a coffee cup, a spatula) add personality without overwhelming the space.

How to do it: Use a botanical illustration style — detailed line work filled with a single colour. Frame each canvas in a simple white or wood frame and hang them in a row above a counter or open shelving.

Colour palette: Sage green, charcoal, and cream on a white background.

Multi-Layer Shadow Box Templates for Stencil Artists
Stencil artists already think in layers — positive space, negative space, depth. These shadow box designs reward that same visual thinking with stunning dimensional results.

Sealing and Displaying Your Stencil Art

Your painting is done — now protect it and show it off properly.

Why sealing matters

Unsealed acrylic paint is vulnerable to dust, moisture, and UV fading. A sealer creates a protective barrier that keeps your colours vibrant for years. It also unifies the surface sheen, giving your piece a professional, finished look.

Best sealants for canvas stencil art

  • Mod Podge (matte or gloss): Affordable and widely available. Apply two thin coats with a soft brush, waiting 20 minutes between coats. Best for budget projects.
  • Acrylic sealer spray: The easiest option. Two light spray coats from 12 inches away, 30 minutes apart. No brush marks. Available in matte, satin, and gloss finishes.
  • Varnish (spray or brush-on): The most durable option. Provides the strongest UV protection. Use a spray varnish for even coverage on textured canvas surfaces.

Pro tip: Always test your sealer on a scrap piece first. Some sealers can cause acrylic paint to yellow slightly over time, especially glossy finishes.

Framing options

  • Gallery wrap (no frame): If you used a thick, gallery-wrapped canvas, the sides are already finished. Hang it directly on the wall for a clean, modern look.
  • Floating frame: A frame that sits slightly away from the canvas edge, giving the illusion that the art is floating inside. Works with both thin and thick canvases.
  • Traditional frame with mat: Dressier and more formal. Pair with a white or off-white mat for a gallery look. This option works best with canvas panels or thin canvases.

For more framing ideas and techniques, see our guide on how to display and frame 3D layered paper art.

Hanging tips

  • Gallery wall arrangement: Group 3-5 stencil art pieces in different sizes. Mix botanical prints with geometric patterns for visual variety, but keep a consistent colour palette.
  • Height: The centre of your canvas should sit at eye level — approximately 57-60 inches from the floor.
  • Spacing: Leave 2-3 inches between pieces in a gallery arrangement. Consistent spacing looks deliberate; random spacing looks accidental.
  • Lighting: A picture light or adjustable track light makes colours pop. Avoid hanging stencil art in direct sunlight, which fades even sealed acrylics over time.

Looking for more creative display ideas? Our paper-cut light box vs. shadow box guide covers layered display techniques that pair beautifully with stencil art.

Troubleshooting: Common Stencil Art Problems

Every beginner hits these speed bumps. Here's how to fix them — and how to prevent them next time.

Paint bleeding under the stencil

What happened: Paint crept under the stencil edges, creating fuzzy lines and lost detail.

Fix: While the paint is still damp, use a small detail brush to clean up the edges. For dried mistakes, paint over the bled area with your background colour, let it dry, and re-stencil that section.

Prevent it next time:

  • Use less paint — the dry brush technique is your best friend
  • Secure the stencil with adhesive spray for a tighter seal
  • Use Mylar instead of paper stencils (thinner material=tighter seal)
  • Pounce straight up and down, never at an angle

Uneven coverage and patchy results

What happened: Some areas are fully opaque while others show the canvas underneath.

Fix: Wait for the first coat to dry, then apply a second thin layer. Multiple light coats always look better than one heavy one.

Prevent it next time:

  • Build colour gradually with 2-3 light pouncing layers
  • Check your paint consistency — too thick won't flow; too thin is transparent
  • Make sure your brush is loaded evenly, not globbed on one side

Stencil lifting mid-paint

What happened: The stencil shifted or peeled up while you were painting, causing a gap or smudge.

Fix: Reposition the stencil as accurately as possible and fill in the gap. Minor misalignments can be touched up with a detail brush.

Prevent it next time:

  • Use adhesive spray on the back of the stencil
  • Tape all four edges, not just two
  • Don't press too hard while pouncing — the downward force can lift the stencil

Design alignment issues with multi-layer stencils

What happened: Your second or third colour layer doesn't line up with the first one.

Fix: Small misalignments (under 1mm) usually aren't noticeable at arm's length. For larger ones, paint over the entire design with your base colour, let it dry, and start again with better registration.

Prevent it next time:

  • Cut registration marks (small triangles) into every stencil layer at the same positions
  • Mark the registration positions on your canvas with light pencil dots before painting
  • Let each colour layer dry completely before applying the next stencil

Frequently Asked Questions

Can I reuse my DIY stencils?

Yes — Mylar stencils can be reused 20-50 times with proper cleaning. Wash them in warm soapy water immediately after each use, pat them dry, and store them flat between sheets of wax paper. Freezer paper and cardstock stencils are single-use only.

What paint works best for stenciling on canvas?

Acrylic craft paint (like FolkArt or Apple Barrel) works best. It's affordable, dries quickly, and comes in a huge range of colours. Thin it slightly with water for smoother application. Avoid heavy-bodied tube acrylics — they're too thick for clean stencil work and tend to build up at the edges.

How do I prevent paint from bleeding under the stencil?

Use the "dry brush" technique — offload most of the paint onto a paper towel before applying it to the canvas. Your brush should look almost dry. Build up colour with multiple light layers rather than one heavy coat. Using repositionable adhesive spray on the back of the stencil also creates a tight seal that prevents bleed.

Can I use spray paint instead of acrylic?

You can, but it requires more preparation. Spray paint produces very even coverage, which is great for stenciling, but you need to mask off the entire canvas around the stencil to avoid overspray. It also doesn't allow for the colour layering control that brush-applied acrylics do. For beginners, stick with acrylics and a stencil brush.

How long should I wait before removing the stencil?

Wait until the paint is tacky but not wet — usually 2-5 minutes with acrylic craft paint. If you remove it while the paint is still liquid, it can smudge. If you wait until it's fully dry, you risk peeling paint off with the stencil. The tacky stage is the sweet spot.

Do I need to seal my stencil art?

It's strongly recommended. Sealing protects against dust, UV fading, and moisture. A spray acrylic sealer or varnish applied in two thin coats will keep your colours vibrant for years. Unsealed acrylics can collect dust in the textured surface and may yellow over time.

Start Your First Stencil Art Project Today

You now have everything you need to create custom stencil art on canvas — from choosing the right materials and cutting your first stencil to painting, sealing, and hanging your finished piece.

The best way to start? Pick one project from the five ideas above, grab supplies from the budget column in our supply table, and give yourself a free afternoon. Your first piece won't be perfect — but it will be yours. And at $5-20 per canvas, there's no pressure to get it right the first time.

Stencil art is one of those crafts that rewards practice fast. Your second piece will be noticeably better than your first. By your fifth, you'll be creating pieces that genuinely look like store-bought art — except they match your space perfectly and cost a tenth of the price.

If you enjoy working with your hands to create home décor, explore more creative projects on our site. From canvas painting ideas for beginners to layered paper-cut art, the creative skills overlap — colour theory, composition, and patience are universal whether you're stencilling on canvas or cutting intricate paper designs.