Articles 13 min read

Metallic & Pearl Cardstock: Cutting for Pro Results

Your comprehensive guide to metallic cardstock cricut settings.

Metallic & Pearl Cardstock: Cutting for Pro Results

Metallic & Pearl Cardstock: Cutting for Pro Results

You've just loaded a sheet of gorgeous metallic cardstock into your Cricut, hit go, and watched in horror as the blade tore through the delicate foil coating, leaving ragged edges and ruined paper. You're not alone. Metallic and pearl cardstock are among the most challenging materials to cut with electronic cutting machines, but they create stunning shadow box layers and paper crafts when you get the settings right.

This guide reveals the exact techniques, settings, and troubleshooting strategies professional crafters use to achieve flawless cuts on metallic, pearl, shimmer, and foil cardstock every single time. Whether you're creating intricate shadow box layers or elegant card designs, these proven methods will transform your specialty cardstock projects from frustrating failures to professional masterpieces.

Understanding Metallic and Pearl Cardstock: What Makes Them Different

Metallic and pearl cardstock aren't just regular cardstock with a shiny coating. Understanding their unique properties is essential for successful cutting. For general troubleshooting, see our comprehensive cardstock troubleshooting guide.

Metallic cardstock features a reflective foil or metallic coating bonded to the paper surface. This coating can be applied to one or both sides and comes in various finishes from mirror-bright to brushed metal. The coating adds thickness and creates a slippery surface that challenges your cutting mat's grip.

Pearl cardstock has a subtle iridescent or pearlescent shimmer created by embedded mica particles or a specialized coating. Papers like Stardream Metallics offer a softer metallic shimmer with colored cores, adding sheen and highlights without the aggressive shine of foil.

Shimmer and glitter cardstock fall into this category too, featuring sparkle particles or textured surfaces that can gum up blades and interfere with cutting precision.

The key challenges these specialty papers present:

  • Slippery surfaces that resist mat adhesion and can shift during cutting
  • Textured finishes that prevent registration marks from being read by your machine
  • Coating debris that builds up on blades faster than regular cardstock
  • Variable thickness as the coating adds unpredictable density
  • Edge visibility where cuts expose white or colored cores underneath the metallic surface

Understanding these properties helps you anticipate problems and choose the right settings from the start.

Essential Blade Selection: Fine Point vs. Deep Cut

Cricut blade selection for metallic cardstock

For metallic and pearl cardstock, blade selection is your first critical decision. The wrong blade will either fail to cut through or damage the delicate coating.

Fine Point Blade is your go-to tool for nearly all metallic and pearl cardstock projects. This blade handles most specialty cardstock beautifully when paired with correct settings. Use the Fine Point Blade for:

  • Light to medium weight metallic cardstock (65-80 lb)
  • Pearl and shimmer papers
  • Intricate shadow box layers
  • Any project requiring detailed cuts

Deep Cut Blade is reserved for exceptionally thick metallic cardstock, typically poster board weight or heavier specialty materials. Your Cricut will usually prompt you if the material selection requires a Deep Cut Blade. Use it sparingly for metallic papers as the deeper blade can catch and tear delicate coatings.

Blade Maintenance for Specialty Papers

Metallic and pearl cardstock are particularly demanding on blades because the coatings create more debris. A dull or dirty blade is the number one cause of failed cuts on specialty papers.

Signs your blade needs replacement:

  • Jagged edges instead of clean cuts
  • Blade skipping or catching on the coating
  • Incomplete cuts even at maximum pressure
  • Visible coating buildup on the blade tip

Cleaning protocol: After every 3-4 sheets of metallic cardstock, remove your blade and use aluminum foil or a cleaning mat to remove coating buildup. For stubborn debris, use a small brush or old toothbrush to gently clean the blade housing.

Replacement schedule: Metallic and specialty papers dull blades 2-3 times faster than regular cardstock. If you frequently work with these materials, keep spare blades on hand and replace them at the first sign of cutting quality degradation.

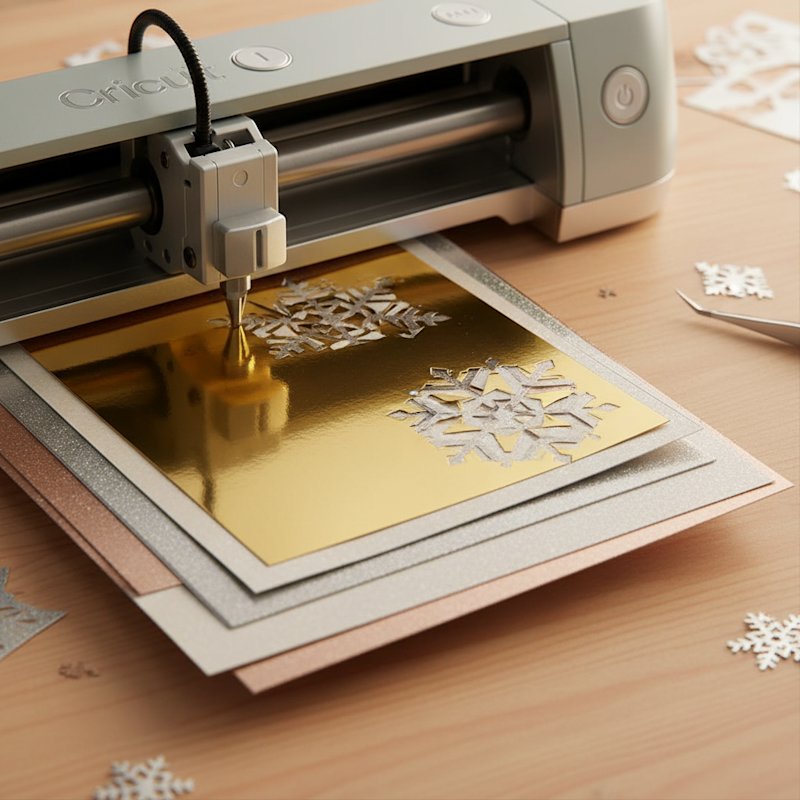
Perfect Machine Settings: Cricut and Silhouette Recommendations

Getting the exact right settings for metallic and pearl cardstock eliminates 90% of cutting problems. Here's what works for both major cutting machine brands.

Cricut Settings for Metallic and Pearl Cardstock

Cricut's material library includes several settings optimized for specialty cardstock. Start with these baseline recommendations:

For heavy metallic foil cardstock: Select the Foil Poster Board setting. This applies appropriate pressure and blade depth for thick metallic materials while protecting the coating from tearing.

For lightweight shimmer and pearl papers: Choose the Pearl Paper setting. This works perfectly with light-weight shimmery frosted metallic papers and subtle iridescent finishes.

For medium weight metallic cardstock (65-80 lb): Start with Medium Cardstock setting and use the pressure dropdown to fine-tune. Many crafters find that medium cardstock at "More" pressure gives cleaner cuts on metallic finishes.

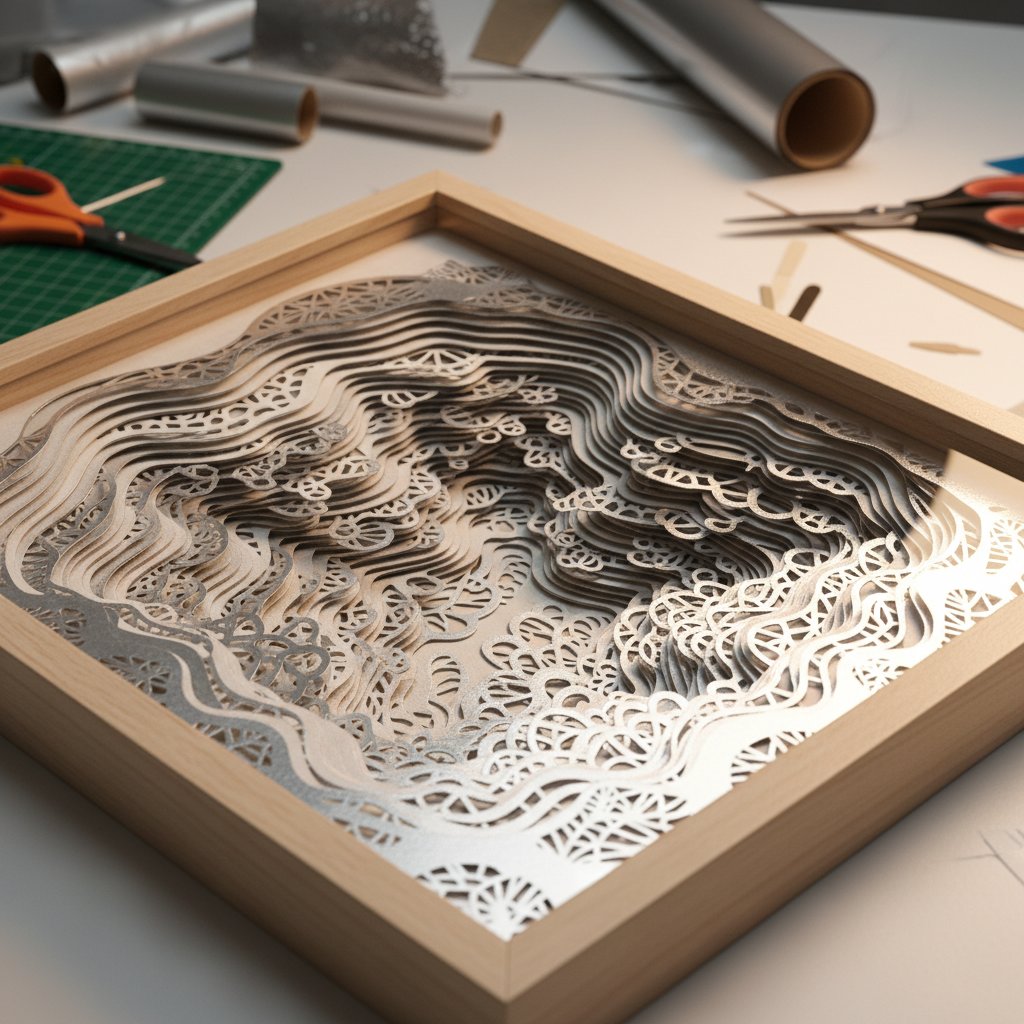
For intricate shadow box layers: Select Cardstock for Intricate Cuts. This setting automatically performs two passes at moderate depth, perfect for detailed designs that need clean cuts without blade gouging.

For cardstock heavier than 80 lb: Enable the double-cut or multi-cut 2x option. This tells your machine to cut the same path twice, ensuring complete cuts through thick metallic materials without increasing pressure to damaging levels.

Pressure Adjustment Strategy

Cricut's pressure dropdown on the final cut screen is your secret weapon for metallic cardstock perfection. The dropdown allows you to specify Less, Default, or More pressure:

  • Start with Default and test
  • If cuts aren't complete, increase to More
  • If coating is tearing or edges are rough, decrease to Less
  • Make small adjustments and test between changes

Silhouette Settings for Metallic and Pearl Cardstock

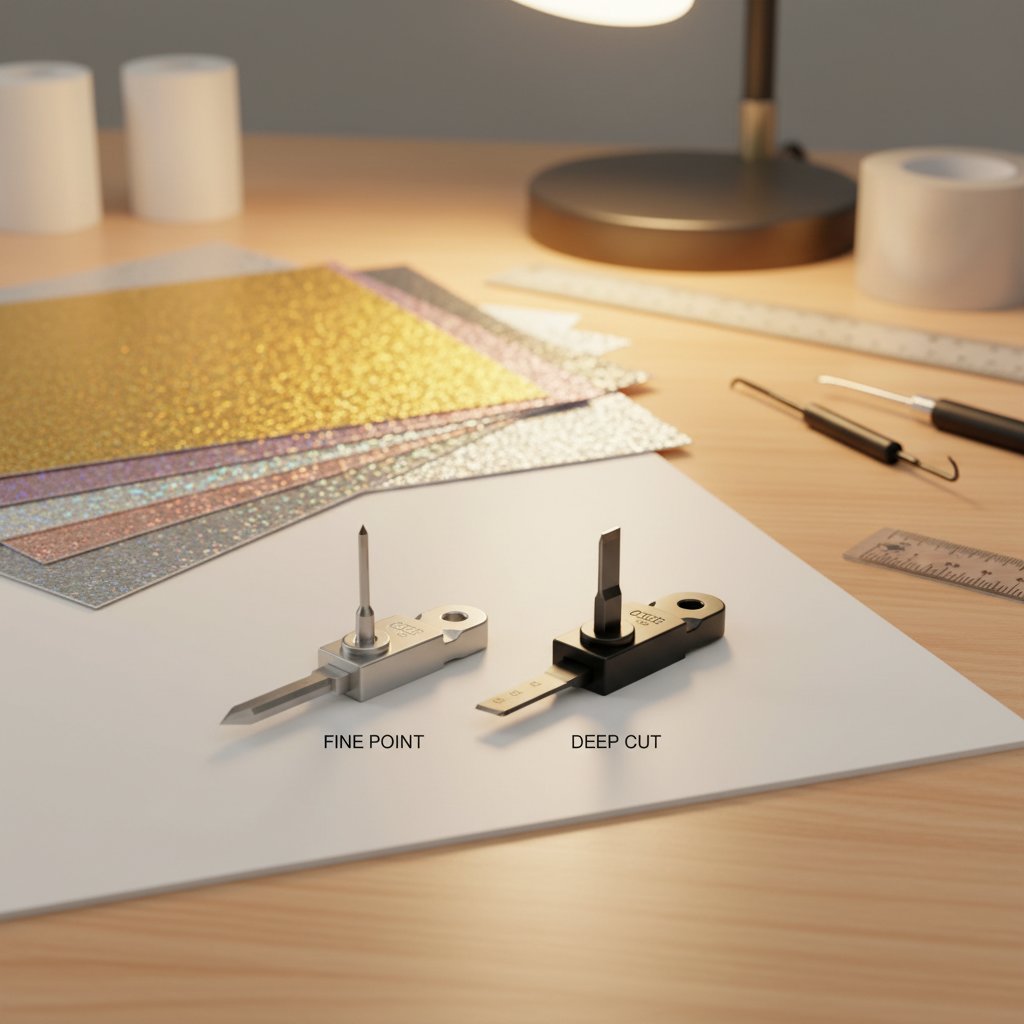
Silhouette machines use blade depth, force, and speed settings instead of material presets. Here's the winning combination for specialty cardstock:

For 65-80 lb metallic cardstock:

  • Blade depth: 6
  • Speed: 4
  • Force: 8-10
  • Passes: 2 (double cut enabled)

For pearl and shimmer papers:

  • Blade depth: 5
  • Speed: 5
  • Force: 7-9
  • Passes: 1-2 depending on weight

For glitter cardstock (similar properties to pearl):

  • Blade depth: 6
  • Speed: 4
  • Force: 10
  • Passes: 2 (auto double cut recommended)

Advanced Silhouette Adjustments

If standard settings aren't working, try these refinements:

Add Line Segment Overcut: This feature extends each cut slightly beyond the endpoint, ensuring corners and intersections cut completely through. Find it in the cutting settings advanced menu.

Increase Passes: Rather than increasing force, add an additional pass. Three passes at moderate force often produce cleaner results than one pass at maximum force on delicate metallic coatings.

Adjust speed: Slower speeds (3-4) give the blade more time to penetrate metallic coatings without tearing. Faster speeds can cause skipping on slippery surfaces.

Mat Selection and Preparation: Preventing Slippage

Metallic cardstock's slippery surface makes proper mat selection critical. Material that shifts even slightly during cutting produces misaligned cuts and ruined projects.

Choosing the Right Mat

StrongGrip Mat (Purple) is your best choice for metallic and pearl cardstock. The aggressive adhesive prevents slippage on coated surfaces and holds specialty papers firmly through intricate cuts. Use StrongGrip for:

  • All glitter cardstock
  • Heavy metallic cardstock (80 lb+)
  • Foil poster board
  • Any project with intricate details

StandardGrip Mat (Green) can work for lightweight pearl and shimmer papers (65 lb or less) but monitor carefully for any slippage. If you notice any movement, switch to StrongGrip.

Securing Troublesome Materials

Even with a StrongGrip mat, some metallic papers resist adhesion. Professional crafters use these techniques:

Masking tape borders: Apply low-tack washi tape or painter's tape around all four edges of your cardstock, adhering it to the mat. This prevents the material from lifting during cutting. Remove tape immediately after cutting to avoid tearing the metallic coating.

Brayer application: After placing metallic cardstock on the mat, use a brayer to apply even pressure across the entire surface. This ensures complete adhesion and eliminates air pockets that cause slippage.

Mat refresh: StrongGrip mats lose adhesive quickly when used with specialty papers. Clean your mat with warm water and mild soap after every 3-4 sheets to restore tack. Consider rotating between two mats so one can rest and regain adhesive strength.

Mat Maintenance for Specialty Papers

Metallic and glitter cardstock leave more residue on mats than regular paper. After each cutting session:

  1. Remove all visible glitter or coating debris with a scraper tool
  2. Use a lint roller to pick up fine particles
  3. Wash with warm water and gentle soap if adhesive feels compromised
  4. Allow to air dry completely before next use
  5. Store with protective cover to maintain adhesive

Common Problems and Solutions: Troubleshooting Metallic Cardstock Cuts

Even with perfect settings, metallic and pearl cardstock can present challenges. Here's how to diagnose and fix the most common issues.

Problem: Not Cutting Through Completely

Your machine completes the cut, but the cardstock isn't fully separated and tears when you try to remove it.

Solutions:

  • Increase pressure by one level (Cricut) or increase force by 1-2 points (Silhouette)
  • Enable double-cut or add an additional pass
  • Check blade sharpness and replace if dull
  • Verify the blade is fully inserted and clicking into place
  • Try the "More" pressure option specifically for stubborn spots

Advanced fix: If only small sections aren't cutting through, your blade may be getting stuck in the metallic coating. Try slowing down the cutting speed to give the blade more time to penetrate.

Problem: Material Slipping During Cut

Your cardstock shifts on the mat mid-cut, causing misalignment and ruined projects.

Solutions:

  • Switch to StrongGrip mat if using StandardGrip
  • Secure all edges with washi tape or painter's tape
  • Clean your mat to restore adhesive
  • Use a brayer to ensure full contact before cutting
  • Check that the cardstock is completely flat without wrinkles or curls

Prevention: Store metallic cardstock flat and allow it to acclimate to room temperature before cutting. Warped or curled paper will never adhere properly.

Problem: Registration Marks Not Reading

Your machine can't detect registration marks on metallic or textured cardstock for print-then-cut projects.

Solutions:

  • Registration marks don't work reliably on highly textured or reflective surfaces
  • Print registration marks on white or light-colored areas only
  • Use matte coating spray on the area where marks will print
  • Consider manual alignment instead of automatic registration
  • Switch to a non-metallic cardstock for print-then-cut projects

Workaround: Print your design on regular cardstock, then back it with metallic cardstock after cutting for a similar effect.

Problem: Rough Edges and Coating Tears

Cuts go through but leave ragged edges or tear the metallic coating.

Solutions:

  • Reduce pressure - you're cutting too deep
  • Replace dull blade immediately
  • Slow cutting speed to prevent coating catch
  • Switch to "Cardstock for Intricate Cuts" setting for gentler multi-pass cutting
  • Check that blade housing is clean and debris-free

Material consideration: Some cheap metallic cardstock has poorly bonded coatings that tear easily. Invest in quality brands like Stardream Metallics or Cricut's specialty cardstock for better results.

Problem: Blade Gumming and Buildup

Your blade gets sticky or accumulates visible coating debris quickly.

Solutions:

  • Clean blade with aluminum foil scrubbing technique after every 3-4 sheets
  • Use a new blade for big metallic projects
  • Store metallic paper in low-humidity environments
  • Consider applying a tiny amount of blade lubricant (sparingly)
  • Remove blade housing and clean both blade and housing thoroughly

Long-term strategy: Budget for more frequent blade replacements when working primarily with specialty papers. The coating accelerates blade degradation significantly.

Shadow Box Layer Techniques: Achieving Intricate Professional Cuts

Shadow box layers using metallic cardstock

Creating layered shadow boxes with metallic and pearl cardstock requires special attention to achieve the crisp, professional look that makes these projects stunning.

Optimal Settings for Shadow Box Layers

Shadow boxes require intricate cuts that must be perfect across multiple layers. Use these specialized settings:

Cricut: Select Cardstock for Intricate Cuts material setting. This automatically cuts twice at moderate depth, ideal for the detailed designs typical in shadow box files. It prevents the blade from cutting too deep while ensuring complete cuts on delicate elements.

Silhouette: Use blade depth 6, speed 4, force 8-10, with automatic double-cut enabled. For especially intricate areas, slow speed to 3 and add a Line Segment Overcut.

Choosing Cardstock for Shadow Box Success

The right cardstock choice dramatically impacts your finished shadow box appearance.

Solid-core vs. white-core: Always choose solid-core cardstock where the color goes completely through the paper. White-core metallic cardstock shows white edges after cutting, creating an unprofessional look in shadow boxes where layers are viewed from angles. Check paper edges before purchasing.

Weight recommendations: For shadow box layers, 65-80 lb cardstock provides the ideal balance of rigidity and cutting ease. Heavier weights can be difficult to cut in intricate patterns, while lighter weights may curl or warp.

Recommended metallic papers for shadow boxes:

  • Stardream Metallics: Offers subtle shimmer with solid colored cores, perfect for elegant shadow boxes. The coating is durable and cuts cleanly.
  • Cricut Pearl Paper: Lightweight with beautiful iridescent finish, ideal for delicate fairy-tale or wedding shadow boxes.
  • Shimmer cardstock: Adds soft highlights without the aggressive shine of foil, suitable for varied lighting conditions.

Layer Alignment Tips

Metallic cardstock can be less forgiving than regular cardstock when assembling shadow box layers.

Cut all layers in the same orientation: Keep your cardstock grain direction consistent across all layers. This ensures uniform curl tendencies and makes alignment easier.

Test fit before adhering: Metallic coatings can add unexpected thickness. Always test your layer stack before applying adhesive to verify proper spacing.

Use alignment jigs: For complex shadow boxes, create alignment templates or jigs to ensure perfect layer registration despite metallic cardstock's tendency to shift.

Allow acclimation: Let freshly cut metallic layers rest flat for 30 minutes before assembly. The cutting process can introduce tension that causes temporary curling.

Professional Tips and Tricks: Elevating Your Metallic Cardstock Projects

Beyond basic settings, these professional techniques will take your metallic cardstock results from good to exceptional.

Always Test Cut First

Never start a full project without testing your exact settings on scrap pieces of the same metallic cardstock. Even within the same brand, different colors or finishes can have slightly different coating thicknesses that require setting adjustments. Cut a small intricate test design and verify:

  • Complete cuts with no tearing
  • Clean edges without roughness
  • No blade buildup after the test
  • Proper material adhesion to mat

Storage Prevents Problems

Metallic cardstock is more sensitive to environmental conditions than regular paper. Store it properly to prevent cutting issues:

  • Keep in original packaging until use
  • Store flat, never rolled or folded
  • Maintain consistent humidity (40-50% ideal)
  • Avoid temperature extremes that cause warping
  • Use immediately after opening when possible

Warped metallic cardstock creates adhesion problems and inconsistent cutting depth that even perfect settings can't overcome.

Combine Textures Strategically

Some of the most striking shadow boxes mix metallic and regular cardstock for contrast. Use metallic layers for focal elements that should catch light while using matte cardstock for background layers. This reduces cost, cutting challenges, and creates visual interest through texture variation.

Know When to Hand-Cut Details

Sometimes the smartest choice is to let your machine cut the bulk of the design, then hand-cut exceptionally delicate areas with a craft knife. For elements thinner than 1/8 inch on metallic cardstock, hand-cutting often produces cleaner results with less risk of coating tears.

Update Your Software

Cutting machine manufacturers regularly update their material libraries with improved settings for specialty materials. Check for firmware and software updates quarterly to ensure you have the latest metallic cardstock profiles.

Conclusion: Mastering Metallic and Pearl Cardstock

Cutting metallic and pearl cardstock doesn't have to be a frustrating gamble. With the right blade selection, precise settings, proper mat preparation, and systematic troubleshooting, you can achieve consistently professional results on these challenging specialty materials.

Remember the fundamentals: start with sharp blades, use StrongGrip mats, select appropriate material settings, and always test before committing to your final project. When problems arise, adjust one variable at a time and document what works for your specific materials and machine.

The stunning visual impact of metallic and pearl cardstock in shadow boxes and paper crafts is absolutely worth the extra attention these materials require. Armed with these professional techniques, you're ready to transform challenging specialty papers into show-stopping creations that gleam with professional quality.

Ready to tackle that shadow box project you've been putting off? Start with a test cut, trust your settings, and prepare to be amazed by the professional results you can achieve.