Articles 25 min read

Cricut Cardstock Troubleshooting: Fix Any Cutting Problem

Your comprehensive guide to cricut not cutting through cardstock.

Cricut Cardstock Troubleshooting: Fix Any Cutting Problem

Cricut Cardstock Troubleshooting Bible: Fix Any Cutting Problem in 10 Steps

If your Cricut is not cutting through cardstock properly, you're not alone. Incomplete cuts, tearing, snagging, and jagged edges are among the most frustrating problems Cricut users face, especially when working on intricate shadow box projects or detailed paper crafts. The good news? Nearly every cardstock cutting problem has a solution, and most can be fixed in minutes once you know what to look for.

This comprehensive troubleshooting guide will walk you through exactly how to diagnose and fix any Cricut cardstock problem. Whether you're dealing with a blade that won't cut through heavy cardstock, a mat that's lost its grip, or mysterious tearing on delicate designs, you'll find the answer here. We've organized this guide into a systematic 10-step troubleshooting process that addresses every common issue, from the simplest fixes to advanced techniques for stubborn problems.

By following these steps in order, you'll be able to pinpoint the exact cause of your cutting issues and implement the right solution. You'll learn when to replace your blade, how to restore worn mats, which settings work best for different cardstock weights, and how environmental factors like humidity can sabotage your cuts. Most importantly, you'll gain the confidence to troubleshoot any future cutting problem that comes your way.

Let's transform your Cricut cardstock frustrations into perfect cuts every single time.

Quick Diagnostic: Identify Your Problem in 30 Seconds

Before diving into the detailed steps, use this quick diagnostic to identify which step addresses your specific issue:

Problem: Cardstock not cutting all the way through
→ Start with Step 2 (Blade Inspection), then Step 5 (Pressure Settings)

Problem: Cardstock tearing or ripping during cuts
→ Start with Step 2 (Blade Maintenance), then Step 3 (Mat Condition)

Problem: Cuts are jagged or have rough edges
→ Start with Step 2 (Blade Condition), then Step 4 (Material Settings)

Problem: Material shifting during cutting
→ Start with Step 3 (Mat Preparation)

Problem: Inconsistent cutting depth across the design
→ Start with Step 6 (Environmental Factors), then Step 8 (Machine Maintenance)

Problem: Machine going through motions but not cutting
→ Start with Step 1 (Basic Checks), then Step 2 (Blade Installation)

Problem: Design too intricate, cuts bleeding together
→ Jump to Step 9 (Advanced Techniques)

Now, let's work through each step systematically to solve your Cricut cardstock problems permanently.

Step 1: Check the Basics (Power, Connection, Firmware)

Before investigating complex issues, verify these fundamental elements are working correctly. Many cutting problems stem from simple oversights that take seconds to fix.

Power and Connection Verification:
Ensure your Cricut machine is plugged into a working outlet and the power light is on. If using a power strip, try plugging directly into a wall outlet to rule out power supply issues. Check that all cable connections are secure, including the USB cable if you're using a wired connection. Loose connections can cause the machine to pause or skip commands during cutting.

Firmware Updates:
Outdated firmware can cause cutting inconsistencies and material recognition problems. Open Cricut Design Space, navigate to the menu, and check for updates. Install any available firmware updates and restart your machine. Firmware updates often include improvements to cutting algorithms and material settings that can resolve mysterious cutting issues.

Machine Reset:
If your machine is behaving erratically, perform a hard reset by unplugging it for 60 seconds, then plugging it back in. This clears temporary glitches and recalibrates the cutting mechanism. For persistent issues, consult your machine's manual for model-specific reset procedures.

Bluetooth Connectivity (If Applicable):
Wireless connection issues can cause cutting jobs to pause or fail mid-project. If using Bluetooth, ensure your device is within 10-15 feet of the machine with minimal obstacles between them. Switch to a wired USB connection temporarily to determine if connectivity is the culprit. Many users find wired connections more reliable for lengthy or intricate cutting jobs.

Once you've verified these basics, move to Step 2 to inspect your blade—the most common source of cardstock cutting problems.

Step 2: Blade Inspection and Replacement Guide

Cricut blade inspection guide showing blade components and wear indicators

Your blade is the single most critical component for successful cardstock cutting. A dull, damaged, or debris-laden blade will sabotage even perfectly configured settings. This step will help you assess blade condition and know when replacement is necessary.

Visual Blade Inspection:
Remove the blade from your Cricut and examine it under good lighting. The blade tip should be sharp and free of visible nicks or bends. If you see a blunted tip, bent edge, or metallic shine where the blade edge should be dark and sharp, replacement is needed. Even microscopic damage can cause tearing and incomplete cuts in cardstock.

Debris Removal Technique:
Blade debris is the most common cause of cardstock tearing. Small paper fibers, adhesive residue, and cardstock particles accumulate in the blade housing and around the blade tip, preventing clean cuts. Here's the proven cleaning method: Take a sheet of aluminum foil and crumple it into a tight ball. Remove your blade from the housing, depress the plunger to expose the blade tip, and gently insert the blade tip into the aluminum foil ball repeatedly—about 50 times. The aluminum acts as an abrasive that removes debris without damaging the blade. After cleaning, inspect the blade again and wipe the housing with a lint-free cloth.

Blade Type Verification:
Ensure you're using the correct blade for your machine and material. For most cardstock projects on Cricut Explore and Maker machines, you need a Premium Fine-Point Blade (identified by white or red caps). Older gray-capped blades are less effective for cardstock. For cardstock heavier than 80lb, consider upgrading to a Deep Point Blade, which has a steeper angle specifically designed for thicker materials. The wrong blade type will struggle regardless of other settings.

Blade Installation Check:
Improper blade installation causes cutting failures that mimic other problems. When inserting your blade, you should hear and feel a definite click as it locks into the housing. The blade should sit flush with the housing opening—if it protrudes or sits recessed, remove and reinstall it. For dial-equipped machines, ensure the blade depth dial is set correctly: setting 4-5 for medium cardstock (65-80lb), setting 6 for heavy cardstock (80-110lb).

When to Replace Your Blade:
Cricut blades typically last 25-50 cutting hours with cardstock, but this varies based on material quality and design complexity. Replace your blade if you've cleaned it thoroughly but still experience tearing, incomplete cuts, or visible blade damage. Keep a spare blade on hand to quickly test whether blade condition is causing your problems. If swapping to a fresh blade immediately solves the issue, you've found your culprit. For a detailed comparison of blade types and when to use each, see our guide to choosing the best Cricut blade for cardstock.

With a clean, sharp, properly installed blade, you're ready to tackle the next common issue: mat condition.

Step 3: Mat Preparation and Cleaning

Cricut mat preparation and cleaning techniques for cardstock projects

Your cutting mat is the foundation of every successful cut. Cardstock requires a very sticky mat to prevent shifting during cutting—even minimal movement causes registration errors, tearing, and incomplete cuts. This step covers mat assessment, cleaning, and replacement timing.

Mat Stickiness Test:
Press a piece of cardstock firmly onto your mat. It should adhere immediately and require moderate force to remove. If the cardstock lifts easily at the corners or edges, your mat has lost too much adhesive. For cardstock cutting, use a StandardGrip mat (green) or StrongGrip mat (purple) for heavier weights. LightGrip mats (blue) do not provide sufficient hold for cardstock projects. For detailed guidance on selecting the right mat, see our Cricut mat guide for cardstock.

Proper Material Placement:
Use a brayer tool or your hand to firmly press cardstock onto the mat, working from the center outward to eliminate air bubbles. Ensure cardstock is completely flat with no curled edges or warped areas. Position your design at least 1 inch from the mat edges to maintain consistent pressure across the entire cut area. For textured cardstock, place the textured side facing up for optimal cutting performance.

Mat Cleaning Process:
When your mat accumulates paper fibers, dust, or adhesive residue, cleaning can restore some stickiness. Remove debris with a plastic scraper tool, working gently to avoid damaging the adhesive. For deeper cleaning, use warm water and a small amount of mild dish soap. Scrub gently with your hands (no brushes or abrasives), then rinse thoroughly and air dry completely—typically 24 hours. The mat will feel less sticky when wet but should regain tackiness as it dries. Never use harsh chemicals, alcohol, or heat to clean mats, as these damage the adhesive permanently.

Mat Restickening Methods:
If cleaning doesn't restore adequate stickiness, you can apply restickening products designed for cutting mats. Apply a thin, even coat according to product instructions and allow full curing time before use. Alternatively, some crafters use repositionable spray adhesive, though this can leave residue on your cardstock backing. Test any restickening product on a scrap piece before committing to an important project. For complete step-by-step mat restoration techniques, see our guide on how to make old Cricut mats sticky again.

Mat Replacement Timing:
Cutting mats typically last 25-40 uses with cardstock before requiring replacement. Replace your mat if cleaning and restickening don't restore adequate grip, if you see visible damage to the surface, or if the mat has become warped or curled. Using a worn mat is false economy—it causes wasted materials and project failures that cost far more than a new mat. Keep a spare mat on hand so you can immediately test whether mat condition is causing cutting problems.

Mat Storage:
Extend mat life by storing it flat or rolled with the sticky side protected by the original protective cover. Keep mats away from heat, direct sunlight, and dusty environments. If your mat becomes curled, place it sticky-side down on a clean surface with weights on top overnight to flatten it before use.

With a properly prepared mat, your cardstock will stay secure throughout the cutting process, enabling clean, precise cuts. Now let's ensure your material settings are optimized.

Step 4: Material Settings Deep Dive

Selecting the correct material setting in Cricut Design Space is crucial for successful cardstock cutting. The wrong setting will cause either incomplete cuts (too little pressure) or tearing and over-cutting (too much pressure). This step will help you choose and fine-tune the perfect settings for your specific cardstock.

Understanding Material Settings:
Cricut Design Space provides pre-configured settings for different cardstock types and weights. Navigate to the material selection screen and search for "cardstock" to see available options. Common settings include Cardstock (for 65-80lb weight), Cardstock for Intricate Cuts (optimized for detailed designs), Heavy Cardstock (80-110lb), Glitter Cardstock, and Pearl Paper. Each setting controls blade depth, cutting pressure, and speed.

Choosing the Right Base Setting:
For standard 65-80lb smooth cardstock, select the "Cardstock" setting. If cutting intricate designs with fine details, switch to "Cardstock for Intricate Cuts," which uses slightly more pressure and slower speed to prevent tearing on delicate cuts. For heavier cardstock (80lb and above), use the "Heavy Cardstock" setting. Specialty cardstocks like glitter, metallic, and textured varieties have dedicated settings that account for their unique properties.

The Custom Material Settings Advantage:
For ultimate control, use Custom Material Settings to fine-tune pressure beyond preset options. Access this by clicking the star icon next to any material setting to save it as a custom preset. You can then adjust pressure incrementally from the base setting. This is essential when working with off-brand cardstock or unusual weights that don't perfectly match Cricut's preset assumptions.

Pressure Adjustment Guidelines:
Start with the recommended setting for your cardstock weight. Perform a small test cut before committing to a full project. If cuts are incomplete (not cutting all the way through), increase pressure by 2-4 units and test again. If cardstock is tearing, over-cutting, or creating rough edges, decrease pressure by 2-4 units. Make incremental adjustments—dramatic pressure changes often overshoot the optimal setting. Document the settings that work for specific cardstock brands and weights for future reference.

Multi-Pass Cutting:
For very heavy cardstock or intricate designs, enable multi-pass cutting in your material settings. This runs the blade over the same path 2-3 times, which often produces cleaner cuts than simply increasing pressure. Multi-pass cuts work especially well for cardstock over 100lb or when cutting extremely detailed designs that tear with single-pass high pressure.

Brand-Specific Considerations:
Not all cardstock is created equal—fiber length, density, and coating affect how it cuts. Premium brands like Bazzill, American Crafts, and Recollections tend to cut more cleanly than budget alternatives. If you consistently experience problems with a particular cardstock brand despite correct settings, consider switching brands. Document which brands work well with your machine for future purchases.

Testing Protocol:
Always perform a test cut when using new cardstock or changing settings. Create a small design (1-2 inches) that includes the level of detail in your actual project. Cut the test, then carefully remove it from the mat and inspect all cuts. Check for complete cutting through the cardstock, clean edges without tearing, and proper release from the waste material. Adjust settings based on test results before cutting your final project. For a comprehensive reference of settings by cardstock type and weight, see our Cricut cardstock settings guide.

With optimized material settings, let's move to pressure adjustments for perfect cuts every time.

Step 5: Pressure and Passes Adjustment

Even with correct material settings, some cardstock requires pressure fine-tuning to achieve perfect cuts. This step covers how to systematically adjust pressure and use multiple passes to overcome stubborn cutting issues.

Understanding Pressure Settings:
Pressure controls how hard the blade presses into the cardstock during cutting. Too little pressure results in incomplete cuts where the blade doesn't penetrate all the way through. Too much pressure causes tearing, especially on intricate designs, and can damage your mat. The goal is finding the minimum pressure that achieves complete cuts without over-stressing the material.

The Pressure Adjustment Process:
Start with Design Space's recommended pressure for your selected material. Perform a test cut and evaluate results. For incomplete cuts, increase pressure using the "More" or "More+" options (or increase custom pressure by 2-4 units). For tearing or over-cutting, decrease pressure using "Less" options (or decrease custom pressure by 2-4 units). Make one adjustment at a time and test after each change. Most cardstock cutting problems can be solved with 2-3 incremental pressure adjustments.

When to Use More Pressure:
Increase pressure if you observe incomplete cuts where the blade traces the design but doesn't cut through the cardstock, weak corners that don't fully separate from the backing, or the need to use excessive force to remove cut pieces from the waste material. Heavy cardstock, densely fibered paper, and brand-new blades often require more pressure than default settings.

When to Use Less Pressure:
Decrease pressure if you see tearing along cut lines (especially on curves), rough or ragged edges instead of clean cuts, over-cutting where the blade cuts into the mat beneath the cardstock, or cardstock puckering around cut areas. Intricate designs with fine details almost always perform better with slightly reduced pressure combined with multi-pass cutting.

Multi-Pass Cutting Strategy:
Multi-pass cuts run the blade over the same path multiple times, distributing the cutting force across several passes instead of one aggressive cut. This produces cleaner edges and reduces tearing on intricate designs. Enable multi-pass by adjusting your material settings to 2 or 3 passes. The tradeoff is longer cutting time, but results are often dramatically better for challenging projects. Multi-pass is especially effective for glitter cardstock, which tears easily with high single-pass pressure.

The Double-Cut Technique:
For exceptionally heavy cardstock or problematic designs, try the double-cut technique: cut your project once, then without unloading the mat, send the same cut file to the machine again. This manually creates a multi-pass effect. Ensure the mat doesn't shift between passes for proper registration. This technique helps when you've reached maximum pressure but still aren't achieving complete cuts.

Pressure Troubleshooting Matrix:

  • Symptom: Incomplete cuts on straight edges → Solution: Increase pressure by 4 units
  • Symptom: Incomplete cuts on curves only → Solution: Increase pressure by 2 units or enable multi-pass
  • Symptom: Tearing on intricate details → Solution: Decrease pressure by 2-4 units and enable multi-pass
  • Symptom: Rough edges everywhere → Solution: Replace blade, then decrease pressure by 2 units
  • Symptom: Inconsistent cutting (some areas complete, others not) → Solution: Check mat stickiness and environmental factors (Step 6)

Documenting Your Settings:
Keep a notebook or digital file recording the pressure settings that work for each cardstock brand, weight, and project type you use regularly. Include notes about environmental conditions if relevant. This reference eliminates trial-and-error for repeat projects and helps you quickly troubleshoot new issues by comparing to known-good configurations.

Now let's examine environmental factors that can sabotage even perfectly configured settings.

Step 6: Environmental Factors (Humidity, Temperature)

Your cutting environment significantly impacts cardstock behavior and cutting performance. Humidity and temperature affect paper's moisture content, which changes how it cuts, tears, and releases from the mat. This often-overlooked factor explains mysterious cutting inconsistencies.

How Humidity Affects Cardstock Cutting:
Paper is hygroscopic—it absorbs and releases moisture based on surrounding humidity. In high humidity (above 60%), cardstock absorbs moisture and becomes slightly softer and more pliable, which can cause imprecise cuts and difficulty weeding. In low humidity (below 40%), cardstock becomes brittle and prone to cracking, tearing, and developing electrostatic charges that cause feeding problems and material sticking together.

Optimal Environmental Conditions:
Professional paper cutting facilities maintain 50% relative humidity (±5%) for optimal results. At home, aim for 45-55% relative humidity and temperatures between 68-72°F. Use a hygrometer (inexpensive and available at hardware stores) to monitor conditions in your crafting space. If conditions fall outside this range, environmental factors may be contributing to cutting problems.

Low Humidity Solutions:
If you're experiencing cracking, tearing on folds, or electrostatic issues, humidity is likely too low. Solutions include running a humidifier in your crafting room (aim for 45-55% humidity), storing cardstock in sealed containers or bags between uses to maintain moisture content, and allowing cardstock to acclimate to room conditions for 24 hours before cutting. Some crafters lightly mist the back of cardstock (non-cutting side) and allow it to rest for 30 minutes before cutting, though this risks warping and should be tested carefully.

High Humidity Solutions:
If cuts are imprecise, cardstock is soft and fibrous, or you're experiencing excessive tearing, humidity may be too high. Solutions include using a dehumidifier to bring humidity to 45-55%, storing cardstock in climate-controlled areas away from damp basements or humid rooms, and using desiccant packets in cardstock storage containers. Cut during lower-humidity times of day (typically mid-morning) rather than evening when humidity often peaks.

Temperature Considerations:
Very cold cardstock (below 60°F) becomes brittle and cuts less cleanly. Very warm conditions (above 80°F) can affect mat adhesive performance. If storing cardstock in a garage, basement, or climate-controlled area, allow it to come to room temperature before cutting. Store your Cricut machine in a temperature-stable environment rather than spaces with wide temperature swings.

Seasonal Adjustments:
You may need different pressure settings for the same cardstock in summer versus winter due to humidity changes. If you documented settings that worked perfectly six months ago but now fail, environmental changes are likely responsible. Re-test and adjust pressure for current conditions, noting seasonal variations in your settings documentation.

Quick Environmental Test:
If you suspect environmental factors, perform this test: cut the same design with the same settings on the same cardstock at different times of day or different days. If results vary significantly, environmental factors are contributing. Check humidity and temperature during successful and unsuccessful cuts to identify patterns. For more on weather-related cutting issues, see our guide on humidity's impact on Cricut cutting. For long-term paper care, see our paper storage guide to prevent cardstock warping.

With environmental factors under control, let's examine software and connection issues that can cause cutting problems.

Step 7: Software Troubleshooting (Design Space Issues)

Sometimes the problem isn't with your machine, mat, or blade—it's with the software sending cutting instructions. Design Space glitches, file issues, and communication problems can all manifest as cutting failures. This step will help you identify and resolve software-related issues.

Design Space Updates:
Outdated software causes compatibility issues and cutting errors. Open Design Space and check for updates (usually in the account menu or settings). Install any available updates and restart the application. Clear your browser cache if using the web version, or reinstall the app if using desktop software. Many mysterious cutting issues resolve after updating to the latest Design Space version.

File Integrity Issues:
Corrupted or improperly formatted SVG files cause cutting problems that appear mechanical but are actually data-related. If a specific design consistently fails while others cut perfectly, the file is likely the problem. Try downloading the file again if purchased, or opening it in vector editing software like Inkscape to verify it's properly formatted. Look for unclosed paths, overlapping elements, or extremely small details that may exceed your machine's precision capabilities.

Calibration:
Design Space includes calibration tools for Print Then Cut and general cutting precision. If experiencing registration issues where cuts don't align with expected positions, run the machine calibration process. This is especially important after changing blades, updating firmware, or if your machine has been moved. Calibration ensures the machine knows exactly where the blade is positioned relative to the mat. For multi-layer projects where alignment is critical, see our guide on fixing shadow box layer alignment issues.

Connection Troubleshooting:
If your machine pauses mid-cut, makes unexpected movements, or fails to complete jobs, connection issues may be responsible. For Bluetooth connections, ensure your device is within 15 feet with minimal obstacles, close other Bluetooth devices that might interfere, and consider switching to wired USB for complex projects. For wired connections, try different USB ports and cables to rule out connection hardware failures.

Project Complexity and Memory:
Extremely complex designs with thousands of cut lines can overwhelm Design Space or your machine's memory. If a project fails repeatedly, try simplifying the design by reducing nodes, ungrouping and cutting in sections, or reducing fine details that may be too small to cut cleanly anyway. Some users find that designs with more than 3,000-4,000 cut lines benefit from being split into multiple cutting operations.

Clear Cache and Reset:
If Design Space behaves erratically, clear the application cache (instructions vary by platform) and perform a fresh login. For persistent issues, uninstall and reinstall Design Space completely. This resolves corrupted preference files and plugin conflicts that can cause cutting communication errors.

With software issues resolved, let's ensure your machine is properly maintained for consistent performance.

Step 8: Machine Maintenance

Regular Cricut maintenance prevents many cutting problems and extends machine life. Dust, debris, and mechanical wear accumulate over time, gradually degrading cutting performance. This step covers essential maintenance tasks that keep your machine cutting perfectly.

Exterior Cleaning:
Dust and paper fibers accumulate on and inside your Cricut, affecting sensor accuracy and mechanical movement. Power off and unplug your machine. Use a soft, lint-free cloth to wipe exterior surfaces. Use compressed air to blow debris from around the blade carriage, rollers, and any accessible interior areas. Pay special attention to the area around the blade housing where cardstock dust accumulates heavily.

Roller Cleaning:
The rollers that feed your mat into the machine collect adhesive residue, paper fibers, and dust, which causes feeding problems and inconsistent cutting depth. Dampen a lint-free cloth with water (no cleaning products) and gently wipe each roller while manually rotating it to clean the entire surface. Ensure rollers are completely dry before using the machine. Clean rollers every 10-15 hours of cutting time or whenever you notice residue buildup.

Sensor Cleaning:
Cricut machines use optical sensors for mat detection and Print Then Cut registration. Smudges or debris on sensors cause reading errors. Locate sensor windows (consult your manual for exact positions—typically near the blade carriage and mat loading area). Gently clean with a microfiber cloth. Never use liquids or cleaners directly on sensors.

Blade Carriage Maintenance:
The blade carriage should move smoothly along its track without catching or resistance. Manually move the carriage from side to side with the machine powered off—it should glide easily. If you feel resistance or grinding, debris may be obstructing the track. Use compressed air to clear the track area. Do not lubricate the track unless specifically recommended in your machine manual, as improper lubrication attracts dust.

Firmware Updates:
Manufacturers release firmware updates to improve cutting performance, fix bugs, and add material support. Check for firmware updates monthly through Design Space. Install updates when available and perform a test cut afterward to ensure proper installation. Keep your machine connected to power during firmware updates to prevent installation failures.

When to Seek Professional Service:
Some issues require professional attention. Contact Cricut support if you experience mechanical grinding or unusual noises during operation, the blade carriage moves erratically or fails to move smoothly, error messages that persist after troubleshooting, or physical damage to components. Don't attempt to disassemble your machine beyond basic user maintenance, as this can void warranties.

Maintenance Schedule:
Establish a regular maintenance routine: clean exterior and rollers every 10-15 cutting hours, clean sensors monthly, check for firmware updates monthly, perform thorough inspection quarterly (check all visible mechanical components for wear or damage), and replace consumables (blades, mats) proactively rather than waiting for failure.

With proper maintenance, let's explore advanced techniques for the most challenging cardstock cutting scenarios.

Step 9: Advanced Techniques for Difficult Materials

Advanced cutting techniques for difficult cardstock materials

Some cardstock types and designs challenge even perfectly configured machines. Glitter cardstock, metallic finishes, ultra-heavy weights, and extremely intricate designs require specialized techniques beyond standard settings. This step provides advanced solutions for the toughest cutting scenarios.

Glitter Cardstock Techniques:
Glitter cardstock tears easily because the glitter coating disrupts blade movement and creates uneven cutting resistance. Solutions include using "Glitter Cardstock" material setting (or custom setting with reduced pressure), enabling multi-pass cutting (2-3 passes) instead of high single-pass pressure, placing a piece of washi tape on the back of intricate areas to reinforce the cardstock, and using a Deep Point Blade instead of Fine Point for thicker glitter
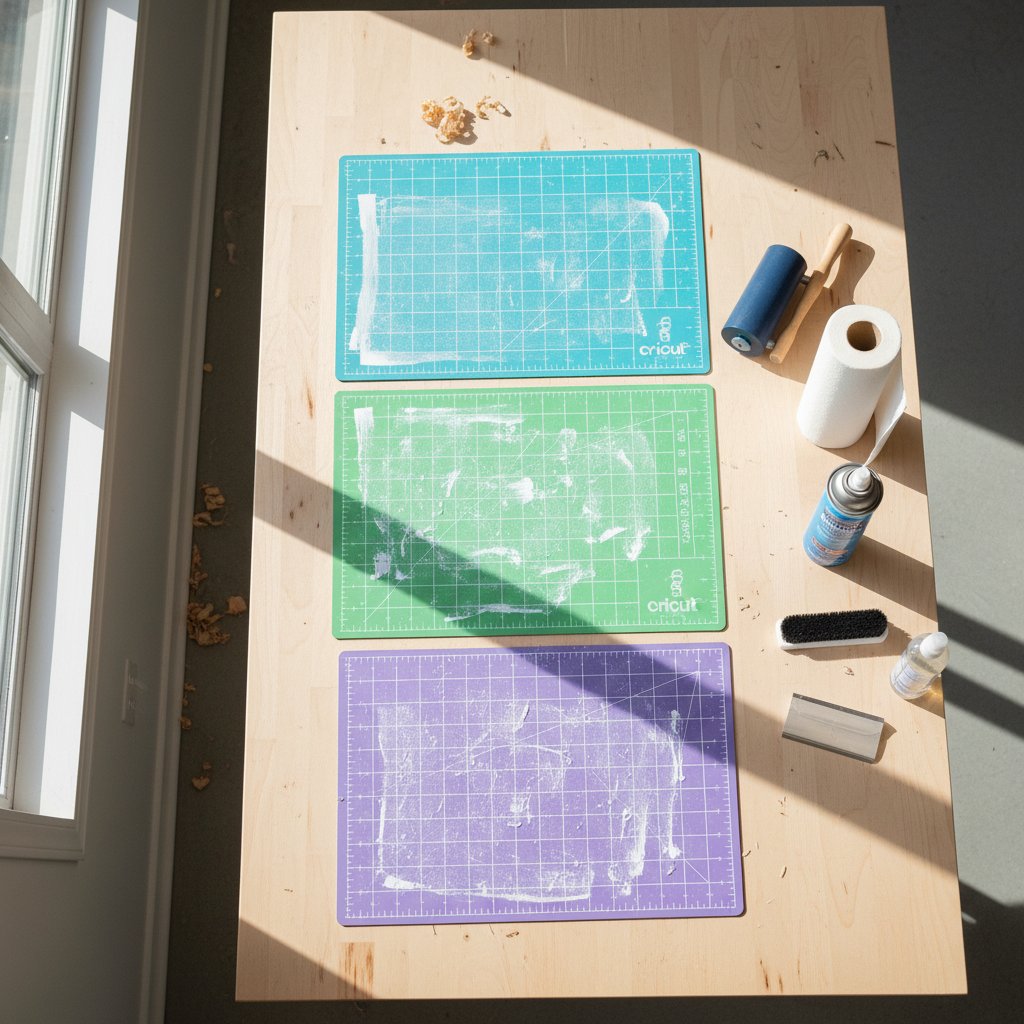
 cardstock. Always clean your blade after cutting glitter cardstock, as glitter particles accumulate rapidly and cause subsequent cutting problems. For complete glitter cardstock techniques, see our glitter cardstock cutting guide.

Metallic and Pearl Cardstock Solutions:
Metallic finishes create a hard, slick surface that blades can skate across rather than cutting cleanly. Use the dedicated "Metallic" or "Pearl Paper" material settings, ensure your mat is very sticky (metallic cardstock shifts more easily), cut with the metallic side facing up for best results, and consider light misting of the back side to slightly soften the paper (test first on scraps). Replace blades more frequently when cutting metallic cardstock, as the hard coating dulls blades faster than standard paper. For detailed metallic cutting techniques, see our metallic and pearl cardstock cutting guide.

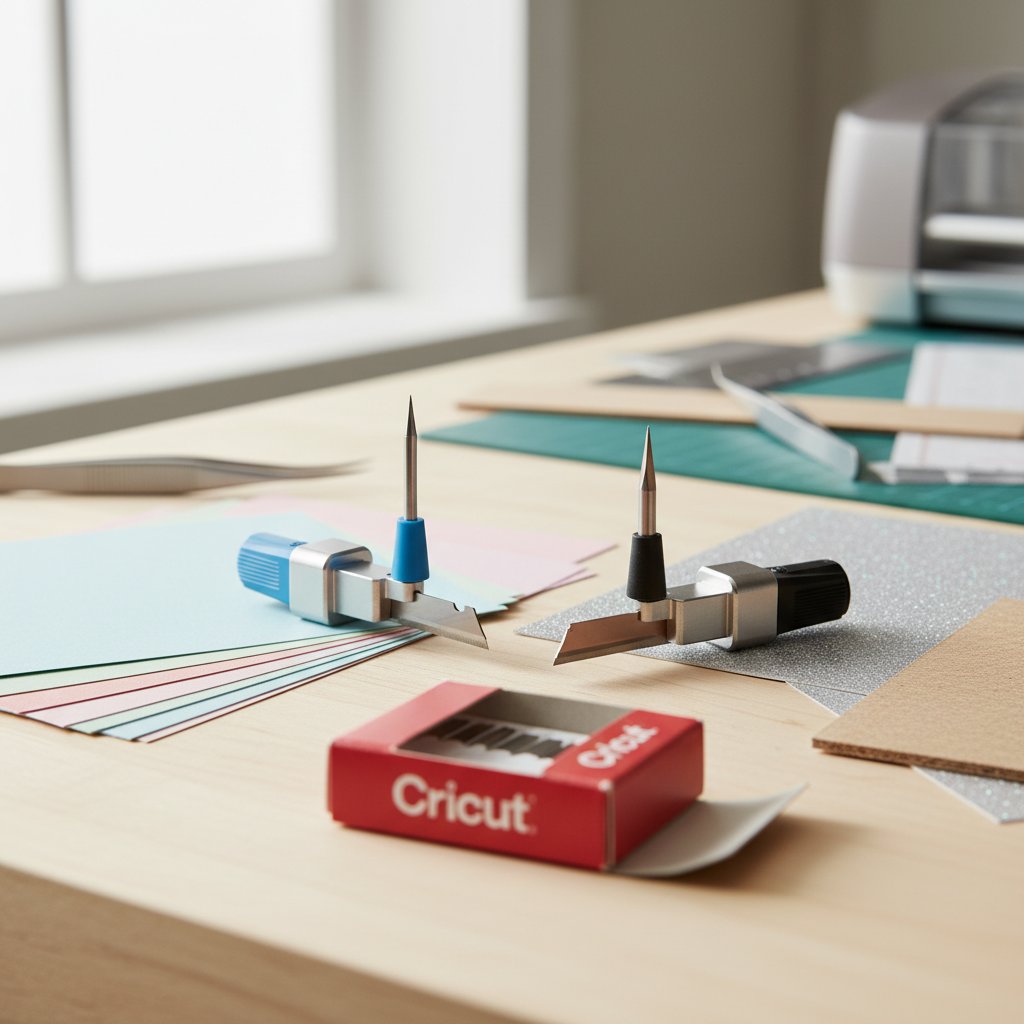
Ultra-Heavy Cardstock (100lb+):
Cardstock over 100lb weight challenges many Cricut models. Techniques include using the Deep Point Blade or Knife Blade (Maker only) instead of Fine Point, enabling maximum pressure settings plus multi-pass (3 passes recommended), using the double-cut technique (cut twice without unloading mat), and simplifying designs to reduce extremely fine details that won't cut cleanly in heavy stock. For weights above 110lb, consider whether your project would work better with chipboard settings and tools.

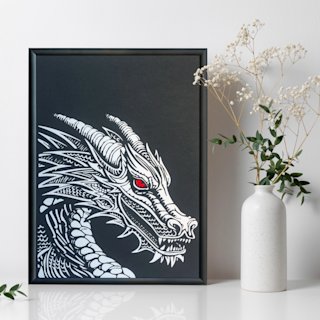
Intricate Design Optimization:
Extremely detailed designs with fine lines, small interior cuts, or delicate connections often tear regardless of settings. Solutions include scaling up designs—details under 0.25 inches often tear, adding small weeding boxes around tiny interior cuts to provide removal access, using "Cardstock for Intricate Cuts" material setting, enabling multi-pass at reduced pressure rather than single high-pressure pass, and manually editing designs in Design Space to simplify problem areas or reinforce delicate connections. Sometimes redesigning one or two problematic elements saves an entire project.

The Freezer Paper Backing Technique:
For cardstock that tears persistently on intricate designs, try this advanced technique: iron a piece of freezer paper to the back of your cardstock (shiny side against cardstock), cut the project with both layers together, and remove freezer paper after cutting. The freezer paper provides temporary reinforcement that prevents tearing while cutting. This works exceptionally well for delicate lace-like designs in thin cardstock.

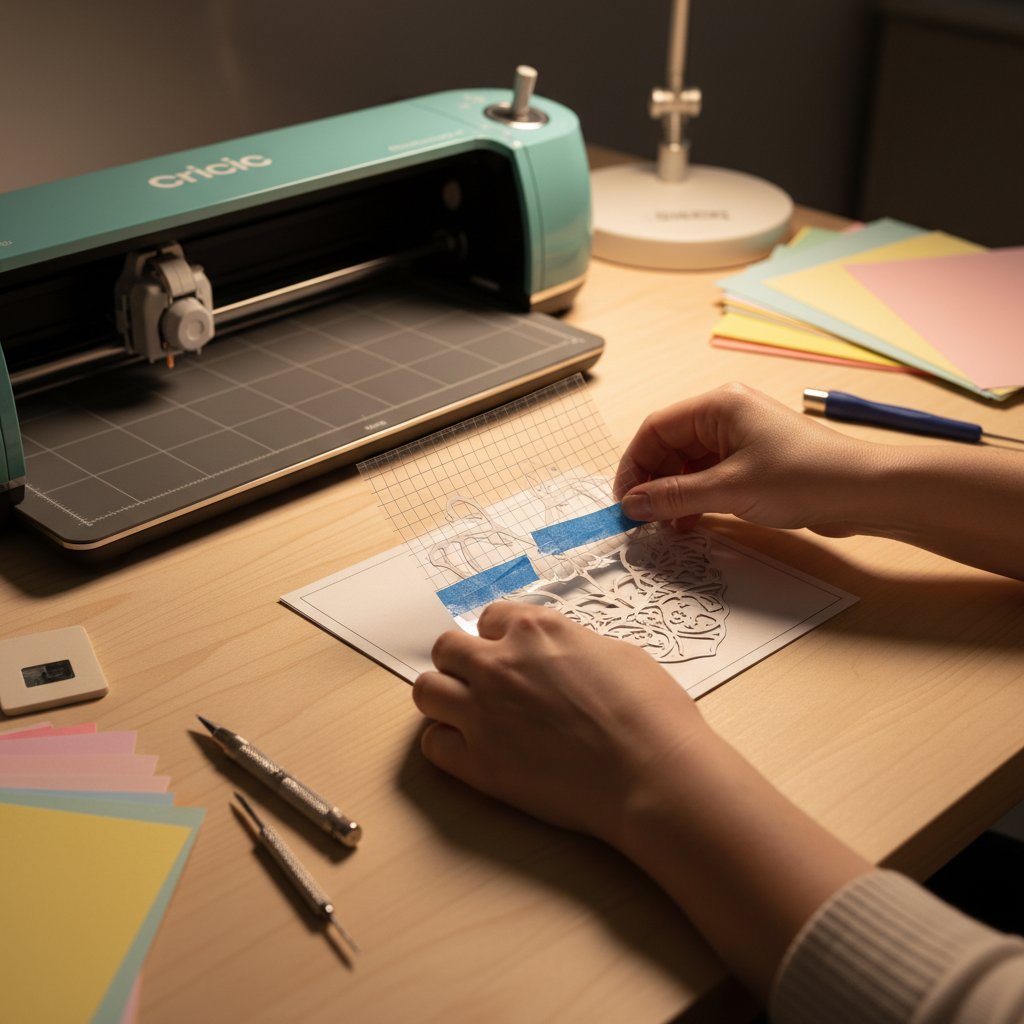
Washi Tape Reinforcement:
For specific problem areas that consistently tear, apply washi tape to the back of the cardstock in those areas before cutting. The tape provides reinforcement without significantly affecting cutting difficulty. Remove tape after cutting. This targeted approach saves difficult projects without requiring full backing techniques.

Textured Cardstock Considerations:
Heavily textured or embossed cardstock presents uneven cutting resistance. Always place textured side facing up (cutting from the smooth back produces cleaner results), increase pressure by 2-4 units compared to smooth cardstock of the same weight, and expect more blade wear—replace blades more frequently when cutting textured materials regularly. Some extremely deep textures simply can't be cut cleanly with rotary cutters and may require alternative tools.

With these advanced techniques mastered, you can tackle virtually any cardstock cutting challenge. Now let's cover when to seek additional help.

Step 10: When to Seek Help and Warranty Information

Despite thorough troubleshooting, some situations require manufacturer support or indicate hardware failure beyond user repair. This final step helps you recognize when to escalate issues and how to work with Cricut support effectively.

Signs of Hardware Failure:
Contact Cricut support if you experience blade carriage failing to move or moving erratically after all troubleshooting, grinding or unusual mechanical noises that persist after cleaning, error codes that don't resolve with restarts and updates, the machine powering on but not responding to commands, or physical damage to components like cracked housing, broken blade housing, or damaged rollers. These issues indicate mechanical or electrical failures that require professional diagnosis.

Warranty Coverage:
Cricut machines typically include one-year limited warranties covering manufacturing defects and mechanical failures. Warranties don't cover normal wear items like blades and mats, damage from misuse or modifications, or problems caused by unofficial accessories. Review your warranty documentation to understand coverage specifics. Register your machine at Cricut's website to ensure warranty support availability.

Contacting Cricut Support:
Before contacting support, gather your machine's serial number (usually on the bottom of the machine), purchase date and proof of purchase, detailed description of the problem and troubleshooting steps you've already taken, and photos or videos demonstrating the issue if possible. Contact Cricut through their official support website, phone support, or social media channels. Organized information speeds resolution and helps support diagnose issues accurately.

Community Resources:
Cricut user communities provide valuable troubleshooting help and creative solutions. Join Facebook groups like "Cricut Design Space" or "Cricut Crafters," participate in Reddit's r/cricut subreddit for technical advice, and watch YouTube troubleshooting videos from experienced crafters. Often, someone has encountered and solved your exact problem. Community members can also recommend specific settings for unusual cardstock brands and types.

When to Consider Replacement:
If your machine is out of warranty and requires expensive repairs, or if you've maximized your current model's capabilities and regularly need features it doesn't offer, replacement may be more economical than repair. Compare repair costs to the cost of a new or refurbished machine. Consider whether upgrading to a more capable model (e.g., Maker vs. Explore) would solve recurring limitations you've encountered.

Professional Servicing:
For valuable machines out of warranty, third-party repair services specializing in cutting machines may offer economical repairs. Ensure any service provider is reputable and provides guarantees on repair work. Compare costs to replacement before committing to expensive repairs.

Conclusion: Your Path to Perfect Cardstock Cuts

You now have a complete troubleshooting system to diagnose and fix any Cricut cardstock cutting problem. Most issues trace back to blade condition, mat stickiness, or material settings—problems you can resolve in minutes with the right knowledge. By working through these 10 steps systematically, you'll pinpoint the exact cause of your cutting issues and implement effective solutions.

Remember these key principles: maintain your blade and mat proactively rather than waiting for failure, always perform test cuts when changing materials or settings, document settings that work for specific cardstock brands and types, and consider environmental factors when experiencing inconsistent results. These habits prevent most cutting problems before they start.

Every Cricut user faces cardstock cutting challenges. The difference between frustration and success is systematic troubleshooting rather than random trial-and-error. With this guide, you're equipped to tackle any cutting problem confidently and keep your projects moving forward.

Related Resources:

Now get back to creating those beautiful shadow boxes and intricate paper crafts with the confidence that you can solve any cutting issue that comes your way.