Articles9 min read

Botanical & Tree Paper Cut Light Boxes

Nature-inspired shadow box designs with trees, leaves, and forest scenes — including layer-by-layer construction guides, paper colour recommendations, and LED lighting tips.

Layered paper cut shadow box nature scene with tree silhouettes showing dramatic depth through multiple layers

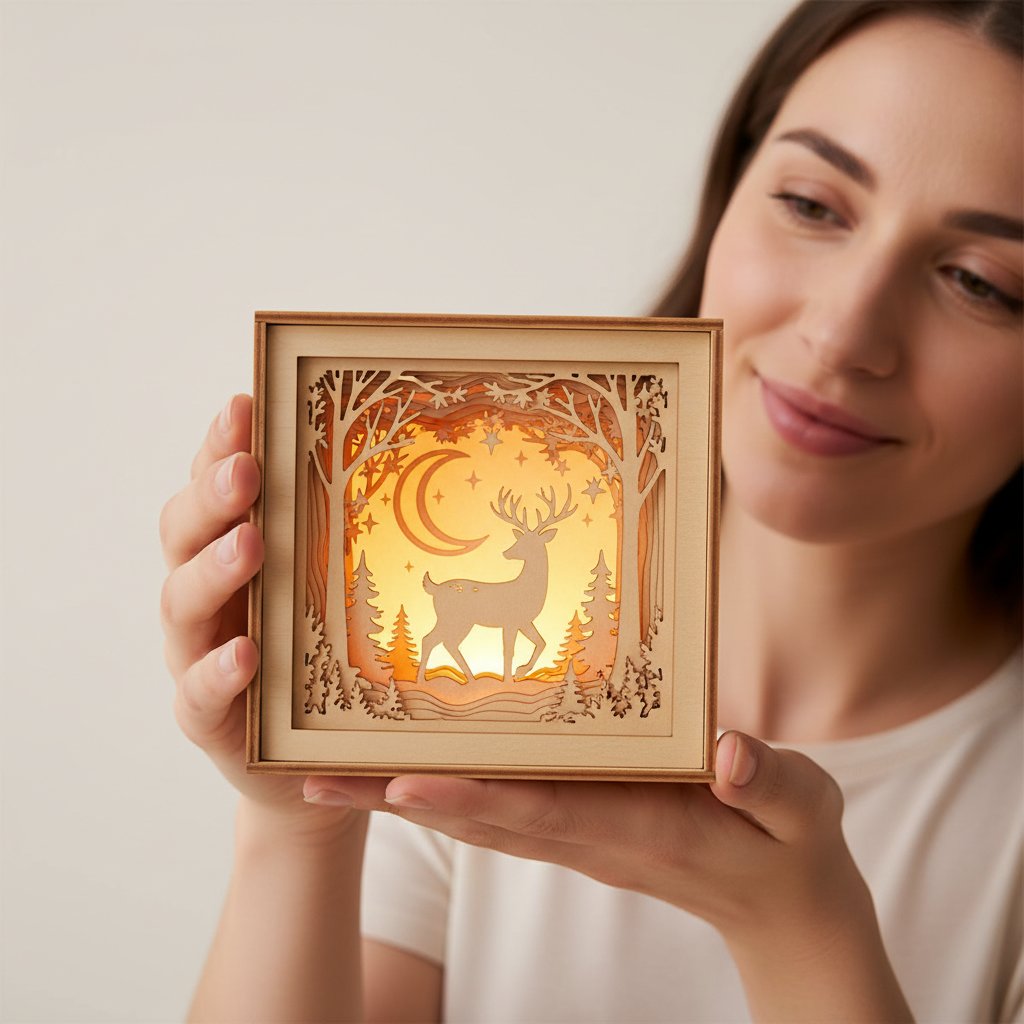
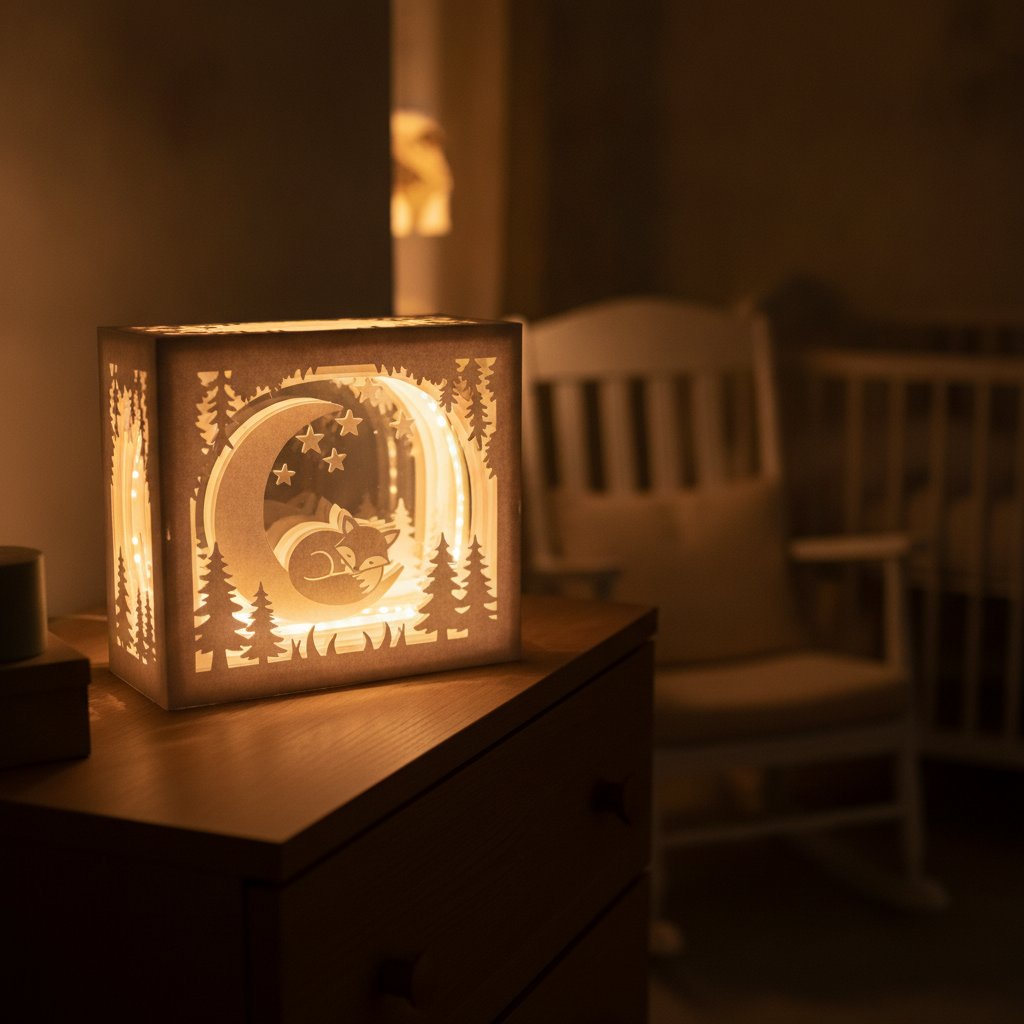
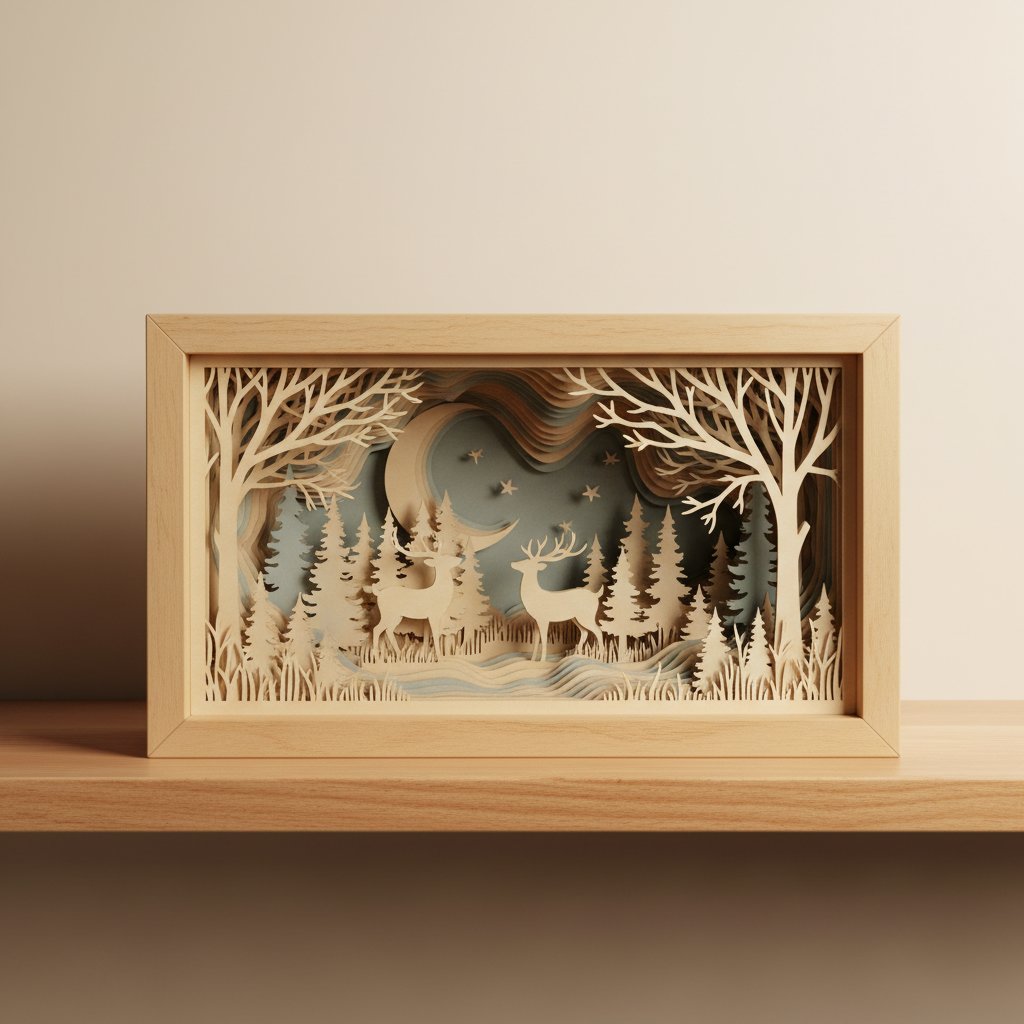
Botanical shadow boxes bring the calm of nature indoors. A layered paper cut tree with warm LED backlighting glowing through the branches — it's the most meditative craft project I've made, and the finished piece becomes the centrepiece of any room.

Unlike flower shadow boxes (which focus on petal detail and colour gradients), botanical and tree designs are about silhouettes and negative space. The magic comes from how light passes through the cutout branches, leaves, and forest layers — creating depth that shifts as you move around the piece.

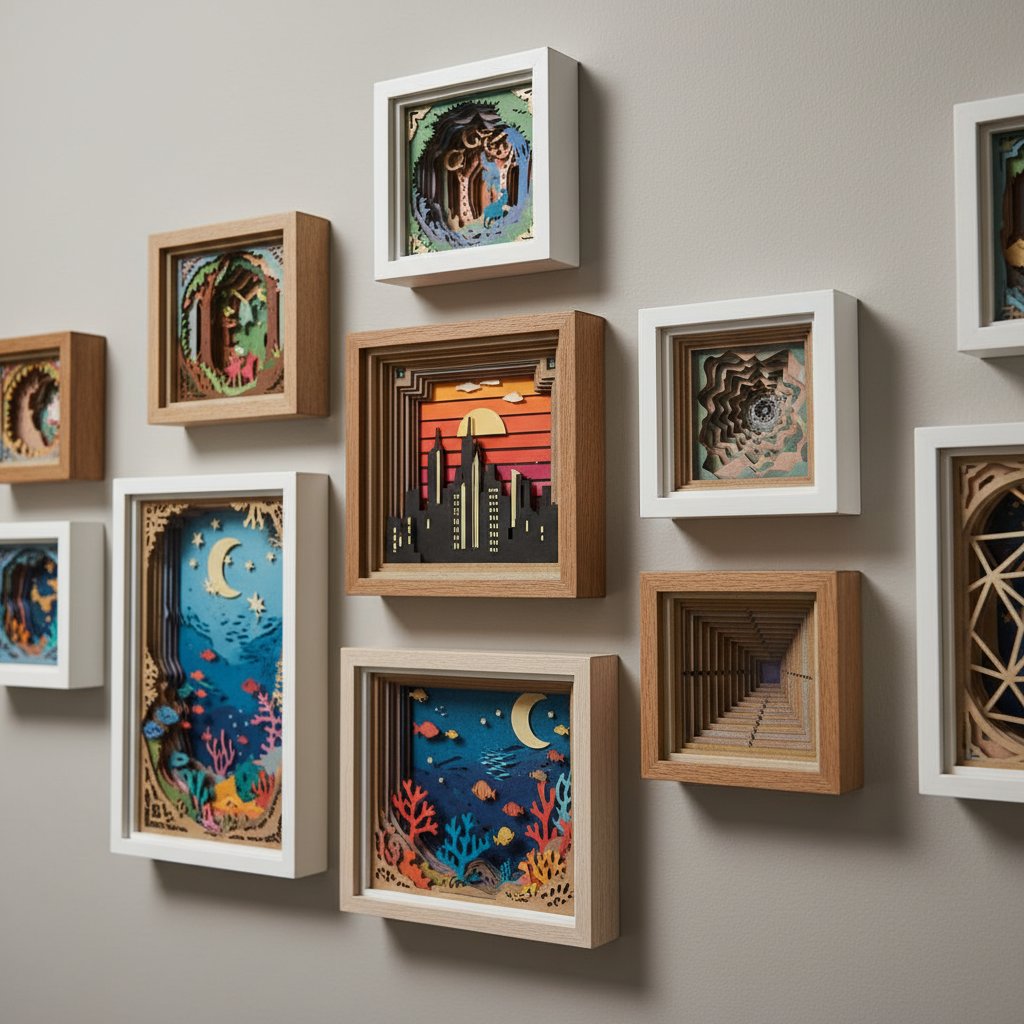
This guide covers four popular botanical themes — tree of life, forest scenes, leaf/frond patterns, and seasonal nature — with layer-by-layer construction breakdowns for each. I've built all four styles on my Cricut Maker and will share the exact paper colours, layer counts, and LED placement that produced the best results.

If you're looking for flower-specific designs, see our flower shadow box ideas and Cricut flower projects guide. This article focuses specifically on trees, leaves, and nature-themed papercut art.

Why Botanical Designs Are Perfect for Light Boxes

Finished intricate layered paper-cut woodland shadow box displayed on a wood shelf

Nature-themed shadow boxes work better with backlighting than almost any other subject because:

  1. Organic shapes create natural light diffusion. Tree branches, fern fronds, and leaf veins have varying widths — the thin areas glow brightly while the thick areas stay dark. This natural contrast produces a luminous effect you can't achieve with geometric designs.

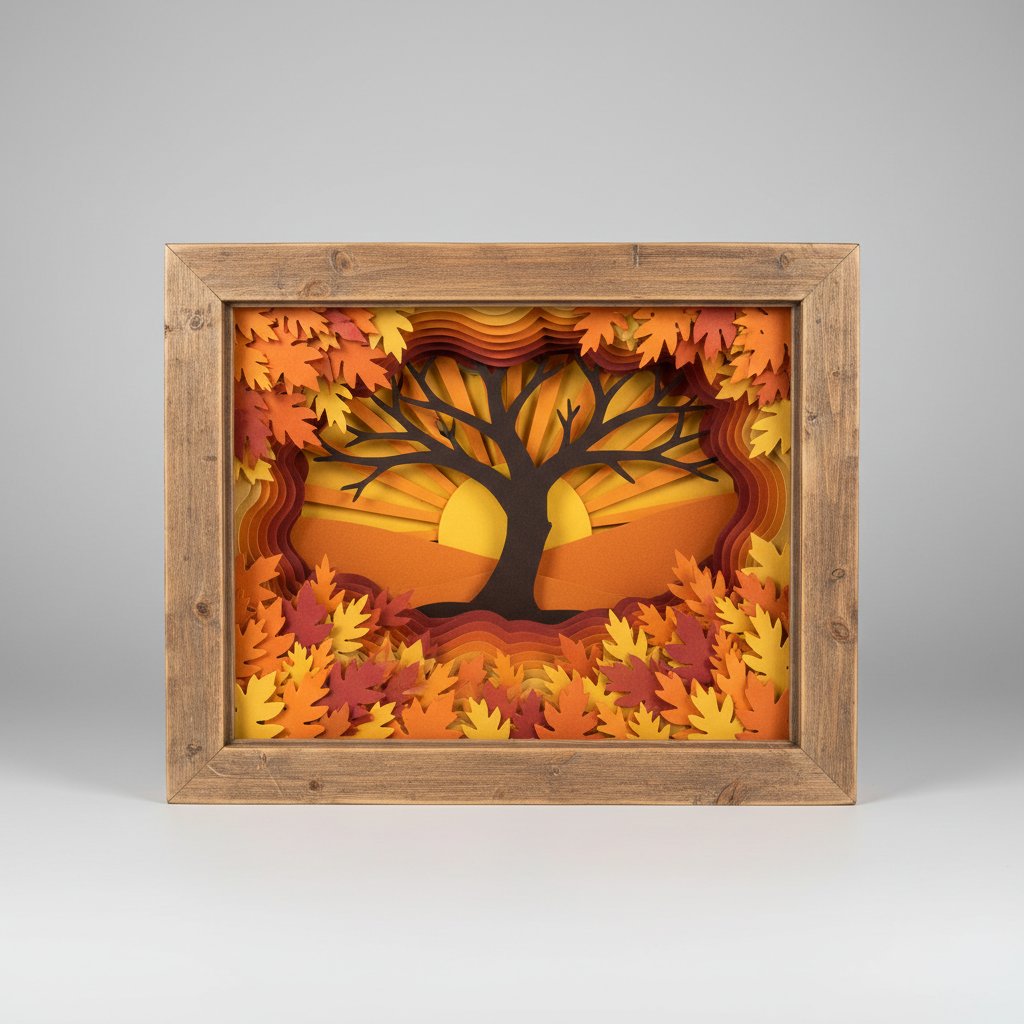
  2. The colour palette is naturally warm. Forest greens, autumn golds, and warm browns all look beautiful with warm white LED backlighting. The colour and the light source are naturally harmonious.

  3. Seasonal adaptability. The same tree design can be spring green, summer lush, autumn fiery, or winter bare — just by changing the cardstock colours. One SVG template, four completely different pieces. Our seasonal shadow box guide covers this approach in detail.

Design 1: Tree of Life Shadow Box

The tree of life is the most iconic botanical shadow box design. It features a central tree with spreading branches and roots, often surrounded by birds or leaf details. The symmetry and organic curves make it one of the most satisfying designs to cut and assemble.

Layers: 5-7

Frame: 8×10 inch, 2 inch depth

Difficulty: Intermediate

Layer-by-Layer Construction

| Layer | Purpose | Colour | Weight | |-------|---------|--------|--------| | Background | Sky/glow backdrop | Warm cream or pale yellow | 65 lb | | Layer 2 | Distant foliage silhouette | Dark green | 65 lb | | Layer 3 | Mid-ground branches | Medium green | 65 lb | | Layer 4 | Main tree trunk & branches | Rich brown | 65 lb | | Layer 5 | Fine branch detail | Dark brown or black | 80 lb | | Layer 6 (optional) | Leaves and birds | Light green or gold | 65 lb | | Foreground | Root detail | Dark brown | 80 lb |

The tree of life design works best with warm backlighting behind the cream background layer. The light glows through the fine branch cutouts in layers 4-5, creating the illusion of sunlight filtering through a canopy. Use warm white LEDs, not cool white — warm light harmonises with the brown/green palette.

Assembly Tips

The critical alignment point is the trunk. All branch layers radiate from a single trunk centre line, so if the trunk layers are offset, the whole tree looks crooked. I mark the trunk centre line on each layer before cutting, then align to that mark during assembly.

Use 2mm foam squares between layers. The tree of life benefits from consistent spacing — uneven depth between layers makes the canopy look lopsided.

Crafter holding and admiring a finished glowing layered papercut shadow box in warm light
Mind Tree Papercut SVG — Signature Botanical Design
The Mind Tree is our most popular botanical shadow box template. A contemplative tree design with intricate root and branch layers, precision-tested for Cricut and Silhouette. Available in multiple frame sizes with pre-grouped cutting layers and colour guides.

Design 2: Forest Scene Shadow Boxes

Forest scenes use multiple tree silhouettes at different depths to create a woodland vista. The layered trees get progressively lighter in colour from front to back, mimicking aerial perspective — the same effect you see looking into a real forest on a misty morning.

Layers: 6-8

Frame: 8×8 or 8×10 inch, 2 inch depth

Difficulty: Intermediate

Colour Approach: Aerial Perspective

The key to a convincing forest scene is the colour gradient from front to back:

| Position | Colour | Effect | |----------|--------|--------| | Foreground | Very dark green or black | Nearest trees, highest contrast | | Mid-front | Dark green | Secondary depth | | Middle | Medium green | Mid-distance trees | | Mid-back | Sage green or grey-green | Trees receding into distance | | Background | Pale grey-green or cream | Far trees, fading into sky | | Sky layer | Warm cream or pale gold | LED glow backdrop |

This gradient is what makes forest scenes look realistic. If all the trees are the same colour, the design looks flat — more like a sticker than a forest.

LED Placement

Place warm white LEDs between the background sky layer and the farthest tree layer. The light glows through all the tree silhouettes, getting progressively filtered by each layer. The foreground trees appear as dark silhouettes against the glowing background — exactly like real backlit trees.

For the most dramatic effect, use our LED safety guide to wire a warm white fairy light strand with the battery pack hidden behind the frame.

A layered papercut shadow box glowing with soft warm white light in a darkened nursery at night

For a botanical approach that uses real plant materials alongside papercut layers, try pressing leaves and flowers between acid-free paper, then mounting them on backing board inside the frame. The combination of papercut silhouette layers with real pressed botanicals creates a uniquely textured piece.

Hands using tweezers to arrange pressed flowers and leaves onto acid-free backing for a botanical shadow box

Design 3: Leaf & Frond Pattern Shadow Boxes

Monstera leaves, fern fronds, and palm designs create bold, graphic shadow boxes that work especially well in modern and tropical-themed interiors. The large, simple shapes are easier to cut than tree branches and look stunning with or without backlighting.

Layers: 4-6

Frame: 8×8 inch, 1.5 inch depth

Difficulty: Beginner

Why Leaves Are the Best Beginner Botanical Project

Leaf shapes are large and bold — no tiny bridges, no delicate inner cuts. The weeding is fast (most waste pieces are big and easy to remove), and the shapes are forgiving of slight cutting imperfections. If a fern frond edge is slightly rough, it actually looks more natural.

Monstera vs Fern vs Palm

Monstera: The iconic split-leaf design. Best for modern/minimal decor. 4-5 layers with different leaf sizes creates a tropical arrangement.

Fern: Delicate fronds that produce intricate shadow patterns when backlit. The most visually complex of the three but still easy to cut because the shapes are flowing curves, not sharp angles.

Palm: Fan-shaped leaves that work in both tropical and coastal decor themes. The simplest shape to cut of the three.

Colour Recommendations

For a contemporary look, use monochromatic greens: dark forest green background, medium green mid-layers, and sage or lime green foreground. Add one cream or gold accent layer for contrast.

For a tropical feel, mix greens with teal: dark teal background, medium green layers, lime foreground. The teal adds warmth without clashing with the botanical theme.

Design 4: Seasonal Nature Shadow Boxes

A finished layered paper shadow box of an autumn scene with fall leaves and a tree glowing warmly from LED backlighting

Seasonal botanical designs let you refresh your decor throughout the year using the same frame and LED setup. Swap the paper layers when the season changes.

Spring

Fresh green layers with cherry blossom accents. Use 3 shades of green plus pale pink for blossom highlights. The design is light and airy — fewer layers (4-5) with wider spacing.

Summer

Lush, dense canopy with deep greens. Use 6-7 layers for a thick, verdant look. Dark forest green through bright lime green creates a sun-dappled forest floor effect.

Autumn

The most dramatic seasonal variation. Replace all greens with warm tones: deep burgundy, burnt orange, golden yellow, and russet brown. The same tree template becomes a completely different piece. Autumn botanicals are my favourite to build because the colour palette is inherently warm and the LED backlighting amplifies the amber tones beautifully.

Winter

Bare branches with optional snowflake accents. Use white, pale grey, silver, and a dark blue or charcoal background. The negative space between bare branches becomes the star — light shines through unobstructed, creating stark, elegant silhouettes.

For seasonal crafting ideas beyond botanicals, see our full seasonal shadow box guide.

Magical Fox Shadow Box — Woodland Nature Scene
This fox shadow box features a woodland forest scene with layered trees and a fox silhouette under moonlight. Perfect for nature-themed decor. Pre-sorted cutting layers, tested on Cricut and Silhouette, with recommended cardstock colours for a warm autumn palette.

Construction Tips for All Botanical Shadow Boxes

Frame Depth Matters More Than Layer Count

Botanical designs need minimum 1.5 inch frame depth for 4-5 layers and 2 inch depth for 6+ layers. The depth between layers creates the 3D effect — cramming 7 layers into a 1-inch frame produces a flat, compressed look. Our frame depth guide has specific recommendations by layer count.

Cardstock Selection for Botanical Designs

Use textured cardstock for tree trunks and branches — the texture mimics bark. Smooth cardstock works better for leaves and fronds. Our cardstock guide covers which brands have the best textures.

For the background layer (the one that receives LED light), use smooth, light-coloured cardstock (cream or pale yellow). Textured or dark backgrounds absorb light instead of diffusing it.

Cutting Botanical Shapes on Cricut

Tree branches and fern fronds have thin bridges that require a sharp blade. If you've cut more than 50 mats worth of cardstock, replace your fine-point blade before cutting botanical designs. A dull blade tears thin bridges rather than cutting them cleanly.

Settings: Medium Cardstock – 80 lb, Multi-Cut 1x for most layers, 2x for the finest detail layer (tree branches with tiny offshoots). See our Cricut settings guide for the full breakdown.

Botanical vs Geometric: Different Approaches

Botanical shadow boxes are more forgiving than geometric ones. A slightly offset leaf layer looks natural; a slightly offset geometric grid looks wrong. If you're new to shadow boxes, start with a botanical design — the organic shapes hide minor assembly errors.

What to Make Next

  • Try all four seasons — use the same tree template with different colour palettes for a seasonal display set. - Add animals — a fox, deer, or owl silhouette adds life to a forest scene. Browse our shadow box collection for animal designs. - Go vertical — try a tall narrow frame (5×12 or 4×14) with a single tree design for a dramatic, architectural piece. - Combine with flowers — mix botanical tree layers with flower layers from our flower shadow box guide for a complete nature scene.
Growing collection of handmade layered paper-cut shadow boxes on a gallery wall
Owl Shadow Box — Woodland Night Scene
An owl perched in a moonlit tree — this layered papercut design combines our most popular woodland elements in one template. Stained-glass-style layers create dramatic depth with warm LED backlighting. Tested on Cricut and Silhouette.
1.What frame depth do botanical shadow boxes need?
For 4-5 layer botanical designs (leaves, fronds), use a 1.5 inch deep frame. For 6-8 layer designs (forest scenes, tree of life), use a 2 inch deep frame. The depth between layers is what creates the 3D effect — don't compress layers to fit a shallow frame.
2.Can I cut botanical shadow box SVGs on a Cricut Explore?
Yes. All botanical designs work on the Cricut Explore Air 2 and Explore 3. Use the fine-point blade with Medium Cardstock setting. For the finest branch detail layers, use Multi-Cut 2x to ensure clean cuts through thin bridges.
3.What colours work best for tree shadow boxes?
For a realistic forest look, use a gradient from dark (foreground) to light (background): dark green, medium green, sage green, and pale grey-green. Add a warm cream background layer for LED backlighting. For autumn themes, use burgundy, burnt orange, golden yellow, and russet brown.
4.How do I light a botanical shadow box?
Place warm white LED fairy lights between the background layer and the second layer. The light filters through all the botanical cutouts, creating a natural glow effect. Warm white (not cool white) harmonises with the green/brown botanical palette. See our [LED guide](/articles/add-led-lights-safely/) for wiring details.
5.What's the easiest botanical shadow box for beginners?
A monstera leaf or fern design with 4-5 layers. The shapes are large and bold — no tiny bridges or delicate inner cuts. The weeding is fast and the shapes are forgiving of slight cutting imperfections. Start here before moving to detailed tree branch designs.