Articles11 min read

Origami Shadow Box Display Guide — Fold, Frame, and Showcase

Turn your origami creations into museum-quality shadow box displays. This guide covers folding techniques, frame selection, layout composition, and lighting for paper cranes, flowers, butterflies, and more.

Shadowbox Flower Rose - image 02

Origami is beautiful on its own — but the moment you place folded paper inside a shadow box, something magical happens. The depth of the frame transforms flat folds into a miniature world. Light and shadow interact with the paper creases. A simple crane becomes a sculptural centerpiece.

An origami shadow box display combines the meditative art of paper folding with the presentation power of a shadow box frame. Whether you are a beginner with a few paper cranes or an experienced folder with complex modular pieces, this guide will help you design, assemble, and display your origami in shadow boxes that look professional.

Already working with layered papercut shadow boxes? Origami shadow boxes use many of the same framing principles but with a different art form at the center. Both benefit from proper frame depth selection and LED lighting.

What You Will Learn

  • How to choose origami models that look great in shadow boxes
  • The best paper types and sizes for framed origami
  • Frame selection: depth, color, and material
  • Layout and composition techniques for multi-piece displays
  • How to mount origami securely without damage
  • Lighting your display for maximum impact
  • Step-by-step project: paper crane constellation shadow box

Choosing Origami Models for Shadow Boxes

Not every origami model works well in a shadow box. The best choices share these traits:

Best Origami Styles for Framing

StyleWhy It WorksDifficulty
Cranes (orizuru)Iconic, elegant lines, great in groupsBeginner
ButterfliesDelicate, natural curves, beautiful en masseBeginner-Intermediate
Flowers (kusudama, roses)Round forms fill space beautifullyIntermediate
Stars and geometricCrisp edges, modular impactIntermediate
Dragons and animalsFocal point pieces, conversation startersAdvanced
Modular / sonobeRepeating units create patternsIntermediate

Three Approaches to Origami Displays

Single statement piece: One complex model (a dragon, a rose) centered in the box with space around it. This approach is dramatic and minimal.

Collection display: Multiple identical or similar models arranged in a pattern. Think 20+ paper cranes "flying" across the frame at different heights. This is the most popular approach and the one we recommend for beginners.

Mixed composition: Several different models arranged to tell a story — a butterfly near a flower, a crane above a wave of geometric shapes. More complex to design but visually rich.

For your first project, we recommend the collection display with paper cranes. They are easy to fold, look beautiful in groups, and create striking visual patterns. See our DIY shadow box ideas for more inspiration.

Paper and Materials

The right paper makes a significant difference in how your origami looks inside a frame. Here is what to consider.

Paper Selection

Washi paper is the gold standard for framed origami. It has visible fibers, subtle texture, and a slight translucency that catches light beautifully inside a shadow box. Standard kami (solid-color origami paper) works well for practice and for collection displays where you want bold, uniform colors.

Paper weight matters. Standard origami paper is 60-70 gsm. For shadow boxes, slightly heavier paper (80-120 gsm) holds its shape better over time and resists sagging inside the frame. Best cardstock for shadow boxes covers weight and texture options in detail.

Size selection: For a shadow box display, fold your models from paper that is proportional to the frame. As a rule of thumb, finished origami should be roughly 1/4 to 1/3 of the frame's shortest dimension. A 12×12 inch shadow box looks best with origami folded from 6-inch paper (yielding roughly 3-inch finished models).

Materials Checklist

  • Origami paper (washi or kami, 6-inch or 8-inch squares)
  • Shadow box frame (see frame selection below)
  • Adhesive: clear fishing line, foam mounting tape, or museum wax
  • Background paper or fabric (solid color to highlight origami)
  • Tweezers for positioning small pieces
  • LED strip or puck light for illumination
  • Glue stick or double-sided tape for background mounting

Avoid liquid glue directly on origami — it can warp and discolor the paper. For shadow box assembly tips that apply to origami projects too, see our spacer and alignment guide.

Frame Selection: Depth, Color, and Style

Depth Is the Most Important Factor

Shadow box depth determines how much 3D space your origami has. For origami displays:

  • 1-1.5 inch depth: Best for flat-folded models (stars, pinwheels). Works for single cranes but feels tight for multi-piece displays.
  • 2-3 inch depth: The sweet spot for most origami shadow boxes. Gives cranes, butterflies, and flowers room to "breathe" without looking lost.
  • 3+ inch depth: Best for large single pieces or multi-layer compositions where you want models at different depths.

For detailed guidance on measuring depth, see our frame size and depth guide.

Frame Color and Material

Black frames create the most dramatic contrast with white and colored origami. They absorb light and make the paper "pop." This is the most popular choice.

White frames work well for minimalist, Scandinavian-inspired displays. Best with white or pastel origami on a contrasting dark background.

Natural wood frames complement traditional Japanese aesthetics. Pair with washi paper and a cream or sage green background.

Floating frames (two panes of glass with no background) create a stunning effect where origami appears to float. Works best with translucent washi paper and strong backlighting.

Layout and Composition Techniques

How you arrange your origami inside the shadow box determines the visual impact. Here are proven composition techniques.

The Constellation Pattern (Best for Beginners)

Arrange origami cranes or butterflies in a sweeping diagonal or arc across the frame, as if they are flying through space. Place larger models closer to the viewer (front of the box) and smaller ones further back to create depth.

Steps:

  1. Fold 12-20 cranes in a gradient of colors (e.g., white to deep blue)
  2. Arrange them in a diagonal sweep from bottom-left to top-right
  3. Attach at different depths using clear fishing line
  4. Use a dark navy or black background

The Radiant Burst

Place a single flower or star in the center. Surround it with 8-12 smaller elements radiating outward, like petals or sunbeams. This creates a mandala-like focal point.

The Landscape

Create a scene: origami trees in the foreground, a mountain fold in the midground, birds (cranes) in the sky. This narrative approach works beautifully in deep (3+ inch) frames.

The Minimalist Single

One perfectly folded model centered in a deep frame with generous empty space around it. The background should be a single rich color. Add a small LED light behind or below the piece for drama.

For more layout ideas, see our Cricut shadow box ideas guide — many composition principles transfer directly to origami displays.

Mounting Origami Without Damage

Preserving your origami is critical. Here are mounting methods ranked from least to most invasive.

Thread invisible fishing line (2-4 lb test) through a small gap in the origami fold. Tie the line to small hooks or eyelets on the back panel of the shadow box. The model appears to float.

Best for: Cranes, butterflies, any model with a fold you can thread through.

Pros: No adhesive contact with paper. Models can be repositioned. Looks magical.

Cons: Requires patience to tie and adjust. Line can be visible in certain lighting.

2. Foam Mounting Tape

Cut small squares of archival-quality foam mounting tape. Attach to the underside or back of the origami model. Press onto the shadow box background.

Best for: Flowers, stars, flat-bottomed models.

Pros: Quick, secure, easy to position.

Cons: Permanent. Tape can leave residue on paper over years.

3. Museum Wax (Removable)

A small dab of museum wax on the contact point holds the model in place but can be gently removed later without damage.

Best for: Lightweight models, temporary displays.

Pros: Fully removable. No marks on paper.

Cons: Not strong enough for heavy or top-heavy models. Can soften in warm environments.

4. Pin Mounting

Use thin insect pins or straight pins pushed through the background board. Gently rest the origami on the pin points.

Best for: Display cases with cork or foam-board backgrounds.

Pros: Very secure. No adhesive on paper.

Cons: Creates tiny holes in the background (not the origami). Requires a soft backing board.

Lighting Your Origami Shadow Box

Lighting transforms an origami shadow box from "nice" to "stunning." The creases and folds in origami create natural shadow patterns that come alive with the right light.

LED Strip Lighting

Adhesive LED strips (warm white, 2700-3000K) along the inside edges of the shadow box provide even, diffused illumination. This is the most popular lighting choice.

Installation tip: Place LED strips along the top and one side edge for directional lighting that highlights the 3D folds. See our LED lighting guide for shadow boxes for product recommendations and wiring tips.

Backlighting

Place an LED panel behind a translucent background. Light passes through both the background and any translucent origami paper (especially washi), creating a glowing effect. This works beautifully with white or light-colored origami.

Spot Lighting

A single LED puck light positioned above or to the side of the display creates dramatic shadows that emphasize the 3D nature of the folds. Best for single-piece displays.

Natural Light Considerations

If you display your shadow box near a window, UV rays will fade colored origami paper over time. Use UV-protective glass in the frame and avoid direct sunlight. See our shadow box repair guide for tips on fixing sun-faded pieces.

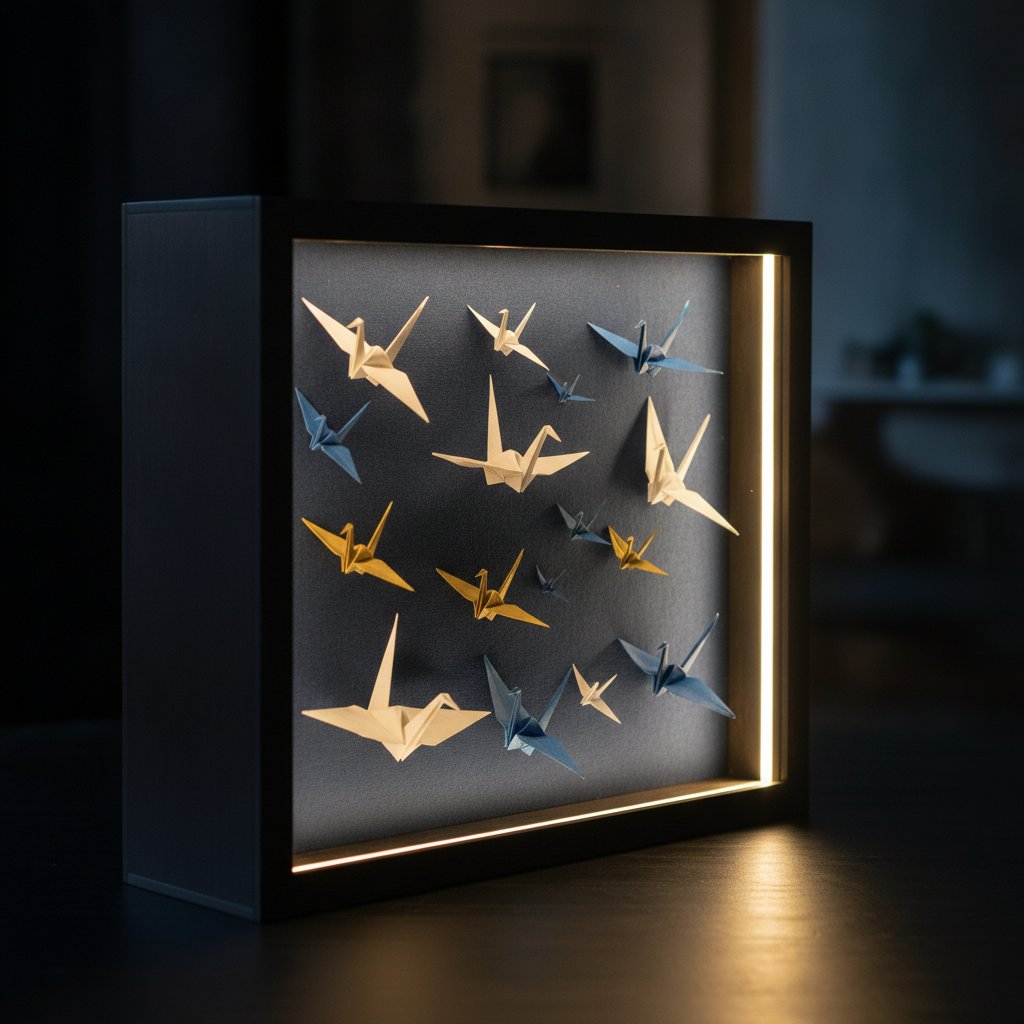
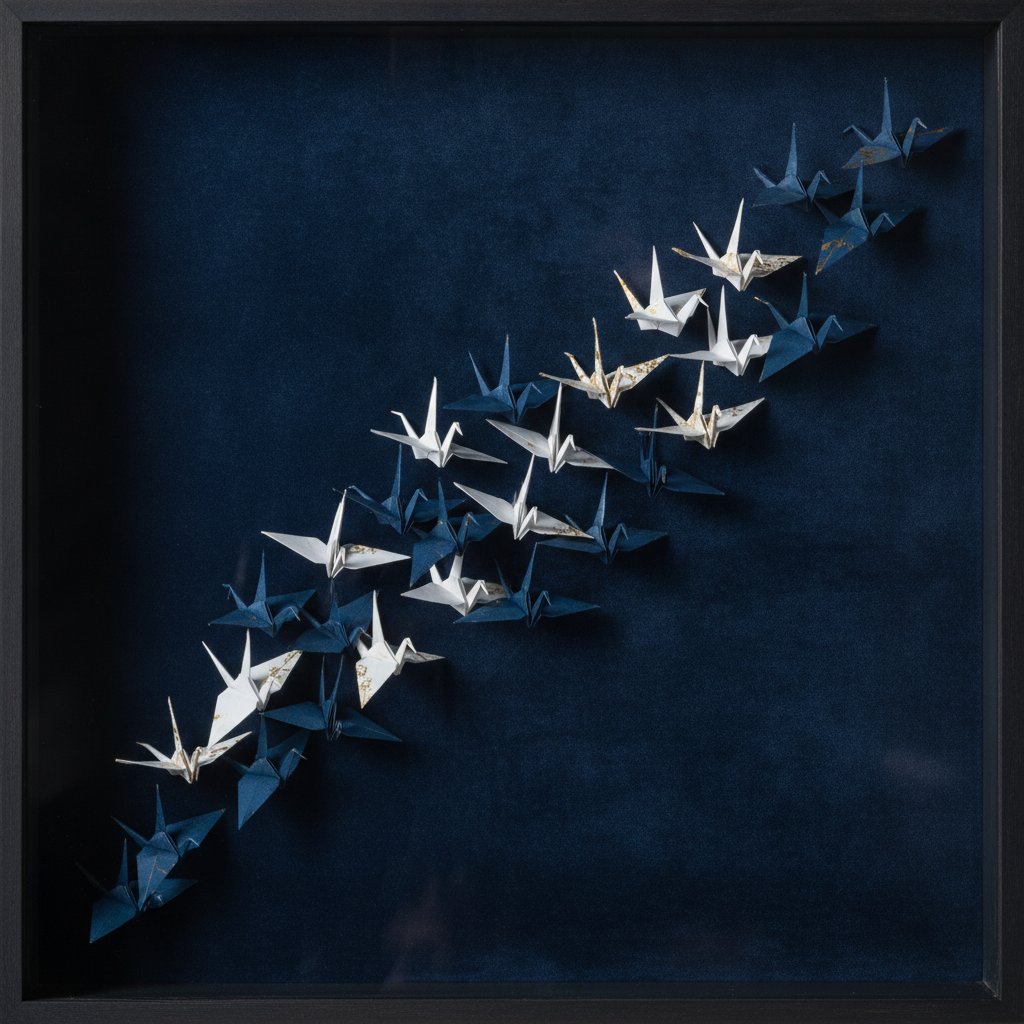
Project: Paper Crane Constellation Shadow Box

This step-by-step project creates a stunning display of paper cranes "flying" through a dark sky. Estimated time: 3-4 hours (including folding).

What You Need

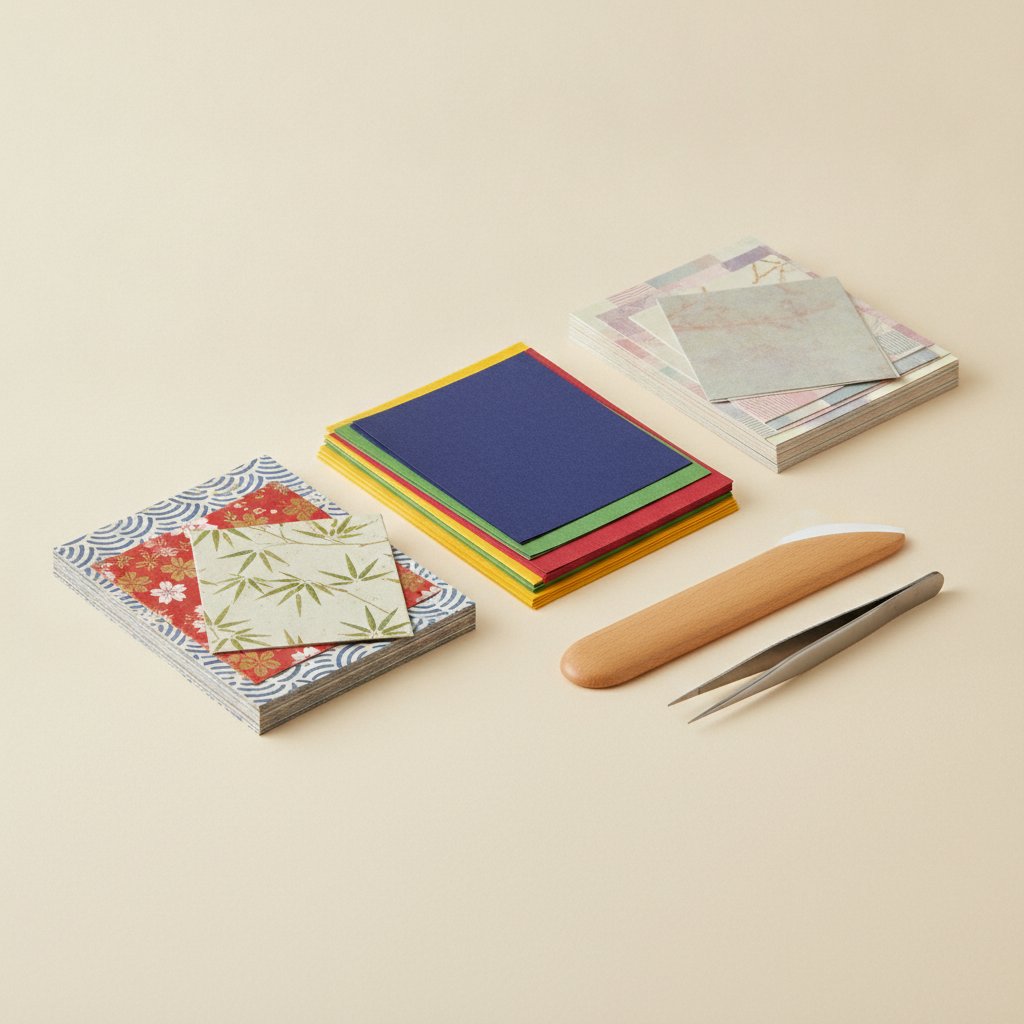
  • 15 sheets of 6-inch origami paper (gradient from white to deep blue)
  • 1 shadow box frame, 12×12 inches, 2-3 inch depth (black)
  • 1 sheet dark navy cardstock (background)
  • Clear fishing line (2 lb test)
  • Small eyelet hooks (15)
  • LED strip light (warm white, battery-powered)
  • Tweezers, scissors, pushpin

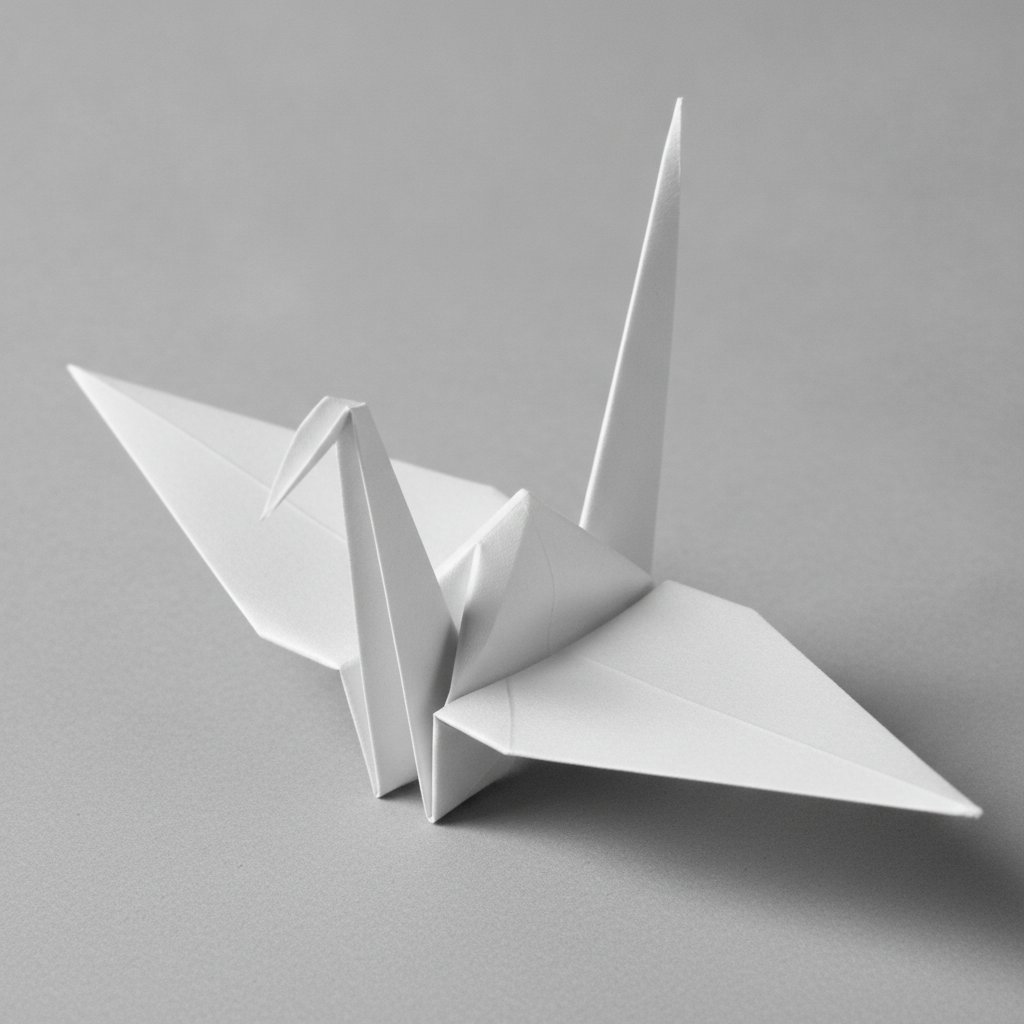
Step 1: Fold the Cranes

Fold 15 cranes using a traditional origami crane tutorial. Use 5 white, 5 light blue, and 5 deep blue sheets. Fold carefully — each crease shows in a shadow box, so take your time.

Beginner tip: If you are new to crane folding, practice with scrap paper first. A well-folded crane has crisp, sharp creases and symmetrical wings. See our beginner shadow box projects for more first-project guidance.

Step 2: Prepare the Background

Cut the navy cardstock to fit the shadow box backing. Use double-sided tape to secure it flat. This dark background will make the white and light-colored cranes stand out dramatically.

Step 3: Plan the Layout

Arrange the cranes on the background (without attaching) to find your constellation pattern. Place white cranes in the center (brightest, focal point), light blue at mid-range, and deep blue at the edges (they blend into the background, creating a fading effect).

Composition tip: Angle the cranes in slightly different directions to suggest movement. Raise some wings more than others for variety.

Step 4: Attach Eyelet Hooks

Using a pushpin, make small pilot holes in the shadow box backing at each crane's position. Screw in the small eyelet hooks. These will anchor the fishing line.

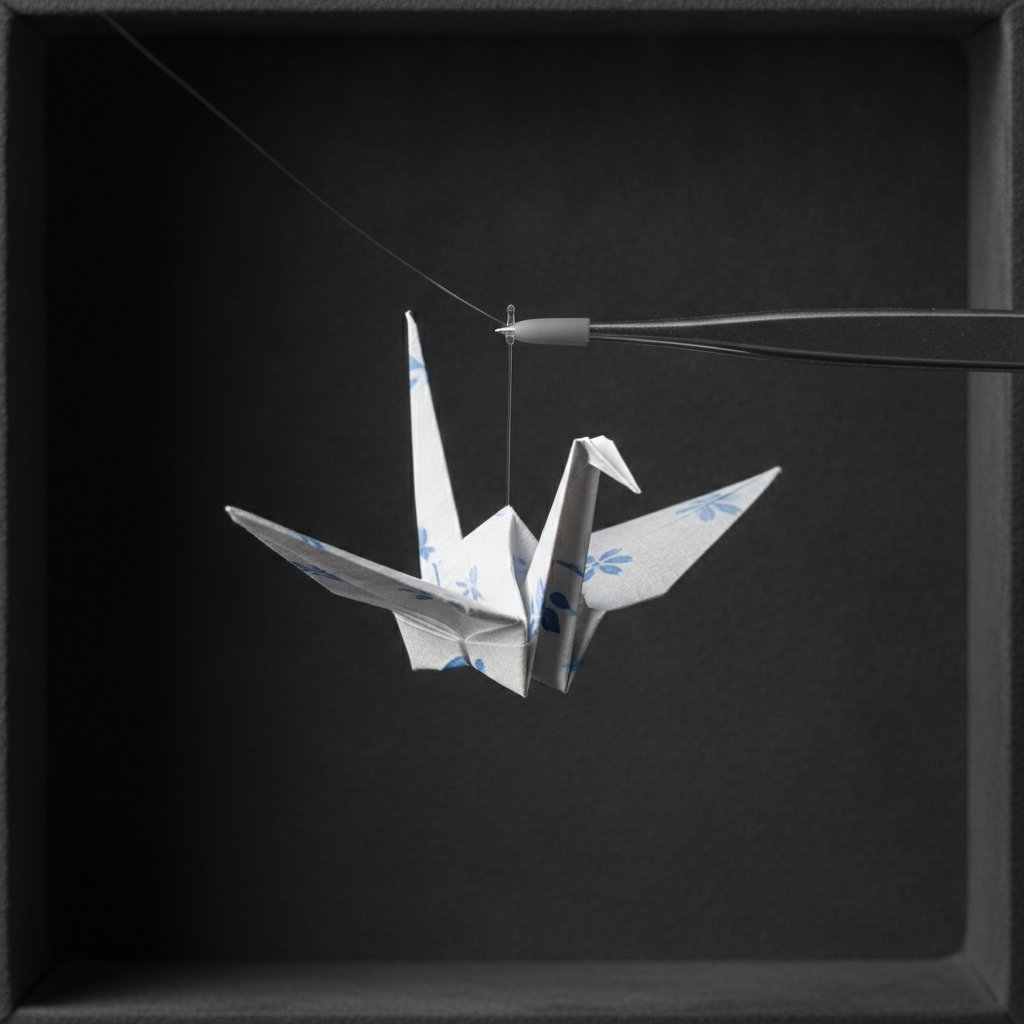
Step 5: Thread and Suspend

Thread fishing line through each crane (through the body fold at the bottom). Tie the line to an eyelet hook at varying lengths — some cranes close to the background (far away), some hanging 1-2 inches forward (close to the viewer). This creates depth.

Use tweezers to adjust the crane's position on the line. Tie a small knot below the crane to keep it from sliding down.

Step 6: Add Lighting

Attach the LED strip along the top inside edge of the frame. Route the battery pack to the bottom corner, behind the frame. Turn on the light and observe how the shadows interact with the crane folds.

Adjust: If a crane casts an unwanted shadow on another, shorten or lengthen the fishing line to reposition it.

Step 7: Seal the Frame

Carefully close the shadow box. Clean the glass inside and out before final sealing. Your crane constellation is ready to display.

Tips and Troubleshooting

Common Problems and Fixes

Cranes sagging over time: Paper absorbs humidity and softens. Use slightly heavier paper (80+ gsm) and avoid displaying in bathrooms or kitchens. If sagging occurs, open the frame and adjust the fishing line tension.

Fishing line visible: Switch to a lighter test line (1-2 lb). Fluorocarbon line is less visible than monofilament. Position lights to minimize reflection off the line.

Background buckling: Use archival-quality, acid-free cardstock. Secure it with tape on all four corners and the center. Humidity is the enemy — if the display warps, see our shadow box repair guide.

Uneven lighting: LED strips sometimes create hotspots. Add a strip of tracing paper or frosted acetate between the LED strip and the display to diffuse the light evenly.

Advanced Techniques

Depth layering: Mount origami at 3+ different depths to create a true 3D scene. The foreground (closest to the glass) should have the largest pieces, the background the smallest — mimicking aerial perspective.

Color gradients: Fold origami in a color gradient (e.g., spring green to deep forest green for a forest scene). This creates a cohesive, professional look.

Mixed media: Combine origami with other elements — dried flowers, calligraphy, small stones, or layered papercut backgrounds for a mixed-media shadow box.

Rotating display: Install a small battery-powered turntable behind the background for a slowly rotating display. Best for single centerpiece origami.

For more advanced shadow box techniques, explore our cost analysis guide to plan materials budgets for larger projects.

Quick Reference

TaskRecommended Approach
First project12-15 paper cranes in a 12×12 black frame
Paper typeWashi for showcase, kami for practice
Paper weight80-120 gsm for framed origami
Frame depth2-3 inches for most displays
Mounting methodFishing line suspension (least damage)
LightingWarm white LED strip, top edge
BackgroundDark solid color (navy, black, charcoal)

Happy folding and framing!