Articles14 min read

Best Glue & Adhesive for Paper Shadow Box Layers: Complete Bonding Guide

Choosing the best glue for paper shadow box layers is the single decision that determines whether your finished piece looks professionally crafted or shows visible adhesive blobs ruining the depth effect.

Best Glue & Adhesive for Paper Shadow Box Layers: Complete Bonding Guide

Choosing the best glue for paper shadow box layers is the single decision that determines whether your finished piece looks professionally crafted or shows visible adhesive blobs ruining the depth effect. After building dozens of layered shadow boxes — from simple 4-layer designs to complex 10-layer pieces with LED backlighting — I've tested every adhesive type on every cardstock finish. This guide shares what actually works.

The wrong adhesive does more than look bad. It warps your carefully cut layers, fails to hold at the correct depth, or — worst of all — reveals every glue spot the moment you switch on LED lights. Different layers demand different adhesives, and using the same glue for every layer is the fastest path to disappointment.

Why Adhesive Choice Matters for Paper Shadow Boxes

Standard papercraft glue advice falls apart when you add shadow box depth and LED backlighting. Here's why adhesive selection is critical:

Backlighting reveals everything. The moment you turn on LED lights behind your shadow box, every adhesive mark becomes visible. A glue spot that's invisible in daylight glows like a beacon through thin cardstock. This is the #1 reason finished shadow boxes look amateur — not cutting quality, not design choice, but visible adhesive.

Different layers need different bonds. Your back panel is a large flat surface that needs even coverage. Mid-layers need to maintain precise spacing with foam adhesive. Front detail layers have tiny, delicate attachment points that need pinpoint accuracy. One adhesive can't do all three jobs well.

Cardstock finish changes everything. Matte cardstock bonds readily with almost anything. Glitter cardstock fights weak adhesives. Metallic finishes resist liquid glue. Vellum shows every adhesive mark regardless. If you're working with specialty cardstock, the wrong adhesive simply won't hold — or will damage the finish trying.

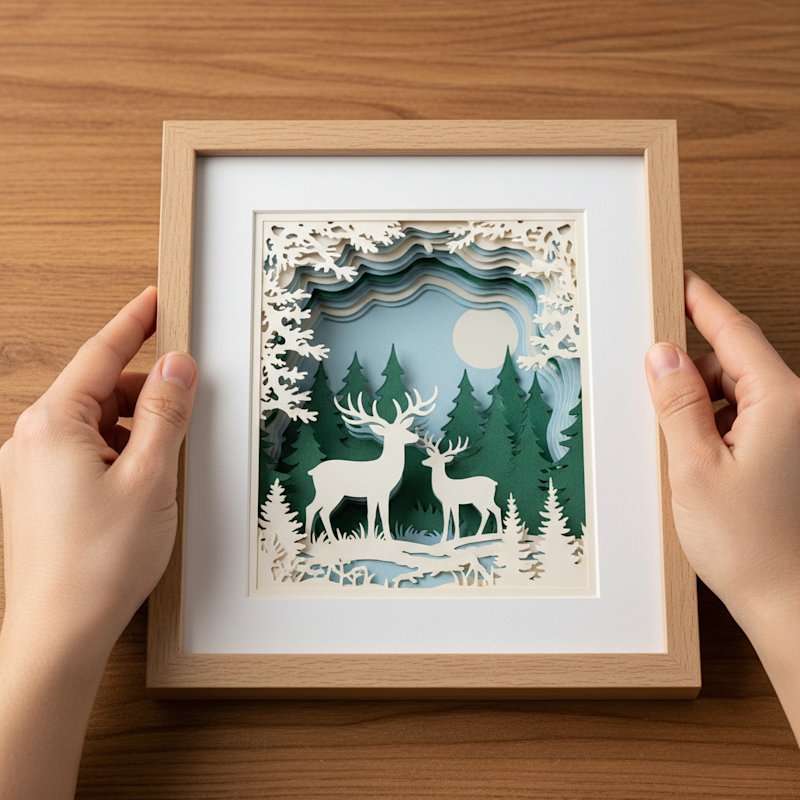
Adhesive Types Compared: Pros, Cons & Best Uses

I've tested these adhesive categories across multiple shadow box projects. Here's what each one does well and where it falls short.

Liquid Glue (Tombow Mono, Aleene's Tacky Glue)

Liquid glue delivers the strongest permanent bond for paper crafts. Tombow Mono Multi (the green-and-white bottle) has become my go-to for front detail layers because its precision tip allows tiny controlled dots.

Strengths: Extremely strong bond, precision application with fine tips, dries permanent, available everywhere, affordable.

Weaknesses: Can warp thin cardstock (under 65 lb) if applied too heavily, requires drying time, some formulas yellow slightly under LED heat over months.

Best shadow box use: Front detail layers with small attachment points. Frame assembly for structural joints.

Tip: Apply with a toothpick for tiny spots. Less is more — a dot the size of a pinhead holds more than you expect on paper-to-paper bonds.

Glue Sticks (UHU, Elmer's)

Glue sticks are the gentlest option for thin cardstock. UHU sticks apply smoothly with minimal moisture, making them the safest choice for warping-sensitive layers.

Strengths: Minimal warping, easy to control coverage, cheap, non-toxic, no dry-time wait for light layers.

Weaknesses: Weakest bond of all options, can lose adhesion in humid environments, not suitable for foam or depth elements.

Best shadow box use: Front detail layers on very thin cardstock where warping is the primary concern.

Tape Runners (Scotch ATG, Runner Adhesive)

Tape runners are the fastest clean adhesive for flat-to-flat layer bonding. The Scotch ATG-714 with its gold tape has been my standard for back panel attachment for years.

Strengths: Instant bond, zero drying time, clean application, no warping, consistent thickness, refillable dispensers reduce waste.

Weaknesses: Only works for flat surfaces, doesn't adhere well to textured or glitter cardstock, harder to reposition once placed.

Best shadow box use: Back panel to frame attachment. Flat mid-layers where both surfaces are smooth cardstock.

Foam Squares & Dots (3M, Scrapbook Adhesives)

Foam adhesives are the essential spacer adhesive for shadow boxes. They simultaneously bond layers and create consistent depth between them — which is the entire point of a shadow box.

Strengths: Creates consistent depth spacing, strong bond, instant adhesion, available in multiple thicknesses (1mm, 2mm, 3mm), invisible from the front viewing angle.

Weaknesses: Can be visible from the side if placed too close to edges, more expensive per layer than liquid glue, thickness options are fixed (can't custom-cut to odd depths).

Best shadow box use: Mid-layer spacing and attachment. This is your primary adhesive for layers 2 through 5 in most designs.

Spray Adhesive (Krylon, 3M Super 77)

Spray adhesive provides the most even, invisible coverage for large flat surfaces. It's the secret weapon for back panels where any visible adhesive pattern would ruin the effect.

Strengths: Perfectly even coverage, invisible under LED light, bonds instantly on contact, handles large surfaces efficiently.

Weaknesses: Requires ventilation and a mask, messy overspray, permanent (no repositioning), fumes require cleanup, not suitable for small detail work.

Best shadow box use: Large back panel attachment. One quick spray gives you invisible, even adhesion across the entire surface.

Safety note: Always spray in a well-ventilated area or outdoors. Wear a mask. Cover your work surface with newspaper or a drop cloth.

Double-Sided Tape (Scotch, Tesa)

Double-sided tape offers precise, invisible adhesion for edge work and narrow bonding surfaces.

Strengths: Precise application, invisible, instant bond, no mess, good for edge and strip bonding.

Weaknesses: Limited to strip-shaped applications, doesn't conform to uneven surfaces, can be fiddly to position accurately.

Best shadow box use: Edge bonding, narrow tabs, and alignment guides between layers.

Which Adhesive for Which Layer?

This layer-by-layer breakdown is the guide I wish I'd had when building my first shadow box. Each layer has different requirements.

Back Panel (Layer 1) — Large Flat Surface

Best choice: Spray adhesive or tape runner.

The back panel is your largest flat surface and the most visible under LED backlighting. Spray adhesive gives perfectly even, invisible coverage. If you don't have spray adhesive, a tape runner with closely spaced parallel lines works well. Avoid liquid glue — any unevenness shows as visible streaks when backlit.

Mid-Layers (Layers 2–5) — Depth & Alignment

Best choice: Foam squares for depth + tape runner for alignment tabs.

These layers need to maintain consistent spacing while staying perfectly aligned. Use foam squares at the corners and strategic mid-points to create depth, then a small strip of tape runner on any alignment tabs your design includes. The foam squares handle spacing and adhesion simultaneously.

Front Detail Layer — Precision Attachment

Best choice: Liquid glue with precision tip or toothpick application.

The front layer has the smallest, most delicate attachment points. You need pinpoint accuracy. A toothpick dipped in Tombow Mono gives you more control than any dispenser. Apply tiny dots only where the design overlaps opaque elements — never in open spaces that LED light passes through.

Spacer Layers — Consistent Depth

Best choice: Foam tape cut to size.

Foam tape (not squares) gives you consistent depth along the full length of each spacer strip. Cut strips to match your layer width for clean, even spacing. This is critical — inconsistent spacer depth creates visible tilting in the finished shadow box.

Frame Assembly — Structural Integrity

Best choice: Strong liquid glue (Aleene's Tacky) or hot glue for non-visible joints.

Frame joints need serious holding power. Hot glue is acceptable here because it's hidden inside the frame structure — just keep it away from any visible areas. For visible frame joints, Aleene's Tacky Glue provides a strong, clear-drying bond.

Glue Visibility Under LED Lighting: How to Avoid Show-Through

This is the problem that catches every new shadow box maker off guard. In daylight, your adhesive looks fine. Turn on the LED lights and suddenly every glue spot lights up like a constellation.

After ruining two projects this way, I developed a simple test: hold your glued layer up to a bright light before assembling. If you can see adhesive spots, they'll be visible in the finished piece.

Why Clear Glue Isn't Always Invisible

"Dries clear" on the bottle does not mean invisible under LED light. Here's why:

  • Clear glues can yellow. Many clear-drying formulas yellow slightly over time, especially with the mild heat from LED strips. That yellowing becomes visible under backlighting.
  • Refractive index mismatch. Even perfectly clear adhesive bends light differently than the cardstock around it. LED backlighting amplifies this difference.
  • Gloss finish catches light. Most clear glues dry with a glossy sheen. In a backlit shadow box, glossy spots reflect LED light differently than matte cardstock.

Strategies for Invisible Adhesion

  1. Position adhesive behind opaque elements. The single most effective technique. Place every glue dot, tape strip, or foam square directly behind a solid paper element — never in the open cut-out spaces.

  2. Use spray adhesive for even coverage. A light mist of spray adhesive on both surfaces creates such a thin, even layer that it's virtually invisible even under direct backlighting.

  3. Choose matte-finish adhesives. Matte tape runners and matte-finish glue (like Tombow Mono Multi's matte side) blend better with cardstock under LED light.

  4. Test before committing. Glue a scrap piece of your cardstock to a clear surface, hold it up to bright light, and check for visibility. Two minutes of testing saves hours of rebuilding.

For more on safe LED integration, see our guide on how to add LED lights safely to shadow boxes.

Adhesive & Cardstock Finish Compatibility Chart

Not all adhesives work on all cardstock finishes. This compatibility chart is based on real testing across dozens of shadow box projects:

Cardstock FinishBest AdhesiveAvoidNotes
MatteAll types workNoneBest bonding surface; everything adheres well
GlitterAleene's Tacky, heavy foam squaresGlue sticks, basic tape runnersGlitter coating resists weak adhesives; use strong bond
Metallic/PearlTape runner, foam adhesiveLiquid glue (can damage finish)Liquid glue breaks down metallic coating on contact
VellumSpecialized vellum adhesive, tiny glue dotsEverything else (all visible)Most adhesive shows through vellum; use specialty products
TexturedLiquid glueTape runner (can't fill texture gaps)Liquid glue fills texture gaps for complete surface contact

Working with Glitter Cardstock

Glitter cardstock is the trickiest surface for adhesion. The glitter coating creates a barrier between the adhesive and the paper fibers underneath. Weak adhesives like glue sticks and basic tape runners barely grip the surface.

After testing multiple options, two products consistently work: Aleene's Tacky Glue (applied thinly and allowed to set for 60 seconds before pressing) and heavy-duty foam squares (Scrapbook Adhesives brand). Both create a bond strong enough to hold glitter cardstock at shadow box depth without shifting.

For more glitter cardstock techniques, see our glitter cardstock cutting secrets guide. If you're still choosing your cardstock, our best cardstock for shadow boxes guide covers weight and finish recommendations for every layer type.

Working with Metallic & Pearl Cardstock

Metallic and pearl finishes have a coated surface that liquid glue can actually dissolve or discolor. The first time I used liquid glue on pearl cardstock, it left a dull spot where the finish had been eaten away.

Stick with dry adhesives: tape runners, foam squares, and double-sided tape. These bond to the surface without chemical interaction. If you must use liquid glue for a specific attachment point, test on a scrap piece first.

Our metallic pearl cardstock cutting guide covers cutting settings for these specialty finishes. For the full assembly workflow including spacer placement, see our layered shadow box assembly guide.

Adhesive Drying Time & Workflow Tips

Shadow box assembly is a multi-step process. Managing drying time keeps your workflow efficient and prevents the most common assembly mistakes.

The Right Assembly Sequence

  1. Start with the back panel. Use spray adhesive or tape runner. This layer has no depth requirements and bonds flat.
  2. Build spacer + mid-layer pairs. Attach foam spacers to each mid-layer, then bond the pair to the assembly. Work from back to front.
  3. Add front detail last. Use precision liquid glue for tiny attachment points. This is the most delicate step — take your time.
  4. Frame assembly is the final step. Use structural adhesive (Aleene's or hot glue) to secure the layered stack into the frame.

Time-Saving Tips

  • Don't stack wet layers. Liquid glue needs 15-30 minutes to set firmly. Stacking wet layers causes shifting and misalignment. Build a drying station with a flat surface and some weights (books work well) to press layers while they dry.
  • Use the toothpick trick. Dip a toothpick in liquid glue for tiny dots on front detail layers. You'll get more precision than any nozzle tip and waste less glue.
  • Weight down glued layers. Place a clean sheet of paper over your glued layer, then stack books on top. This prevents warping while the glue dries and ensures full surface contact.
  • Work on a craft mat. A silicone craft mat prevents your work surface from becoming a permanent adhesive casualty. Wax paper works in a pinch.
  • Keep adhesives sealed. Foam squares lose their tack when exposed to air for extended periods. Liquid glue thickens. Tape runners collect dust. Close everything between uses.

Avoiding Common Adhesive Mistakes

The same mistakes show up repeatedly in shadow box assembly. Our common beginner mistakes guide covers these in detail, but the adhesive-specific ones are. For the true cost breakdown of all materials including adhesives, see our shadow box project cost analysis.

  • Using too much glue. A thin, even layer bonds stronger than a thick puddle. Excess glue seeps out, warps paper, and shows under LED light.
  • Skipping the light test. Always hold your adhesive layer up to a bright light before final assembly. Fix visible spots before they're locked inside the frame.
  • Mixing adhesive types on the same layer. Different adhesives can interact chemically. Pick one adhesive per layer and stick with it.

You don't need a massive adhesive collection. Five products cover every shadow box bonding situation:

The Essential 5

  1. Tombow Mono Multi Liquid Glue — Precision tip for front layers and detail work. Dual-tip (broad and fine) gives you versatility. ($4-6)
  2. Scotch ATG-714 Tape Runner — Fast, clean adhesion for flat layers and back panels. Refillable and economical long-term. ($12-15 dispenser, $5-7 refills)
  3. 3M Foam Squares (mixed sizes) — Depth spacing and mid-layer adhesion. Get the variety pack with 1mm, 2mm, and 3mm thicknesses. ($6-8)
  4. Scotch Double-Sided Tape — Edge bonding and narrow attachment strips. Precision applicator makes placement easy. ($4-5)
  5. Elmer's or UHU Glue Stick — Backup option for thin, warp-sensitive cardstock. Cheap and always useful. ($2-3)

Total starter kit cost: approximately $28-37 for everything you need.

The Budget 3 (Covers 90% of Shadow Box Needs)

If you're on a tight budget, these three products handle nearly every shadow box adhesive situation:

  1. Aleene's Tacky Glue ($3-4) — Strongest liquid bond, works on all cardstock types including glitter
  2. Foam Squares ($6-8) — Essential for creating depth between layers
  3. Tape Runner ($5-7) — Fast, clean adhesion for flat layers

Budget total: approximately $14-19.

Where to Buy

Craft stores (Michaels, Joann, Hobby Lobby) carry all of these products. Amazon offers bulk pricing if you build shadow boxes regularly. Check for coupons — craft stores run 40-50% off single-item coupons weekly, which is perfect for stocking up on your ATG dispenser or foam squares.

Storage Tips

  • Store liquid glue upright with the cap tightly sealed
  • Keep foam squares in their original packaging until needed — exposure reduces tackiness
  • Tape runners last 12-18 months once opened; label yours with the date
  • Spray adhesive cans last 2+ years if stored in a cool, dry place

Frequently Asked Questions

Can I use hot glue for paper shadow boxes?

Hot glue works for frame assembly but not for layer bonding — it's too thick, creates visible bumps under LED light, and can melt delicate paper. Use foam tape or liquid glue for layer-to-layer adhesion instead. If you need a strong structural bond for the frame joints themselves, hot glue is fine since those areas are hidden inside the frame.

Why does my glue show through when the shadow box is lit?

LED backlighting illuminates adhesive that's invisible in daylight. The fix: position glue only behind opaque paper elements, use spray adhesive for even thin coverage, or use foam adhesives that create intentional depth rather than random spots. Always test by holding your glued layer up to a bright light before final assembly.

What adhesive works best with glitter cardstock shadow box layers?

Glitter surfaces resist weak adhesives. Use Aleene's Tacky Glue or heavy-duty foam squares. Avoid glue sticks and basic tape runners — they won't grip the glitter coating reliably. Let liquid glue set for about 60 seconds before pressing the layers together for maximum bond strength.

Conclusion

The best adhesive for paper shadow box layers isn't one product — it's the right product for each layer. Foam squares create depth between mid-layers. Spray adhesive gives invisible coverage on back panels. Liquid glue with a toothpick handles delicate front details. And tape runners provide fast, clean bonding for flat surfaces.

The adhesive choices that matter most for shadow boxes are different from general papercraft. LED backlighting makes visibility the top concern — far more important than for flat paper projects. Always test your adhesive under bright light before committing to assembly, position glue behind opaque elements, and choose matte finishes over glossy when both are available.

Start with the essential 5 adhesive kit, follow the layer-by-layer guide above, and you'll avoid the two biggest shadow box assembly failures: visible adhesive and layer shifting. Your finished shadow boxes will look clean, professional, and — most importantly — glue-free when the lights come on.

Ready to put these adhesive techniques to work? Browse our shadow box SVG templates designed for clean layer assembly, each with recommended adhesive notes for every layer depth.


At Mural Moods Art, every SVG template is designed with clean cut lines and logical layers to make your crafting experience smooth and enjoyable. Find your next project at https://muralmoodsart.com.