Articles12 min read

How to Cut Different Types of Paper with Cricut

A paper-by-paper reference of Design Space settings, blades, mats and fixes — built from the cuts that actually failed on my own Cricut, so you can skip the wasted sheets I went through.

Fanned stack of cardstock sheets in graduated weights and colors showing varying thickness

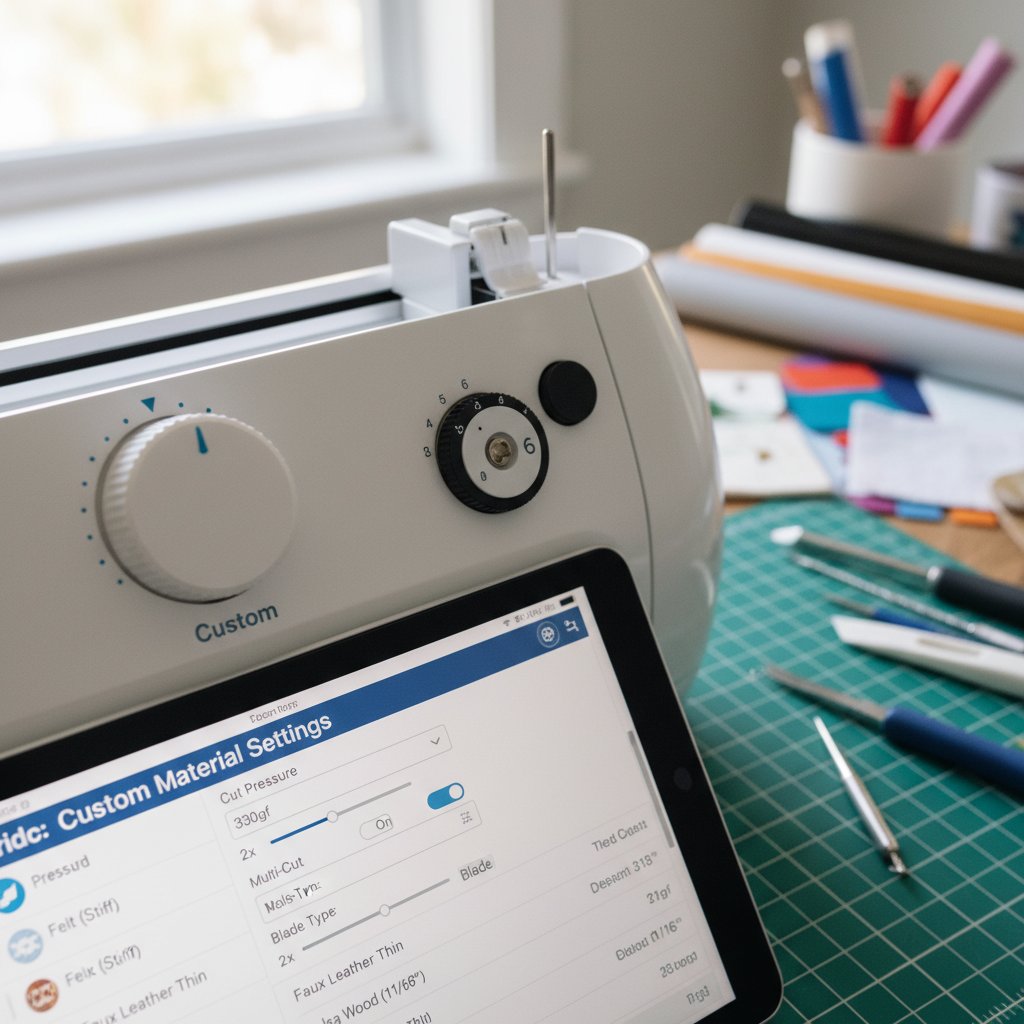
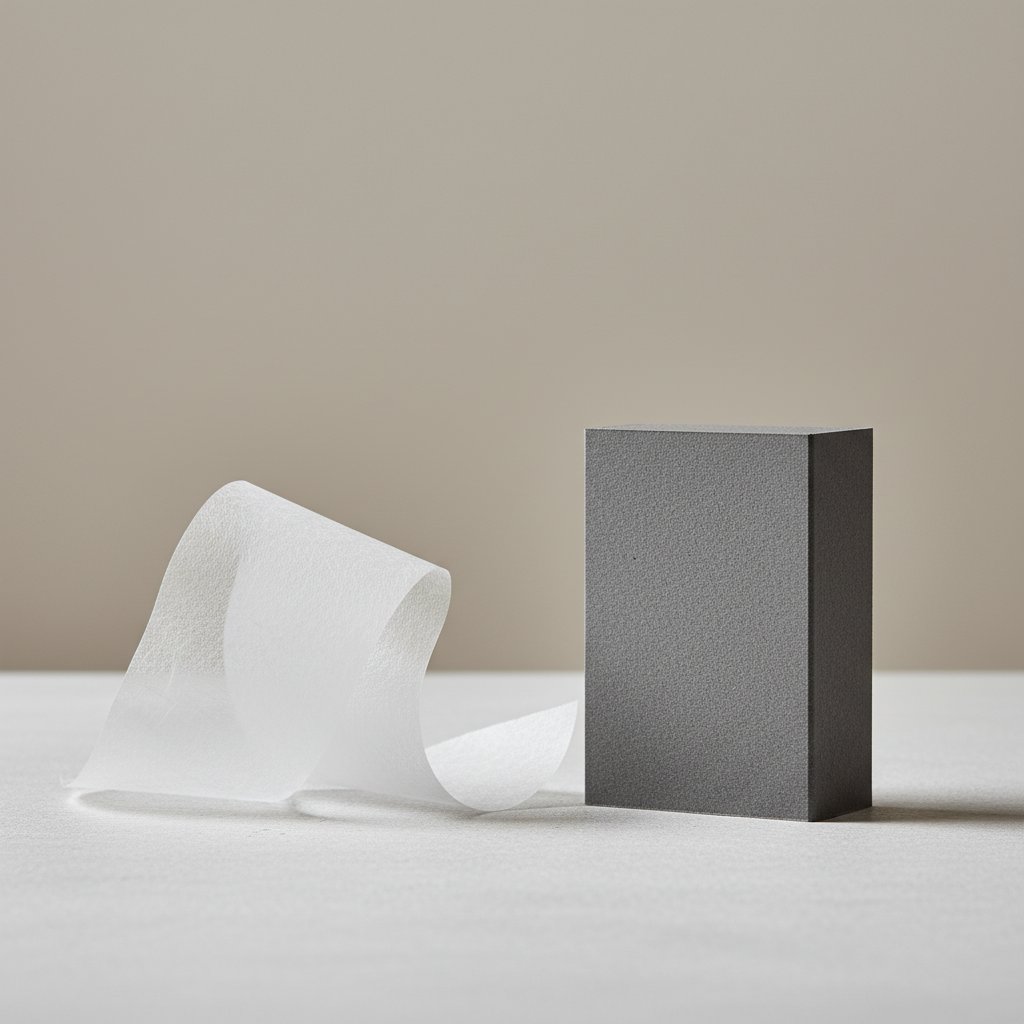
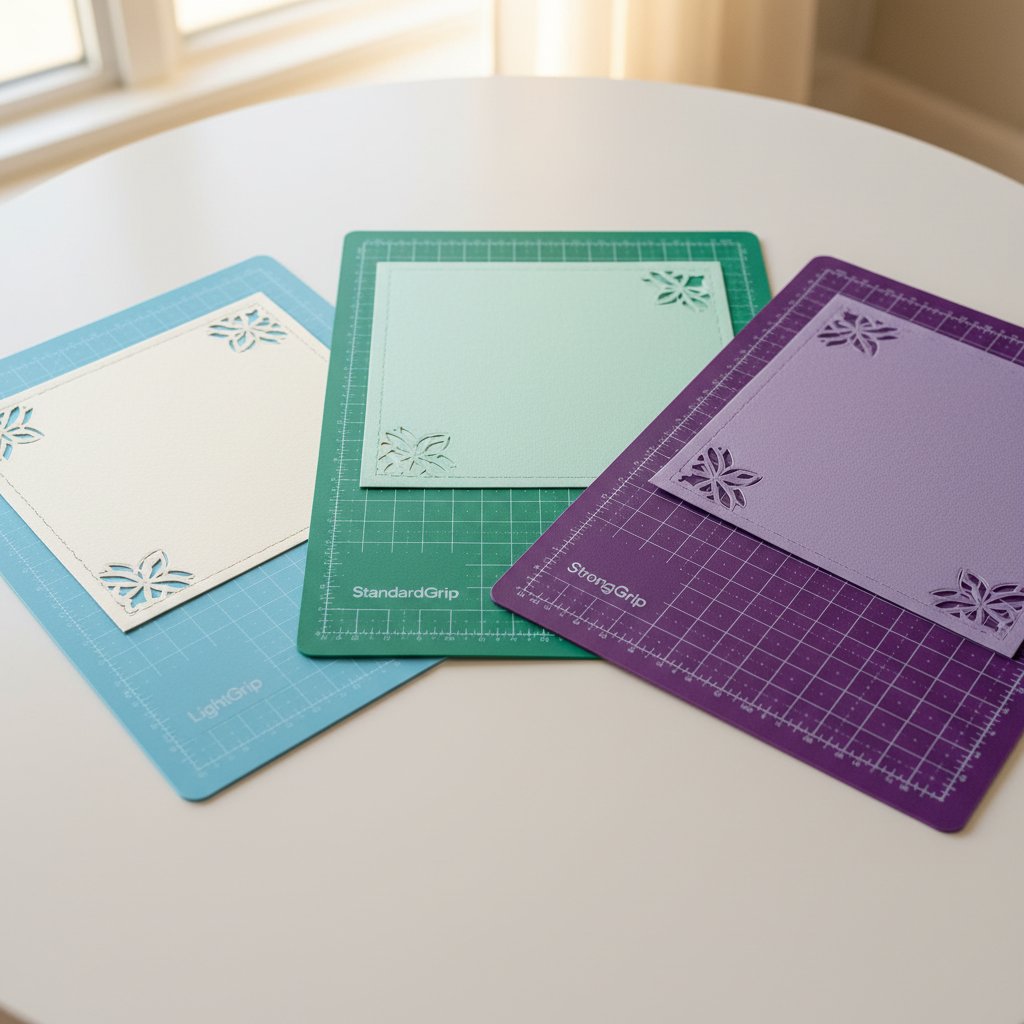
The first time I tried to cut vellum on my Cricut I used the same Cardstock setting that had just given me a flawless shadow-box layer. The vellum came off the mat in ribbons — every translucent sheet shredded because the pressure was double what vellum can survive and the StandardGrip mat held on harder than the paper itself. The machine was right, the blade was sharp, the file was fine. I had simply treated "paper" as one material. It is not. That shredded stack is what made me build the settings notebook this article is based on.

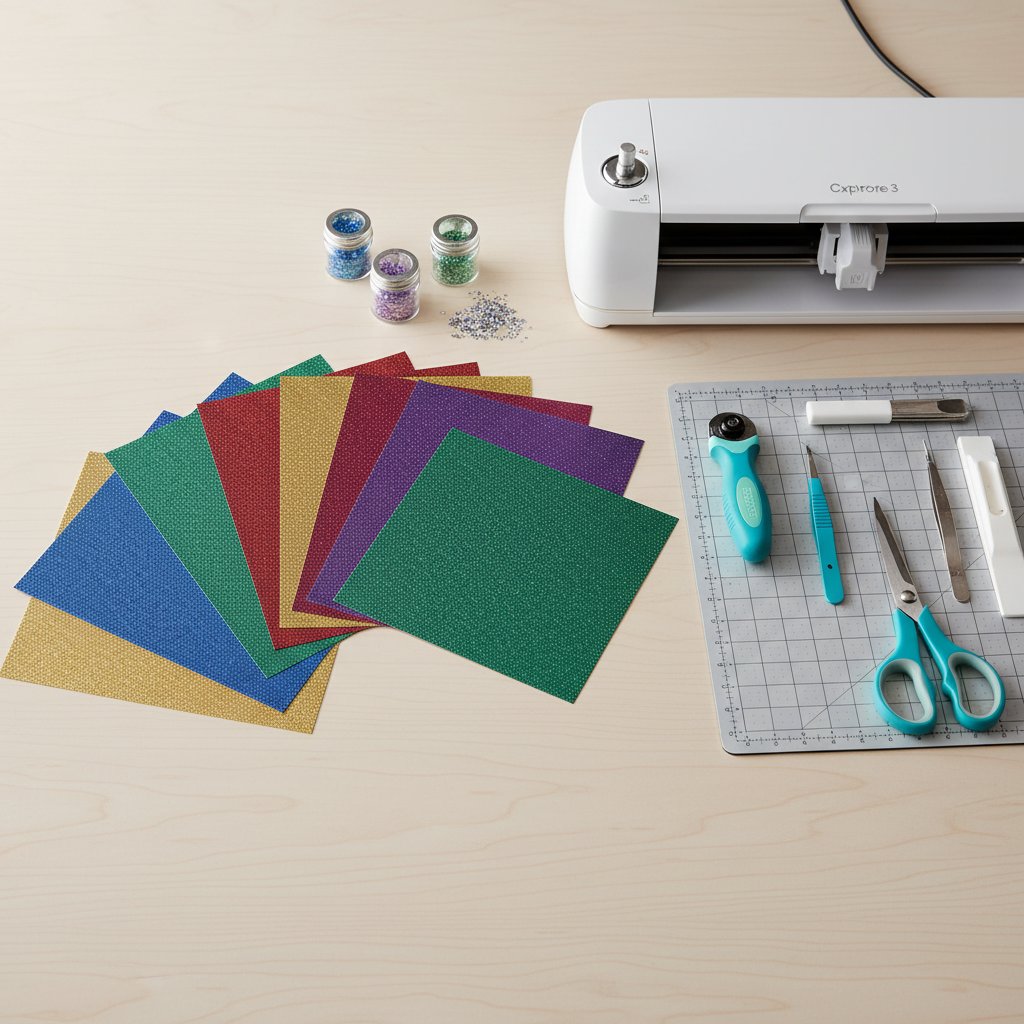
How to cut different types of paper with Cricut is really six small skills wrapped into one workflow: pick the right Design Space material setting, match the blade to the paper's abrasiveness, choose a mat whose grip the paper can survive, decide whether the design needs a second pass, and know how to recover when a sheet tears or won't cut through. Most beginner resources stop at "use the Cardstock setting" — which works for exactly one paper type and ruins the other five. This guide is the reference I wish I had had: a paper-by-paper breakdown with the exact settings, the blade and mat each paper demands, and the failure mode each one is prone to, plus a quick-reference table you can keep next to your machine.

If you are brand new to loading a mat and pressing Make It, pair this with our Cricut Design Space tutorial for beginners so the Design Space steps below land cleanly. And because every paper here eventually becomes a layered project, the paper cutting techniques for beginners with Cricut guide is the natural next read once your cuts are clean.

Quick Reference: Cricut Settings by Paper Type

Bookmark this table. It is the single most useful thing in this guide — the exact Design Space setting, blade, pressure, pass count and mat for each paper I cover, distilled from the detailed sections below.

Cricut pressure dial and blade depth adjustment settings for custom cardstock material configuration
Paper typeDesign Space settingBladePressurePassesMatWatch out for
Cardstock 65 lbLight Cardstock / CardstockFine-point, sharpDefault1StandardGripTearing if blade dull
Cardstock 80–110 lbCardstock (intricate) / Heavy CardstockFine-pointMore1–2 (multi-cut 2×)StandardGripNot cutting through=dull blade
Vellum (28–32 lb)Vellum / Light CardstockFine-point, freshLess1LightGripStandardGrip will rip it on removal
Glitter cardstockGlitter CardstockFine-point (dedicated)More2 (multi-cut 2×)StrongGripSheds grit; dulls blade fast
Metallic / foil paperCardstock (adjusted)Fine-point, sharpMedium–More1–2StandardGripNo Print Then Cut (sensor flares)
Tissue paper (20–30 lb)Tissue / Light CardstockFine-point, very sharpMinimum1LightGrip + transfer sheetSlides; cut 2–4 layers at once
Kraft paper (40–60 lb)Kraft / Medium CardstockFine-pointMedium1StandardGripFibres fray if blade dull
Construction paperMedium CardstockFine-pointMedium–More1StandardGripInconsistent between brands — test cut

Two rules apply to the whole table. First, always run the built-in test cut on a scrap corner of a new paper before committing a full sheet; the single biggest cause of wasted paper is skipping it. Second, when a setting name below does not exist in your Design Space version, pick the closest weight bracket — the settings mastery guide Cricut cardstock settings for perfect cuts maps every material option to a paper weight if you need the detail.

Why Different Papers Need Different Settings

Flimsy thin paper drooping beside sturdy heavy cardstock holding its shape, comparing paper weights

Four physical properties decide what a Cricut needs to do to a sheet, and they are why one setting cannot cover "paper":

  • Weight and thickness. A 20 lb tissue and a 110 lb cardstock differ by a factor of
    five in thickness. The blade has to travel further down to clear a heavy sheet, so the
    pressure — the force pushing the blade — has to scale with weight. Too little and the
    cut stops short of the mat; too much and a light sheet tears.
  • Coating and abrasiveness. Glitter and metallic foils are coated in particles that
    are literally abrasive. They grind the blade tip down, which is why a blade that cuts
    cardstock for a month can fail on glitter in eight projects.
  • Reflectivity. The Cricut sensor that registers Print Then Cut marks needs a matte
    surface. Glossy photo paper, metallic foil and glitter all flare the sensor, so those
    papers are cut-only.
  • Surface fragility. Vellum, tissue and photo paper have delicate top layers. A
    StandardGrip mat — perfect for cardstock — bonds to them so strongly that peeling the
    cut off shreds it. They demand a LightGrip mat.

Get these four ideas and the rest of the guide is just specifics: you will already understand why vellum wants low pressure and a gentle mat, and why glitter wants two passes and a sacrificial blade.

Cardstock: The Foundation Paper Type

Cardstock is where every Cricut paper journey starts and where 90% of shadow-box work happens. The two weights that matter are 65 lb (the everyday craft weight — cuts cleanly in one pass on the default Cardstock setting) and 80 lb (heavier, stiffer, and the right choice when a design has fine filigree or thin bridges that need to stay rigid during weeding).

Use a sharp fine-point blade and a StandardGrip mat. Load the cardstock, brayer it flat so there are no air pockets, Attach the design so it cuts in one position, and run a test cut on a corner. For detailed 80 lb work, switch the setting to Cardstock (for intricate cuts) — it applies more pressure in a single pass, which is better than a second pass because two passes can shift the sheet a hair and produce a fuzzy edge.

The two failure modes are a mirror image of each other. If the cardstock tears, the blade is dull or the pressure is too high — drop to a fresh blade first. If it doesn't cut through, the blade is dull or the pressure is too low — again, a fresh blade is almost always the real fix; raising pressure on a blunt tip just mashes the fibres. The deeper reference on this is our Cricut cardstock types guide, and the best blade for cardstock comparison covers exactly when to move from fine-point to deep-point.

Practise Cardstock Layers on a Real File
Cardstock settings are easiest to dial in on a true multilayer design. The Hydrangea shadow box SVG is a tested layered file — separate depth planes, sensible line weights, and a layer count that exercises the Cardstock setting end to end without pushing into the fiddly territory that needs 80 lb. Run it once on 65 lb cardstock and you will see exactly what "clean cut, clean weed" should look like before you add specialty papers.

Vellum: Translucent and Delicate

Vellum is the paper that punishes the wrong setup the hardest. At 28–32 lb it is light, and its translucency is the whole point — backlit vellum layers glow. But that same delicacy means a StandardGrip mat will not release it intact, and cardstock pressure will slice it into confetti.

The setup: a fresh fine-point blade (a blade that is even slightly dull catches and tears vellum instead of cutting it), the Vellum or Light Cardstock setting with the pressure dropped to Less, and — non-negotiable — a LightGrip mat. For extra safety, hinge the vellum onto a sheet of transfer tape first, then stick the transfer tape to the LightGrip mat; you peel the tape up and the vellum comes with it unstressed.

The payoff is huge: vellum layers behind a cut design turn a flat piece into something that glows from within, which is why stained-glass-style SVGs are built for it. If a cut still tears after a fresh blade and low pressure, you are almost certainly still on a StandardGrip mat — switch mats before you change anything else. (The full deep-dive on vellum technique is the advanced vellum paper cutting with Cricut guide.)

A File Designed to Glow on Vellum
Stained-glass shadow-box files are engineered around translucent layers, which makes vellum their ideal substrate. The Lily shadow-box SVG uses a stained-glass layout — bold lead-lines that cut cleanly and open panels meant to be lit from behind — so the low pressure and LightGrip mat you just set up produce a piece that actually glows rather than a flat cutout.

Glitter Cardstock: Bold and Abrasive

Flat-lay of jewel-tone glitter cardstock sheets fanned beside a Cricut machine and crafting tools on a wood desk

Glitter cardstock is the paper that breaks beginners' blades. The glitter coating is abrasive — it is essentially fine sandpaper — so it cuts slowly, sheds grit onto the mat, and wears a fine-point blade down two to three times faster than plain cardstock. The trick is to treat glitter as its own category with its own consumables.

Set Design Space to Glitter Cardstock, turn pressure to More, and enable multi-cut 2× so the blade makes two passes — one pass rarely clears the full glitter depth cleanly. Use a StrongGrip mat, because the grit shedding reduces ordinary mat adhesion and you do not want the sheet shifting mid-cut. Most importantly, dedicate one blade to glitter and label it. If you cut glitter and cardstock with the same blade, the glitter-dulled tip will start tearing your plain cardstock within a few projects.

Bold, high-contrast silhouettes suit glitter best — the sparkle does the visual work, so the design does not need fine internal detail (which glitter struggles to render cleanly anyway). When cuts come out incomplete, the fix sequence is: clean the blade tip with a foil-ball (below), confirm multi-cut is on, and if it is still short, retire that blade to cardstock-only and break out a fresh one for glitter.

A Single-Layer Silhouette Made for Glitter
Glitter cardstock rewards bold, connected shapes and punishes fine filigree. The Dragon papercut SVG is a single-layer silhouette with continuous paths and built-in bridges — exactly the cut-friendly geometry that lets glitter's sparkle carry the design without asking the abrasive sheet to hold tiny interior details it will only tear on.

Metallic and Foil Paper: Reflective and Luxurious

Metallic and foil-coated papers (gold, silver, copper, iridescent) sit between cardstock and glitter: heavier than plain cardstock because of the foil layer, mildly abrasive like glitter but far less so, and — the catch — too reflective for Print Then Cut. The Cricut sensor cannot read registration marks off a shiny surface, so metallic is a cut-only paper. Design for it accordingly: use cut lines, not printed art.

Use a sharp fine-point blade, the Cardstock setting with pressure nudged to More for heavier foils, and a StandardGrip mat. The most common failure isn't the cut — it is the foil layer tearing away from the paper backing at the cut edge when the blade is dull and drags. A fresh blade shears the foil cleanly; a dull one peels it. For luxury pieces (wedding stationery, premium wall art) pair metallic layers with stained-glass or floral SVGs where the foil reads as a highlight rather than the whole design.

A Floral File That Turns Foil Into a Highlight
Metallic paper shines brightest as an accent layer inside a larger design rather than as a flat sheet. The Rose stained-glass shadow-box SVG gives foil a defined role — bold petal outlines and open panels — so a single metallic layer reads as a gilded highlight against plain cardstock, the look that makes wedding and anniversary pieces feel expensive.

Tissue, Kraft, and Construction Paper

These three round out the papers a Cricut will realistically see, and each has one quirk to know.

Tissue paper (20–30 lb) is so light it slides on the mat and tears if you breathe on it. Use the Tissue or Light Cardstock setting at minimum pressure, a LightGrip mat, and a transfer-sheet hinge (tissue onto transfer tape, tape onto the mat). The pro move is to stack 2–4 tissue layers for a single cut — the stack cuts more cleanly than one sheet because the layers support each other. Tissue is how you make paper flowers and pom-poms.

Kraft paper (40–60 lb) is the easy one: Medium Cardstock setting, fine-point blade, StandardGrip mat, medium pressure. Its only quirk is a visible grain, so for structural pieces (boxes, packaging) mind the grain direction the way you would with wood. It frays at the edge when the blade dulls — a clean cut looks slightly fuzzy otherwise.

Construction paper is the budget paper and the inconsistent one. Weight and fibre density vary by brand and even by batch, so the single rule is always test cut a new brand. Set it to Medium Cardstock, expect to nudge pressure up or down per brand, and reserve it for kids' crafts and prototypes — for anything you want to keep, step up to real cardstock.

Blade Maintenance by Paper Type

A cutting machine blade tip plunged into a ball of crumpled aluminum foil to clean off metallic coating debris

The blade is the consumable that decides whether every setting in this guide works, so it is worth managing deliberately. Papers dull the fine-point tip at very different rates, fastest to slowest:

Glitter > Metallic > Construction > Cardstock > Kraft > Vellum > Tissue

A single fine-point blade lasts roughly 20–30 cardstock projects, but only 8–12 glitter projects. The practical system is to own two or three blades and label them by paper family — one for glitter only, one for cardstock, one kept pristine for vellum and tissue. When a blade starts to tear papers it used to cut cleanly, demote it: the glitter blade becomes the cardstock blade, the cardstock blade becomes the rough-cut blade, and a fresh one takes the vellum slot.

Between replacements, clean the tip. The fastest method is the aluminium-foil ball: poke the blade tip into a crumpled ball of foil a dozen times to scrape off dried adhesive and metallic debris, then wipe with an alcohol pad. This does not sharpen a dull blade, but it rescues a blade that is merely gunked up — a common cause of "suddenly bad" cuts after a glitter or adhesive-paper session.

Mat Selection by Paper Type

Three Cricut cutting mats in light, standard and strong grip levels with cardstock

Choosing the mat is half the battle — the wrong grip ruins more delicate papers than any setting does. Match the mat to the paper's surface fragility, not its weight:

  • LightGrip (blue) — vellum, tissue, photo paper, and any coated sheet with a delicate
    top layer. If a paper might tear on removal, it goes here.
  • StandardGrip (green) — cardstock, metallic, kraft, construction. The everyday mat
    for anything sturdy enough to peel off cleanly.
  • StrongGrip (purple) — glitter cardstock and heavy 100–110 lb cardstock, where grit
    shedding or sheer weight needs extra hold to stop the sheet drifting mid-cut.

Whatever the mat, brayer the paper flat before every cut — air pockets cause incomplete cuts and curling. Clean the mat with a lint roller between projects (glitter sheds fastest and shortens mat life), and replace it when the adhesive no longer holds a sheet taut at the corners. The full mat-matching reference, including how to revive a tired mat, is the Cricut mat guide for cardstock.

Troubleshooting by Paper Type

When a cut goes wrong, work the fix in this order — it resolves almost every failure without wasting more sheets:

  1. Paper not cutting through — fresh blade first (the most common cause by far), then
    raise pressure one step, then enable multi-cut 2×. On glitter, multi-cut is usually
    mandatory, not optional.
  2. Paper tearing — pressure too high or mat too grippy. Drop pressure to Less and
    switch to a LightGrip mat (essential for vellum and tissue). Confirm the blade is
    actually sharp; a dull blade catches and tears where a sharp one slices.
  3. Sheet sliding on the mat — brayer it down firmly, clean the mat, and for tissue
    use the transfer-sheet hinge. Sliding=misaligned double-passes.
  4. Fuzzy or frayed edges — almost always a dull blade on kraft, construction or heavy
    cardstock. Replace it; raising pressure on a blunt tip just mashes fibres.
  5. Foil or coating peeling at the cut edge — metallic paper with a dragging dull blade.
    Fresh blade, and slow the cut by using the intricate-cuts setting so the blade shears
    rather than pulls.

The diagnostic thread running through all five: reach for a fresh blade before you touch the pressure. Most "my Cricut stopped cutting cleanly" problems are a dull blade masquerading as a settings problem, and no amount of extra pressure fixes a blunt tip — it just tears the paper. Keep spares labelled by paper family and the table above will do its job for hundreds of cuts.

1.Can I use the same Cricut setting for every paper type?
No. Paper weight, coating and surface fragility vary so much that one setting only works for one paper family. Cardstock pressure will shred vellum, and vellum pressure will not punch through glitter cardstock. Always match the Design Space setting — and the mat grip — to the specific paper, and run a test cut on a scrap corner first.
2.Why does glitter cardstock dull my blade so fast?
The glitter coating is abrasive — effectively fine sandpaper — and it grinds the fine-point blade tip down two to three times faster than plain cardstock. Expect about 8–12 glitter projects per blade versus 20–30 for cardstock. Dedicate a single blade to glitter and label it so a glitter-dulled tip does not start tearing your plain cardstock.
3.Can I do Print Then Cut on metallic or glitter paper?
No. Print Then Cut relies on the Cricut sensor reading registration marks, and glossy, metallic or glitter surfaces flare the sensor so it cannot register the marks. Use metallic, glitter and photo paper for cut-only designs. If you need a metallic Print Then Cut effect, use a matte-coated metallic cardstock instead.
4.What is the best mat for cutting vellum on a Cricut?
A LightGrip mat. StandardGrip adhesive bonds to vellum more strongly than the vellum holds itself together, so peeling the cut off a StandardGrip mat shreds it. For extra protection, hinge the vellum onto a sheet of transfer tape first, then stick the transfer tape to the LightGrip mat and lift the whole assembly off together.
5.How do I stop tissue paper from sliding on the cutting mat?
Use a transfer-sheet hinge: place the tissue on a sheet of transfer tape, then adhere the transfer tape to a LightGrip mat. Cutting two to four layers of tissue stacked together also helps — the layers support each other and cut more cleanly than a single flimsy sheet. Set pressure to minimum so the blade slices rather than drags.
6.How often should I replace my Cricut blade when cutting paper?
It depends on the paper. A fine-point blade lasts roughly 20–30 cardstock projects, 15–20 on metallic, and only 8–12 on glitter cardstock. Replace the blade when cuts no longer go all the way through, when edges fray or drag, or when designs that used to cut cleanly start tearing. Blades are consumable — keep spares labelled by paper family and retire a blade at the first sign of dulling rather than fighting it with extra pressure.
7.What Design Space setting should I use for cardstock?
Use Light Cardstock for 60–65 lb paper, Cardstock for 65–80 lb, Cardstock (for intricate cuts) for detailed designs on 65–80 lb, Heavy Cardstock with multi-cut 2× for 100–110 lb, and Glitter Cardstock with multi-cut 2× for glitter sheets. Always Attach the design before Make It so it cuts in one position, and run the built-in test cut on a scrap corner before committing a full sheet.
8.Do I need a deep-point blade for any paper type?
Rarely for paper. A sharp fine-point blade handles cardstock up to about 80 lb, including most intricate work. Step up to the deep-point (Deep Cut) blade only for heavy 100–110 lb cardstock, thick glitter cardstock that will not clear in one pass, or specialty papers the fine-point cannot get through. For everyday paper cutting a fresh fine-point blade is the right tool.