Articles 11 min read

How to Import Multi-Layer Shadow Box SVGs in Cricut

Your comprehensive guide to how to use layered shadow box svg in cricut.

How to Import Multi-Layer Shadow Box SVGs in Cricut

How to Import Multi-Layer Shadow Box SVGs in Cricut Design Space

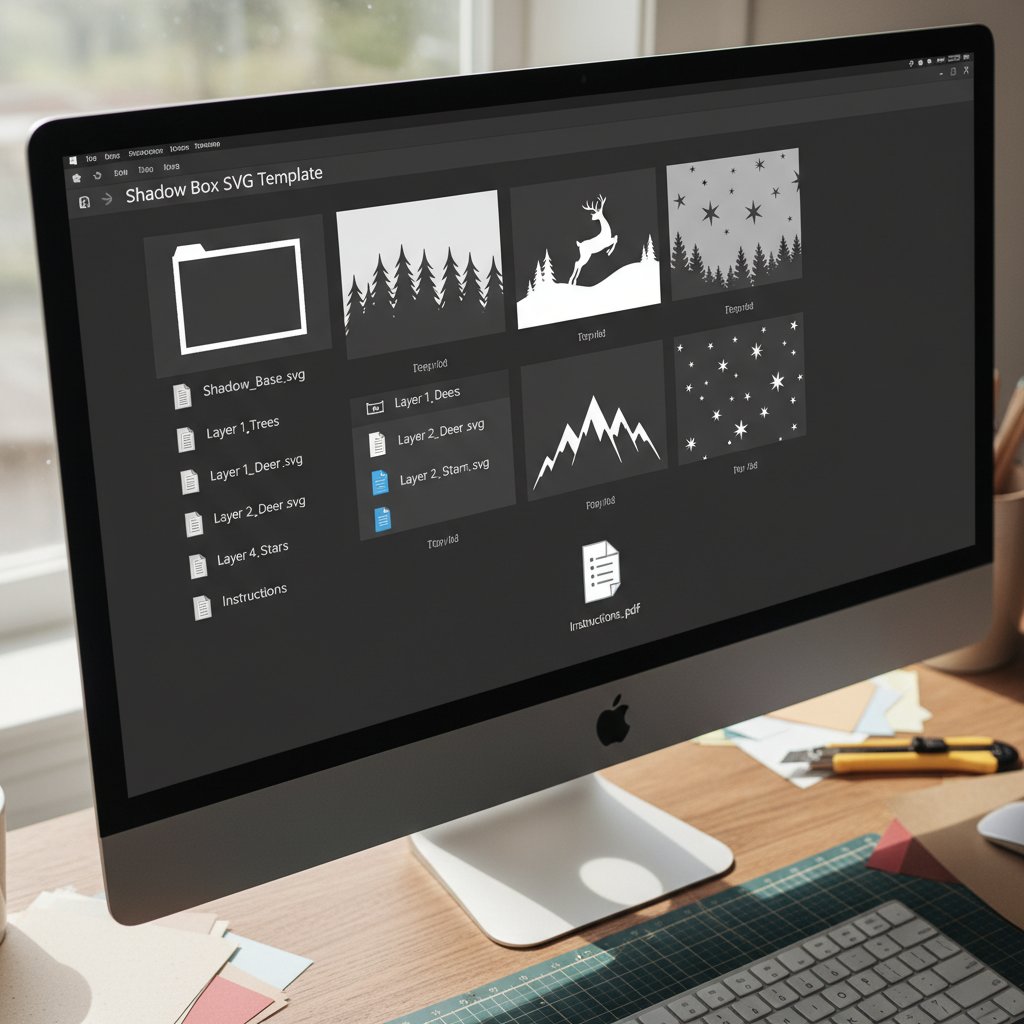
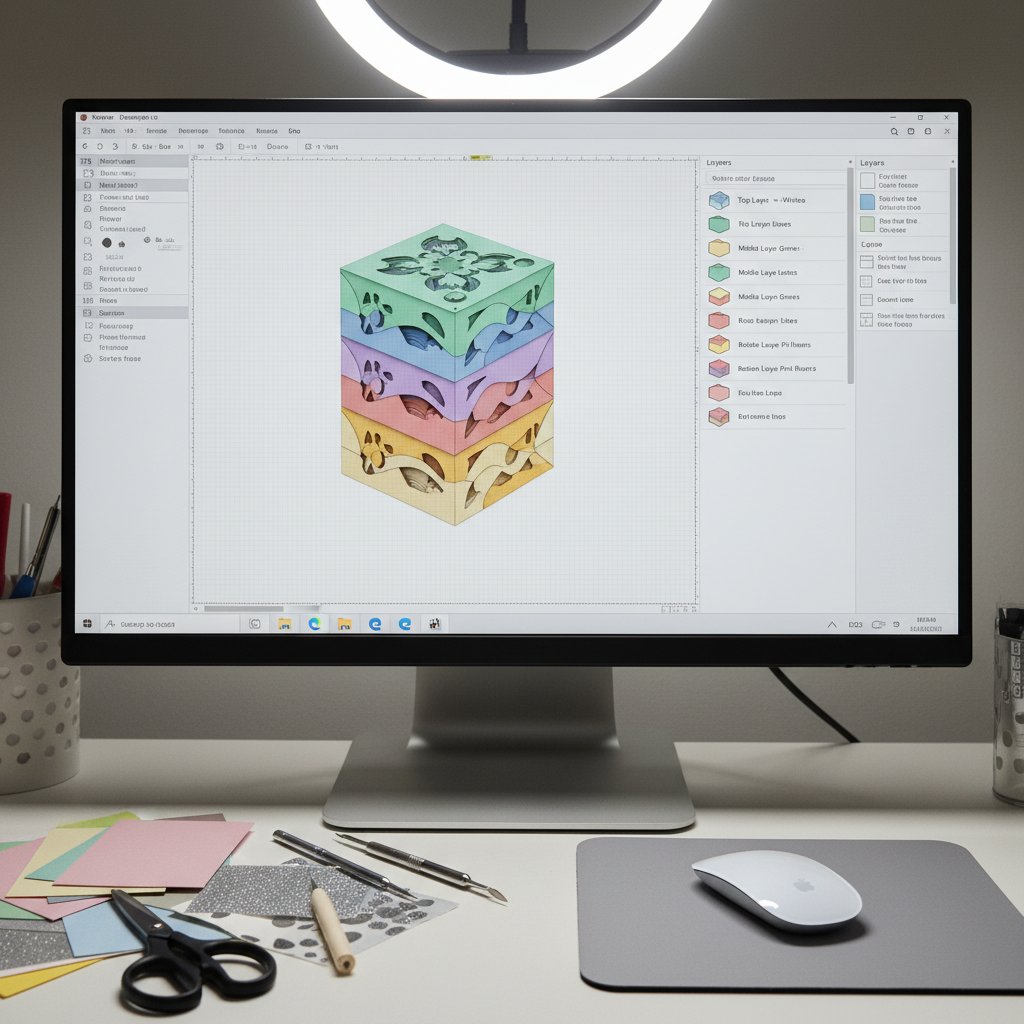
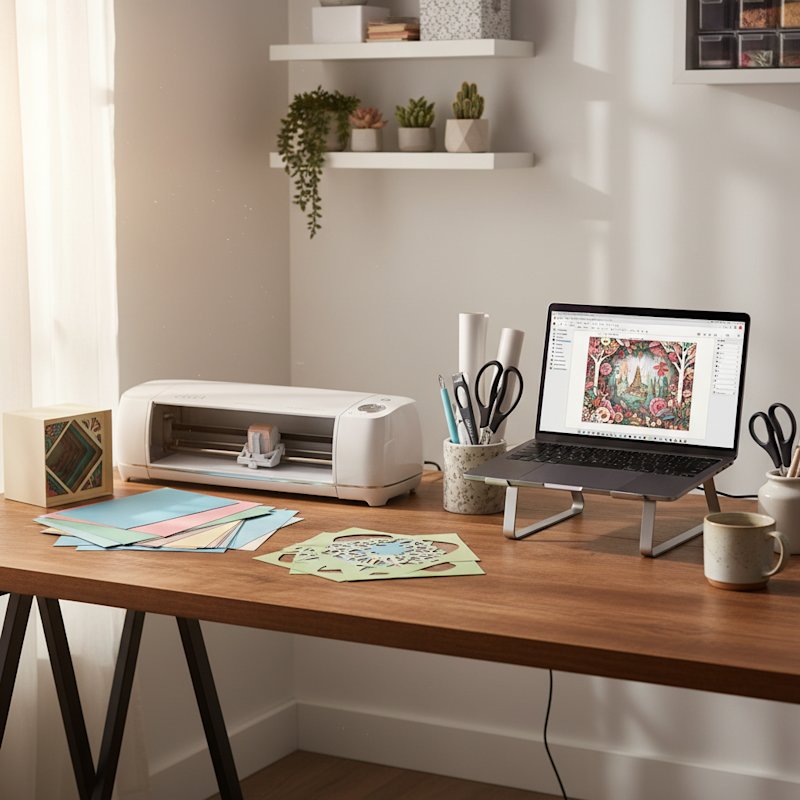
Importing multi-layer shadow box SVG files into Cricut Design Space can feel intimidating when you're new to paper crafting. You've downloaded a beautiful shadow box template, but now you're staring at zip folders and unfamiliar file formats, wondering how to actually get those layers into Design Space so you can start cutting.

This beginner tutorial walks you through every step of how to use layered shadow box SVG files in Cricut, from unzipping your download to organizing layers and preparing them for cutting. Whether you're working on your first shadow box project or you've struggled with previous imports, this guide will help you master the process.

By the end, you'll understand how to locate SVG files on your computer, upload them to Cricut Design Space, work with multi-layer designs, and verify everything is ready to cut.

Understanding Shadow Box SVG Files

Shadow box SVG files contain multiple layers—typically 6-12 separate pieces—that you'll cut, stack with foam spacers, and illuminate to create three-dimensional art. Unlike a simple vinyl decal that's just one cut file, shadow box templates are complete multi-layer projects packaged together.

Each layer represents a different depth level in your finished shadow box. Layer 1 might be the frontmost element (like tree branches), while Layer 8 could be the background (like distant mountains). When cut from cardstock and assembled with spacing between them, they create the stunning depth that makes shadow boxes magical.

Why this matters for importing: When you upload a shadow box SVG to Cricut Design Space, the software needs to recognize and separate these individual layers so you can cut them one at a time on different pieces of cardstock. Well-designed shadow box templates make this process automatic.

Shadow box templates are distributed as SVG (Scalable Vector Graphics) files because SVGs scale to any size without losing quality. This is crucial when resizing your design to match different frame sizes without creating blurry or pixelated edges.

Step 1: Unzipping Your Downloaded Template

Computer desktop showing unzipped shadow box SVG template folder with organized files including SVG files, preview images, and PDF instructions

Most shadow box templates download as compressed zip folders containing the SVG file, preview images, and PDF assembly instructions. You cannot upload files directly from a zip folder to Cricut Design Space, so unzipping is mandatory.

How to Unzip on Windows

  1. Navigate to your Downloads folder
  2. Locate the zip folder (has a zipper icon and ends in ".zip")
  3. Right-click on the zip folder
  4. Select "Extract All" from the menu
  5. Choose where to save the extracted files (Desktop or a Crafts folder)
  6. Click "Extract"

How to Unzip on Mac

  1. Navigate to your Downloads folder
  2. Locate the zip file
  3. Double-click the zip file

macOS automatically unzips the folder and creates a new regular folder with the contents.

Locating Your SVG File

Once unzipped, open the folder and look for files ending in .svg. These are your actual cut files. You may see:

  • One main SVG (like "cardinal-shadowbox-8x8.svg") - The complete multi-layer design
  • Multiple numbered SVGs (like "layer1.svg," "layer2.svg") - Individual layers
  • Preview images (PNG/JPEG) - Show what the finished project looks like but can't be used for cutting

For most shadow box projects, you'll import the single main SVG file that contains all layers. Always upload the .svg file to Design Space, not PNG or JPEG preview images.

Step 2: Opening Cricut Design Space

Access Cricut Design Space using:

  • Desktop app: Most stable performance (recommended)
  • Web browser: Visit design.cricut.com
  • Mobile app: iOS/Android tablets (limited functionality)

For shadow box projects, use the desktop application or web browser on a computer. The mobile app has limitations with complex multi-layer files.

To start:

  1. Log into Cricut Design Space
  2. Click "New Project" (green button in upper left)
  3. A blank canvas appears—your workspace for importing the shadow box design

Step 3: Uploading Your SVG to Design Space

Here's how to import your shadow box SVG file:

Step 1: Click the "Upload" button in the left sidebar (looks like an upward arrow).

Step 2: The upload window appears. Click "Browse" to find files on your computer, or drag-and-drop the SVG file directly into the upload area.

Step 3: Navigate to where you unzipped your shadow box template. Select your SVG file (ending in .svg) and click "Open."

Step 4: Design Space processes the file and shows a preview thumbnail.

Step 5: Click "Upload" (green button).

Step 6: The uploaded design appears in "Recently Uploaded." Click the thumbnail.

Step 7: Click "Insert Images" to add the design to your canvas.

Your shadow box design should now appear on the canvas, ready for the next steps.

Troubleshooting: Blurry Preview

Many beginners panic when their shadow box design looks pixelated or blurry in the upload preview window. This is a known Design Space bug and does not affect cut quality. The preview sometimes displays SVG files with low resolution, but once you upload and insert the image onto your canvas, the design will be perfectly crisp.

Step 4: Working with Multi-Layer Designs

Cricut Design Space interface showing the Layers panel with multiple color-coded shadow box layers organized and ready for cutting

When your shadow box SVG appears on the canvas, you're looking at all layers stacked on top of each other. Well-designed shadow box SVG files automatically separate into individual layers.

Viewing Your Layers

Look at the "Layers" panel on the right side of your screen. You should see multiple entries, each representing a different shadow box layer. Each entry corresponds to one physical piece of cardstock you'll cut.

Layer indicators:

  • Color coding: Each layer appears in a different color
  • Eye icons: Click to show/hide individual layers
  • Layer names: Some templates include names like "Layer 1 - Front"

Ungrouping Layers

Sometimes shadow box SVGs import as a single grouped object. If you see only one entry in your Layers panel but know your design has multiple layers, you need to ungroup.

How to ungroup:

  1. Select the imported design on your canvas
  2. Click the "Ungroup" button in the bottom toolbar
  3. Your design separates into individual layers

You may need to ungroup multiple times for complex designs. Keep clicking "Ungroup" until you see all individual layers in the Layers panel matching your expected layer count (usually 6-12).

Organizing Your Layers

Once ungrouped, identify which layer is which so you can cut them in the correct order.

Check for layer numbers: Well-designed templates include small numbers or labels on each layer. Look carefully at each layer on your canvas for tiny "1," "2," "3" labels in corners or edges.

If layers aren't numbered: Reference the preview image or PDF instructions that came with your template to identify which layer is which.

Using the Layers panel: Click the eye icon next to any layer to toggle visibility. This helps you:

  • View one layer at a time to understand its shape
  • Verify which layer you're about to send to cut
  • Check for any unexpected elements

Step 5: Resizing Your Shadow Box for Your Frame

One of the most powerful features of SVG files is the ability to resize designs to fit different frame sizes while maintaining perfect cut quality.

The Critical Rule: Resize All Layers Together

This is the most important rule: You must resize all layers together at the same time and by the same percentage. If you resize layers individually or at different ratios, they won't align correctly when you assemble them, creating visible gaps and misalignments.

How to Resize All Layers Together

Step 1: Select all layers simultaneously by:

  • Clicking and dragging a selection box around the entire design
  • Holding Shift and clicking each layer in the Layers panel
  • Pressing Ctrl+A (Windows) or Cmd+A (Mac)

Step 2: Verify all layers are selected. You should see selection handles around the entire design, and all entries in the Layers panel should be highlighted.

Step 3: Check the lock icon at the top of the screen (between width and height dimensions). Make sure this lock icon is closed (locked). This ensures proportional resizing without distortion.

Step 4: Resize using exact dimensions (recommended):

  • Click in the width field at the top and type your exact desired width
  • Press Enter
  • Height adjusts automatically to maintain proportions

Calculating the Right Size

Don't make your shadow box the exact same size as your frame's interior. You need clearance space on all sides.

Recommended sizing formula:

  • Measure your frame's interior opening
  • Subtract 0.25-0.5 inches from both width and height
  • Resize your design to these dimensions

Example: If your frame has an 8x8 inch interior:

  • Optimal shadow box size: 7.5 x 7.5 inches (leaves 0.25 inches clearance all around)

For rectangular frames like 8x10:

  • Frame interior: 8 x 10 inches
  • Optimal shadow box size: 7.5 x 9.5 inches

This clearance ensures the paper layers don't press against the frame glass, which can cause unwanted shadows or pressure points.

Step 6: Preparing Individual Layers for Cutting

Cricut machines cut one layer at a time, so you'll send each layer to cut separately on individual pieces of cardstock.

Selecting a Single Layer to Cut

Step 1: In the Layers panel, click the eye icon next to all layers except the one you want to cut first. This hides the other layers.

Step 2: Click directly on the visible layer to select it.

Step 3: Verify only this one layer is selected.

Step 4: Click "Make It" (green button in upper right corner).

Step 5: Design Space shows the cutting preview screen with your selected layer. Verify only one layer appears here.

Step 6: Select your material setting (usually "Medium Cardstock" for shadow boxes) and send to your Cricut to cut.

Step 7: After cutting that layer, return to the canvas by clicking the back arrow.

Step 8: Repeat for the next layer: unhide it, select it, click "Make It," and cut.

Material Settings

For standard shadow box cardstock (65-80 lb cardstock):

  • Select "Medium Cardstock" from the material menu
  • This setting works for most shadow box projects

Always run a test cut on scrap cardstock before cutting your first actual layer. This verifies your settings are correct and prevents wasting cardstock.

Common Import Problems and Solutions

Problem: SVG Won't Upload

Common causes:

  • File is still zipped (unzip completely first)
  • File isn't actually SVG format (verify it ends in .svg)
  • File is corrupted (re-download from source)
  • Design Space technical issues (try different browser or restart app)

Problem: All Layers Import as One Solid Shape

Solutions:

  • Select the design and click "Ungroup" multiple times
  • Verify you uploaded the .svg file, not a .png or .jpg preview image

Problem: Layers Import Scattered Across Canvas

This is actually okay—you can work with scattered layers. Just be careful when selecting all layers to resize (use Shift+click each layer in the Layers panel to ensure you select them all).

Problem: Missing Small Details

Solutions:

  • Select the layer and click "Ungroup" to separate all elements
  • Check your download folder for additional "optional details" SVG files
  • Compare to preview image—if elements are missing, contact the designer

Final Checklist Before Your First Cut

Before sending your first shadow box layer to your Cricut, verify:

Design Preparation:

  • ✅ SVG file successfully uploaded to Design Space
  • ✅ All layers are visible in the Layers panel
  • ✅ Layers are ungrouped properly if necessary
  • ✅ Design is resized correctly for your frame (with clearance space)
  • ✅ All layers were resized together at the same percentage
  • ✅ Lock icon is locked to maintain proportions

Cutting Preparation:

  • ✅ Fresh or sharp blade installed in your Cricut
  • ✅ Cutting mat is clean and properly sticky
  • ✅ Cardstock is ready (correct weight: 65-80 lb, correct colors)
  • ✅ Material setting is correct (usually Medium Cardstock)
  • ✅ Test cut completed on scrap cardstock
  • ✅ First layer selected and ready to cut

Next Steps: Cutting and Beyond

Successfully importing your shadow box SVG into Cricut Design Space is a major milestone. Here's what comes next:

Moving to Cutting

Once comfortable with importing, you're ready to cut your layers. The cutting process involves loading cardstock onto your cutting mat correctly, sending each layer to cut in sequence, weeding the small cut pieces from each layer, and keeping layers organized for assembly.

Our complete cutting guide covers optimal machine settings, troubleshooting cutting problems, and achieving crisp, clean cuts every time.

Assembly

After cutting all layers, you'll assemble them with foam spacers to create the three-dimensional effect. This involves positioning foam spacers strategically between layers, aligning layers precisely, and building the stack from back to front.

The assembly process is where your flat cardstock layers transform into stunning dimensional art.

Adding Lights

The final touch that makes shadow boxes truly magical is LED backlighting. Battery-operated LED strips installed behind your layered paper create the glowing effect that highlights all the intricate cutouts.

Our guide on installing LED lights safely covers choosing the right lights, positioning them for even illumination, and safety considerations.

Choosing Your First Project

If you're still looking for the perfect shadow box template to start with, our five easy beginner projects guide recommends specific designs that are forgiving for first-timers while producing impressive results.

Conclusion

Importing multi-layer shadow box SVG files into Cricut Design Space transforms from a confusing technical challenge into a simple, repeatable process once you understand the steps. By unzipping your downloaded template, uploading the SVG file correctly, separating and organizing layers, resizing everything together proportionally, and verifying your design before cutting, you set yourself up for shadow box success.

The key principles to remember: always work with the .svg file format, resize all layers together with the lock icon engaged, and verify each layer before sending it to cut. These fundamentals prevent the most common beginner mistakes and ensure your layers align perfectly during assembly.

With your shadow box SVG successfully imported and prepared in Design Space, you're ready to move forward confidently into cutting your layers and creating your first stunning illuminated shadow box. The import process that seemed intimidating at first will become second nature by your third or fourth project.

Now that you know how to use layered shadow box SVG files in Cricut, you have the technical foundation to explore countless shadow box designs and bring your creative visions to life.