Articles14 min read

How to Make Heirloom Paper Christmas Ornaments with Vellum

A progressive build guide for vellum Christmas ornaments — beginner silhouettes to advanced backlit scenes — with the real cut settings, adhesives, and lighting that took my first forest ornament from a torn mess to a piece I now hang every December.

Layered paper-cut Christmas tree shadow box with ornament cutouts glowing warmly

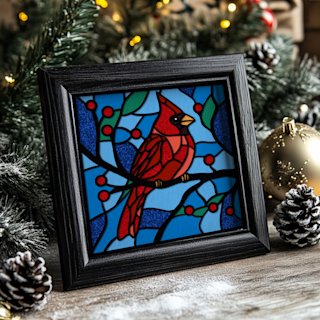
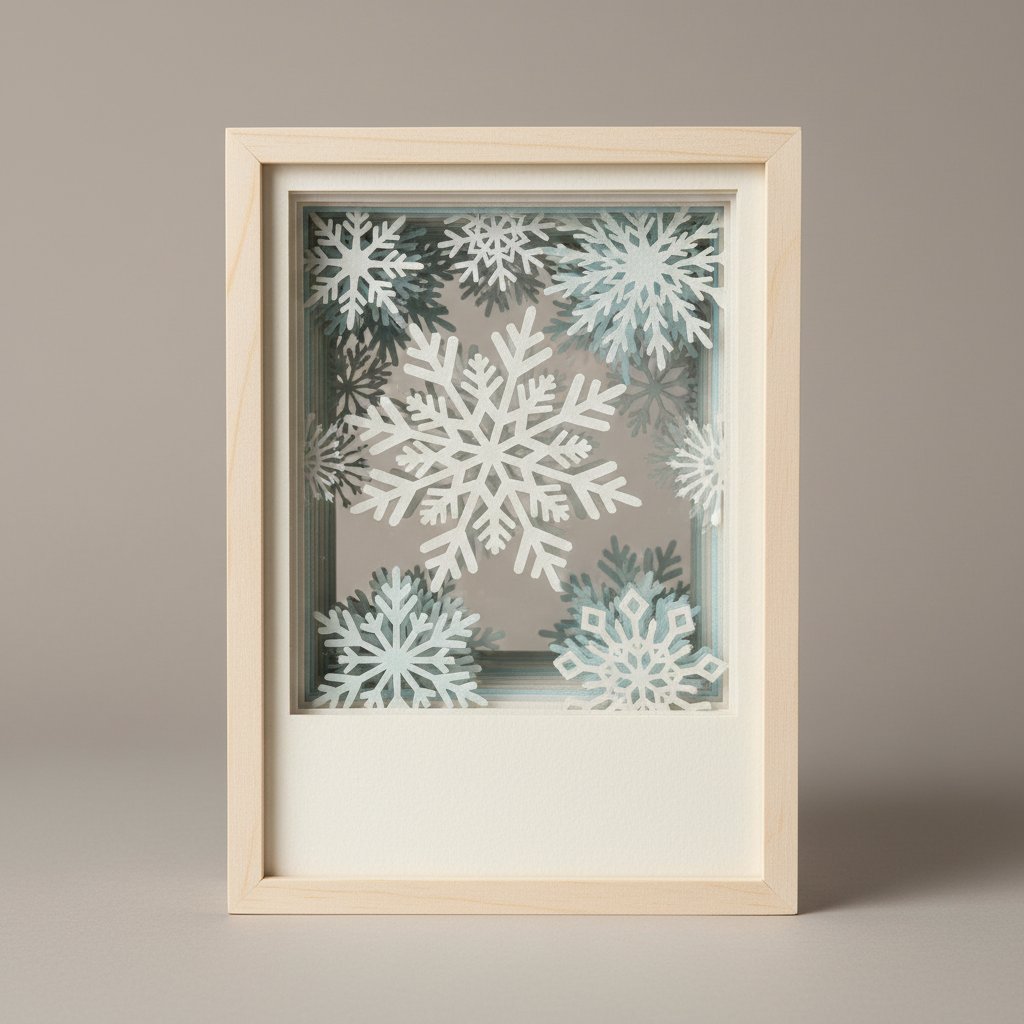
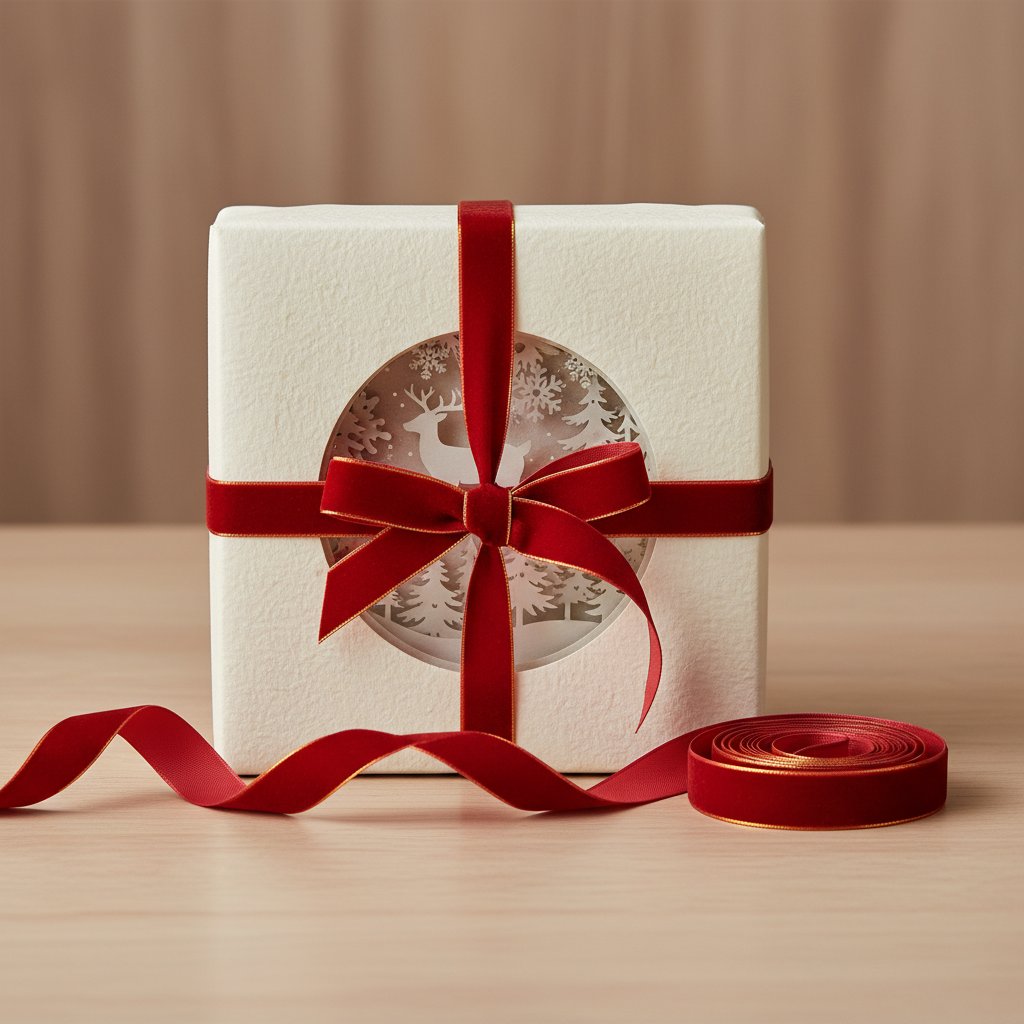
Heirloom paper Christmas ornaments are the ones that come out of the box year after year and still make you stop and look. The secret is not a rare paper or a clever file — it is vellum. That thin, translucent sheet turns a flat cut into something that glows when the tree lights hit it, and it is the single material that elevates a paper ornament from "nice craft" to "keep this forever."

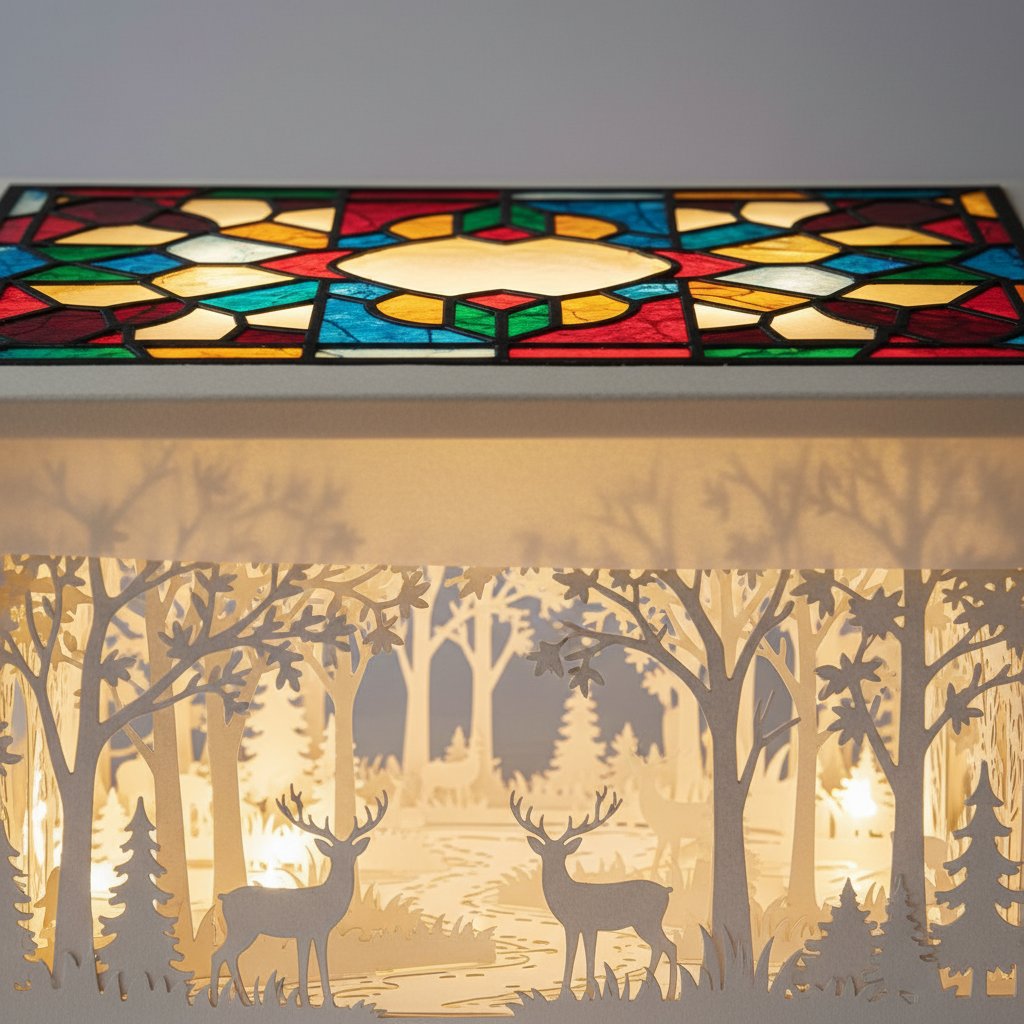
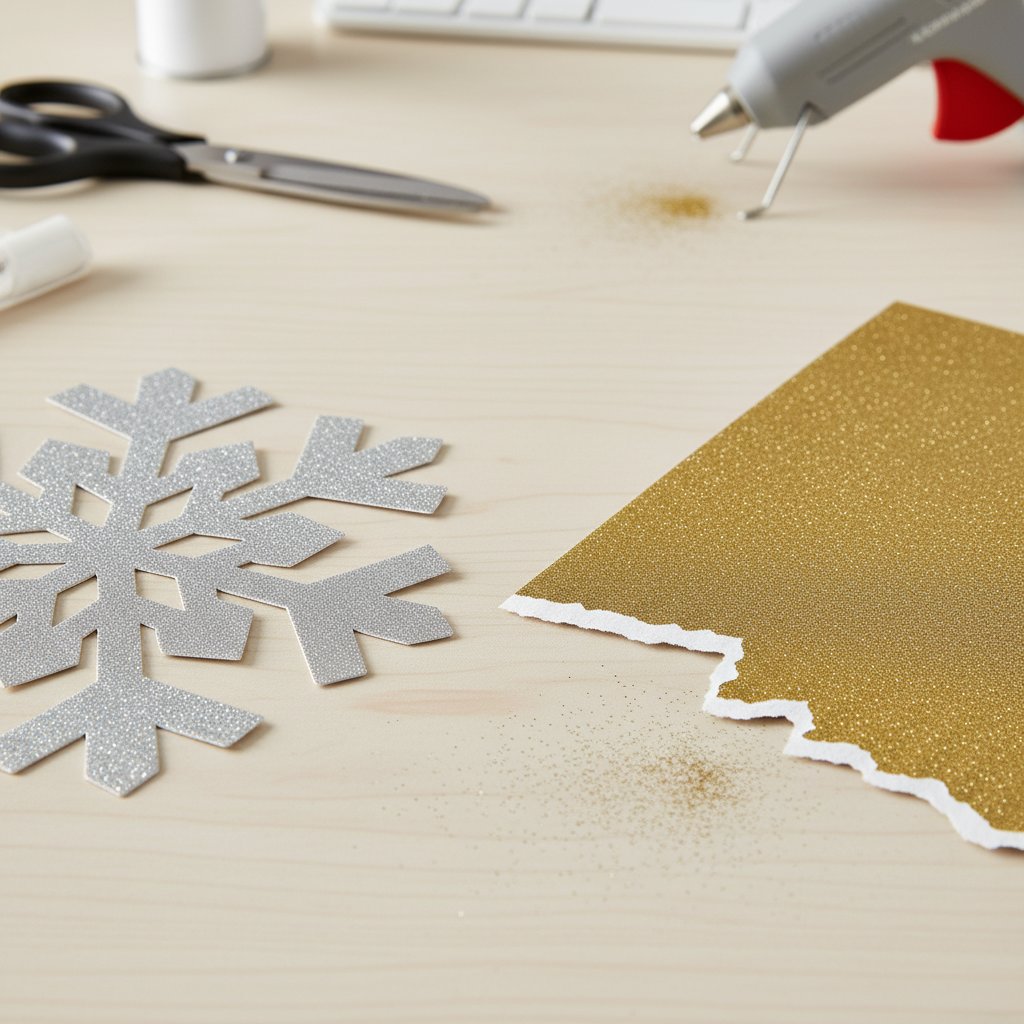
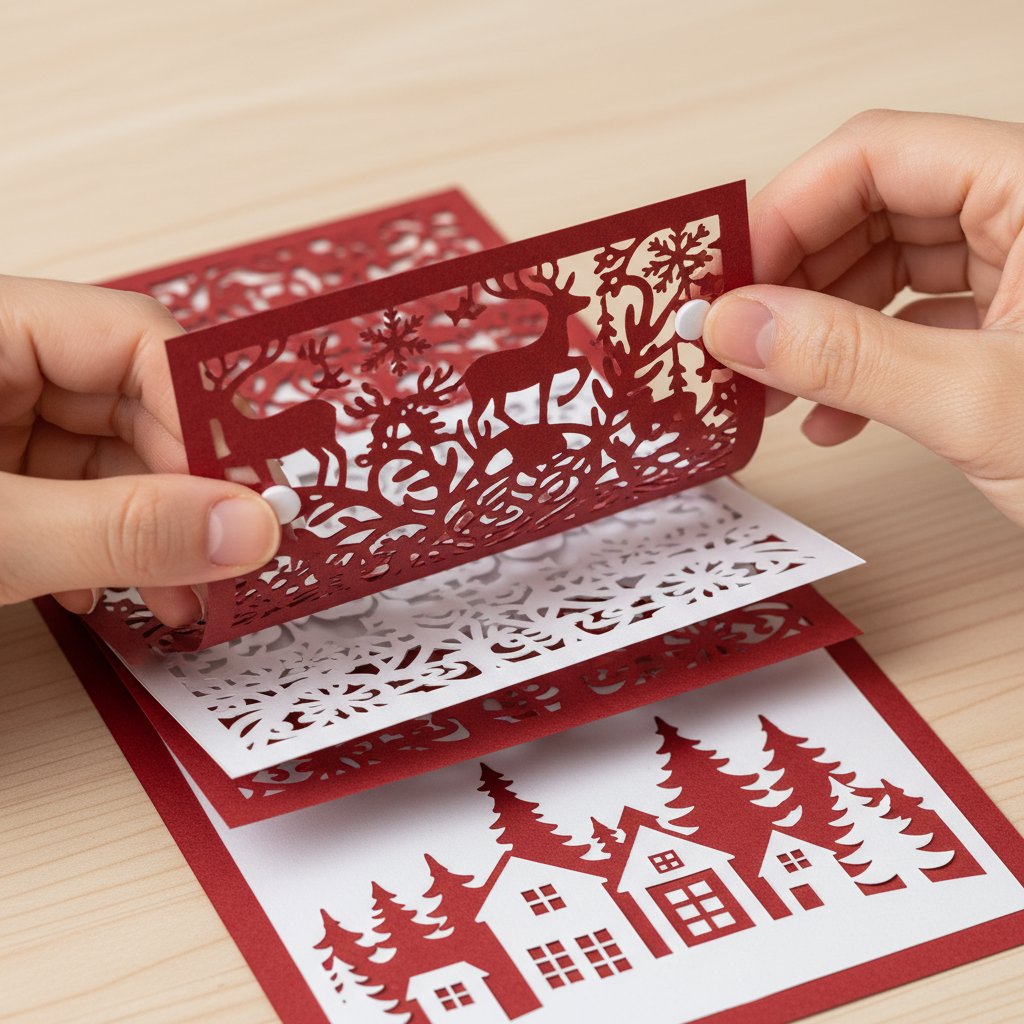
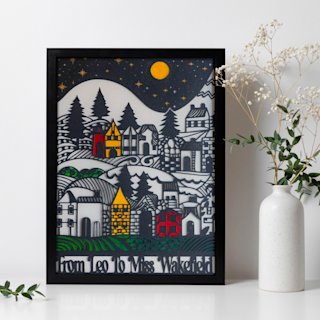
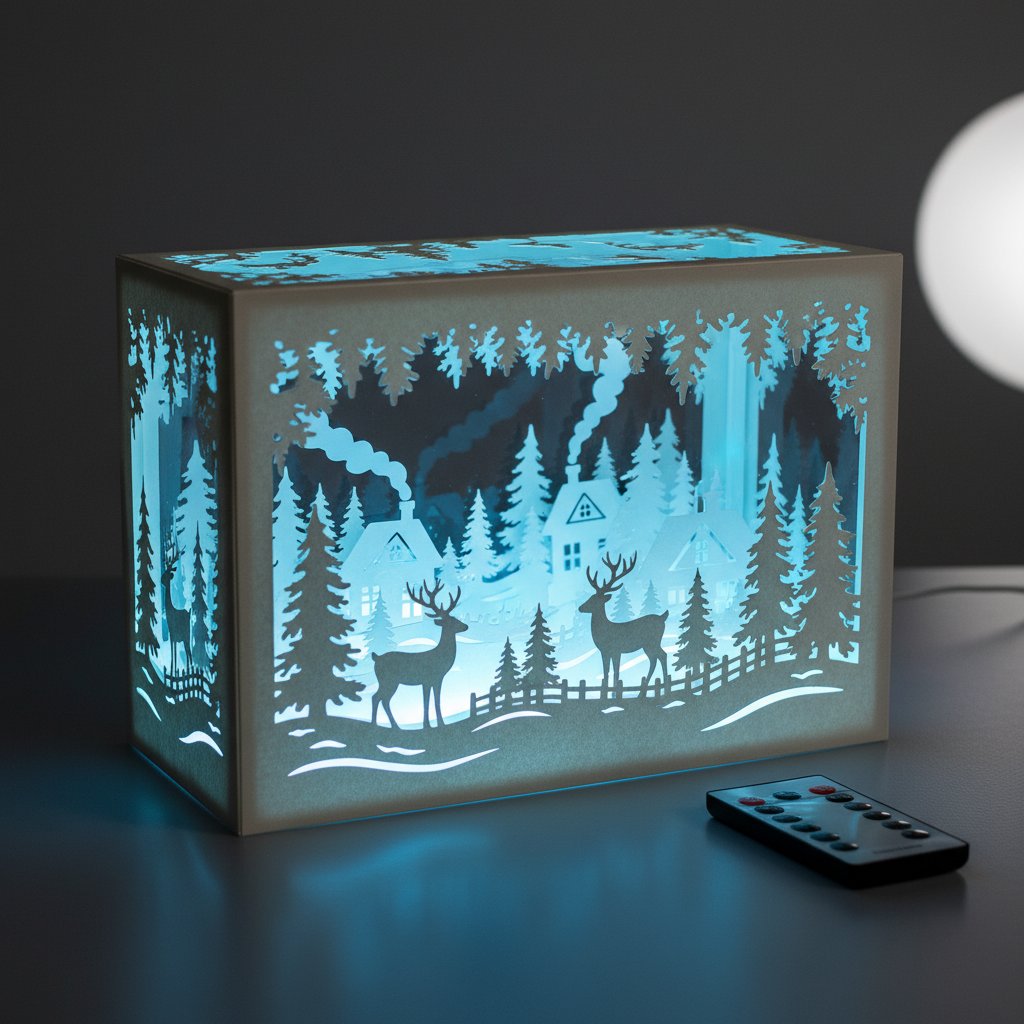
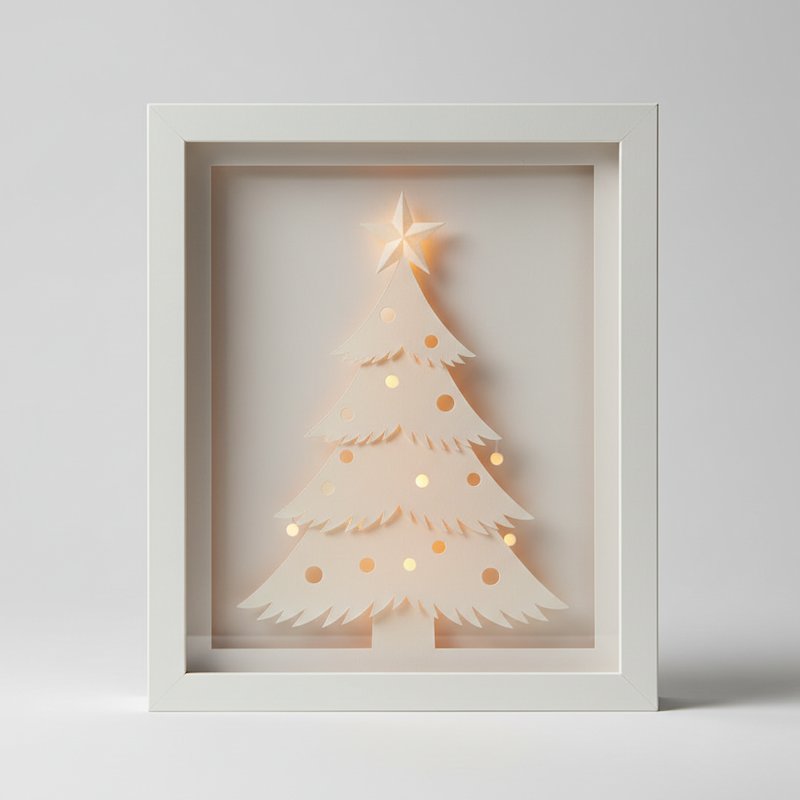
This is a progressive guide. We start with one-layer silhouettes a beginner can cut in an afternoon, move to two-layer scenes with real depth, and finish with multi-layer backlit ornaments that throw soft shadows across the whole room. Every setting and adhesive in here comes from a real build — most from a five-layer deer-in-the-forest vellum ornament I cut and assembled for my own tree, including the three sheets I ruined before it worked. If you want the full material science behind vellum before the holiday projects, our advanced vellum cutting guide covers weight, finish, and blade behaviour in detail. Here we use all of that on one seasonal goal: ornaments worth passing down.

What Makes a Paper Ornament "Heirloom"

An heirloom ornament is built to last, not to survive one season. Three things separate it from a quick holiday craft.

Material quality. Acid-free cardstock, real paper vellum (not a plastic tracing sheet), and archival-safe adhesives. Cheap paper yellows and goes brittle within two or three years; archival stock stays clean for decades. I have vellum ornaments from 2019 that look the same as the day I cut them because I used the right paper and stored them flat.

Thoughtful construction. Layers bonded at stress points, not glued edge to edge. Reinforced hanging points so the thread never tears through a delicate top layer. A little structural thinking up front is the difference between an ornament that survives being packed and one that arrives at the new house in pieces.

Design with depth. This is where vellum earns its place. A single cut silhouette is pretty. Add a translucent vellum layer behind it and the whole piece glows when light passes through. That light-diffusing effect is the visual signature of an heirloom paper ornament — it is what makes people lean in and touch the frame.

A layered paper shadow box with a translucent colored acetate stained-glass top and warm vellum-diffused backlight

The vellum in that image is doing the job vellum does best: scattering light so every cut edge reads as a soft halo instead of a hard line. The rest of this guide is how to get that effect, reliably, at three skill levels.

Choosing Vellum for Christmas Ornaments

Not all vellum is right for ornaments, and the weight you pick changes both how it cuts and how it glows.

The Finishes That Suit Holiday Work

| Finish | Look on a tree | Best ornament use | |--------|----------------|------------------| | Clear / smooth vellum | Clean, glassy glow | Diffusers, layer-blending, snow and ice effects | | Parchment vellum | Antique, softly mottled | Nativity, vintage, "old-world" heirloom pieces | | Metallic vellum | Shimmer in tree lights | Toppers, stars, premium accents | | Pearlescent vellum | Colour-shift as it turns | Floating ornaments, suncatcher styles |

Weight Decides Everything

  • 17–21 lb vellum: the delicate overlay weight. Glows beautifully but tears easily and will not hold a shape on its own. Use it layered over cardstock, never as a standalone ornament layer. - 24–29 lb: the sweet spot for cutting ornaments. Holds a bridge, still translucent, survives handling. Start every heirloom project here. - 30+ lb cover vellum: stands on its own in a frame, but loses glow with every added layer. Reach for it only on structural back layers.

The deer-in-forest ornament I keep referencing is built on 24 lb clear vellum for the glowing tree and sky layers, with a 30 lb parchment-vellum backer so the whole piece has a faint antique warmth. That combination is now my default for any ornament meant to look decades older than it is.

Start With a Single-Layer Vellum Silhouette
The fastest way to feel that heirloom glow is to cut one bold silhouette on 24 lb vellum and hold it up to a string of tree lights. The Mind Tree head and the Snowman both cut clean as standalone vellum pieces — cut once, back with cardstock, hang with gold thread.

Beginner: One-Layer Silhouette Ornaments

A one-layer vellum ornament is a single cut shape — a snowflake, a star, a tree, a simple figure — backed with cardstock for stability and hung so light passes through the vellum. This is where heirloom-quality work starts, and honestly it is the project I make most often, because a clean silhouette in quality paper already looks better than most store-bought ornaments.

The Build

  1. Cut the silhouette on 24 lb vellum. One LightGrip blue mat, a fresh fine-point blade, the "Washi Sheet" setting, MultiCut at 2×. (Full settings are in the next section.) 2. Cut the same file on cardstock one size larger as a backer ring, or cut a solid cardstock back and trim a window so only the vellum shows from the front. 3. Bond edge-only. Run a thin line of vellum tape runner only where the backer will cover it. Nothing shows through the translucent layer. 4. Hang it. A single loop of gold wire or invisible thread through a reinforced top tab. Reinforce the hole with a tiny glue dot or a small brad so the thread never cuts through.
Single layered paper-cut red rose silhouette shadow box in a square frame

That rose silhouette shows the effect at its purest: one layer, one material, and the translucency does all the visual work. On a tree, with lights behind it, a single vellum silhouette looks fragile and luminous in a way cardstock alone never manages.

Three Starter Shapes

  • Snowflake — symmetrical, forgiving, and the cut edges catch light like real frost. - Star — the classic; cut two and sandwich them for a 3D point. - Simple tree or figure — the Mind Tree head reads as art, not craft, on vellum.

If you are brand new to the machine, cut a few practice silhouettes from scrap first. Our free Christmas SVG files include ornament-scale shapes that are a perfect starting set, and most need no resizing.

Machine Settings for Tear-Free Vellum Ornaments

Cricut machine precisely cutting an intricate Christmas snowflake from white cardstock

Vellum punishes shortcuts. My first holiday silhouette tore in three places because I ran it on a green StrongGrip mat at cardstock pressure with a blade I should have swapped a month ago. The settings below are what I settled on after that mess, and they have not failed me on an ornament since.

The Setup That Works

  • Mat: LightGrip (blue). A slightly-used blue mat grips vellum better than a fresh one, which can be too tacky and curl the sheet on removal. - Material setting: "Washi Sheet," or a custom setting based on "Light Cardstock, 50 lb." - Pressure: one notch below default. If a cut tears, drop pressure before changing anything else. - MultiCut: 2×. A second pass cleans the edge; 3× starts to fray it. - Blade: a fresh fine-point, reserved for vellum only. I label the housing with tape.

Pressure by Vellum Weight

| Vellum weight | Mat | Pressure | MultiCut | |---------------|-----|----------|----------| | 17–21 lb | LightGrip (blue) | Light | 2× | | 24–29 lb | LightGrip (blue) | Light–Medium | 2× | | 30+ lb | LightGrip or StandardGrip | Medium | 2× |

Always Test Cut First

Before any ornament run, cut a small corner square from the same sheet. You are checking three things: does it cut through, are the edges crisp, and — the vellum-specific one — does the sheet peel off the mat without curling? If the test curls, press a clean cotton t-shirt to the mat once to de-stick it, then retest. For the full per-paper reference behind these numbers, our Cricut settings mastery guide breaks down every material type.

Troubleshooting the Five Vellum Failures

A cleanly cut silver glitter snowflake beside a gold glitter sheet with a rough torn incomplete edge on a craft desk

Almost every vellum ornament problem is one of these five. Here is the order to fix them.

Tearing on intricate cuts. Too much pressure, a dull blade, or a mat that is too sticky. Drop pressure one notch, fit a fresh fine-point blade, confirm a LightGrip mat. On very fine filigree, slow the cut or switch to the rotary blade on a Maker — it slices instead of dragging.

Incomplete cuts. Usually under-pressure or an old blade. Raise pressure a little, enable MultiCut 2×, or move up one vellum weight. Do not just max the pressure — that swings you straight back into tearing.

Shifting mid-cut. The mat lost tack in one spot, or the sheet is wider than the mat. Re-stick or replace the mat and tape the corners with low-tack washi tape so the rollers do not catch a loose edge.

Fuzzy or scuffed edges. The blade is dragging through dense fibres. Replace it and reduce pressure. On metallic or pearlescent vellum, clean the blade with a crumpled ball of aluminium foil between cuts to clear coating buildup.

Curling on removal. The mat is too tacky for the weight, or you pulled too fast. Peel the mat away from the vellum (flip and bend the mat back), not the vellum off the mat. Store the cut flat under a book right away. For a full decision tree on cut-through and tearing problems that also apply to vellum, our best Cricut blade guide covers blade choice and sharpness in depth.

Intermediate: Two-Layer Scene Ornaments

A two-layer ornament adds a scene: a house with snow, a cardinal on a branch, a winter village street. The front layer is a cardstock silhouette cut; the back layer is vellum, and the gap between them is where the glow lives. This is the build that makes people ask where you bought it.

Designing for Depth

  • Front layer: cardstock silhouette, cut clean, with enough solid border to hold its shape. - Back layer: 24 lb vellum, sized to sit 2–3 mm behind the front. That small air gap is the whole trick — without it, the vellum sits flat and the depth disappears. - Registration: add two tiny alignment crosses to both files. Match the crosses first, then bond. It takes thirty seconds and saves the whole project.
Hands adding foam adhesive dots between layers of a Christmas paper-cut shadow box

Those small foam dots are doing two jobs at once: holding the 3 mm gap that creates the depth, and hiding the adhesive behind solid parts of the silhouette so nothing shows through the vellum. Place them only behind petals, rooftops, tree trunks — anywhere the design sits on top of the glue.

Bonding Without Show-Through

Vellum is translucent, which means every drop of glue is visible from the front. The rule for two-layer work: bond only at points the front silhouette covers. Foam dots, a thin tape-runner line behind a solid border, or a light spray-adhesive mist on the cardstock back (never on the vellum) all stay invisible. Avoid liquid glue — it wrinkles vellum and shows as a greasy streak. For the complete bonding reference across every paper craft, our glue and adhesive guide ranks adhesives by visibility and material.

Build a Two-Layer Winter Scene
The Christmas Village and the Red Cardinal are built for two-layer vellum work. Cut the silhouette on cardstock, back it with 24 lb vellum on 3 mm foam dots, and the village windows and the cardinal's breast glow warm behind the cut.

Advanced: Multi-Layer Backlit Ornaments

This is the heirloom tier. A multi-layer backlit ornament uses four to six layers — front silhouette, two or three vellum mid-layers for colour and diffusion, a cardstock back, and a hidden light source. Built well, it is a small illuminated scene you can hang on a tree. This is exactly how I built the deer-in-the-forest ornament I keep coming back to.

The Deer Forest Build (Five Layers)

Side cross-section of a layered Christmas paper-cut shadow box showing sturdy base and delicate top layers

From back to front, the layer stack is:

  1. Back cardstock — structural base, 80 lb, with a small channel for the LED wire. 2. Warm-white LED strip — a short 2700K segment run along the bottom edge, battery pack tucked behind the base. 3. Vellum diffuser — a full sheet of 21 lb clear vellum between the LEDs and the design. This single sheet turns harsh LED dots into an even glow. It is the most important layer in the whole build. 4. Two vellum mid-layers — a 24 lb parchment-vellum forest cut, then a paler 21 lb snow-sky layer. Separated by 3 mm foam dots each, so light pools between the trees. 5. Front silhouette — the deer, birds, and foreground trees cut from 80 lb cardstock.

What I Learned (the Hard Way)

  • Three layers of vellum is the ceiling. I tried five on an early version and the stack went milky and lost all glow. Two to three translucent layers is the sweet spot. - Lightest tint on top, most saturated underneath. Light passes through every layer down to the backing colour, so order controls the whole mood of the piece. - The diffuser sheet is non-negotiable. Without it, the LEDs read as five glaring dots through the vellum. With it, the same lights become a smooth dawn behind the trees. - Leave an air gap at the top. LEDs stay cool, but any fully enclosed paper piece needs a small vent so warm air can rise out. Never use incandescent or halogen — vellum is paper, and paper plus heat is a fire hazard.
A paper-cut winter shadow box illuminated with cool blue RGB LED lighting glowing through the cut layers

That winter piece shows the colour-shift you can pull off once the layering and lighting are under control — a cool LED behind a warm vellum stack reads as moonlight on snow. For the full wiring, battery, and heat walkthrough behind any lighted paper piece, our safe LED guide is the step-by-step reference I used to wire the deer ornament.

Take It Backlit: Forest and Nutcracker Scenes
The Christmas Deer with Birds and the Nutcracker are dense, detailed scenes built for multi-layer vellum work with a hidden LED. Cut the forest layers on clear vellum, drop a warm strip behind the diffuser sheet, and the whole scene glows like a lit window.

Lighting Vellum Ornaments Safely

Backlighting is what turns a vellum ornament from "pretty" to "heirloom," and the good news is it is genuinely simple — as long as the light is cool.

Placing a flameless battery LED tea light inside a paper lantern for safe lighting

Pick the Right Light

  • Warm-white LED tea lights (2700K): the easiest, safest choice for any enclosed ornament. Battery-operated, cool to the touch, and they tuck behind a backer card. - Copper-wire fairy lights: best for soft, scattered glow inside lantern-style ornaments. Cheap, battery-powered, and they stay cool. - Short LED strip segments: what I use in the multi-layer deer build. Dimmable, low-heat, run along the inner base edge. - Never incandescent, halogen, or real flames. Vellum is paper. The whole point of an heirloom is that it lasts — do not set it up to burn.
Warm-white LED fairy lights switched on and glowing on a tabletop during a safety test before installation

The Diffuser Trick (Again)

Bare LEDs show as harsh dots through vellum. One full sheet of clear vellum between the light and the cut layer softens those dots into an even glow. I use this on every backlit piece now — it is the single biggest upgrade you can make, and it costs one sheet of paper.

Finish and Gift Your Heirloom Ornaments
The Christmas Gift Card Set and the Gingerbread House cut beautifully on vellum and backings, and they gift as well as they hang. Cut a set on quality paper, wrap flat between boards, and you have a handmade present that looks far harder than it is.

Finishing, Hanging, and Storing Heirloom Ornaments

How you finish and store an heirloom ornament is half of why it survives to become an heirloom at all.

Hanging Methods That Last

  • Gold wire or fine cord: the heirloom default. Loop through a reinforced top tab and it holds the ornament's weight without cutting the paper. - Invisible thread: for floating, "how is that hanging?" pieces. Reinforce the hole with a glue dot or brad so the thread does not slice through the top layer over the years. - Velvet ribbon: for a rich, traditional look on larger pieces. Knot, do not glue.

Display Away From Direct Sun

Vellum yellows in UV and warps in humidity, so where you hang an heirloom matters. A spot lit by tree lights but out of direct afternoon sun is ideal. For the full preservation reference — UV, humidity, framing — our preserving paper art guide covers long-term care across every paper type.

Finished handmade Christmas paper-cut shadow box wrapped as a personal gift with ribbon

Store Flat, Dry, and Separated

This is the step most people skip, and it is the reason ornaments do not survive the year. Store each ornament flat between two pieces of stiff board, with acid-free tissue between layers, in a dry box with a silica gel packet to hold humidity steady. Never stack heavy things on top, and never lay a finished vellum piece loose in a bag — one crease and the translucency amplifies it across the whole panel. Handle cut pieces by the outer border; cotton gloves for final assembly stop the thumbprint that ruins the last layer.

Finished glowing layered Christmas paper-cut shadow box centerpiece displayed on a mantel

Built well and stored right, a vellum ornament like that mantel piece is the one your family will reach for first every December — and the one you will still be hanging in twenty years.

1.Can I cut vellum for Christmas ornaments on a Cricut Explore, or do I need a Maker?
Both work. The Explore handles single-layer and two-layer ornaments cleanly. For the intricate multi-layer backlit scenes with very fine detail, a Maker with the rotary blade option gives cleaner cuts on curves and lets you slice instead of drag on delicate filigree. For either machine, use 24–29 lb vellum, a LightGrip blue mat, and a fresh fine-point blade.
2.What Cricut setting should I use for vellum ornaments?
Start with the "Washi Sheet" material setting, or a custom setting based on "Light Cardstock, 50 lb," on a LightGrip mat with a fine-point blade and MultiCut at 2×. For 30+ lb cover vellum, move pressure up to medium. Always run a corner test cut on the same sheet first — if it curls on removal, de-stick the mat with a clean cotton t-shirt and retest.
3.How do I stop my vellum from tearing when I peel it off the mat?
Use a LightGrip (blue) mat, not a green StrongGrip one. Peel the mat away from the vellum — flip the mat and bend it back — rather than pulling the vellum off the mat. For very delicate pieces, use transfer tape or reverse-weed by lifting the mat off the cut. A slightly-used blue mat grips vellum better than a fresh, too-tacky one.
4.What adhesive will not show through vellum on an ornament?
For translucent vellum, use small foam adhesive dots placed only behind solid parts of the design, a thin vellum tape runner run along edges that will be covered, or a light repositionable spray adhesive misted on the cardstock backer (never on the vellum). Avoid liquid glue — it wrinkles the sheet and shows as a dark streak from the front.
5.How do I align multiple layers in a two-layer or multi-layer ornament?
Add two small registration crosses to every layer in your cut file. Match the crosses first, tack the layers together with temporary adhesive, then bond at the final anchor points. Use 3 mm foam dots between layers to hold the air gap that creates depth and gives the vellum room to glow.
6.Are battery LED lights safe inside a paper ornament?
Yes, as long as they are LED. Warm-white LED tea lights, copper-wire fairy lights, and short LED strip segments are all cool to the touch and safe for enclosed vellum pieces. Add a full clear-vellum diffuser sheet between the LEDs and the cut layer to turn harsh dots into an even glow, leave a small air gap at the top, and never use incandescent, halogen, or real flames.
7.What makes a paper ornament "heirloom" rather than just DIY?
Heirloom ornaments use archival materials — acid-free cardstock, real paper vellum, and archival-safe adhesives — plus thoughtful construction and light-diffusing design. Built and stored correctly, they last for decades instead of one season, which is the whole point: a piece meant to be passed down, not tossed in January.
8.How do I store vellum ornaments so they last for years?
Store each ornament flat between two stiff boards with acid-free tissue between layers, in a dry box with a silica gel packet to hold humidity steady. Keep them out of direct sunlight, never stack heavy items on top, and handle cut pieces by the outer border or with cotton gloves so skin oils do not shadow the translucent surface.

Where to Take Vellum Ornaments Next

The skill ladder here stacks with the rest of the craft. A few directions worth exploring once your silhouettes cut clean and your glue stays hidden.

Go deeper on the material. The weight, finish, and blade choices that make vellum behave are the same ones behind every paper project. Our advanced vellum cutting guide is the full material reference, and our layered shadow box assembly guide walks through spacers and registration in detail.

Build the light into the design. Backlighting an ornament is just the start. The same LED and diffuser thinking scales up to any winter piece — start with our safe LED guide.

Grow your holiday file library. Stained-glass florals, dense scenes, and single-layer silhouettes all translate to vellum. Browse our free Christmas SVG files for ornament-scale designs that suit translucent layering.

Protect what you make. Vellum yellows in UV and warps in humidity, so display and storage matter as much as the cut. Our preserving paper art guide closes that loop.

The short version: an heirloom paper Christmas ornament asks for real vellum, a fresh blade, a gentle mat, hidden glue, and — if you want the glow — a cool light behind a diffuser sheet. Give it those five things and it will be the ornament your family reaches for first, this December and every one after.