Articles9 min read

How to Make a Layered Paper Shadow Box with Cricut

A complete step-by-step tutorial — from importing your first layered SVG in Design Space to assembling a glowing shadow box you can hang tonight.

Simple floral silhouette shadow box with layered rose petals creating depth through backlighting

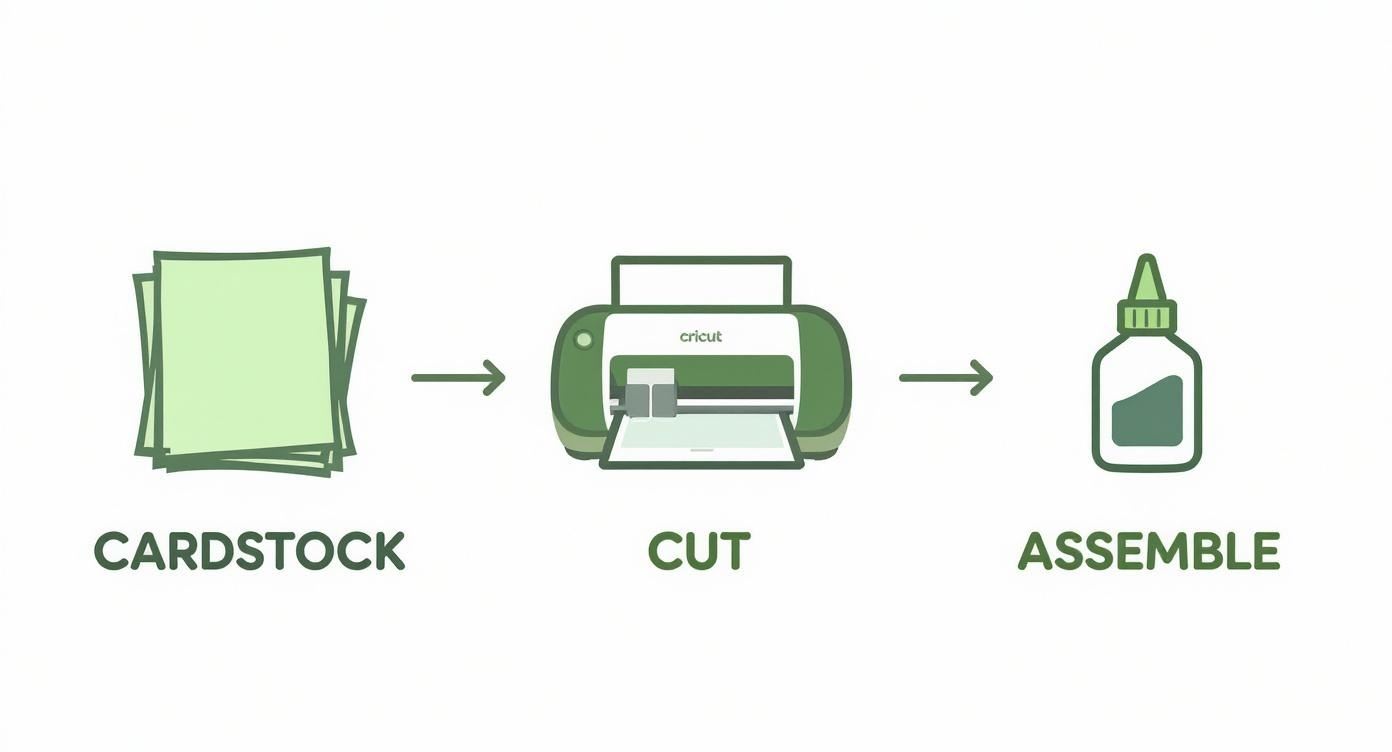
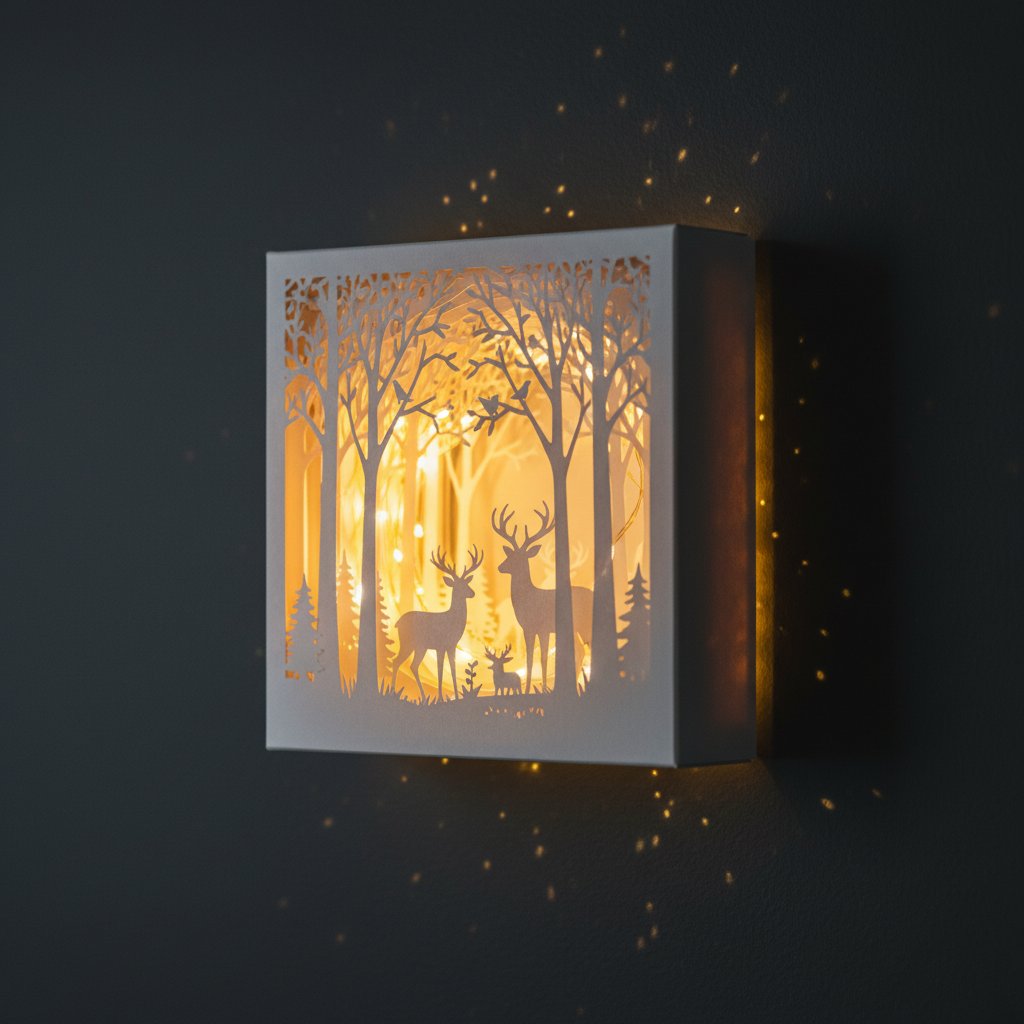
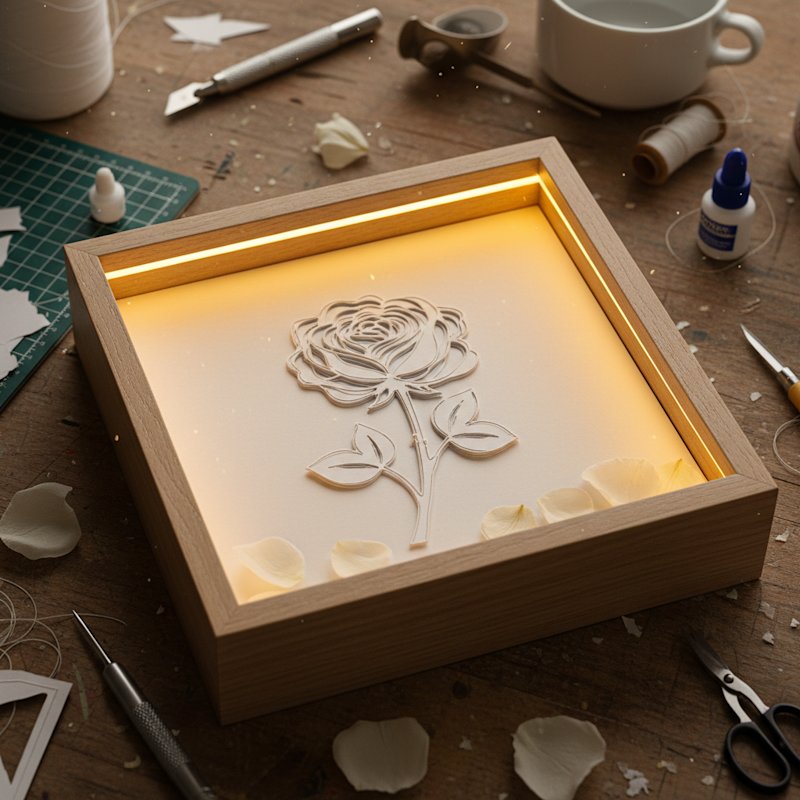
Making a layered paper shadow box with a Cricut is one of those projects that looks impossibly complex when you see the finished result — glowing layers of paper creating depth and dimension — but breaks down into straightforward steps once you know the workflow.

I made my first shadow box in 2024 using a 5-layer floral template and my Cricut Maker. It took me 90 minutes from opening Design Space to hanging the finished piece on the wall. My second one took 45 minutes. The learning curve is real but short, and this tutorial covers every step so you can skip the mistakes I made.

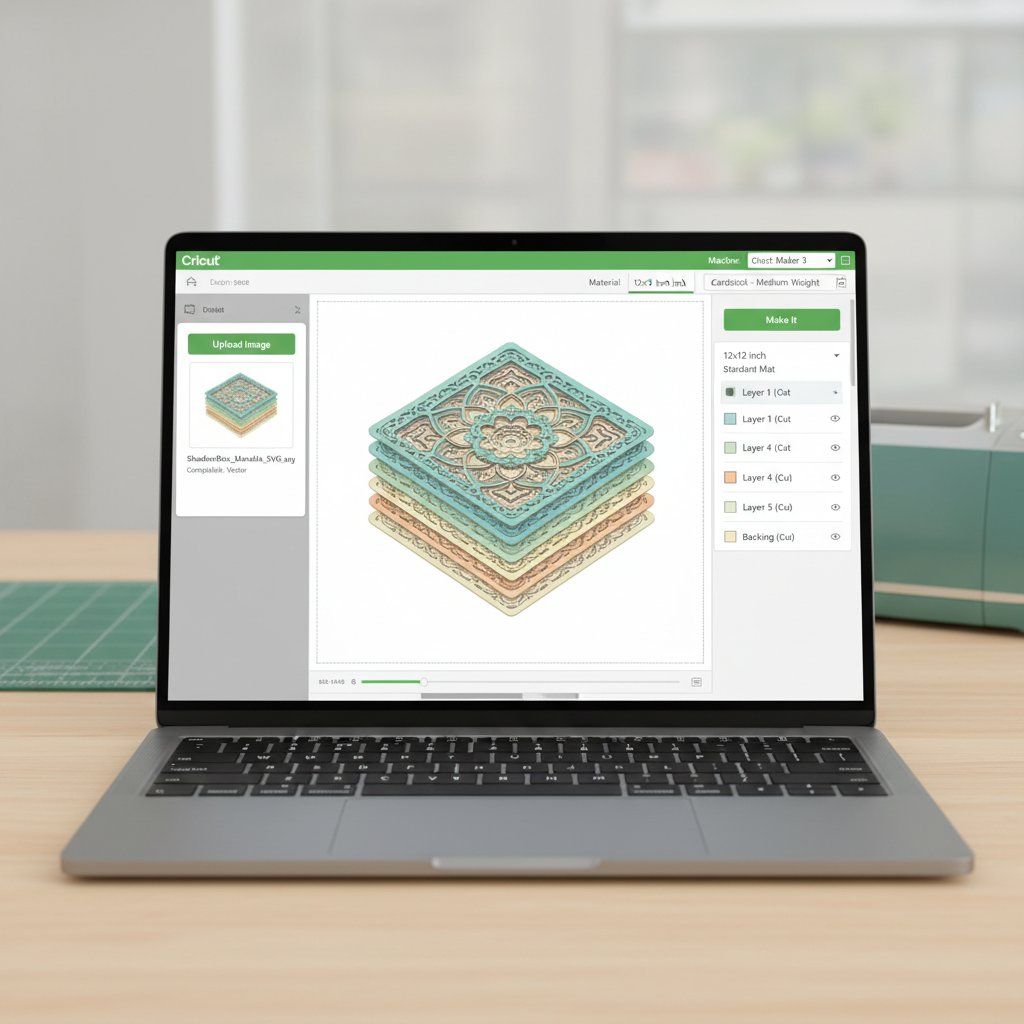
This guide follows the complete Cricut-specific workflow: importing a layered SVG into Design Space, organising and colour-coding layers, sizing to your frame, selecting the right cut settings, cutting in the correct order, and assembling everything into a finished shadow box with optional LED lighting.

What You Need Before You Start

Overhead flat lay of shadow box supplies including a frame colored cardstock foam dots and craft tools

Gather these supplies before you begin. Nothing here is expensive or hard to find:

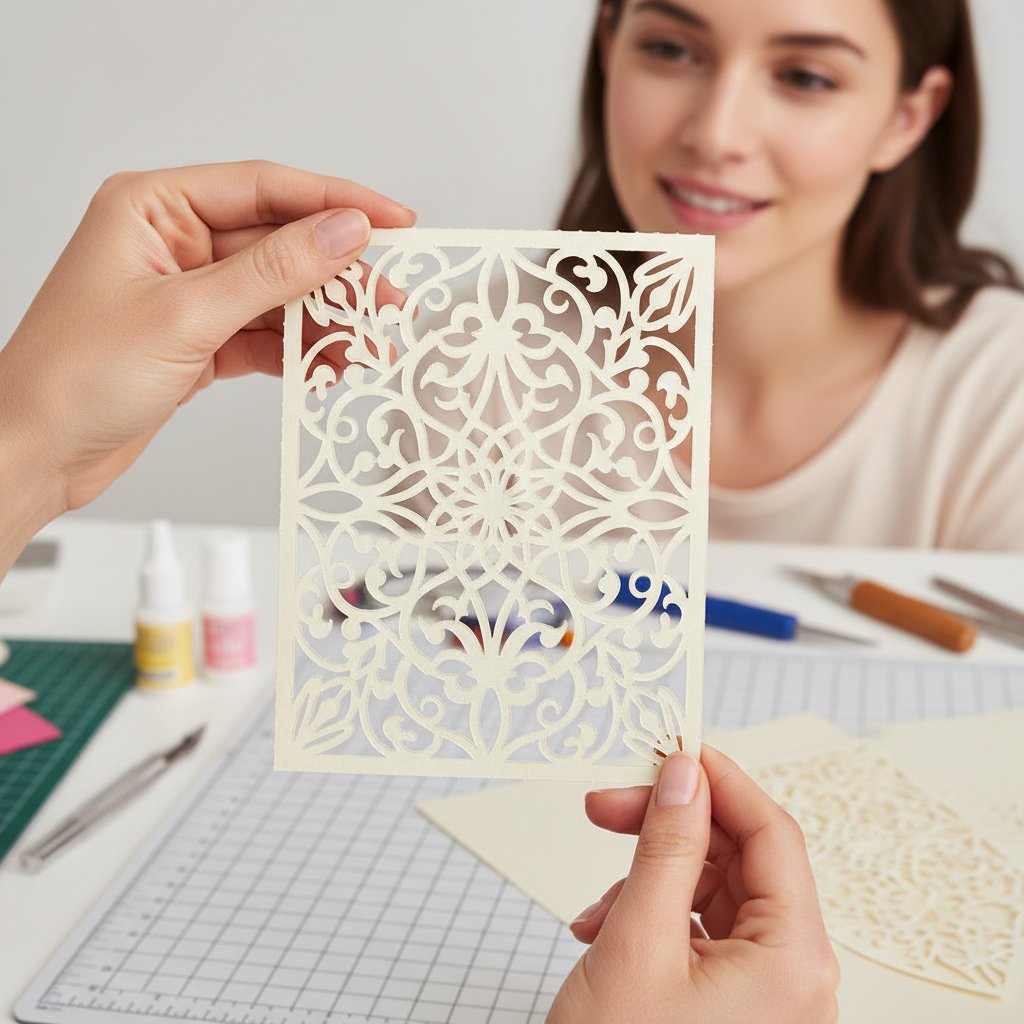
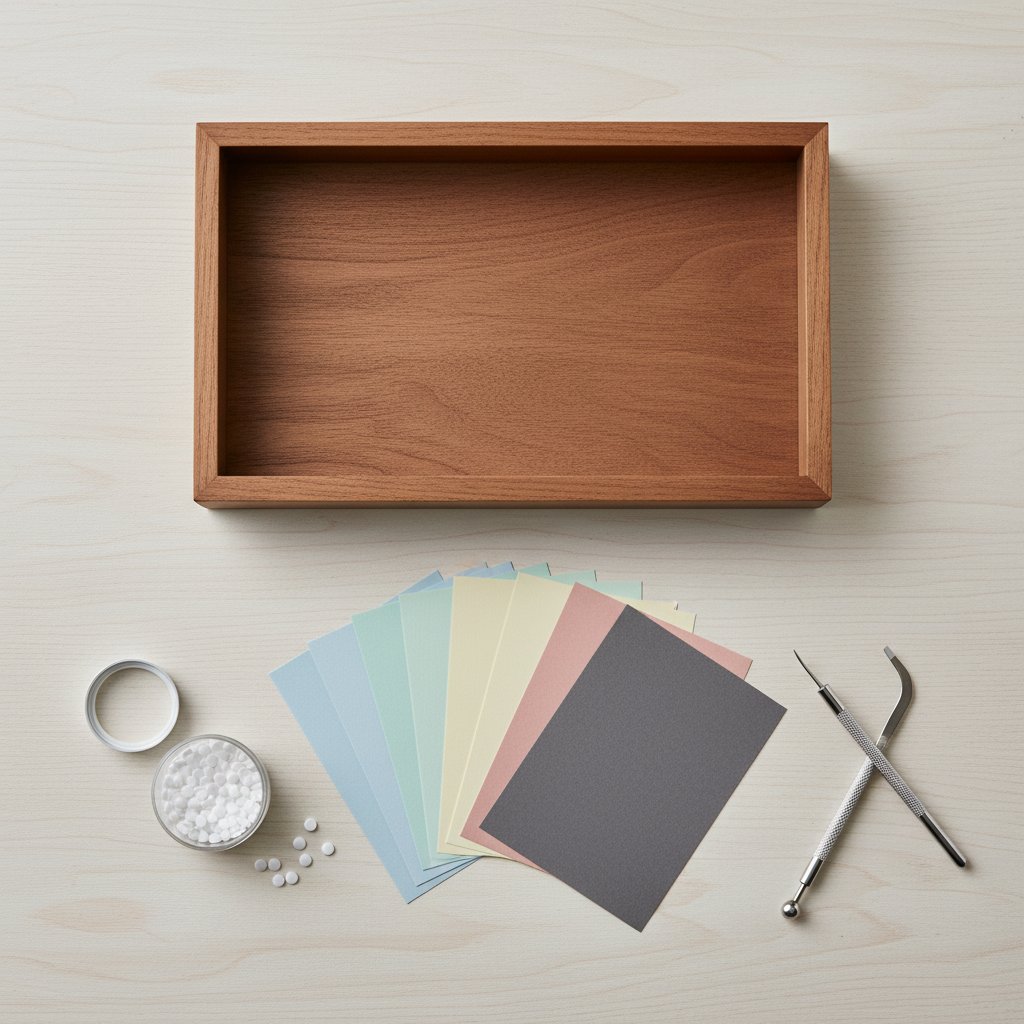
Materials: - A layered shadow box SVG template (I'm using a 5-layer design for this tutorial) - Cardstock in 4-5 colours (200-230 gsm — I cover exact recommendations below) - A shadow box frame, 8×8 inch or larger, with at least 1.5 inch depth - Foam adhesive squares or dots (3mm thick) - LED fairy lights (warm white, battery-powered)

Tools: - Cricut Maker, Maker 3, Explore Air 3, or Explore 3 - StandardGrip or LightGrip mat (depending on cardstock weight) - Fine-Point blade (or Deep-Point blade for 250+ gsm) - Spatula tool for removing cuts from the mat - Tweezers for small detail pieces

For detailed supply comparisons, see my Cricut cardstock settings mastery guide and my cardstock buying guide.

Step 1: Import and Organise Your SVG in Design Space

Three-step Cricut crafting process showing cardstock being cut with Cricut machine then assembled with glue

Open Cricut Design Space and start a new project. Click Upload in the left panel, then Upload Image, and select your layered SVG file. Most shadow box SVGs come as a single file with all layers grouped together.

Once uploaded and inserted onto your canvas, you'll see all layers stacked on top of each other. Here's how to organise them:

Ungroup the Layers

Select the entire design, right-click, and choose Ungroup. Each layer should now be individually selectable. A typical 5-layer shadow box has:

  1. Background layer — the solid back piece (no cutouts) 2. Layer 1 — furthest from the viewer, largest shapes 3. Layer 2 — middle ground elements 4. Layer 3 — foreground detail 5. Front frame layer — the decorative border with cutouts

Colour-Code Each Layer

Change the fill colour of each layer to match the cardstock you plan to use. This serves two purposes: it helps you visualise the final piece, and when you send layers to cut, Design Space groups them by colour. Click on a layer, then click the colour square next to "Operation: Basic Cut" and pick your colour.

I use dark navy for backgrounds, medium tones for middle layers, and lighter shades for the front frame. The contrast between layers is what creates the 3D depth effect.

For a deeper dive into SVG importing, see my guide to importing multi-layer shadow box SVGs in Design Space.

Practice this tutorial with the Mind Tree Papercut SVG — a single-layer design that's perfect for your first shadow box build. Clean lines, easy cutting, and a striking result when layered with a solid backing and LED lights.

Step 2: Resize for Your Frame

Cricut Design Space canvas showing layered shadow box SVG with colour-coded layers sized to 7 inches

The most common mistake beginners make is cutting layers at the wrong size. Every layer must fit inside your frame with proper margins.

Measure Your Frame

Open the back of your shadow box frame and measure the visible area — the space between the inner edges of the frame, not the total frame size. An 8×8 inch frame typically has a 7×7 inch visible area. Write this number down.

Resize All Layers

Select all layers at once (drag a selection box around everything). Click the lock icon to maintain proportions, then type your visible area measurement into the width field. All layers scale together — this is critical. If you resize layers individually, they won't align during assembly.

Check Mat Constraints

Your Cricut mat has a maximum cutting area. For a 12×12 inch mat, the max cut size is about 11.5×11.5 inches. If your design exceeds this, you'll need a larger frame or a 12×24 inch mat. Most beginner shadow boxes use 8×8 or 9×9 inch frames, which fit comfortably on a standard mat.

For more on sizing SVGs for different frame dimensions, see my resizing guide for shadow box SVGs.

Step 3: Choose Cardstock and Cut Settings

A fresh sharp craft knife making a clean precise cut through dark cardstock on an intricate floral papercut design

The right cut settings make the difference between clean, crisp cuts and torn, fuzzy edges. Here's what works for shadow box cardstock.

Cardstock Recommendations

For shadow boxes, I recommend 200-230 gsm cardstock. This weight is rigid enough to stand upright between spacer layers but not so thick that it resists intricate cuts.

  • Background layer: 230-250 gsm (needs to be the stiffest — it bears the weight) - Middle layers: 200-216 gsm (standard cardstock weight) - Front frame: 200-216 gsm (needs clean detail cuts)

Avoid anything over 250 gsm for intricate cutout layers — the blade struggles on tight corners and you get ragged edges.

Design Space Cut Settings

For 200-216 gsm cardstock, use the built-in "Cardstock (for Intricate Cuts)" setting. This uses the Fine-Point blade with a pressure of around 320. If you have a Maker, use the Custom setting and search for your specific cardstock brand — the Adaptive Tool System adjusts pressure dynamically.

Key settings checklist: - Blade: Fine-Point (or Deep-Point for 250+ gsm) - Multi-cut: Off (one pass is enough with a fresh blade) - Pressure: Default for "Cardstock (for Intricate Cuts)" - Mat: StandardGrip for 200-216 gsm, StrongGrip for 230+ gsm

Blade freshness matters. A dull blade is the number one cause of torn cardstock. Replace your Fine-Point blade after 30-40 cuts on cardstock. For detailed blade comparisons, see my Cricut blade guide for cardstock.

Step 4: Cut Each Layer in Order

You'll cut one layer at a time, swapping cardstock colours between cuts. Here's the most efficient order.

Cut from Back to Front

Start with the background layer (no cutouts, just a solid rectangle). This is your quickest cut and lets you verify your settings are correct. If the background cuts cleanly, your settings are right for the rest.

Next, cut Layer 1 (furthest back, usually the simplest cutout pattern). Then Layer 2, Layer 3, and finally the front frame layer (the most intricate piece). Cutting back to front means if you make an error, you've only lost the simpler layers.

Between Each Cut

  1. Remove the cut piece from the mat using the spatula tool — don't peel with your fingers, which can curl the cardstock. 2. Wipe the mat with a lint-free cloth to remove paper fibers. 3. Place the next colour cardstock on the mat, smoothing from center to edges. 4. In Design Space, hide the layers you've already cut (click the eye icon) and make only the current layer visible. 5. Click "Make It" and confirm the mat layout.

Handling Intricate Cuts

Close-up of intricate paper-cut detail being carefully lifted from a Cricut cutting mat with a spatula tool

The front frame layer usually has the finest detail. If small pieces get stuck in the cardstock, don't force them out — flip the mat upside down and peel the mat away from the cardstock (not the other way around). This prevents tearing.

If your Cricut misses small cuts on the front layer, try a second pass by selecting the layer and running "Make It" again without removing the cardstock from the mat. The blade retraces the same paths, cutting through any spots that didn't separate on the first pass.

For detailed troubleshooting of cut quality issues, see my cutting guide for shadow box layers.

Ready to move beyond basics? The Magical Fox Shadow Box SVG is a crowd favourite — layered woodland details that look amazing with a warm LED glow. It's a perfect second project after you've mastered the basics in this tutorial.

Step 5: Assemble Your Shadow Box

Deep shadow box with an ornate layered papercut floral border framing hand-lettered art

Assembly is where flat cutouts become a 3D piece. The key is consistent spacing between layers.

Prepare the Frame

Remove the back panel from your shadow box frame. Clean the glass inside and out — fingerprints show up dramatically when the LED lights are on. Place the frame face-down on your work surface.

Layer Order: Back to Front

  1. Background layer. Place it face-down against the inside of the frame's back panel. Secure with double-sided tape at the corners. This layer sits at the very back.

  2. Layer 1. Apply foam adhesive squares at the corners and 2-3 points along the edges. Press it onto the background layer, aligned with the edges. The foam squares create the spacing that gives the shadow box its depth.

  3. Layer 2. Same process — foam squares on the back, align, press. Each layer sits on foam spacers above the previous one.

  4. Layer 3. Continue the pattern. By now, you should see the depth building up.

  5. Front frame layer. This goes last, closest to the glass. Apply foam squares and press it into position.

Alignment Tips

The alignment doesn't need to be pixel-perfect — shadow boxes are forgiving because the depth hides small misalignments. But the edges should line up within 1-2mm. If a layer shifts, you can gently lift it (foam squares release with careful pressure) and reposition.

I use two alignment markers: I line up the top edge first, then check the left edge. Once those two are flush, the rest follows naturally because all layers were cut at the same size.

Add LED Lights (Optional)

Illuminated layered paper-cut shadow box glowing warmly on a wall with fairy lights behind

Drape warm-white LED fairy lights across the back of the frame, between the background layer and the frame's back panel. The lights sit behind the paper layers, creating a warm glow that shines through the cutouts. Tuck the battery pack into the bottom corner of the frame.

For detailed LED installation instructions and safety tips, see my LED lighting guide for shadow boxes.

Common Issues and Quick Fixes

Even experienced crafters hit snags. Here are the most common problems and how to solve them mid-project.

Torn edges on intricate cuts: Your blade is dull or your pressure is too high. Replace the blade first (it's the fix 80% of the time). If tearing persists, reduce pressure by 10-15 units in custom settings.

Cardstock curling on the mat: High humidity or old mat adhesive. Flatten the cardstock under heavy books for 30 minutes before cutting. Use a brayer to press the cardstock firmly onto the mat before cutting.

Layers not aligning: You probably resized layers individually instead of all at once. Re-import the SVG, select all layers, and resize as a group. For a quick fix, trim the offending layer with sharp scissors along the edges.

Uneven depth between layers: You're using different spacer thicknesses. Standardise on 3mm foam squares for all layers. Consistent spacing is what creates the clean depth effect.

LED lights not glowing through all layers: The layers are too close together, or you're using cardstock that's too opaque. Darker cardstock colours block more light — if you want maximum glow-through, use lighter colours on middle layers and save the darkest shade for the background only.

For a comprehensive troubleshooting guide, see my beginner mistakes article and the shadow box repair guide.

Looking for a stunning floral project? The Rose Flower Shadowbox SVG features layered petals that create incredible depth when lit from behind. It's a rewarding build that combines the techniques from every step in this tutorial.
1.What Cricut machine do I need to make a shadow box?
Any Cricut that cuts cardstock works — Maker, Maker 3, Explore Air 3, Explore 3, or even the Joy Xtra for smaller designs. The Maker series handles thicker cardstock (up to 300 gsm) via the Adaptive Tool System, but for standard 200-230 gsm shadow box cardstock, any current Cricut model works well.
2.How long does it take to make a shadow box with a Cricut?
Plan for 60-90 minutes for your first shadow box: 10 minutes to import and organise the SVG, 5 minutes to resize, 25-35 minutes to cut all layers (including mat changes between colours), and 20-30 minutes for assembly. Your second shadow box drops to about 45 minutes as you get familiar with the workflow.
3.Do I need a deep-cut blade for shadow box cardstock?
Usually no. The standard Fine-Point blade handles cardstock up to about 230 gsm cleanly. Switch to the Deep-Point blade only if you're using 250+ gsm cardstock (like heavy watercolour paper or specialty cardstock). For most shadow boxes, 200-216 gsm cardstock with a Fine-Point blade gives the best results.
4.Can I make a shadow box without a frame?
Yes — you can layer cardstock between acrylic sheets, mount layers directly on a canvas panel with foam spacers, or use a shadow box without glass. The frame and glass protect the paper and contain the LED lights, but they're not strictly necessary. A frameless approach works well for temporary displays or event decor.
5.What size frame should I use for my first shadow box?
Start with an 8×8 inch frame with at least 1.5 inches of depth. This size is large enough to show detail but small enough to cut on a standard 12×12 mat without any size adjustments. The depth gives you room for 4-5 layers plus LED lights. Once you're comfortable with 8×8, move up to 9×9 or 12×12 inch frames.