Articles13 min read

Paper Flower Wall Art for Bedroom

Design guide with colour schemes for every bedroom style, renter-friendly mounting techniques, and lighting integration — plus a complete paper flower cutting tutorial.

Glowing backlit layered paper-cut flower shadow box hanging on a wall

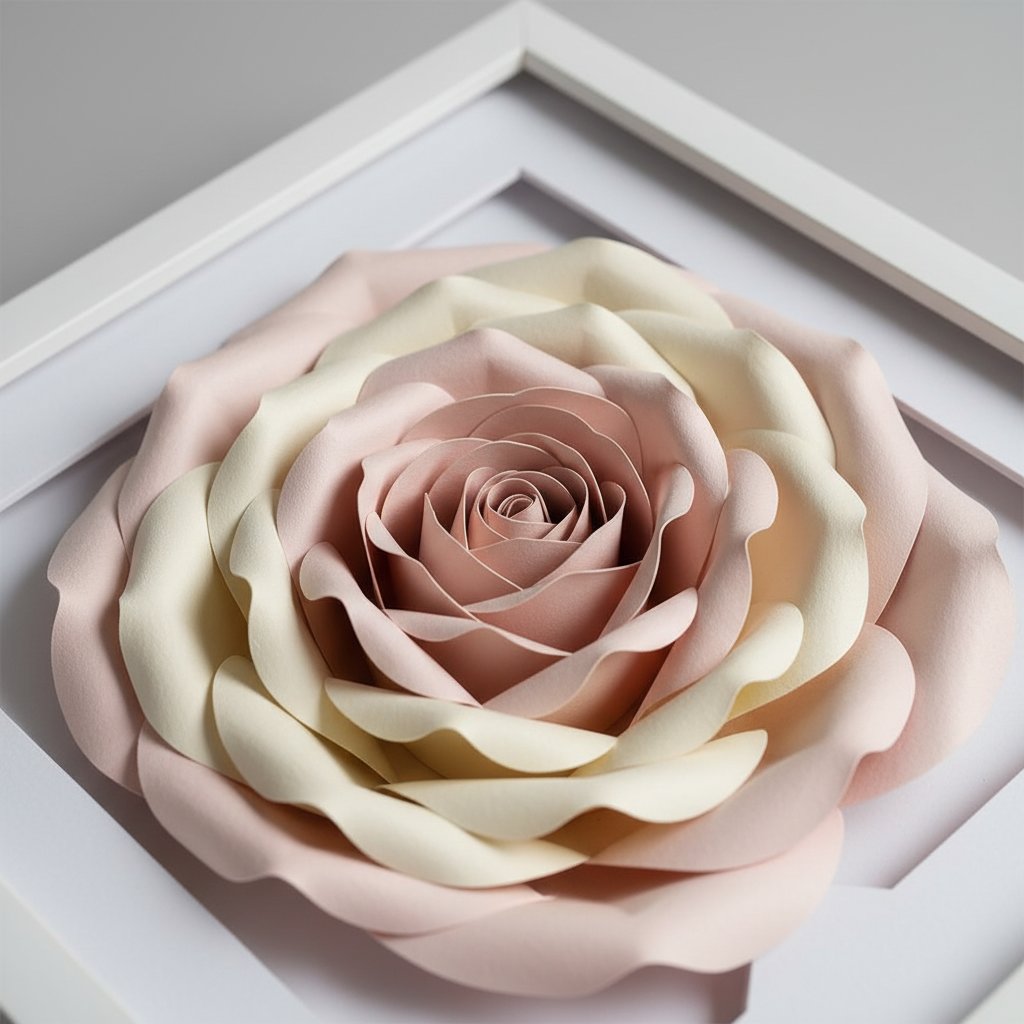
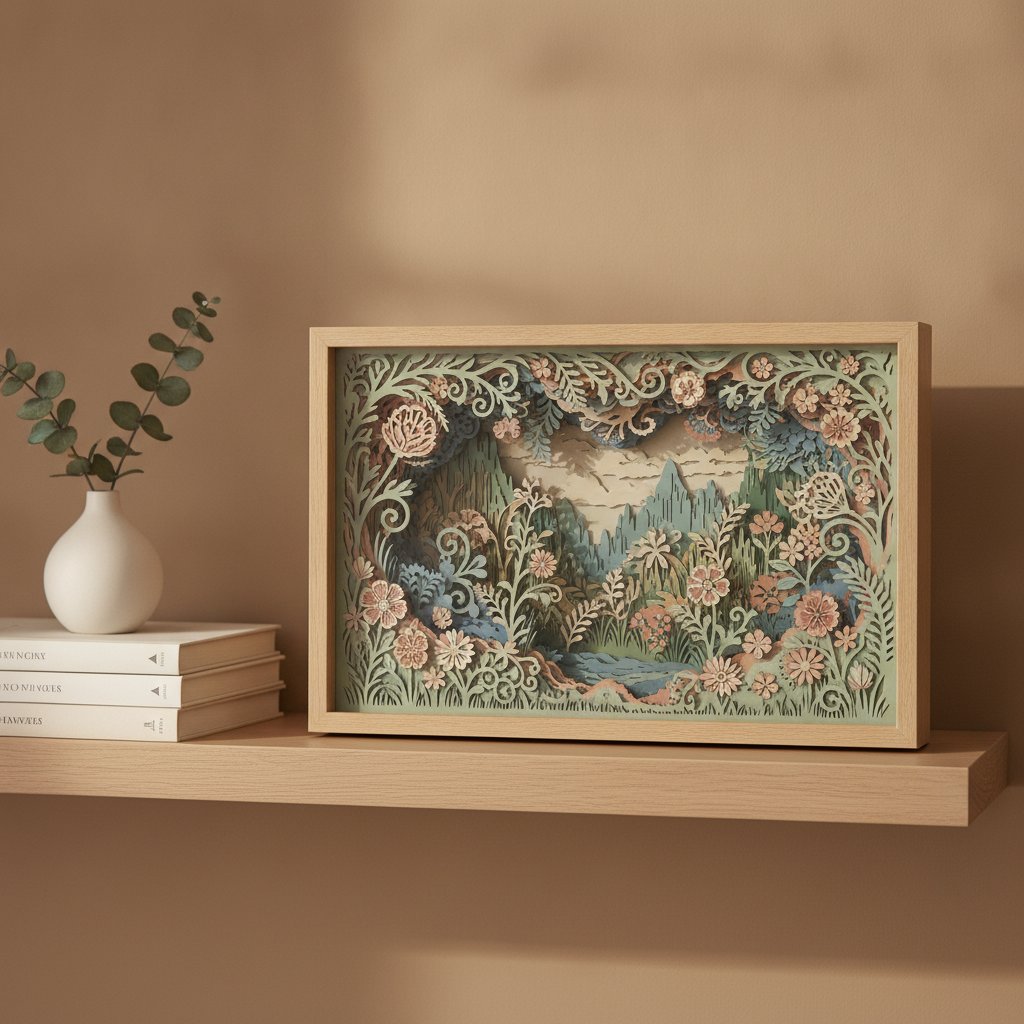
Paper flower wall art transforms a bedroom from "place to sleep" into a personal sanctuary. Unlike mass-produced prints, paper flowers bring real texture, depth, and handmade character to your walls — and they're endlessly customisable to match your colour scheme, room size, and personal style.

I've installed paper flower walls in three different bedrooms (my own, my daughter's, and a friend's rented apartment), and each one turned out completely different despite using the same basic techniques. The magic is in the arrangement, colour choices, and lighting.

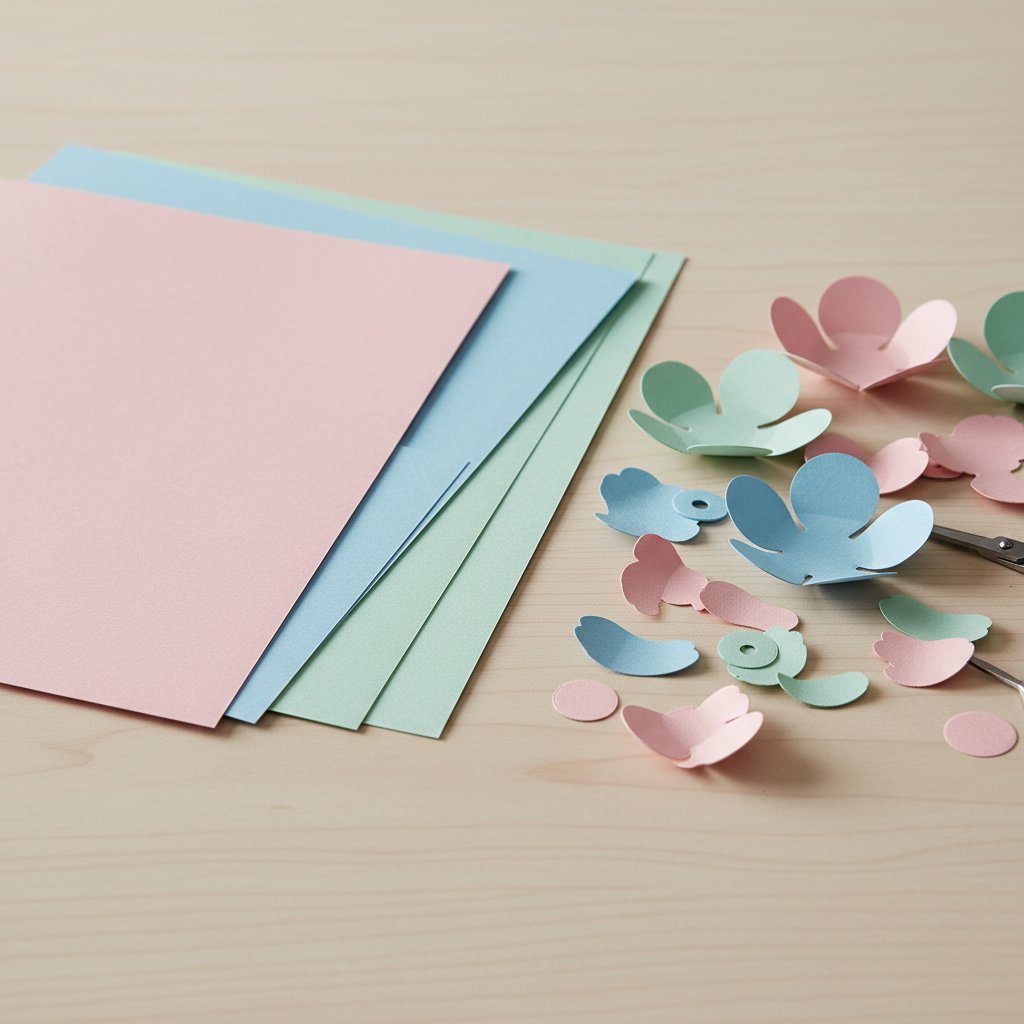
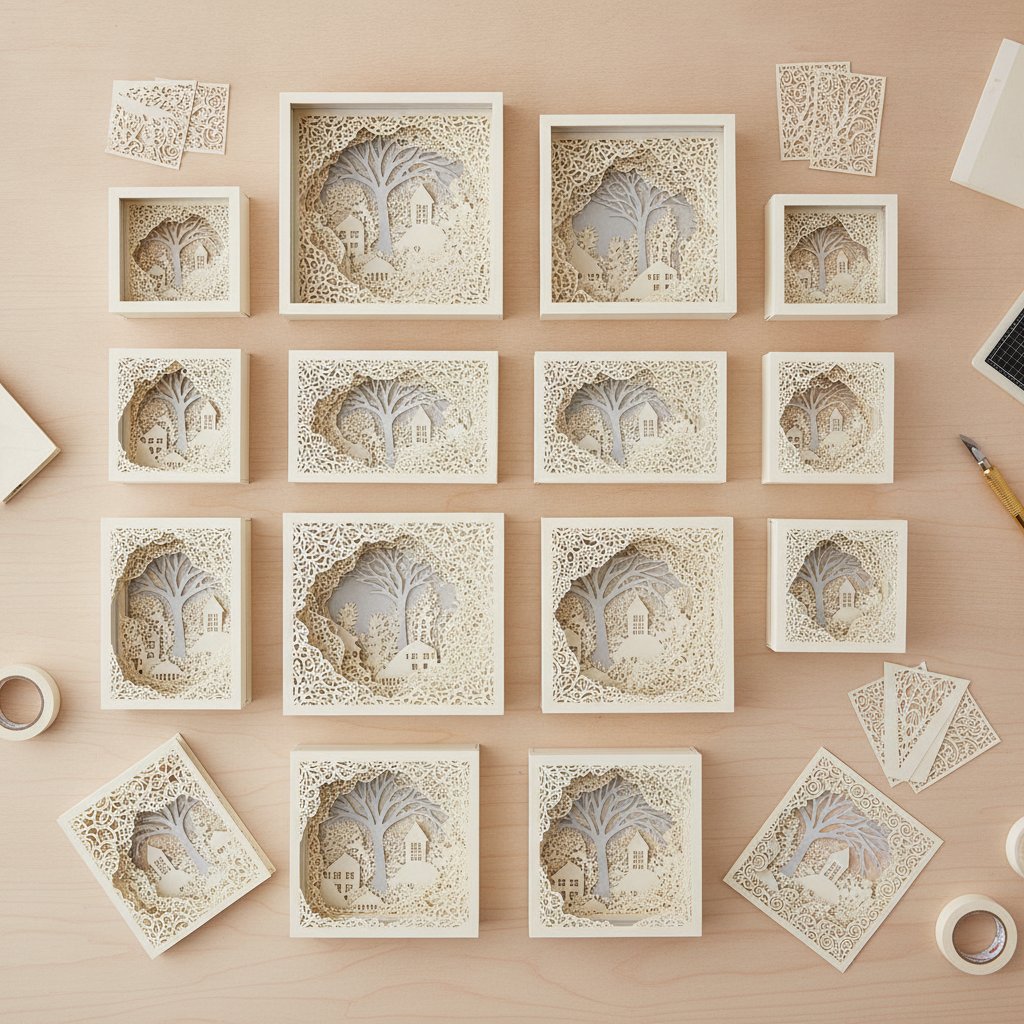
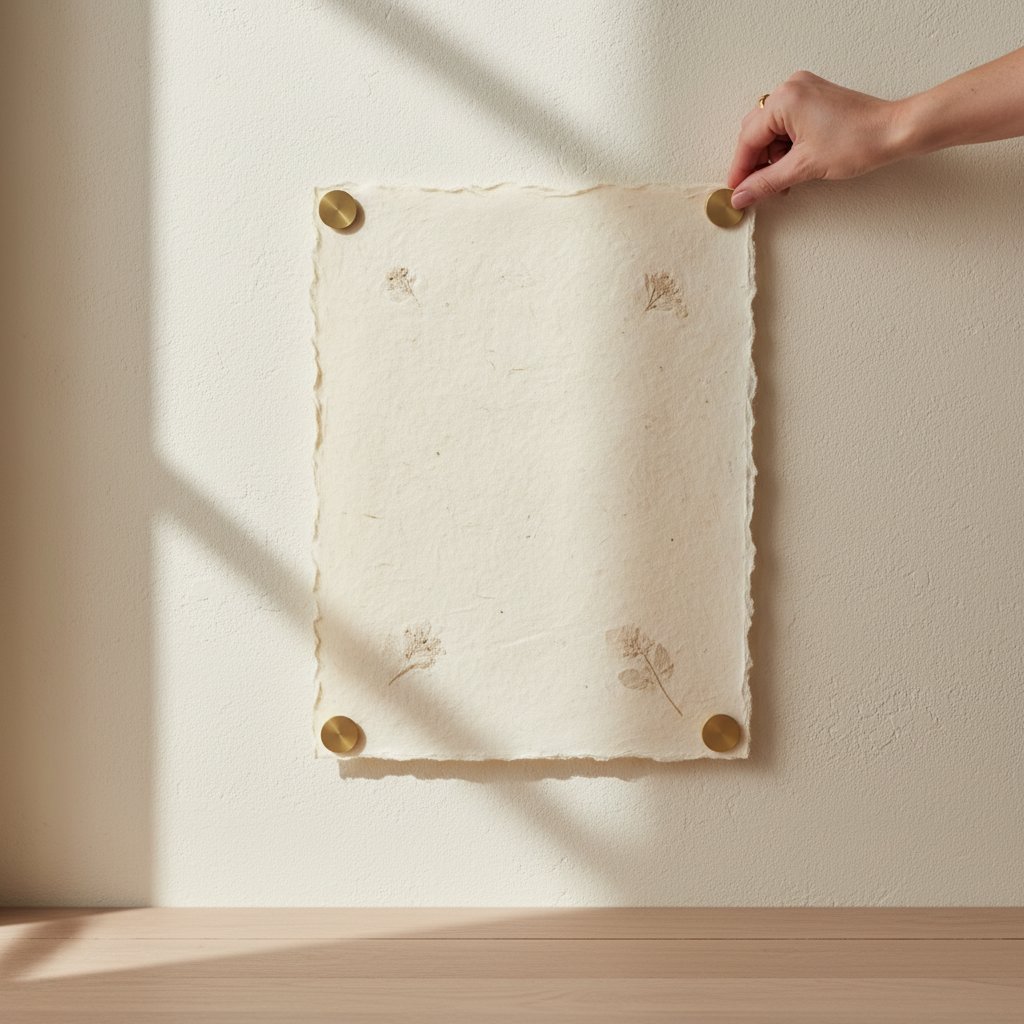
This guide covers everything you need to create paper flower wall art specifically for bedrooms — from choosing paper types that won't fade in sunlight to renter-friendly mounting methods that won't damage walls. I'll walk through five core flower styles, three colour scheme approaches, and a complete step-by-step tutorial for cutting and assembling your first paper flower wall display.

Why Paper Flowers Work So Well in Bedrooms

A finished layered papercut floral shadow box displayed as home decor on a styled shelf

Bedrooms are the ideal space for paper flower wall art for three reasons:

  1. Low humidity and indirect light. Unlike bathrooms or kitchens, bedrooms keep paper art in good condition for years. No steam, no cooking splatter, no direct sun (usually) — just stable indoor conditions that preserve colours and shapes.

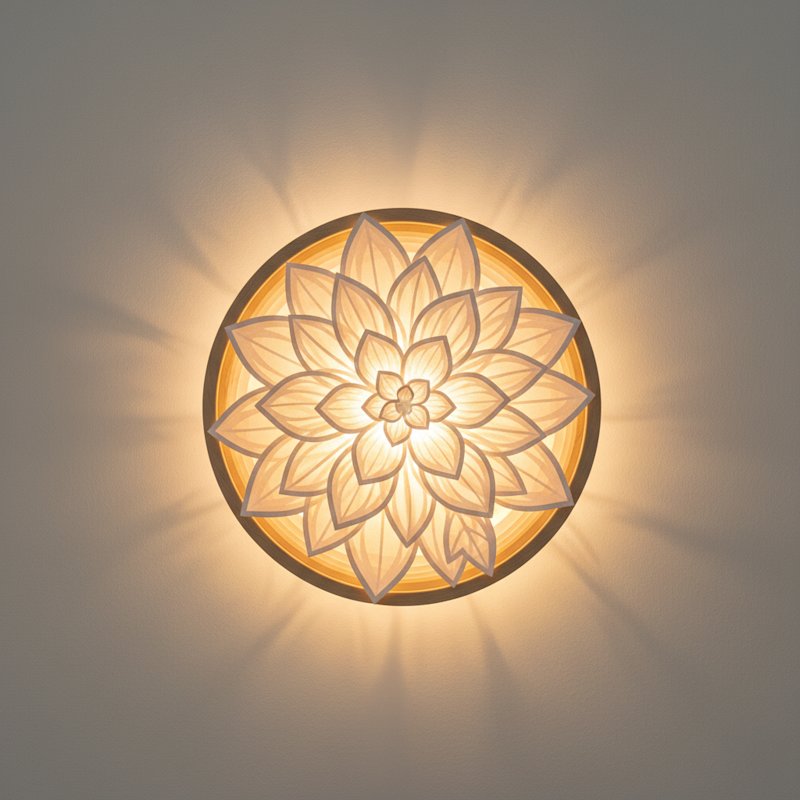
  2. Intimate viewing distance. You see bedroom wall art from 3-8 feet away while lying in bed or getting dressed. That's the sweet spot for paper flowers — close enough to appreciate the texture and layering, far enough that minor imperfections are invisible.

  3. Personal expression. A bedroom is the most private room in your home. Paper flower art lets you create something that's completely yours — no one else will have the same arrangement on their wall.

The only bedroom-specific concern is dust, which settles more on 3D paper flowers than on flat prints. I cover maintenance and cleaning at the end of this guide.

Best Paper Types for Bedroom Flower Wall Art

Fanned stack of colored cardstock sheets beside cut paper flower petals ready for layering

Not all paper is equal for wall flowers. Here's what works and what doesn't, based on my testing across multiple installations:

Cardstock (65–80 lb) — Best for Flat and Semi-3D Flowers

Standard cardstock is my go-to for most bedroom paper flower projects. It cuts cleanly on a Cricut or Silhouette, holds its shape, and comes in hundreds of colours.

For bedrooms specifically: Choose solid-core cardstock (colour all the way through, not just surface-coated). Bedroom lighting varies throughout the day, and white-core edges become visible in low-angle evening light. Our cardstock guide covers the best brands.

My pick: American Crafts 12×12 cardstock pads. They're solid-core, available in themed colour collections (which is perfect for matching bedroom palettes), and affordable at ~$0.25 per sheet.

Text Weight Paper (24–32 lb) — Best for Delicate Petals

Lighter text weight paper creates softer, more translucent petals that look delicate and romantic — perfect for the bedroom aesthetic. The trade-off is that text weight paper doesn't hold 3D shapes as well as cardstock.

Use text weight for the inner petals of roses and peonies, where the translucency adds depth. Pair with cardstock outer petals for structure.

Vellum — Best for Light-Diffusing Effects

Vellum (translucent paper) is a secret weapon for bedroom paper flower art. When you place vellum petals in front of a light source — even ambient bedroom light — they glow with a soft, ethereal quality. I used vellum inner petals on the roses in my daughter's bedroom and they look magical with her bedside lamp on.

Metallic and Glitter Cardstock — Use Sparingly

Metallic and glitter papers catch bedroom lighting beautifully, but they're heavier and harder to cut. Use them for accent petals (1-2 per flower) rather than the entire flower. Our metallic cardstock guide covers the Cricut settings that produce clean cuts.

5 Essential Paper Flower Styles for Bedrooms

These five styles cover the range of what looks good on a bedroom wall. You don't need to master all five — pick two or three that match your style and skill level.

Close-up of layered paper-cut flower shadow box showing depth between rose petal layers

1. Rolled Roses (Beginner)

The most popular paper flower for walls, and for good reason. A single strip of paper is rolled into a spiral, creating a rose that looks complex but is genuinely easy to make. Rolled roses work at any scale — from 2-inch miniatures to 12-inch statement blooms.

Bedroom use: Scatter in varying sizes across the wall. Group 3-5 roses in a cluster with 1-2 leaf shapes for a natural arrangement. This is what I recommend for your first paper flower wall project.

2. Layered Petal Flowers (Beginner to Intermediate)

Each petal is cut individually and layered in concentric circles, building the flower from the outside in. More time-consuming than rolled roses but the result looks more realistic.

Bedroom use: Best for large statement flowers (8+ inches). A single large layered peony above the bed creates a dramatic focal point. Our flower shadow box guide covers the Cricut cutting process for layered flower designs.

3. Origami Flowers (Intermediate)

Folded paper flowers that don't require cutting — just folding. The kusudama (modular ball) is the most popular style for wall art. Each unit takes 2-3 minutes to fold; 30 units make one flower ball.

Bedroom use: Hang from the ceiling at varying heights for a floating garden effect, or mount directly on the wall in a geometric grid pattern.

4. Paper Cut Silhouette Flowers (Intermediate)

Flat papercut designs that create intricate flower silhouettes — like a shadow box without the frame. Cut on a Cricut from a single sheet of cardstock. The result is a delicate, botanical-style artwork.

Bedroom use: Frame in a floating frame for a polished look, or mount directly on the wall for a more organic feel. These work well in shadow box frames with LED backlighting.

5. 3D Shadow Box Flowers (Advanced)

Multi-layered papercut flowers designed for shadow box frames with depth. Each layer adds dimension, and when backlit, the effect is stunning. This is the most technically demanding style but produces the most impressive result.

Colour Schemes for Bedroom Paper Flower Art

The colour scheme makes or breaks a paper flower wall. Here are three approaches that work specifically in bedrooms, based on what I've seen succeed (and fail):

Monochromatic: Single Colour, Multiple Shades

Pick one colour and use 3-4 shades from dark to light. This is the safest approach and works in any bedroom style.

Example — Pink monochromatic: Dark magenta outer petals → medium rose → blush pink → pale cream centre. This creates depth without colour clash.

Works best in: Minimalist, Scandinavian, and modern bedrooms.

Complementary: Two Opposing Colours

Choose two colours opposite on the colour wheel. The contrast creates energy and visual interest.

Example — Purple and gold: Deep purple petals with gold accent details. This creates a luxurious, dramatic feel.

Works best in: Glam, bohemian, and eclectic bedrooms.

Nature-Inspired: Realistic Botanical Colours

Use the actual colours of real flowers — cream roses, pink peonies, white lilies — paired with natural greens for leaves.

Example — English garden: Cream and blush roses, soft green leaves, occasional lavender accent flower. This creates a calm, natural feel.

Works best in: Cottage, romantic, and traditional bedrooms.

Colour Temperature Tip

Bedrooms benefit from warm tones (creams, blushes, soft golds) over cool tones (pure whites, icy blues) because warm tones feel cosier and more relaxing under warm bedroom lighting. If your bedroom has cool grey or blue walls, use warm-toned flowers to add warmth without repainting.

Arranging Paper Flowers on Bedroom Walls

How you arrange paper flowers matters as much as the flowers themselves. Here are three proven layouts:

Sets of cut cardstock shadow box layers in several different sizes arranged for various frame dimensions

The Cluster (Above the Bed)

Group 5-15 flowers in a concentrated cluster, centred above the headboard. Place the largest flower in the centre, medium flowers around it, and small flowers and leaves at the edges. The cluster should be roughly 60-80% of the headboard width.

Installation tip: Arrange the flowers on the floor first, then photograph the layout. Tape the photo to the wall to preview placement before committing. I skipped this step on my first installation and ended up repositioning half the flowers.

The Cascade (Corner or Side Wall)

Start with 3-4 large flowers near the top of the wall and cascade downward with progressively smaller flowers and trailing vines. This creates a waterfall-of-flowers effect that works beautifully in bedroom corners.

Best for: Walls adjacent to the bed, or the wall facing the bed where you'll see the cascade from your pillow.

Frame individual paper flowers or small arrangements in matching frames, hung in a grid pattern. This is the most polished, gallery-style approach and works well in bedrooms where you want the flower art to look intentional and designed rather than bohemian.

Use 6-9 frames in a 2×3 or 3×3 grid, spaced 2-3 inches apart. Each frame contains a single flat papercut flower design. Our paper wall art guide covers spacing and hanging techniques.

Hydrangea Shadow Box — Bedroom Flower Art with Depth
The hydrangea shadow box template creates a layered floral display that works as a standalone piece or as part of a gallery wall arrangement. Pre-sorted layers, tested Cricut settings, and colour recommendations included. 8×8 frame, 5-layer depth.

Mounting Techniques — Renter-Friendly Options

Sheet of paper art mounted directly on a wall held flat at the corners by small adhesive strips

If you're renting, you need mounting methods that hold securely but remove cleanly. Here's what actually works, tested on three different wall types:

Command Strips (Best for Framed Pieces)

3M Command picture hanging strips hold framed paper flower art securely and remove without residue. Use 2-4 strips per frame depending on size.

Load capacity: Up to 16 lb per strip pair — more than enough for paper art in a frame.

Removable Adhesive Dots (Best for Unframed Flowers)

Glue dots designed for temporary mounting hold individual paper flowers flat against the wall. They're invisible once applied and remove without damaging paint.

My experience: I used 2-3 adhesive dots per 6-inch flower. They held for over a year on my friend's apartment wall with no damage on removal.

Poster Putty (Best for Lightweight Pieces)

Non-drying poster putty works for flat papercut flowers and small 3D blooms. Knead it warm, press a small ball onto the back of each flower, and press to the wall.

Limitation: Only holds lightweight pieces (under 2 oz). Not suitable for large 3D flowers or shadow boxes.

Pin Nails (Permanent Installations)

For permanent installations in owned homes, tiny pin nails (3/4 inch) create nearly invisible mounting points. Push through the flower's centre where the nail head will be hidden by the flower itself.

Note: Only use in walls you own. Even small nail holes violate most lease agreements.

What NOT to Use

  • Hot glue on walls — will damage paint and possibly drywall - Double-sided tape — residue is extremely difficult to remove - Velcro strips — too bulky, visible behind thin paper flowers

Adding Light: Illuminated Paper Flower Wall Art

Illuminated layered paper-cut shadow box glowing warmly on a wall with fairy lights behind

Lighting transforms paper flower wall art from "nice" to "spectacular." Here are three approaches ranked by impact:

String Lights Behind Flowers (Highest Impact)

Weave warm white fairy lights (copper wire, battery operated) behind and between paper flowers. The light glows through translucent petals and creates shadows between layers, adding dimension that's invisible in daylight.

Battery placement: Use a small Command hook to hold the battery pack behind a large flower or above the door frame. Replace batteries monthly for daily use.

Safety: LED lights stay cool — safe for paper. Never use incandescent fairy lights near paper. Our LED safety guide covers wiring for paper art in detail.

LED Strip Behind Shadow Boxes

If using framed shadow box flowers, mount a short LED strip on the back of the frame, pointing at the wall. This creates a halo glow effect around each piece.

Bedside Lamp Up-lighting

The simplest approach: position a bedside lamp to shine upward at the flower wall. Warm light from below creates dramatic shadows that change as you move around the room. No modification to the flowers needed.

Lighting Tip for Vellum Flowers

If you used vellum petals (recommended in the paper types section), position a single small LED behind each vellum-petaled flower. The vellum diffuses the light into a soft glow that looks like the flower is lit from within. This was the single most impactful detail in my daughter's bedroom installation.

DIY Tutorial: Rolled Rose Wall Cluster

This step-by-step tutorial creates a cluster of 9 rolled roses above a headboard. The project takes about 4 hours from cutting to final mounting.

Materials: 12 sheets of cardstock (3 shades of your chosen colour), scissors or Cricut, hot glue gun, removable adhesive dots, pencil.

A fresh sharp craft knife making a clean precise cut through dark cardstock on an intricate floral papercut design

Step 1: Cut the Spiral Strips

Cut 9 spiral strips from cardstock — 3 large (10 inch), 3 medium (7 inch), 3 small (4 inch). Use your lightest colour for small flowers and darkest for large.

If you have a Cricut, search Design Space for "rolled paper flower" — there are dozens of free spiral templates. Set Material to Medium Cardstock and cut with the fine-point blade.

Step 2: Roll Each Rose

Starting from the outside edge, roll the spiral tightly around a pencil or quilling tool. Continue rolling until you reach the centre circle. Release the tension slightly — the rose will unfurl to its natural shape. Apply hot glue to the centre circle and press the base of the rolled petals onto it.

My timing: Each rose takes about 3 minutes. The first few will be tight; by rose #5 you'll find the right tension naturally.

Step 3: Arrange on the Floor

Clear floor space and arrange the 9 roses in your desired pattern. Place the 3 large roses in a triangle, 3 medium roses between them, and 3 small roses filling the gaps. Take a photo.

Step 4: Transfer to the Wall

Using your floor photo as a guide, mark the position of each flower lightly with pencil on the wall. Apply 2-3 adhesive dots to the back of each rose and press firmly to the wall, starting with the centre large rose and working outward.

Step 5: Add Leaves (Optional)

Cut 6-8 leaf shapes from green cardstock. Tuck them between and behind roses, securing with adhesive dots. Leaves extend slightly beyond the flower cluster to create a natural, organic edge.

Rose Shadow Box SVG — Bedroom Gallery Wall Statement Piece
A single rose shadow box in a deep frame creates a striking focal point for a bedroom gallery wall. 7-9 layers of depth, stained-glass effect when backlit, and tested on Cricut Explore and Maker. Available in 6×6 to 10×10 frame sizes.

Seasonal Bedroom Paper Flower Ideas

One advantage of paper flower wall art is easy seasonal updates. Swap a few flowers each season to keep the display fresh:

Deep shadow box with an ornate layered papercut floral border framing hand-lettered art
  • Spring: Replace accent flowers with cherry blossom sprays in pale pink. Add butterfly shapes between blooms. - Summer: Sunflower pieces in warm yellows. Pair with leafy greens for a bright, energetic feel. - Autumn: Deep burgundy and burnt orange roses. Add leaf-shaped pieces in copper and gold. - Winter: White paper flowers with silver accents. Add snowflake shapes for a frosty bedroom theme.

For more seasonal inspiration, see our seasonal shadow box crafts guide.

Maintenance and Longevity

Paper flower wall art in a bedroom typically lasts 2-5 years before showing signs of fading or dust buildup. Here's how to maximise longevity:

Dusting

Use a soft makeup brush to gently dust each flower every 2-3 months. The soft bristles reach into petal crevices without bending the paper. Don't use compressed air — it can detach adhesive mounts.

Fading Prevention

Keep paper flowers away from direct sunlight. If your bedroom gets morning or afternoon sun, position flowers on a wall that doesn't receive direct rays, or use sheer curtains to diffuse the light. Our art preservation guide covers UV protection methods.

Humidity

Bedrooms are generally low-humidity environments, which is ideal for paper art. If you live in a humid climate, avoid placing flowers on exterior walls where condensation can occur. See our humidity and cutting guide for more on how moisture affects paper.

Budget Breakdown

Hands holding up a finished first illuminated layered papercut shadow box with a softly glowing floral scene

Here's a realistic cost estimate for a 9-rose wall cluster:

| Item | Cost | Notes | |------|------|-------| | Cardstock (12 sheets) | $3-6 | Pad of 24 sheets ~$6 | | Adhesive dots | $4 | 100+ dots per pack | | Hot glue sticks | $2 | For rose assembly | | LED fairy lights (optional) | $8-12 | Battery operated, copper wire | | Total | $9-24 | Without lights: $9-12 |

This is one of the most affordable bedroom wall decor options available. Compare to a single framed print at $40-100 or a canvas at $50-150.

Lily Shadow Box — Elegant Bedroom Accent
The lily shadow box template produces a refined, stained-glass floral piece that complements any bedroom style. With 7 layers of depth and clean Cricut cuts, it works as a standalone nightstand display or part of a bedroom gallery wall. Warm LED backlighting recommended.
1.Can I mount paper flower wall art without damaging apartment walls?
Yes. Use removable adhesive dots (Glue Dots brand) for individual flowers or 3M Command strips for framed pieces. Both hold securely and remove cleanly. I've tested adhesive dots on painted drywall for over a year with zero damage on removal.
2.How long do paper flowers last on a bedroom wall?
Paper flower wall art in a bedroom (low humidity, no direct sun) typically lasts 2-5 years. Dust with a soft makeup brush every 2-3 months and keep away from direct sunlight to prevent fading.
3.What's the best paper for paper flower wall art?
65-80 lb solid-core cardstock is the best choice for most bedroom paper flowers. It cuts cleanly, holds 3D shapes, and comes in hundreds of colours. Use vellum for inner petals if you want a light-diffusing effect.
4.How many paper flowers do I need for a bedroom wall?
For a cluster above a queen headboard, 9-15 flowers in varying sizes (3 large, 3-6 medium, 3-6 small). For a full wall display, 25-40 flowers. Start with fewer and add more — it's easier to add flowers than to remove them.
5.Can I use a Cricut to cut paper flowers for wall art?
Yes. Cricut Design Space has dozens of free rolled flower and layered petal templates. Use Medium Cardstock setting with the fine-point blade. For the cleanest cuts on petal curves, use a fresh blade and a StandardGrip mat. See our [Cricut flower guide](/articles/flower-shadow-box-ideas-paper-cut-cricut/) for machine-specific settings.
6.Will paper flowers attract bugs?
No. Plain cardstock and paper don't attract insects. The only risk is if flowers collect dust and you also have high humidity — dust mites can colonise dusty surfaces. Regular dusting with a soft brush eliminates this concern.
7.How do I clean paper flower wall art?
Use a clean, dry makeup brush (large powder brush) to gently sweep dust off each petal. Work from the top down. Don't use water, spray cleaners, or damp cloths — moisture warps paper.
8.Is paper flower wall art safe for a child's bedroom?
Yes, with two precautions: mount flowers securely so they can't fall on a sleeping child, and if using LED fairy lights, keep the battery pack out of reach. Use Command strips rather than adhesive dots for extra security.