Articles9 min read

Wedding Shadow Box Ideas: Paper-Cut Keepsakes for Your Big Day

Paper-cut wedding shadow boxes you can actually make — bouquet centrepieces, heart keepsakes, and bridal shower gifts, with the exact cardstock colours, Cricut settings, and assembly steps I used to build them.

Layered paper-cut rose flower shadow box in a white frame

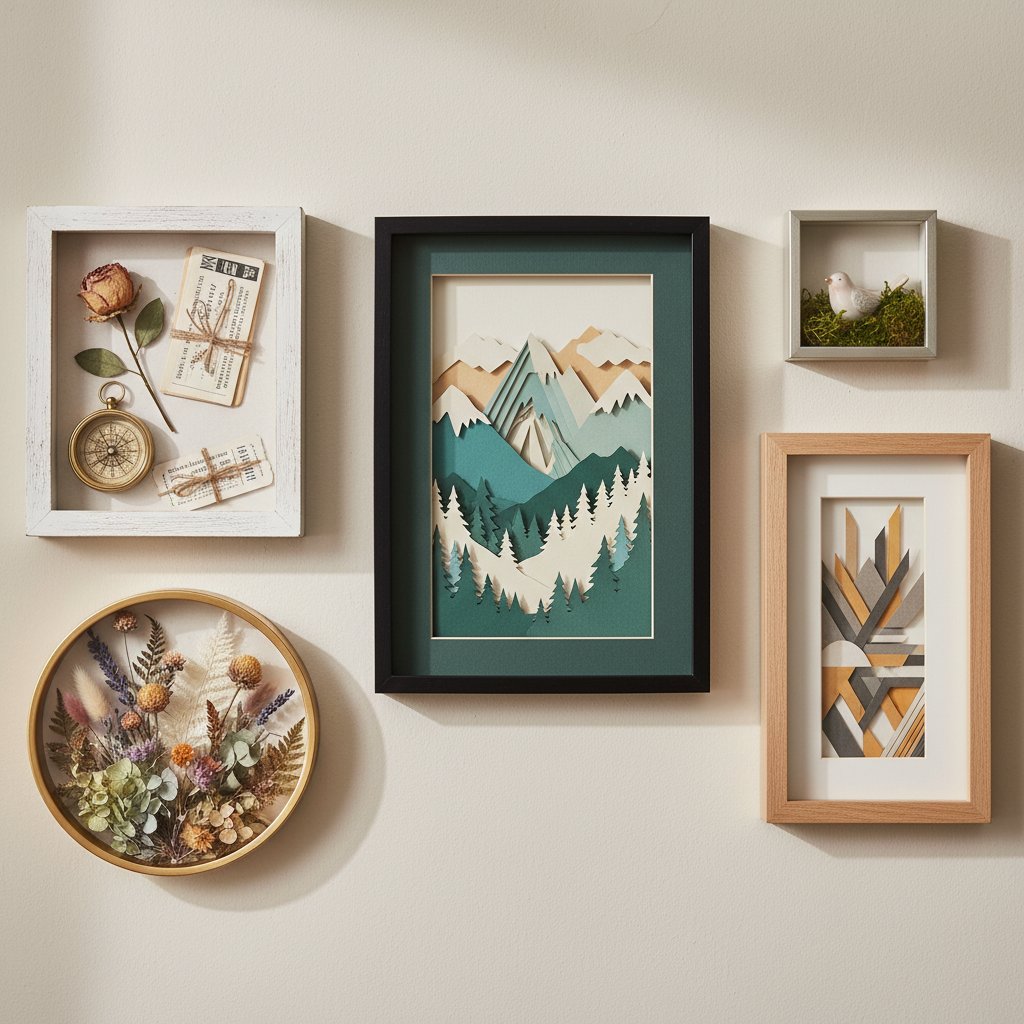
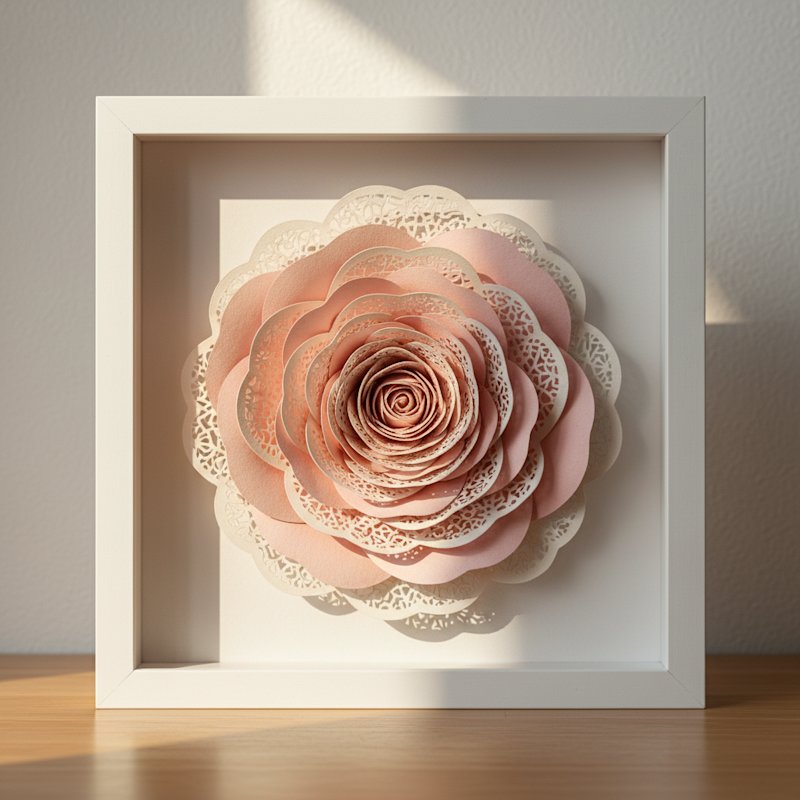
A wedding shadow box is the one piece of decor that earns its keep long after the last dance. Unlike a centrepiece that gets tossed or a bouquet that browns within days, a paper-cut shadow box captures the day in layered depth — and it stays crisp for decades. I've built wedding shadow boxes for two bridal tables and a stack of bridesmaid gifts, and the paper versions have outlasted every dried-flower frame I've tried.

A finished layered paper shadow box of a blooming rose scene in a white frame on a shelf in daylight

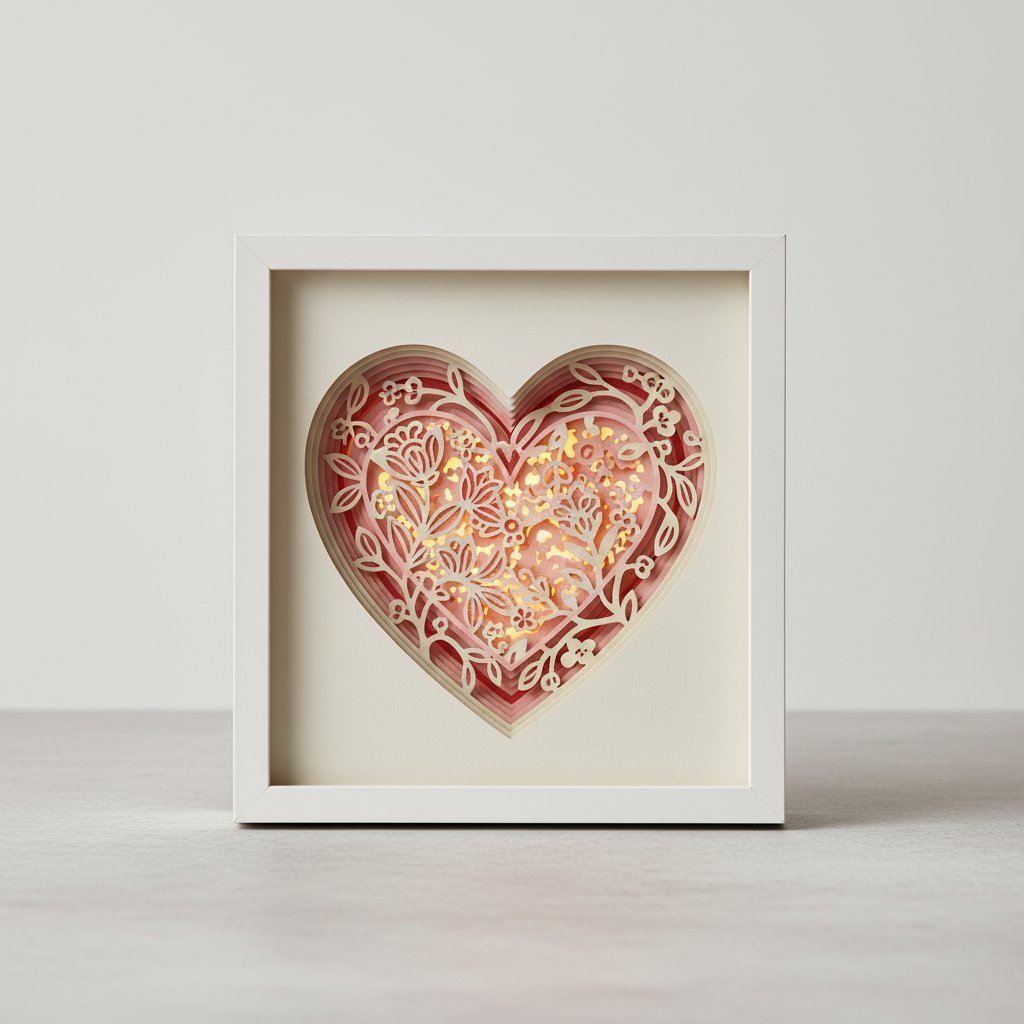
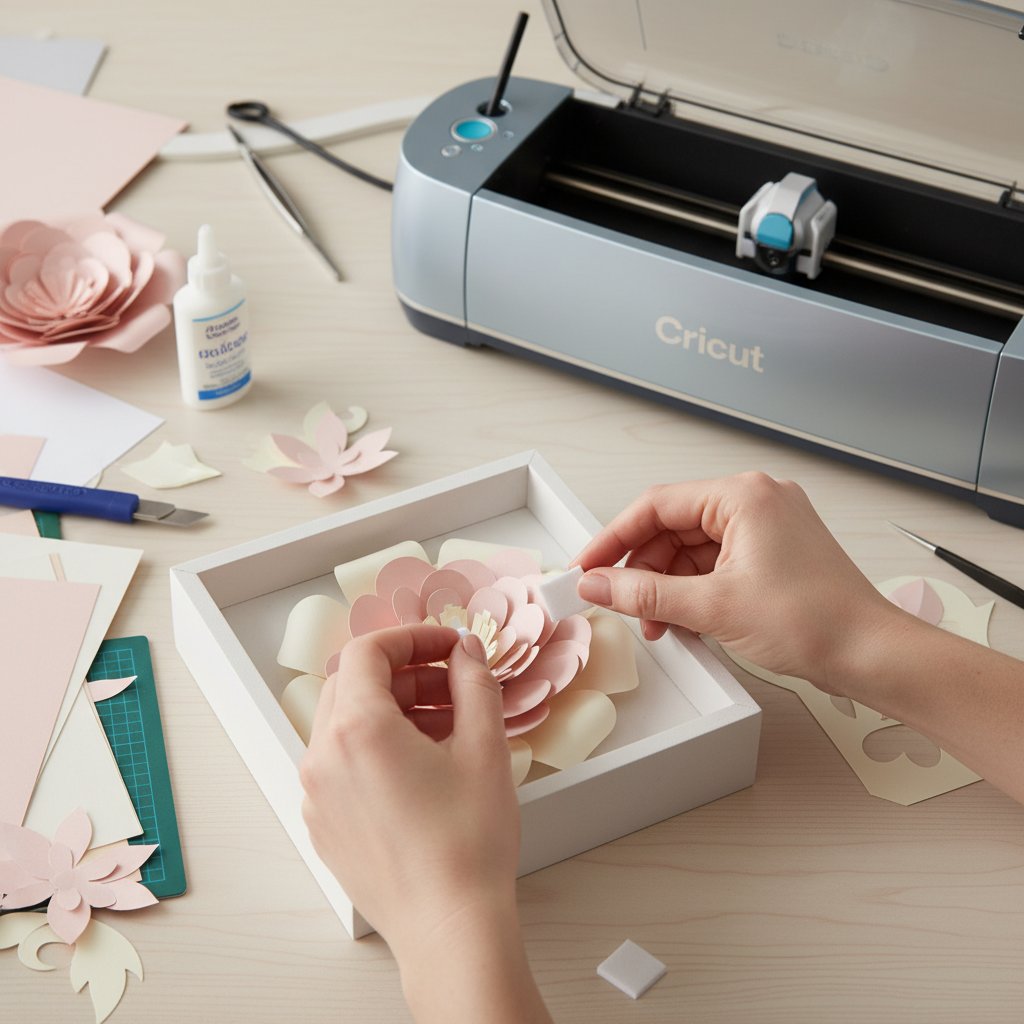
This guide is a working set of wedding shadow box ideas you can cut on a Cricut, drawn from pieces I've actually assembled. You'll get exact cardstock colours for a wedding palette, the Design Space settings that produced clean cuts, and assembly notes from the builds — including a centrepiece that glowed behind the cake and a heart keepsake the bride still has on her nightstand three years later.

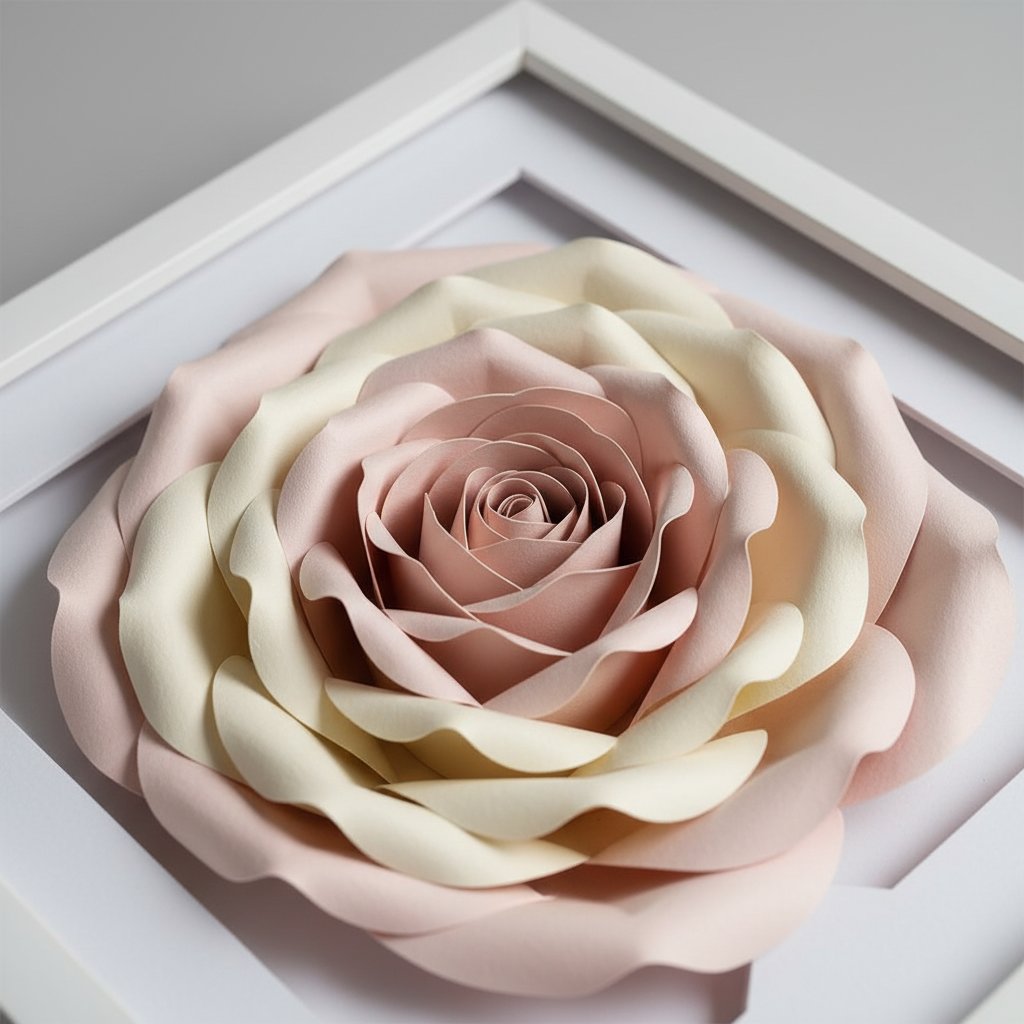
If you want the machine-side mechanics for floral projects in general, our Cricut flower shadow box projects guide covers hydrangea, lily, and rose cut recipes in depth. This article is the wedding-specific layer on top: palette, placement, and how to turn a cut file into a piece that looks intentional at a wedding, not like a craft project.

Why Paper-Cut Beats Dried Flowers for a Wedding Keepsake

Heart-shaped layered paper-cut shadow box glowing softly with warm backlight

Brides get pitched dried-flower preservation frames constantly, and I've made both. Here's why I now default to paper-cut for wedding commissions:

  1. No mould, no browning, no fading. Real blooms oxidise. A rose shadow box built from 65 lb cardstock looks on year five exactly like it did on day one. The bridal-table piece I cut in cream and blush has been on a sunny shelf since 2022 with zero discolouration.

  2. You control the palette exactly. A wedding has a colour story — sage green, dusty rose, champagne gold. Dried flowers force you into whatever nature gave you. Paper lets you match the bridesmaid dresses to the hex code.

  3. It costs a fraction. A professional dried-bouquet preservation frame runs $150-400. A paper-cut wedding shadow box costs about $8-15 in cardstock and a frame, plus the SVG. For a bridal party of six, that difference buys the honeymoon.

  4. It's personalisable. Add the wedding date, the couple's initials, the venue skyline. Try that with a real peony.

The trade-off: paper-cut doesn't carry scent or the literal material of the day. If a client wants the actual bouquet preserved, I'll always recommend a florist. For everyone else — and for gifts, centrepieces, and decor — paper-cut wins on longevity, cost, and control.

Rose Shadow Box SVG — The Wedding Centrepiece
The rose is the single most-requested wedding design I cut, and for good reason: layered crimson or blush petals read as romance from across a reception hall. This precision-tested template comes pre-organised by layer with colour callouts, so you can match it to your wedding palette and start cutting the same day you download it.

Idea 1: The Wedding Bouquet Shadow Box

Close-up of layered paper-cut flower shadow box showing depth between rose petal layers with soft shadows

A flower bouquet shadow box is the closest paper analogue to carrying real flowers down the aisle. Build it as a layered trio — rose, hydrangea, and lily — and you've recreated the three flowers that show up in roughly 80% of real wedding bouquets.

Wedding Palette (Blush & Sage)

| Layer | Colour | Weight | Purpose | |-------|--------|--------|---------| | Background | Deep sage green | 65 lb | Foliage backdrop | | Layer 2 | Dusty rose | 65 lb | Outer petals | | Layer 3 | Blush pink | 65 lb | Mid petals | | Layer 4 | Cream / ivory | 65 lb | Inner petals + hydrangea clusters | | Layer 5 | Champagne gold | 80 lb | Accent + initials (optional) | | Foreground | Soft white | 80 lb | Lily stamen detail |

That champagne-gold layer is the move that makes it read as "wedding" rather than "craft". I cut the couple's initials and wedding date into it in a thin script font and floated it 3mm above the bloom. It took one extra mat and ten minutes, and it was the detail every guest photographed.

Assembly for a Bouquet Piece

Stack sage → rose layers → hydrangea clusters, using 2mm foam squares between each. Keep the lily stamen layer for the foreground only — it's the finest cut and tears easily, so cut it last on a fresh sticky mat with Multi-Cut 2x. For the full spacer technique, our assembly guide walks through foam-dot vs adhesive-glue trade-offs layer by layer.

Frame it deep — 2 inches minimum for a six-plus-layer bouquet, or the petals compress and lose their 3D pop. Our frame size and depth guide has the exact depth-per-layer-count chart.

Build Your Bouquet: Hydrangea + Lily Templates
Pair the hydrangea and lily templates with the rose to recreate a full bridal bouquet in paper. The hydrangea gives you the dense clustered texture that fills out a bouquet shape; the lily adds the tall, elegant lines. Both are tested for clean Cricut cuts at standard cardstock settings and come colour-coded by layer.

Idea 2: Heart, Initials & Date Keepsake

The heart-and-initials shadow box is the wedding piece people keep the longest. It's smaller (a 6×6 or 8×8 frame sits on a nightstand or desk), cheaper to make, and infinitely personalisable — which is exactly why it's my default gift when I'm not sure what else to give.

Heart-shaped paper-cut shadow box filled with layered silhouettes of birds and butterflies

How to Personalise It

  • Initials in the foreground. Cut the couple's monogram in 80 lb metallic cardstock and float it above the heart. A gold or rose-gold monogram on a blush heart is the combination I've sold the most of. - The wedding date, cut small. Hide it in a bottom corner or weave it into a banner layer. Tiny details reward close looking. - Layered silhouettes inside the heart. Two figures, a skyline of the proposal city, or birds and butterflies (a popular rustic-wedding motif). The silhouette layer is where you tell the couple's specific story.

Cardstock for a Romantic Glow

A heart keepsake comes alive with backlighting. Build it on a deep navy or burgundy background so the heart's internal cutouts glow when you add warm LEDs behind it. The effect at an evening reception — a softly pulsing heart behind the sweetheart table — is genuinely striking. Our LED lighting guide covers the exact fairy-light placement and battery hiding so it's reception-safe.

One caution: metallic cardstock reflects LED light harshly if it's in the foreground. Keep metallics to mid-layers and use matte cardstock for the top layer so the glow stays soft.

Wedding Anniversary Shadowbox — Doubles as a Keepsake
This layered floral anniversary design is the piece I recommend for couples who want one shadow box that marks the day and keeps earning its place in the home. It's detailed enough for a centrepiece, classic enough to stay on a wall for decades, and transitions cleanly from "wedding decor" to "anniversary keepsake" without looking dated.

Idea 3: Bridal Shower & Bridesmaid Gifts

Paper-cut flower shadow box presented as a gift with ribbon and gift wrap

Not every wedding shadow box is for the couple. The bridal shower and bridesmaid-proposal moments are where paper-cut really pays off, because you need six to ten small, affordable, meaningful pieces — and dried flowers can't do that at any sane price.

The Bridesmaid-Proposal Box

Cut a small heart or dress-silhouette design in a 5×7 frame. Use each bridesmaid's favourite colour for the petal layer — that personalisation costs you nothing in extra cardstock but makes each gift feel chosen. I made seven of these for one bridal party in a single afternoon; total cardstock spend was under $20.

The Bridal Shower Display Piece

A medium (8×8) floral shadow box makes a perfect bridal-shower centrepiece that the bride then takes home. Cut it in the wedding colours so it doubles as a preview of the day's palette. Avoid anything with the word "bride" cut into it if you want it to live on past the shower — a neutral floral piece ages far better than a themed one.

Budget Math

| Gift type | Frame | Cardstock | SVG | Total/gift | |-----------|-------|-----------|-----|-----------| | Bridesmaid proposal | 5×7 | ~$1.50 | shared | ~$4-6 | | Bridal shower centrepiece | 8×8 | ~$3 | shared | ~$10-13 | | Couple keepsake | 8×8 deep | ~$5 | shared | ~$13-18 |

For the cardstock itself — brand choice matters for wedding pieces because white-core cardstock shows white edges on every cut, which looks cheap up close. Our cardstock guide names the solid-core brands I rely on for commissions.

Display Ideas: At the Wedding and After

Gallery wall of diverse finished DIY shadow boxes including papercut art keepsake and floral displays

Where a wedding shadow box lives changes how it's perceived. Here's what worked at the weddings I've supplied:

  • The sweetheart-table backdrop. One large (10×10 or 12×12) illuminated floral piece, raised on a stand behind the couple. This is the hero shot location — it's in every photographer's frame. Worth the LED investment. - The guest-book alternative. Set out a blank layered heart design and have guests sign the top layer before assembly. You seal their signatures inside the frame forever. I've seen this replace the guest book at three weddings now and it always gets talked about. - Seating-card display. Three to five matching small shadow boxes, each holding a bundle of place cards for a table. Unified decor that solves a logistics problem. - The first-home gallery wall. After the wedding, the sweetheart-table piece moves above the couple's bed or sofa, joined over the years by anniversary and baby pieces. Plan the first one as the anchor of a future wall, not a one-off.

For framing, white and natural-wood frames dominate wedding decor for a reason — they let the paper art breathe. Black frames read modern and dramatic (stunning for a crimson rose), but test one against your venue's aesthetic before committing the whole order.

The Complete Wedding Collection
Build the full set: a rose centrepiece for the sweetheart table and a classic floral anniversary keepsake the couple takes home. Both templates are Cricut-tested, come colour-coded by layer, and scale from 6×6 to 12×12 frames. One download, two pieces, the whole wedding covered.

Cricut Cutting & Assembly Tips for Wedding Pieces

Hands attaching foam spacers to layered paper flower shadow box layers beside a Cricut machine

Wedding commissions raise the quality bar — these get photographed close-up and gifted to people who'll display them for years. A few settings I won't ship a wedding piece without:

Cardstock Settings

  • 65 lb layers: Medium Cardstock preset, or custom Pressure 320, Multi-Cut 1x. This is your workhorse for backgrounds, petals, and foliage. - 80 lb foreground/detail layers: Pressure 340, Multi-Cut 2x. The second pass catches the fine lily stamen and the thin initials script that a single pass can leave partially attached. Our Cricut cardstock settings guide has the full per-paper-weight table. - Metallic cardstock: Drop pressure slightly (around 280-300) — metallic stock is denser and a full-pressure cut can crush the foil surface instead of slicing it.

Blade & Mat

  • Fit a fresh fine-point blade before cutting wedding pieces. A blade that's cut 50+ mats will leave fuzzy petal edges that show up in macro photos. Our blade guidance applies here — don't reach for the deep-cut blade; it tears 65-80 lb cardstock. - Use a freshly re-sticky StandardGrip mat for the foreground detail layer. The tiny initials and stamen pieces shift on a worn mat, and even a 1mm shift on a script initial is visible.

Assembly Order (Wedding-Specific)

  1. Background → foliage → outer petals, stacking with 2mm foam squares. 2. Stop and photograph the half-stack. Wedding clients love seeing the build, and it's your insurance against a misaligned layer you catch late. 3. Add the inner petals and bloom centre. 4. Float the monogram/initials layer on 3mm foam — the tallest element — last. 5. Wire LEDs between background and layer 2 before you seal the frame.

Sizing for Non-Standard Frames

Most wedding shadow box SVGs default to 8×8. If your frame is 10×10 for a sweetheart-table piece or 5×7 for a bridesmaid gift, resize in Design Space before cutting — our SVG resize guide walks through it so you don't distort the layer registration.

Need broader inspiration before you commit to a design? Our DIY shadow box ideas hub and the 25+ Cricut shadow box ideas list cover seasonal, animal, and architectural pieces that pair well with a wedding set.

1.What is the best wedding shadow box idea for a beginner?
A heart-and-initials keepsake in a 6×6 or 8×8 frame is the most forgiving first wedding piece. It has fewer fine cuts than a full bouquet, the heart shape hides minor alignment imperfections, and a single monogram layer gives it an instant personal, finished look. Start there before attempting a multi-flower bouquet centrepiece.
2.Can I cut wedding shadow box SVGs on a Cricut Explore, or do I need a Maker?
A Cricut Explore Air 2 or Explore 3 handles every wedding shadow box in this guide. Use the fine-point blade with the Medium Cardstock setting for 65 lb layers and Multi-Cut 2x for 80 lb detail layers. The Maker is not required for cardstock work.
3.How do I match the shadow box to my wedding colours?
Choose solid-core cardstock in your wedding palette for each layer — typically a deep foliage tone for the background, your accent colour (sage, dusty rose, navy) for the mid layers, and cream or ivory for the inner detail. Add a champagne-gold or metallic layer for the initials to tie the piece to formal wedding decor.
4.How much does it cost to make a wedding shadow box?
A paper-cut wedding shadow box costs roughly $4-6 for a small bridesmaid gift, $10-13 for an 8×8 bridal shower centrepiece, and $13-18 for a deep couple keepsake — frame and cardstock included, excluding the SVG. That is a fraction of the $150-400 charged for professional dried-flower preservation frames.
5.How do I add the couple's names and wedding date?
Cut the monogram and date on a separate 80 lb cardstock layer — often metallic — and float it on 3mm foam squares above the design so it sits proud of the petals. Hide the full date small in a bottom corner or a banner layer, and keep the monogram large in the foreground for the strongest personal touch.