Articles12 min read

3D Paper Art for Beginners — A Layer-by-Layer Guide

3D paper art for beginners is less about fancy tools and more about four fundamentals: clean cuts, even layer spacing, controlled adhesive, and a depth plan. This guide walks you through each skill, then three project levels — from a 3-layer silhouette you can finish in under an hour to 10+ layer scenes with real atmosphere.

Deep layered paper-cut shadow box viewed at an angle showing paper layers receding into depth

3D Paper Art for Beginners — A Layer-by-Layer Guide to Real Depth

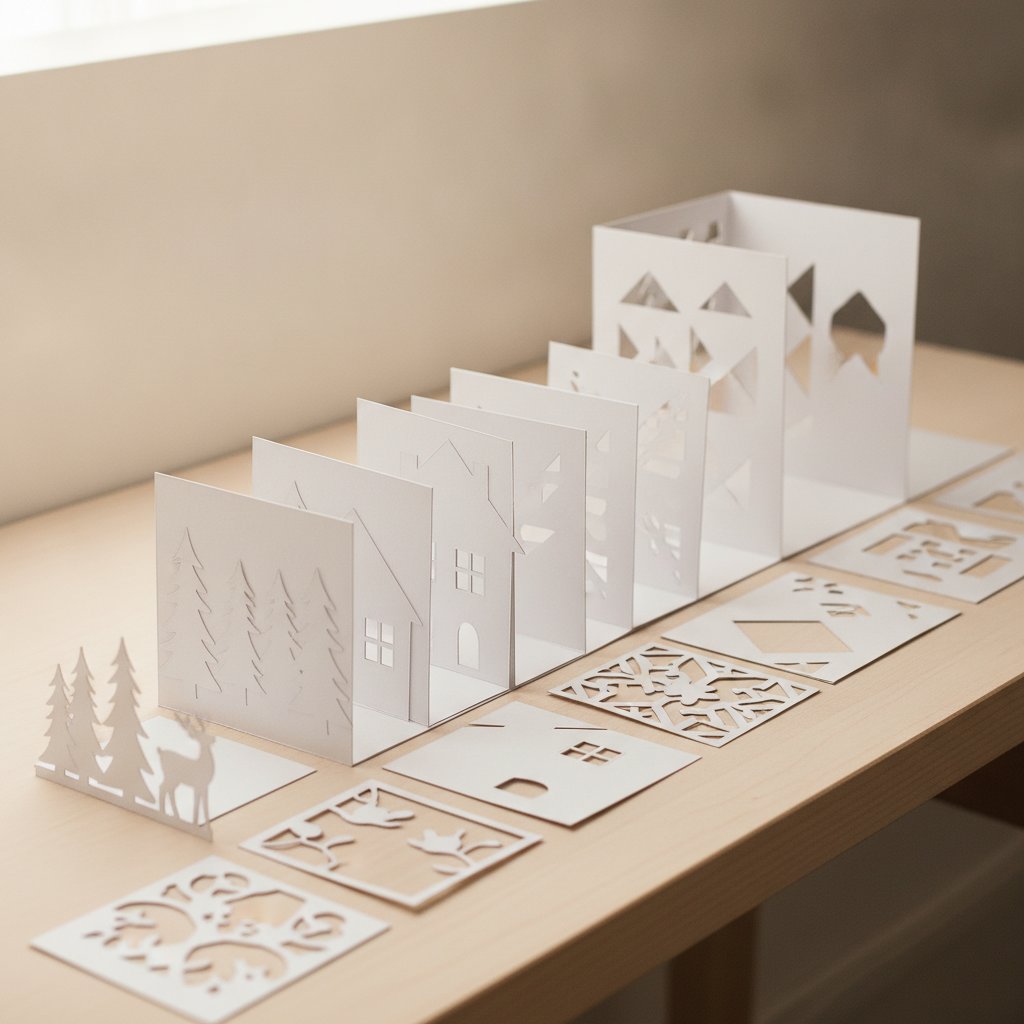
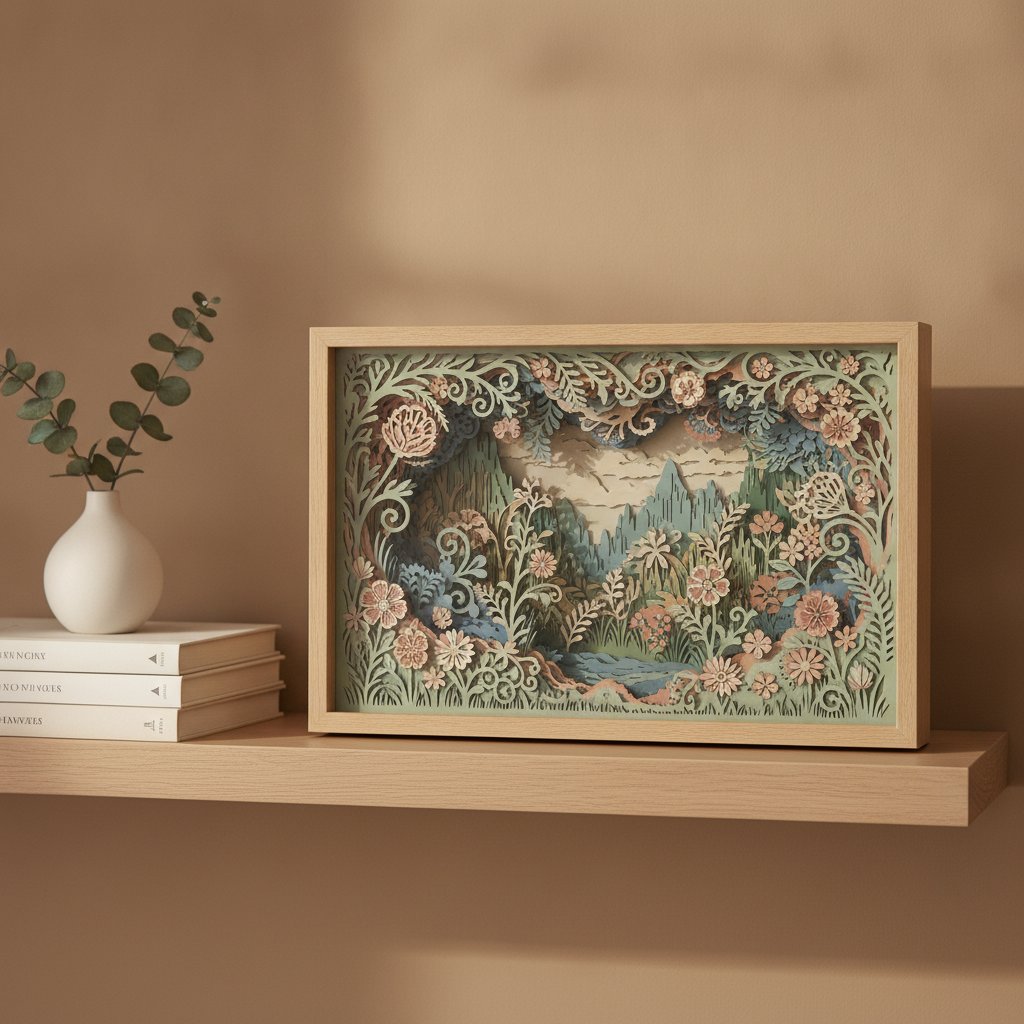
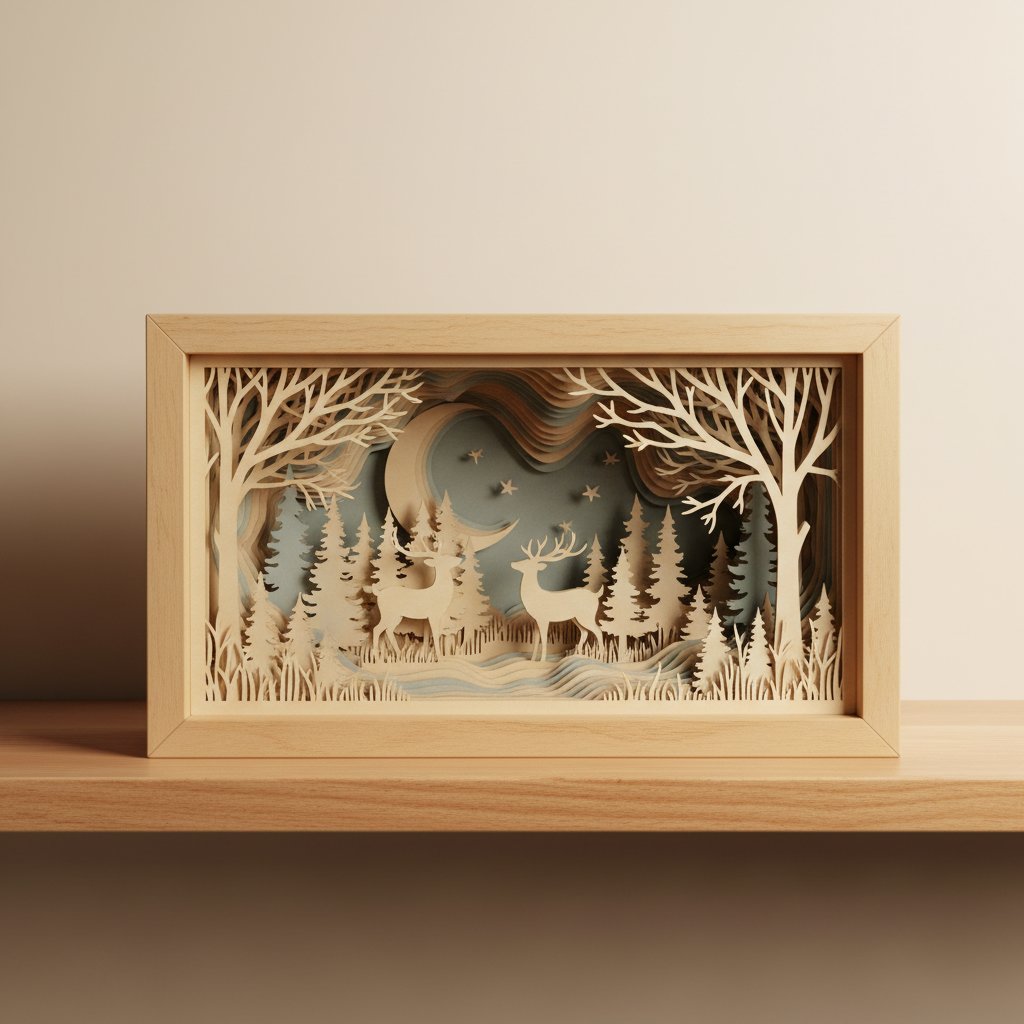
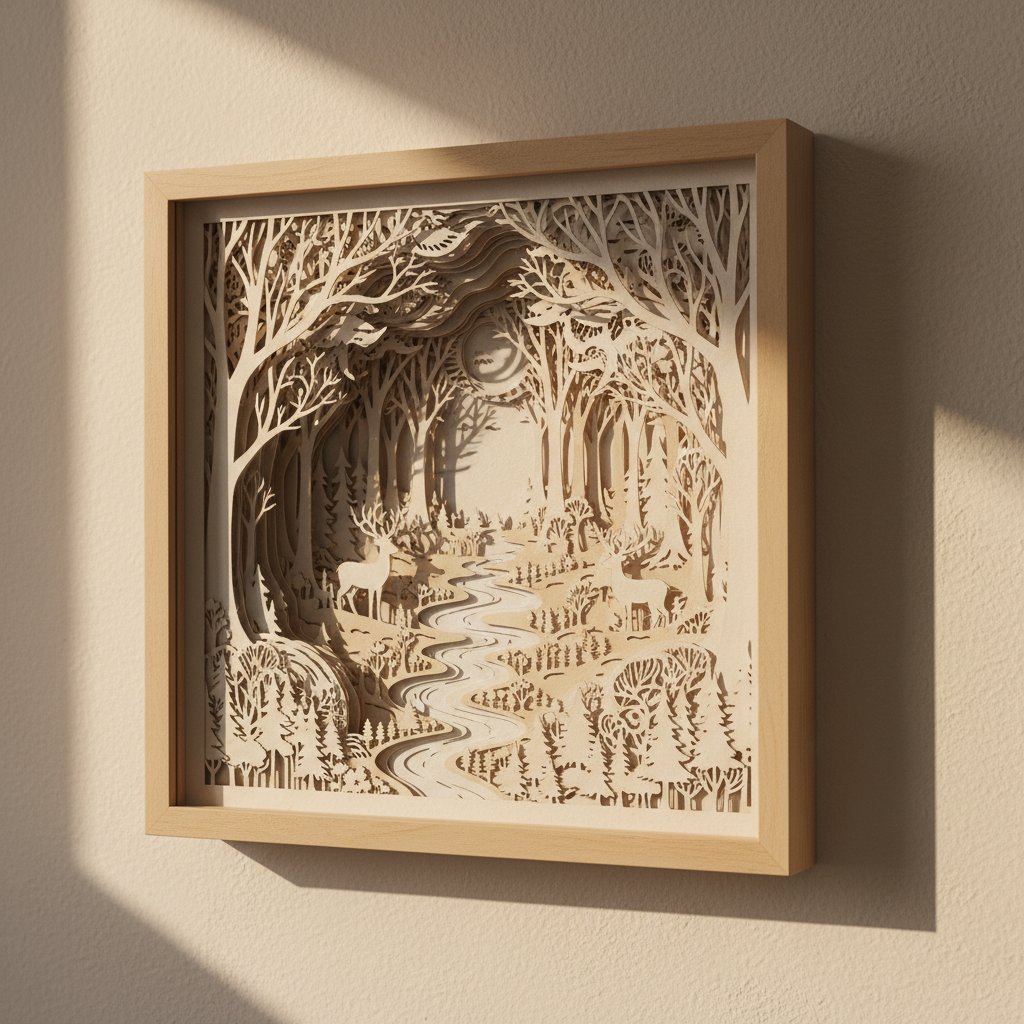
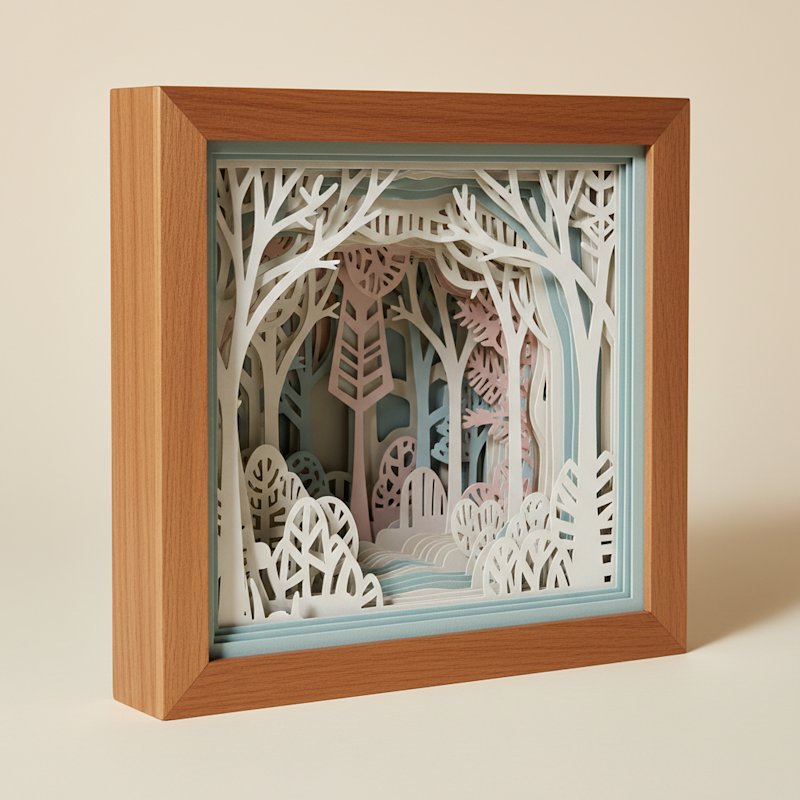
3D paper art for beginners sounds intimidating until you make your first piece and realize the secret: depth comes from spacing, not complexity. A simple three-layer mountain can look more striking than a fussy ten-layer design if the cuts are clean and the layers are spaced evenly.

Layered paper-cut nature scene with tree silhouettes showing visible depth between layers

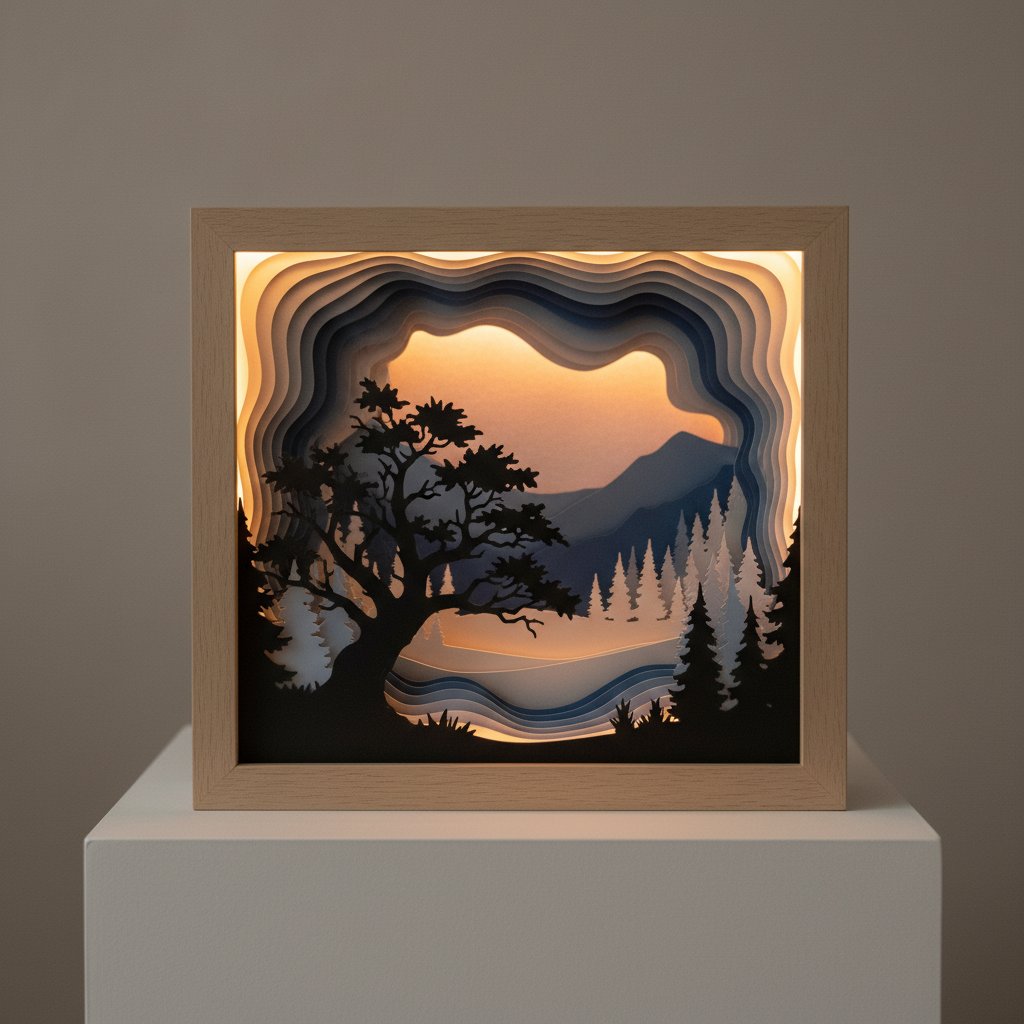
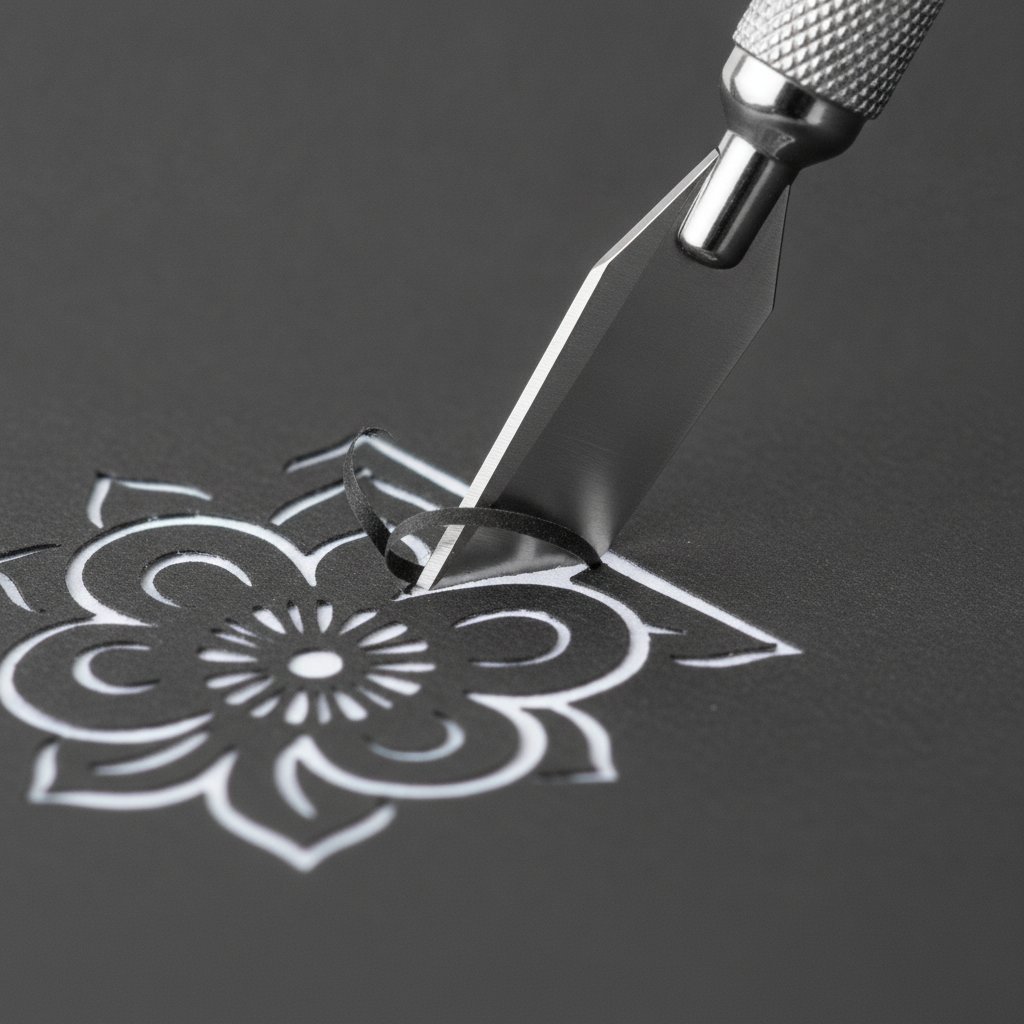
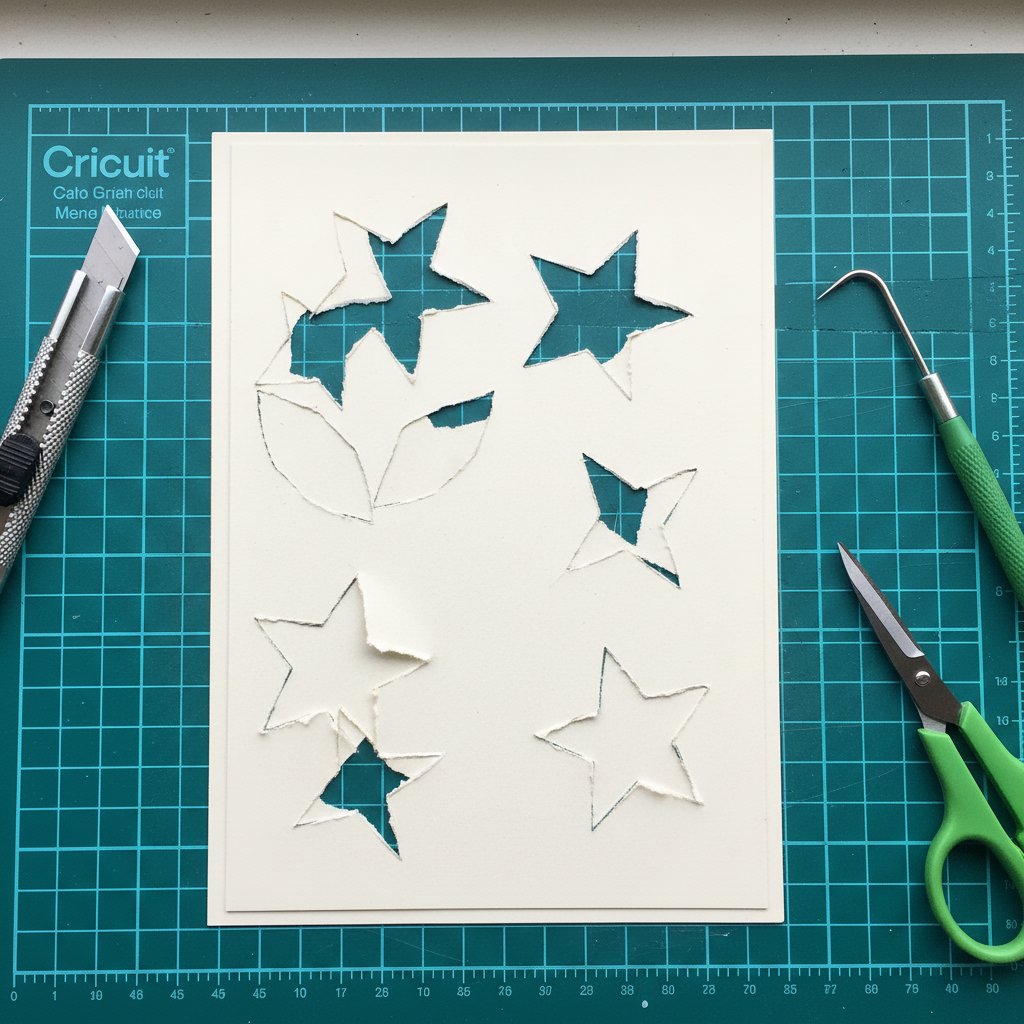
When I made my first successful 3D piece — a 3-layer mountain silhouette on a 5×7 panel — I cut it by hand with a fresh #11 blade, spaced the layers with 5 mm foam squares, and finished it in 42 minutes from sketch to frame. That single build taught me more than a dozen flat paper crafts ever had. This guide distills what I learned across roughly thirty layered builds into four fundamentals and three skill levels you can work through at your own pace.

If you've already tried a simple shadow box project, think of this as the fundamentals course that explains why those builds look good — so your next one looks deliberate, not lucky.

What Is 3D Paper Art?

3D paper art is the practice of stacking cut paper layers at small, even distances so the piece reads as dimensional rather than flat. Stand to the side of a finished piece and you can see real shadows falling between the layers — that shadow is the entire point. The medium covers a few overlapping styles:

  • Layered scenes — landscapes, skylines, and silhouettes built from a stack of coloured cardstock
  • Papercut shadow boxes — the same idea, framed in a deep box so the gap between layers is protected
  • Geometric 3D — folded or stacked shapes (boxes, pyramids, faceted reliefs)
  • Relief sculpture — paper built up or molded for a raised, textured surface

Why beginners gravitate toward it: the materials are cheap, mistakes are fixable (just recut a layer), and the visual payoff is immediate. A modest piece takes 30–45 minutes; a complex one can fill an afternoon. Compared to original framed 3D art at $100–$1,000+, a hand-cut paper piece costs $10–$40 in materials and looks genuinely gallery-ready behind glass.

Beginner Fundamentals: 4 Core Skills

Before any project, nail these four. Every common mistake traces back to skipping one of them.

1. Cutting Precision

Clean edges are non-negotiable — ragged cuts destroy the 3D effect because the eye lands on every torn fiber. Use a fresh blade (I swap blades after roughly two full sheets of detailed cutting), pull the knife toward you in short strokes, and rotate the cardstock rather than twisting your wrist.

A fresh sharp craft knife making a clean precise cut through dark cardstock

2. Layer Spacing

Spacing is what creates depth. 3–6 mm between layers is the sweet spot. Closer than 3 mm and the piece reads flat; past about 8 mm and layers start to look disconnected, like floating shelves. Foam adhesive squares (3 mm and 5 mm) are the easiest way to keep spacing consistent across a whole layer.

3. Adhesive Technique

Use the smallest amount that holds. Foam squares for spacing, a fine-tip glue pen for fine details, and double-sided tape for large background layers. Wipe overflow immediately — dried glue squeeze-out catches dust and ruins clean lines. Avoid liquid craft glue on thin layers; it warps them.

4. Depth Planning

Decide layer order before you cut. The reliable rule: darkest layer at the back, lightest at the front, with colour value shifting gradually between them. This mimics atmospheric perspective (distant objects read lighter and hazier) and makes the depth legible.

Neatly cut white cardstock shadow box layers organized in numbered sequence across a workbench

I number each layer lightly in pencil on the back as I cut it. On a 7-layer build it takes 20 extra seconds and saves the "which layer goes where?" panic at assembly time.

Essential Tools for Beginners

You do not need a cutting machine to start. Hand-cutting teaches blade control that pays off forever. Here is the realistic starter kit, split by priority.

PriorityToolWhy
Must-have65–80 lb cardstockHolds shape, cuts cleanly
Must-have#11 craft knife + spare bladesPrecision cuts; swap blades often
Must-haveSelf-healing cutting matProtects the table and the blade
Must-haveMetal rulerStraight cuts; plastic gets shaved by the blade
Must-haveFoam adhesive squares (3 mm + 5 mm)Consistent layer spacing
Nice-to-haveTweezersPlacing small foreground pieces
Nice-to-haveBone folderClean creases on any folded pieces
Upgrade laterCricut or Silhouette machineSpeed + repeatability once you're hooked
Three-step crafting process showing cardstock being cut on a cutting machine

A functional hand-cutting starter kit lands around $30–$50. When you're ready to add a machine for speed and repeatability, our paper cutting tools guide and Cricut paper cutting walkthrough cover what each tool is actually worth.

Start Simple With Ready-Made Layered Templates
Hand-designing your first few scenes is slow. These layered SVG templates do the depth-planning for you — each one is already split into clean, numbered layers, so you can focus on cutting and spacing. Begin with the free village scene, then move to a coastal or forest silhouette.

Cardstock Selection for 3D Art

The paper is the project, so this choice matters more than any tool.

  • Weight: 65–80 lb (176–216 gsm) is ideal. Lighter warps and curls; heavier fights the blade and dulls it fast.
  • Finish: Matte avoids glare under glass (best for display). Texture adds subtle depth. Metallic works as a single highlight layer, not a full stack.
  • Colour planning: Darker tones for back layers, lighter for front. A reverse gradient — dark in front — flattens the piece and confuses the eye.
  • How many sheets: Start with 3–5 layers per project. You'll usually buy two sheets per layer so you have a spare after a miscut.
Fanned stack of cardstock sheets in graduated weights and colours ready for layering

Want to go deeper on pairing colours for depth? Our colour theory guide for layered paper art walks through gradients, contrast, and atmospheric perspective with the exact palettes that read as "distance."

Level 1: Simple 3-Layer Projects (30–45 minutes)

Three layers is the minimum where depth becomes obvious. This is where I tell every beginner to start.

Good first subjects: mountain silhouette, sun-over-horizon, single tree on a hill, basic geometric stack.

Layer structure: background (solid sky or gradient) → midground (the main shape) → foreground (a detail or accent).

An open planning notebook with hand-drawn shadow box layer sketches before cutting

My first build, step by step

My first successful piece was a 3-layer mountain range on a 5×7 panel. Here's exactly what I did:

  1. Sketched the three silhouettes on paper, back to front, with 5 mm of offset between each.
  2. Cut each layer from a different grey — darkest at the back. About 8 minutes of cutting.
  3. Test-stacked dry to confirm the depth read well before gluing anything.
  4. Spaced with 5 mm foam squares, back to front, checking alignment as I went.
  5. Framed in a shallow shadow box so the layers were protected.

Total time: 42 minutes. Total cost: about $3 of cardstock plus a frame I already owned. The result hung in my hallway for a year and every visitor asked where I'd bought it.

Beginner tip: keep shapes simple on purpose. A clean three-layer mountain beats a fussy ten-layer scene every time.

Level 2: Intermediate 5–7 Layer Projects (1–2 hours)

Once three layers feels easy, add depth gradually. Each new layer should shift colour value a small step — that gradual shift is what makes a scene look like it recedes into the distance.

Good Level 2 subjects: layered forest, botanical or floral scene, city skyline at dusk, simple landscape with a sky gradient.

A finished layered papercut floral shadow box displayed as home decor

The skill that unlocks Level 2

Planning five or more layers before cutting. I sketch a quick "depth map" — a side-view stick diagram showing each layer's position — so I know the order before I touch a blade. On a 7-layer forest scene I once cut the third layer in the wrong grey and had to recut it; after that, the depth map became non-negotiable.

Level 2 workflow

  1. Plan depth order and assign a colour value to each layer (back=darkest).
  2. Cut all layers, numbering each on the back.
  3. Dry-stack to preview the gradient before committing.
  4. Assemble back-to-front with consistent 5 mm spacers.
  5. Step back every two layers to check the depth is reading correctly.

Floral scenes are the perfect Level 2 subject — petals and leaves layer naturally, and small colour shifts between bloom layers look intentional rather than fussy.

Layered Floral SVGs Built for Intermediate Depth
Floral designs are the ideal Level 2 build — each petal and leaf is a natural layer, and the gradual colour shift reads as real depth. These pre-split floral templates give you 6–9 numbered layers so you can practice spacing and gradient planning without designing from scratch.

Level 3: Advanced 10+ Layer Projects (2–3+ hours)

Ten-plus layers is where 3D paper art starts to feel like atmosphere. The trick is atmospheric perspective: fade colours toward cooler, lighter, hazier tones at the back, and keep front layers crisp, dark, and high-contrast. Done well, a forest looks like it disappears into morning fog.

Finished intricate layered paper-cut woodland shadow box with many depth layers

What changes at Level 3

  • Numbering is mandatory. On an 11-layer build, pencil numbers on the back of every layer — you will lose track otherwise.
  • Work back-to-front, always. Each new layer should hide the spacers of the one behind it.
  • Step back constantly. Every two layers, walk three metres back and check the depth. Small misalignments are invisible up close and obvious from a distance.
  • Highlight sparingly. One metallic or white accent layer on the foreground is plenty; more than that kills the atmosphere.

My first 11-layer piece was a woodland fox scene. It took 3 hours and 10 minutes, used four greys plus a rust accent, and taught me that the difference between "busy" and "deep" is colour restraint — not layer count.

Common Beginner Mistakes (and How to Avoid Them)

Almost every "why doesn't my piece look right?" moment traces back to one of these.

Close-up of paper cutting mistakes on cardstock showing torn edges and uneven cuts
  1. Dull blade. A dragging blade tears cardstock instead of cutting it. If you're pressing hard, the blade is dull — swap it. For a full breakdown of cut failures and fixes, see our guide to common beginner mistakes with paper-cut shadow boxes.
  2. Inconsistent spacing. Mixed 2 mm and 8 mm gaps look accidental. Pick one spacer size per piece and stick to it.
  3. Reversed gradient. Dark in front, light in back flattens the scene. Flip it: dark back, light front.
  4. Too much glue. Squeeze-out collects dust and shows under raking light. Use foam squares or the tiniest dot of glue pen.
  5. No depth plan. Guessing layer order at assembly time always wastes a recut. Sketch first.
  6. Rushing assembly. Fast stacking misaligns layers and you won't notice until it's glued. Slow down; step back.
Push Your Depth With Advanced Layered Scenes
Ready for 10+ layers? These detailed character and landscape templates are pre-split into many numbered layers with built-in atmospheric gradients — the fox, cat, and dragon designs are the ones I'd reach for to practice Level 3 restraint and spacing at scale.

Displaying Your 3D Paper Art

How you frame 3D paper art matters as much as how you cut it — the frame has to protect the gap between layers, or the depth collapses in transit.

Papercut art float-mounted in a deep glassless shadow box frame on a wall
  • Deep shadow boxes — the best all-round choice; the frame depth holds the layers safely and the shadow adds drama. Not sure how deep to go? Use our shadow box frame depth guide.
  • Glass-free float frames — ideal for 3–5 layer pieces; clean look, no glare, shows off the raw edges.
  • Framing without glass — keeps textured cardstock glare-free; see our guide on how to frame paper art without glass for the float-mount technique.
  • DIY foam-board mounts — cheap, light, and great for testing pieces before you commit to a real frame.

Taking Your 3D Paper Art to the Next Level

Once the fundamentals are second nature, a few upgrades transform a hobby piece into something striking.

  • Add lighting. A thin LED strip tucked behind the back layer makes the depth glow — just do it safely. Our guide to lighting up a paper-cut shadow box safely covers LED choice, heat, and wiring.
  • Mix media. A wash of watercolour on the back layer, or metallic pen on a foreground accent, adds richness without adding layers.
  • Scale up. Moving from 5×7 to 11×14 or 16×20 forces you to re-think spacing and contrast — a great growth exercise.
  • Protect it. UV fades cardstock fast. If a piece will hang in sunlight, read up on how to preserve paper art from fading before you hang it.
  • Sell your work. Good 3D paper art photographs beautifully and sells in the $25–$150 range once you have a consistent process.

Frequently Asked Questions

Do I need a Cricut to make 3D paper art?

No. Hand-cutting works perfectly for beginners and actually builds better blade control early on. A Cricut or Silhouette helps with speed and repeatability once you're cutting the same design many times, but it's an upgrade, not a requirement. Start by hand; add a machine only if you fall in love with the medium.

How do I stop my cardstock layers from warping?

Use 65–80 lb cardstock (lighter weights curl), avoid over-gluing (liquid glue is the main culprit), press layers flat under a book while adhesive cures, and keep your workspace dry. Humidity warps paper faster than anything — if your room is damp, a small dehumidifier near your crafting area makes a visible difference.

What's the minimum number of layers for a real 3D effect?

Three. Fewer than three reads as flat. Five layers gives a clear sense of depth, and ten-plus creates dramatic, atmospheric depth. Start at three, build confidence, then add layers one at a time rather than jumping straight to ten.

Can I use regular printer paper for 3D art?

Not for finished pieces. Standard 20 lb printer paper is too thin — it warps when glued, tears at the blade, and won't hold a clean edge. It's fine for sketching templates or practicing a cut path, but switch to 65–80 lb cardstock for anything you intend to frame.

How long does finished 3D paper art last?

Decades, with the right materials and framing. UV-protective glass prevents fading, a sealed shadow box keeps out dust and humidity, and acid-free (archival) cardstock won't yellow. Keep pieces out of direct sun and away from moisture and they genuinely outlast trends.

Ready to Make Your First 3D Paper Art?

You now have the four fundamentals — clean cuts, even spacing, controlled adhesive, and a depth plan — plus three project levels to grow into. Grab three sheets of cardstock, a fresh blade, and some 5 mm foam squares, and cut a simple 3-layer silhouette tonight. Your first piece is closer than you think.

For more, explore our five easy paper-cut shadow box projects for beginners, the colour theory guide for layered paper art, and the full set of layered shadow box SVG templates from Mural Moods Art — we're here to help you make something with real depth.