Articles11 min read

Papercut SVG Guide — From Templates to Custom Designs

Go from downloading a ready-made template to designing your own papercut SVG files — with real cut results, editing walkthroughs, and the exact tools that work for Cricut and Silhouette.

Simple floral silhouette shadow box with layered rose petals creating depth through backlighting

Every papercut project starts with one thing: an SVG file. Whether you buy a template, download a free one, or draw your own from scratch, the SVG is what your cutting machine reads to turn a flat sheet of paper into layered art.

I've worked with hundreds of papercut SVGs on my Cricut Maker — from simple single-layer silhouettes to complex 9-layer shadow box designs. Along the way I've learned what makes a file cut cleanly, how to fix files that don't, and how to start designing your own without getting overwhelmed by vector software.

This guide covers the full SVG workflow for papercut projects:

  1. Understanding SVG basics — what's inside a papercut file and why it matters

  2. Finding quality templates — where to source them and what to look for

  3. Editing existing SVGs — resizing, re-layeout, and cleanup

  4. Designing custom papercut SVGs — from first sketch to cut-ready file

If you're brand new to papercut projects, start with our how to make a layered paper cut shadow box guide for the assembly basics, then come back here when you want to understand the SVG side.

What's Inside a Papercut SVG File

Close-up of layered paper-cut flower shadow box showing depth between rose petal layers with soft shadows

An SVG (Scalable Vector Graphic) is a text-based file format that describes shapes using mathematical paths rather than pixels. For papercut projects, this matters for three reasons:

It scales without losing quality. A well-made SVG cuts just as crisply at 4 inches as at 24 inches. No blurry edges, no pixelation — the cutting machine reads the same paths either way. See our guide to resizing shadow box SVGs for any frame for the practical steps.

It separates into layers. A papercut SVG designed for layered projects contains grouped paths — one group per layer. Each group becomes a separate cut job. Your machine cuts the back layer first and the front layer last, and you stack them with foam spacers.

It preserves bridges. In a papercut, every enclosed area must stay connected to the surrounding paper through thin bridges (also called tabs). Without bridges, pieces fall out during cutting. A good papercut SVG has these built into the design.

File Formats You'll Encounter

| Format | Extension | Best For | Notes | |--------|-----------|----------|-------| | SVG | .svg | Cutting machines | Gold standard. Editable, scalable | | DXF | .dxf | Silhouette Studio (free tier) | Older format, limited features | | PNG | .png | Preview only | Raster — cannot be cut directly | | EPS | .eps | Print, professional design | Needs conversion for cutting machines | | Studio3 | .studio3 | Silhouette machines only | Proprietary, not cross-platform |

For Cricut users, always use SVG. For Silhouette users with the free edition of Silhouette Studio, DXF may be your only import option. Our import guide for Cricut Design Space and Silhouette Studio import guide walk through the exact steps.

Finding Quality Papercut SVG Templates

Overhead flat lay of shadow box supplies including a frame colored cardstock foam dots and craft tools

Not all SVG files are created equal. A poorly constructed SVG causes miscuts, tears, and frustration. Here's what to look for — and what to avoid.

What Makes a Good Papercut SVG

Clean, closed paths. Every cut line should be a single closed path. Open paths (lines with gaps) confuse cutting machines and produce partial cuts. You can spot open paths by opening the SVG in a vector editor — they show up as paths with endpoints that don't connect.

Appropriate bridge width. Bridges need to be wide enough to hold during cutting (at least 1-2mm at your intended cut size) but narrow enough to blend into the design. Bridges that are too thin snap; bridges that are too thick look clumsy.

Logical layer organisation. Multi-layer SVGs should have clearly named groups or layers. If you open the file and see hundreds of ungrouped paths, you're in for hours of cleanup.

Tested at the recommended size. The best template sellers include cut photos and recommended dimensions. If a listing shows only digital renders (no actual paper photos), the design may not have been tested.

Where to Source Templates

Paid template shops (like this one) offer tested, machine-ready files with support. You get consistent quality, proper layer separation, and instructions. For shadow box SVG templates, expect to pay $3-10 per design.

Free SVG sites are useful for practice, but quality varies wildly. Always inspect the file in a vector editor before cutting. Our free shadow box SVG guide lists verified free resources.

Etsy and creative marketplaces offer enormous variety but require vetting. Check reviews that mention actual cutting results, not just digital appearance. Look for sellers who show real cut photos in their listings.

Start With a Tested Template
The Mind Tree papercut SVG is a single-layer design that's perfect for your first custom papercut project. Clean paths, tested cuts, and easy-to-follow instructions included.

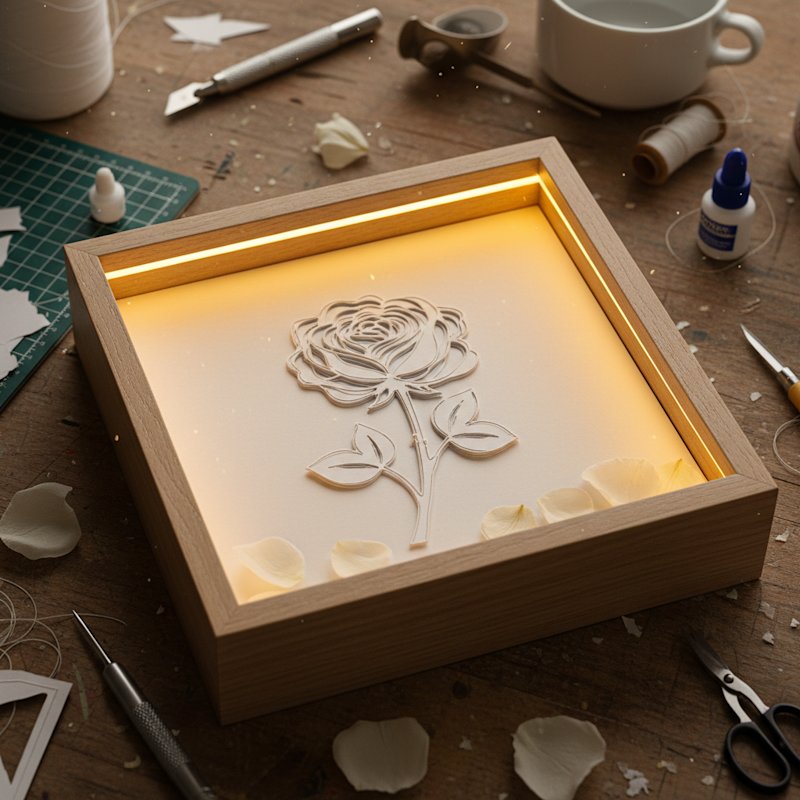
Editing Existing Papercut SVGs

Deep shadow box with an ornate layered papercut floral border framing hand-lettered art

Most crafters don't need to design from scratch — they need to modify an existing template. Maybe you want to resize a design, change a layer's shape, or remove a detail you don't like. Here's how.

Several printed papercut shadow box template sheets next to freshly cut paper layers showing different design formats

Most crafters don't need to design from scratch — they need to modify an existing template. Maybe you want to resize a design, change a layer's shape, or remove a detail you don't like. Here's how.

Tools for Editing SVGs

Inkscape (free, open-source). The best free option for SVG editing. It handles path editing, boolean operations (union, difference, intersection), and layer management. The learning curve is steep but the official tutorials cover the basics in under an hour.

Adobe Illustrator (paid). The industry standard for vector work. More polished than Inkscape, with better performance on complex files. If you already have a Creative Cloud subscription, use Illustrator.

Cricut Design Space (free with machine). Limited editing capability. You can resize, rotate, weld, slice, and attach — but you can't edit individual paths or nodes. Good for simple modifications but not for serious SVG editing.

Silhouette Studio (free / Designer Edition). The free version handles basic edits. The paid Designer Edition ($25-50) unlocks full SVG import and advanced path editing.

Common Edits and How to Do Them

Resizing. Open the SVG in Inkscape or Illustrator. Select all objects. Scale proportionally (hold Shift in Inkscape, or enable "constrain proportions" in Illustrator). Export as SVG. Done. For frame-specific sizing, see our SVG resizing guide.

Removing a layer. In Inkscape, open the Objects panel (Object → Objects). Find the layer group you want to remove. Select it and delete. Save the file. The remaining layers re-index automatically — no manual cleanup needed.

Changing a shape. Select the path with the Node tool (Inkscape) or Direct Selection tool (Illustrator). Drag individual nodes to reshape. For papercut designs, always maintain bridge connections — if you move a node that breaks a bridge, reconnect it before saving.

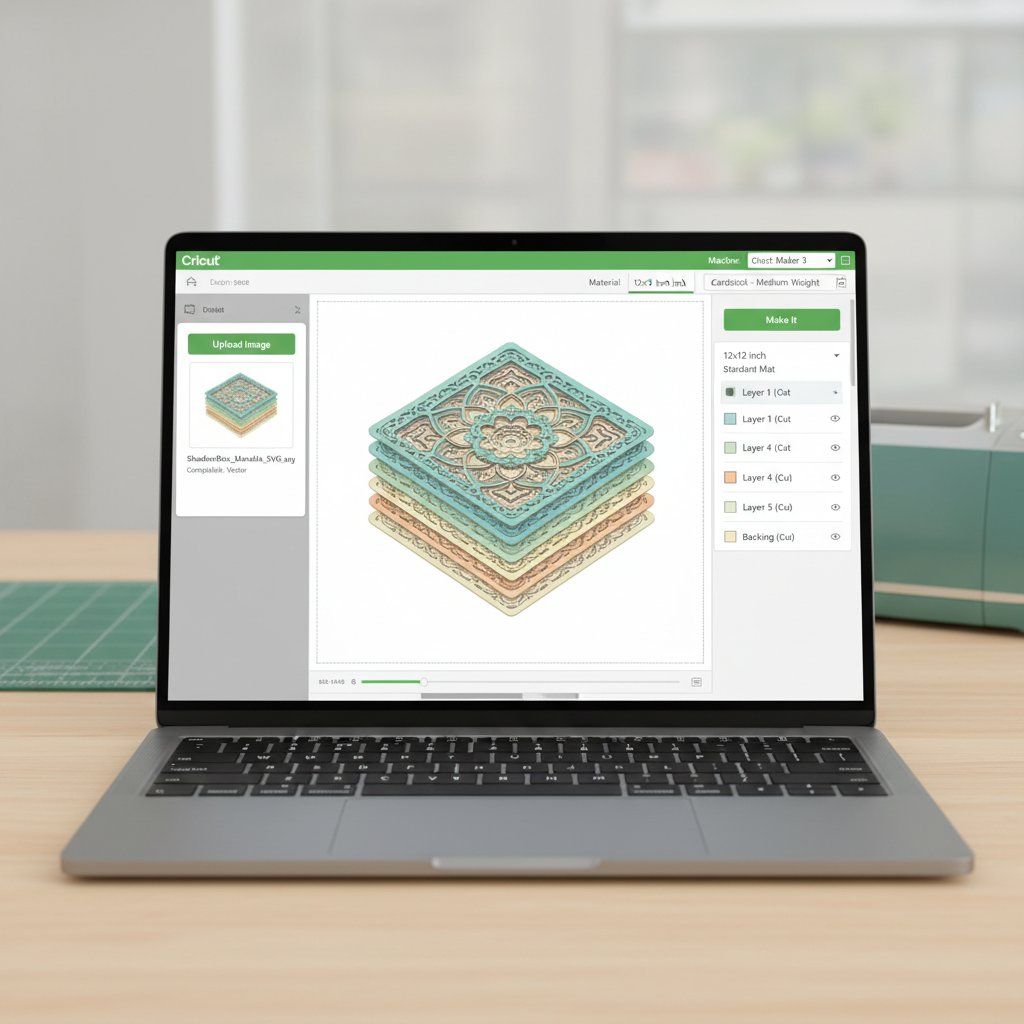
Merging two designs. Open both SVGs. Copy the layers from one file. Paste into the other. Scale and position. Use Path → Union to merge overlapping shapes, or Path → Intersection to create cutout effects. Check that all bridges still exist before exporting.

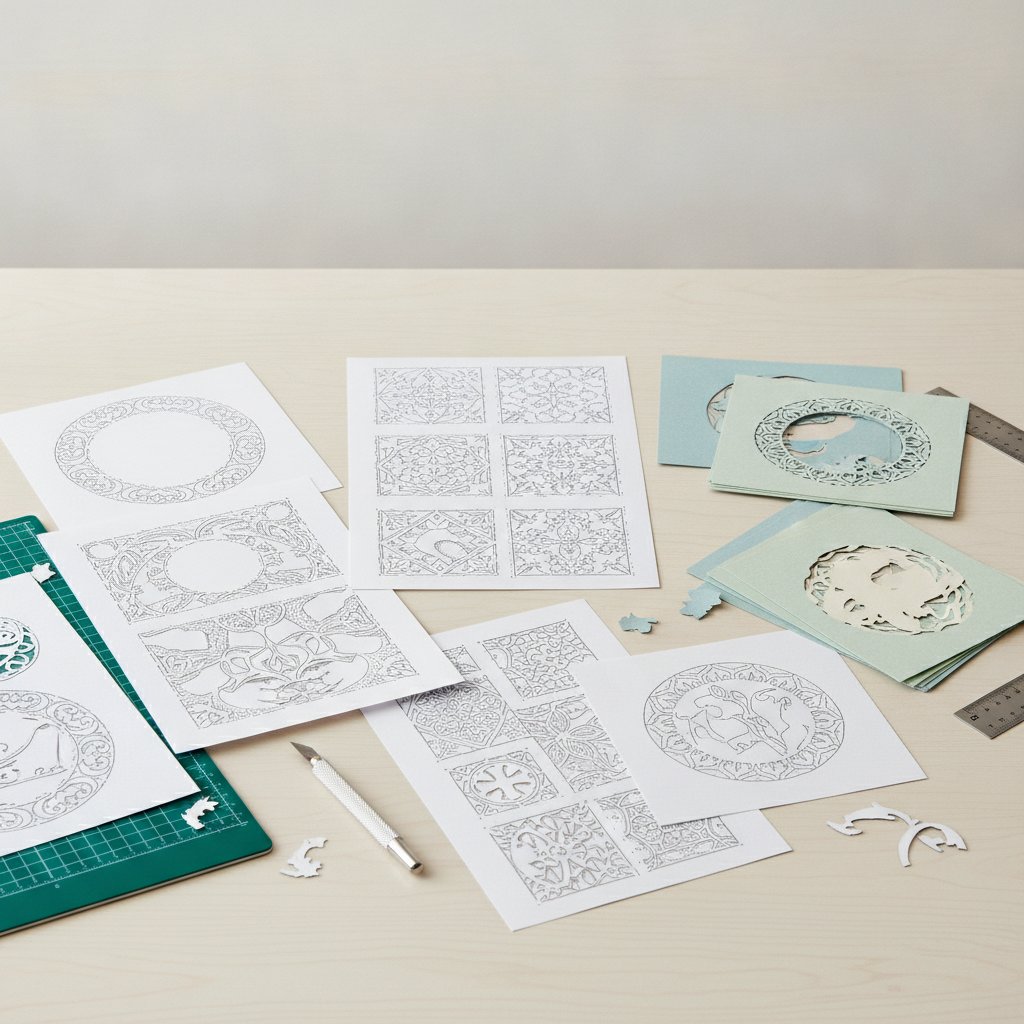
Fixing Common SVG Problems

Double lines (overlapping cuts). Open the file in Inkscape. Select all. Run Path → Union. This merges overlapping paths into single cut lines. Double lines are the #1 cause of torn paper — the blade cuts the same path twice.

Open paths. Zoom in on every connection point. If a path endpoint doesn't meet the adjacent path, select both endpoints and use Path → Join. Open paths cause the machine to lift the blade mid-cut, leaving rough edges.

Too many nodes. Some auto-traced SVGs have thousands of unnecessary nodes. Select the path, run Path → Simplify (Inkscape) or Object → Path → Simplify (Illustrator). This reduces node count while preserving the shape. A smoother path cuts more cleanly.

Designing Your Own Papercut SVGs

Fanned stack of colored cardstock sheets beside cut paper flower petals ready for layering

Designing custom papercut SVGs is where this craft gets addictive. You start with an idea, turn it into paths, cut it, and hold a physical piece of art that didn't exist before. Here's the workflow I use for every original design.

Step 1: Start With a Reference Image

Find a photo, sketch, or illustration of what you want to create. Import it into your vector editor as a locked background layer. This becomes your tracing reference. For papercut designs, high-contrast images work best — silhouettes, bold shapes, designs with clear figure-ground separation.

Step 2: Trace the Main Shapes

Using the Pen tool (Bezier curve tool), trace the major shapes of your reference. Don't try to capture every detail — papercut designs need simplified shapes. Think in terms of positive and negative space: what stays (paper) and what gets cut away (holes).

For a single-layer papercut like the Seaside Houses design, you're creating one continuous silhouette. Everything must connect. If you trace a shape that becomes an island (completely surrounded by cut areas), it will fall out during cutting.

Step 3: Add Bridges

Every island needs at least one bridge to connect it to the surrounding paper. In your vector editor, draw thin rectangular paths (1-2mm wide at your intended cut size) that connect each island to the nearest landmass. These bridges should follow the natural lines of the design — place them along edges, shadows, or structural lines where they'll be least visible.

Step 4: Simplify the Paths

After tracing, your design probably has too many nodes. Select each path and simplify it (Path → Simplify in Inkscape). Aim for the minimum number of nodes that still captures the shape. Fewer nodes=smoother cuts. A good target is one node every 5-10mm of path length.

Step 5: Test Cut at Scale

Before committing to your final version, cut a small test. Scale the design down to 3-4 inches and cut it on inexpensive cardstock. This reveals three critical problems:

  • Bridges that are too thin — they'll snap at small sizes - Details that are too fine — they'll blur together or tear during weeding - Paths that are too close together — the blade can't navigate narrow channels

Adjust the design based on your test cut, then cut again at full size. Two test cuts are cheaper than one ruined sheet of premium cardstock. For cardstock recommendations, see our best cardstock guide.

Designing Multi-Layer Papercut SVGs

An intricate premium papercut shadow box with ten finely detailed layers creating dramatic depth

Single-layer designs are the starting point. Multi-layer designs (like shadow boxes) add depth by stacking multiple cut layers with foam spacers between them. The design process is different.

Layer Planning

Before drawing anything, plan your layers on paper. For an 8×8 inch shadow box with 1.5 inch depth:

  1. Background layer — solid piece with no cutouts, sets the base colour 2. Mid layers (3-5) — each one adds detail and depth, with progressively more cutouts 3. Foreground layer — the most intricate cuts, visible detail

Each layer should be visually distinct. If two adjacent layers look too similar, the depth effect is lost. Use contrasting colours and different levels of detail.

Separating a Design Into Layers

Take your single-layer papercut design and divide it into layers based on depth:

  1. Duplicate the full design for each layer 2. On the back layer, remove all interior details — keep only the outermost silhouette 3. On each successive layer, add more interior detail 4. On the front layer, keep the most intricate cuts

The key rule: each layer must be a single connected piece. If a layer has multiple disconnected parts, it won't hold together during assembly. Add bridges between sections if needed.

Exporting Multi-Layer SVGs

Export each layer as a separate SVG file, or export one file with clearly named groups. In Inkscape, use layers (Layer → Add Layer) and name them "Layer-1-Background", "Layer-2-Middle", etc. When you import into Cricut Design Space or Silhouette Studio, each group becomes a separate cut job.

Ready-to-Cut Papercut Templates
Skip the design phase and go straight to cutting. These tested papercut SVGs include clean paths, proper bridges, and instructions — just load your mat and cut.
Multi-Layer Shadow Box SVG
The Chill Cats shadow box is a tested 8-layer design that's ready to import into Cricut Design Space. Proper bridges, clear layer names, and full instructions included.

Getting Clean Cuts From Your SVG

Cricut Design Space interface showing shadow box template being imported and prepared for cutting

A perfect SVG still produces bad results if your cutting setup is wrong. These are the settings that consistently produce clean papercut cuts on Cricut and Silhouette machines.

Cricut Settings for Papercut SVGs

| Material | Blade | Pressure | Multi-Cut | Speed | |----------|-------|----------|-----------|-------| | 65 lb cardstock | Fine-point | Default | 1x | Default | | 80 lb cardstock | Fine-point | +20 | 1x | Default | | 110 lb cardstock | Deep-point | +30 | 2x | Medium | | Glitter cardstock | Fine-point | +40 | 2x | Slow |

Always do a test cut first. The settings above are starting points — your specific machine, blade condition, and cardstock brand may need adjustment. Our Cricut cardstock settings guide covers this in detail.

Silhouette Settings for Papercut SVGs

For Silhouette machines, use the following as starting points:

  • 65 lb cardstock: Blade 3, Speed 5, Force 18, Passes 1 - 80 lb cardstock: Blade 4, Speed 4, Force 22, Passes 1 - 110 lb cardstock: Blade 5, Speed 3, Force 28, Passes 2

Mat Preparation

A clean, properly sticky mat is essential for papercut projects. Fine details shift on a mat that's lost its grip. If your cardstock lifts during cutting, the blade catches and tears. Check our Cricut mat guide for mat recommendations by paper weight.

Blade Maintenance

A dull blade is the most common cause of rough edges and torn bridges. Replace your blade every 20-30 cuts on heavy cardstock, or sooner if you notice dragging. For papercut designs with many fine details, a fresh blade makes a visible difference.

The individual cut paper layers of a shadow box laid out in a row before assembly to review depth and detail

Our best blade for cardstock comparison covers when to use fine-point vs deep-point vs bonded-fabric blades.

1.What software do I need to create papercut SVGs?
Inkscape (free) or Adobe Illustrator (paid). Inkscape handles everything most crafters need — path editing, boolean operations, layer management, and SVG export. Start with Inkscape and upgrade to Illustrator only if you need its advanced features.
2.Can I edit SVG files in Cricut Design Space?
Cricut Design Space offers limited editing: resize, rotate, weld, slice, and attach. You cannot edit individual path nodes or modify bridge structures. For any meaningful SVG editing, use Inkscape or Illustrator before importing.
3.How do I know if an SVG will cut correctly?
Open it in a vector editor and check for: (1) closed paths with no gaps, (2) bridges connecting all islands to the main shape, (3) no overlapping double-lines. Then do a small test cut at 3-4 inches before cutting at full size.
4.What's the minimum bridge width for a papercut SVG?
At least 1mm at your intended cut size for 65 lb cardstock, or 1.5-2mm for heavier paper. Thinner bridges risk snapping during cutting or weeding. When in doubt, make bridges wider — you can always thin them in your vector editor later.
5.Can I convert a JPEG or PNG into a papercut SVG?
You can auto-trace a raster image in Inkscape (Path → Trace Bitmap) or Illustrator (Image Trace), but the results need manual cleanup. Auto-tracing produces messy paths with too many nodes and broken bridges. The best approach is to auto-trace for a rough starting point, then manually refine the paths.
6.How many layers should a multi-layer papercut SVG have?
5-9 layers for a standard 1.5-inch-deep shadow box. Fewer than 5 layers doesn't create enough depth. More than 9 layers becomes difficult to assemble and may not fit the frame. Start with 5-6 layers and add more as you gain experience.
7.Why does my SVG look different in Design Space than in my editor?
Cricut Design Space may flatten groups, ignore certain stroke styles, or simplify complex paths. Always preview the cut lines in Design Space before cutting. If shapes are missing or distorted, simplify the SVG in your editor (fewer nodes, no fancy strokes, filled shapes only).