Articles20 min read

Cricut Shadow Box Ideas for 3D Paper Art

25 layered paper projects you can actually cut — organised by theme, difficulty, and occasion so you spend less time searching and more time crafting.

Shadowbox Magical Fox - Image 03

You just unboxed your Cricut, you've cut a few practice shapes, and now you're staring at the machine thinking: what do I actually make? That's the question every crafter hits, and it's exactly why I put together this collection of Cricut shadow box ideas — 25 layered paper projects organised by theme and difficulty so you can pick one and start cutting today.

I've been making layered paper shadow boxes for over two years. In that time I've test-cut hundreds of SVG templates on my Cricut Maker, ruined plenty of cardstock, and learned which designs actually work on the machine versus which ones look great on screen but fall apart the moment you try to weed them. Every project in this list has been through real Cricut cutting — no wishful thinking.

What You'll Find Here

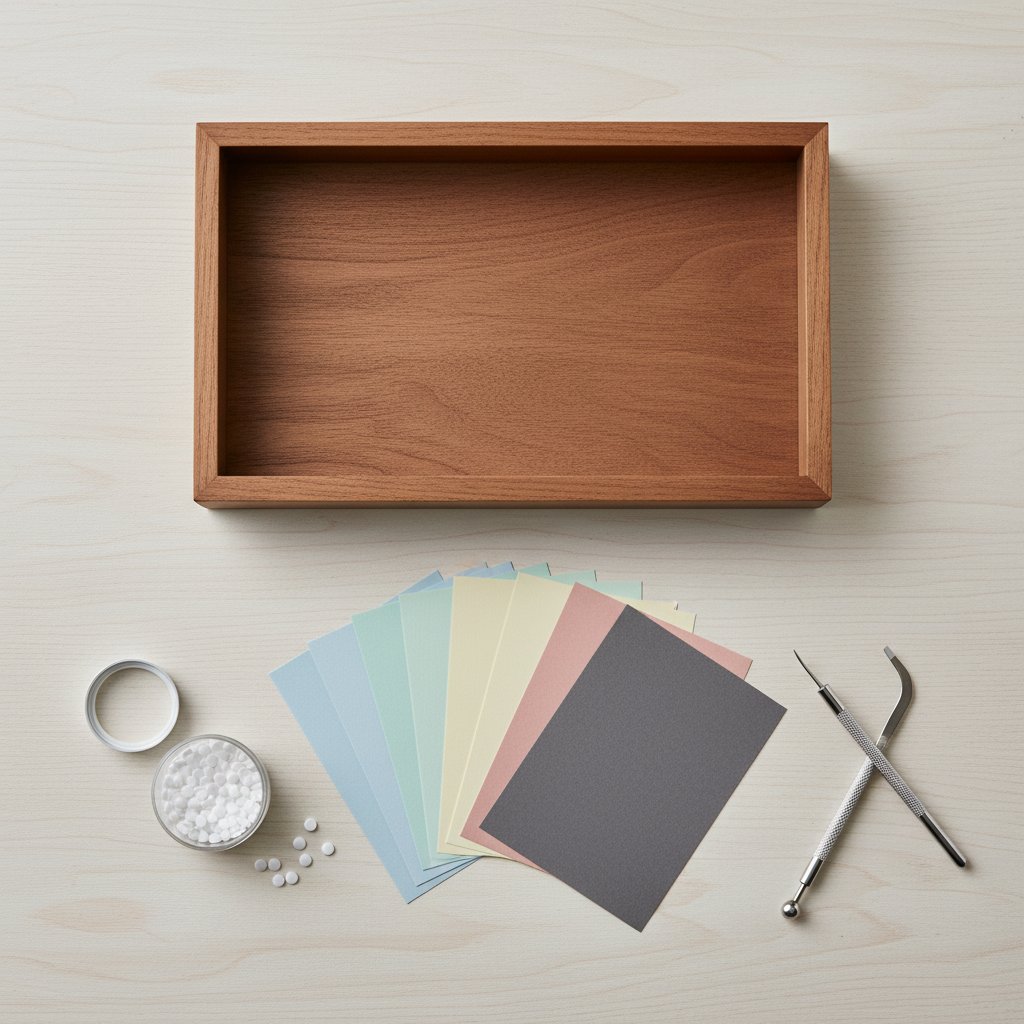
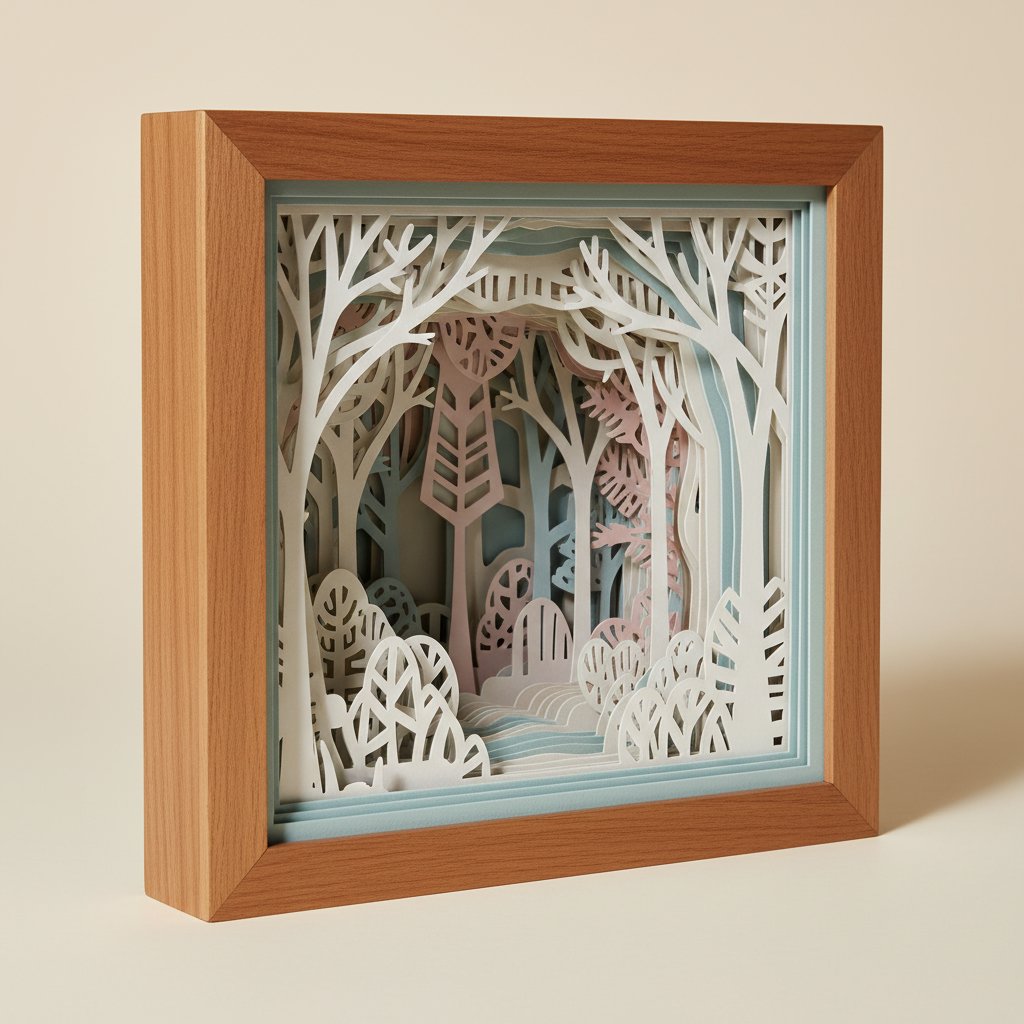
Each project includes the difficulty level (beginner, intermediate, or advanced), the recommended frame depth, and the cardstock colours that work best. I've grouped them into five categories:

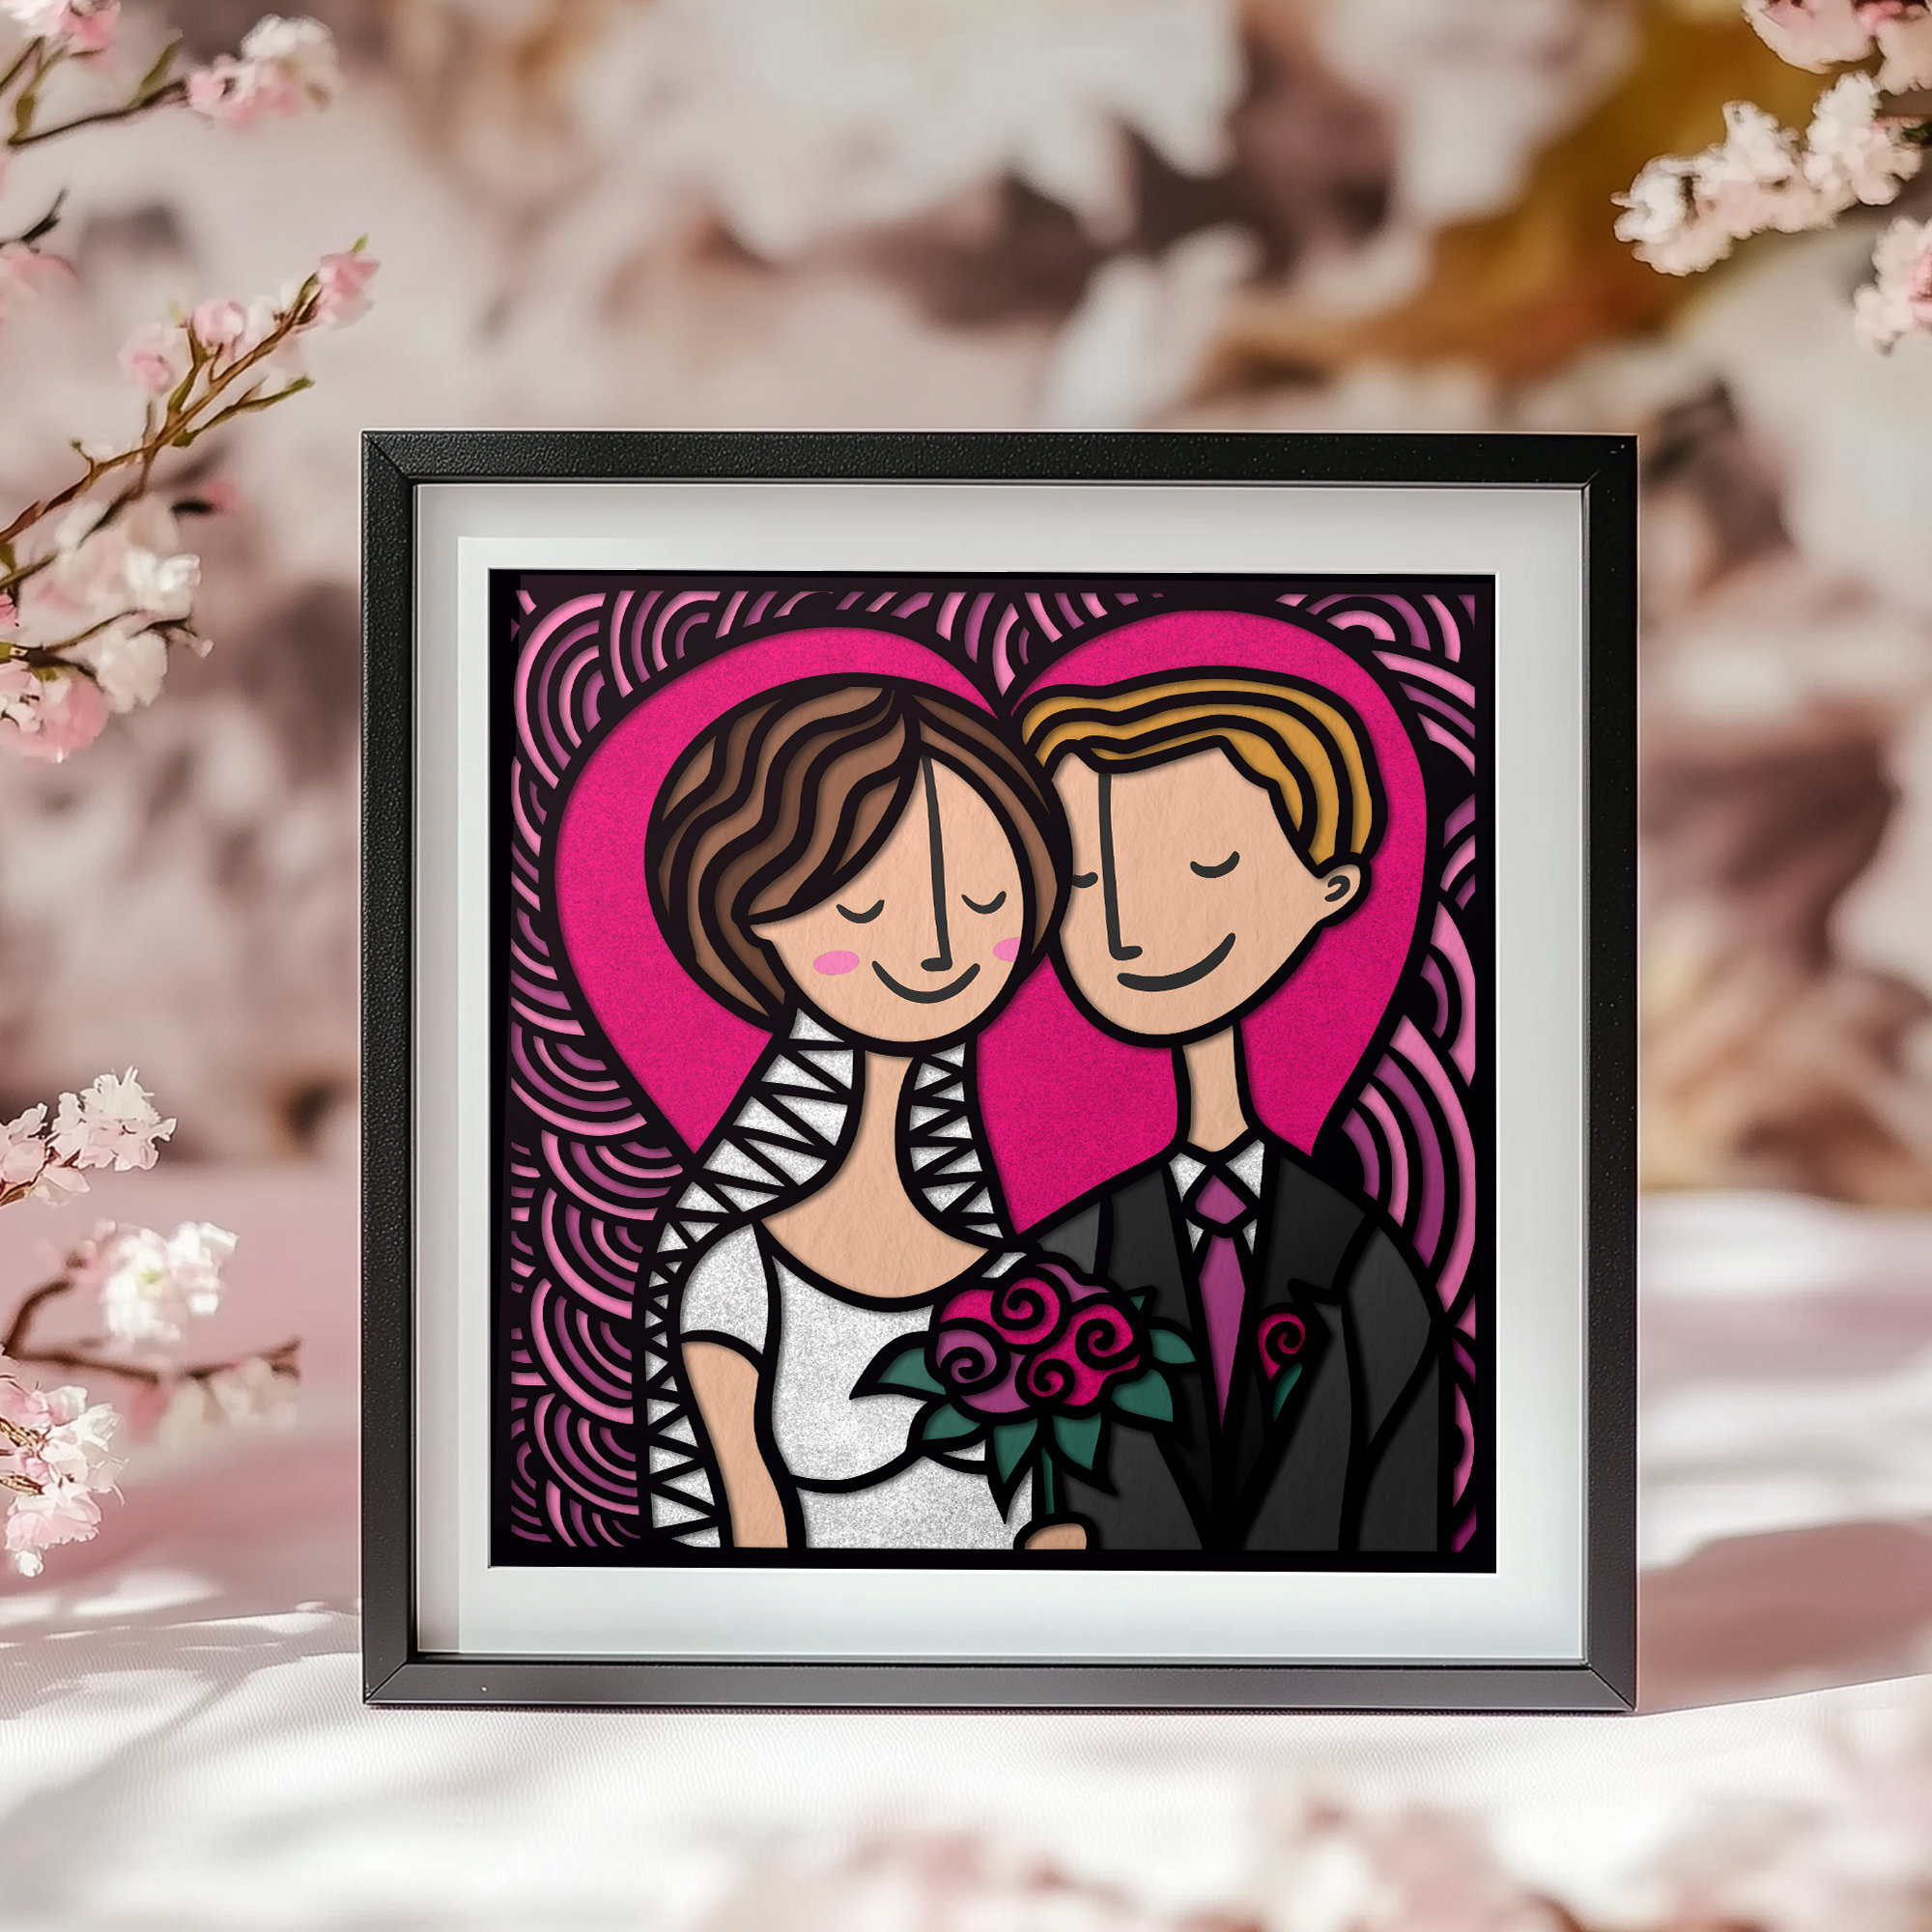
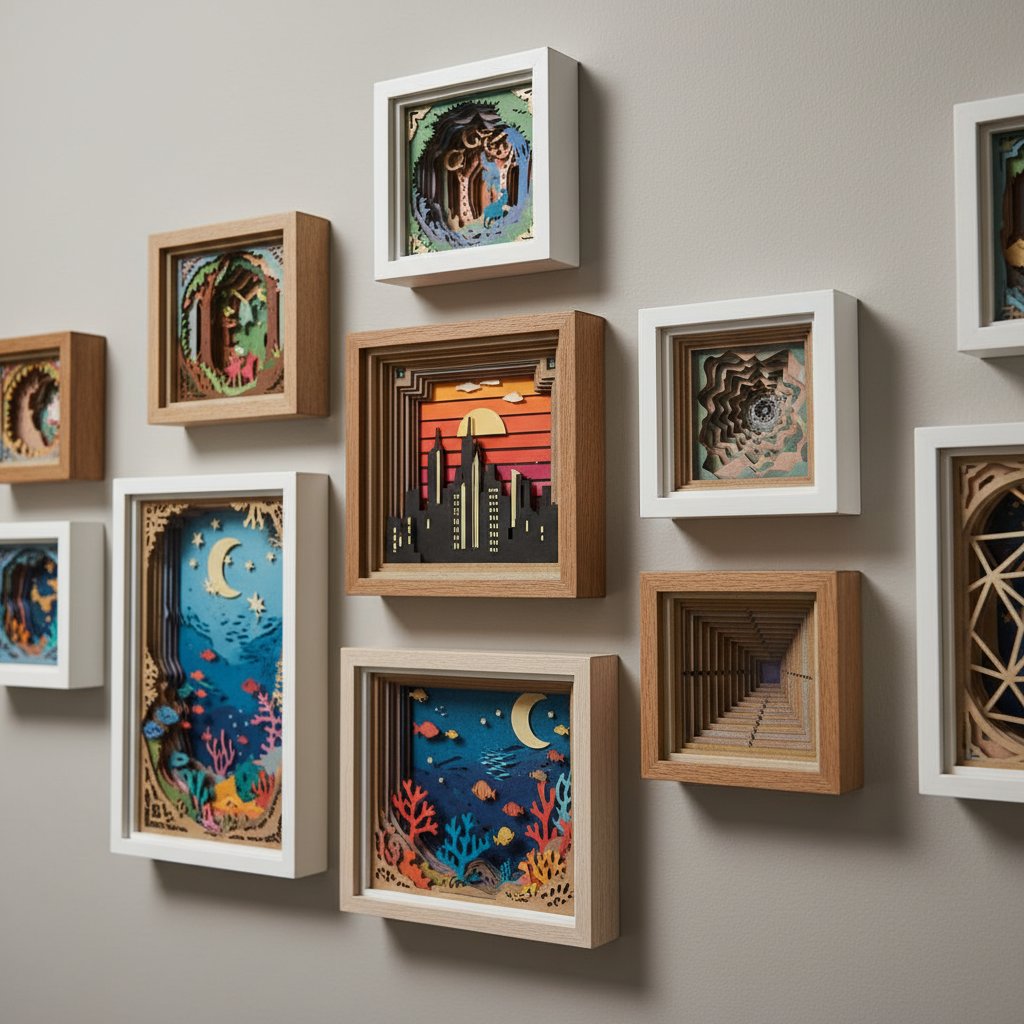
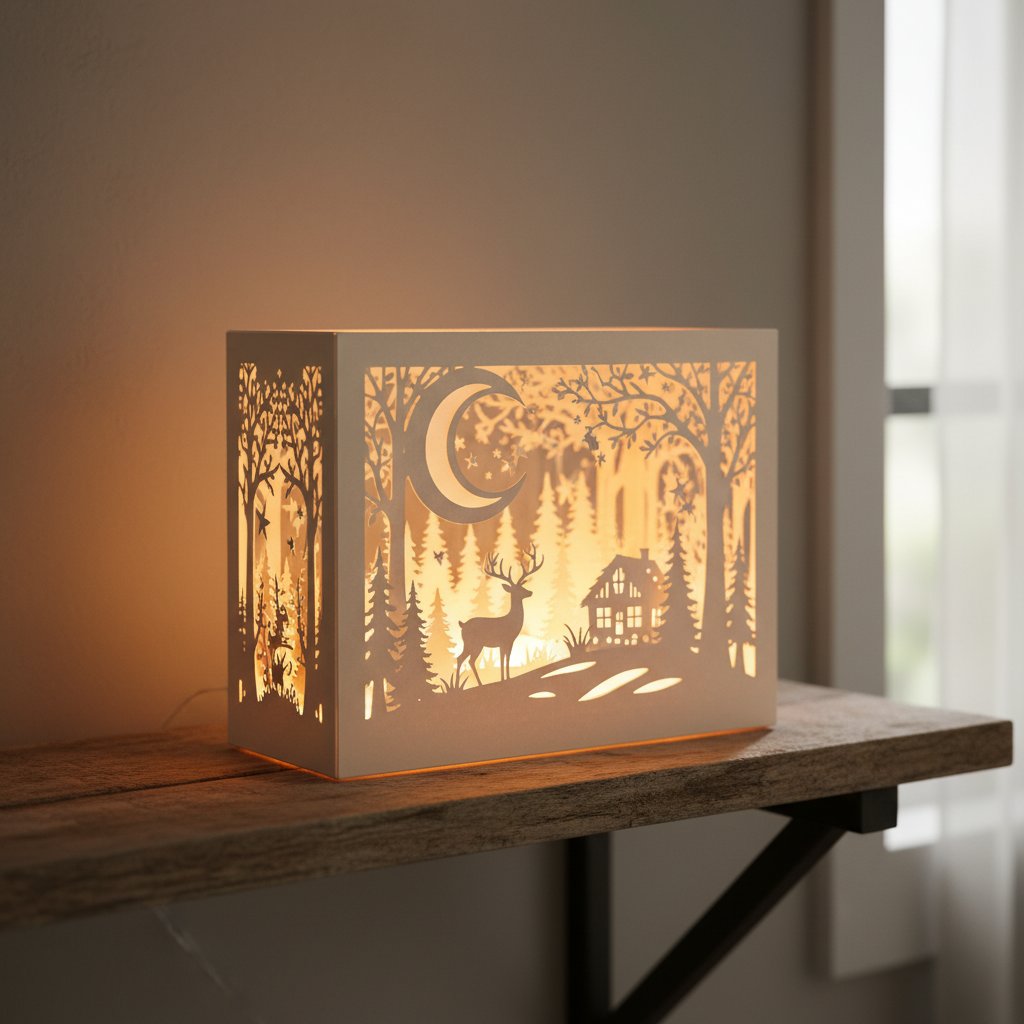
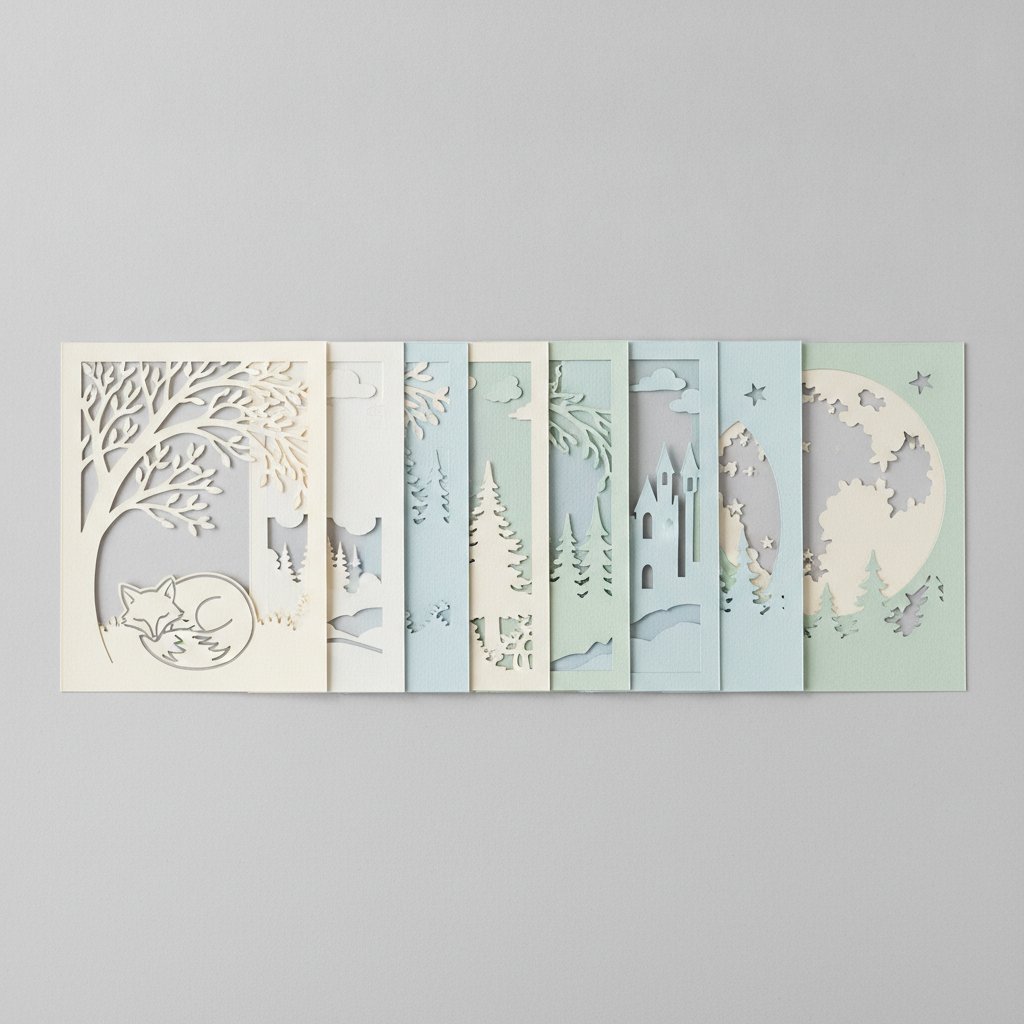
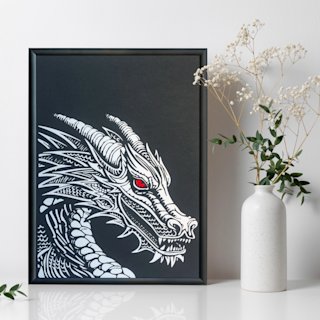
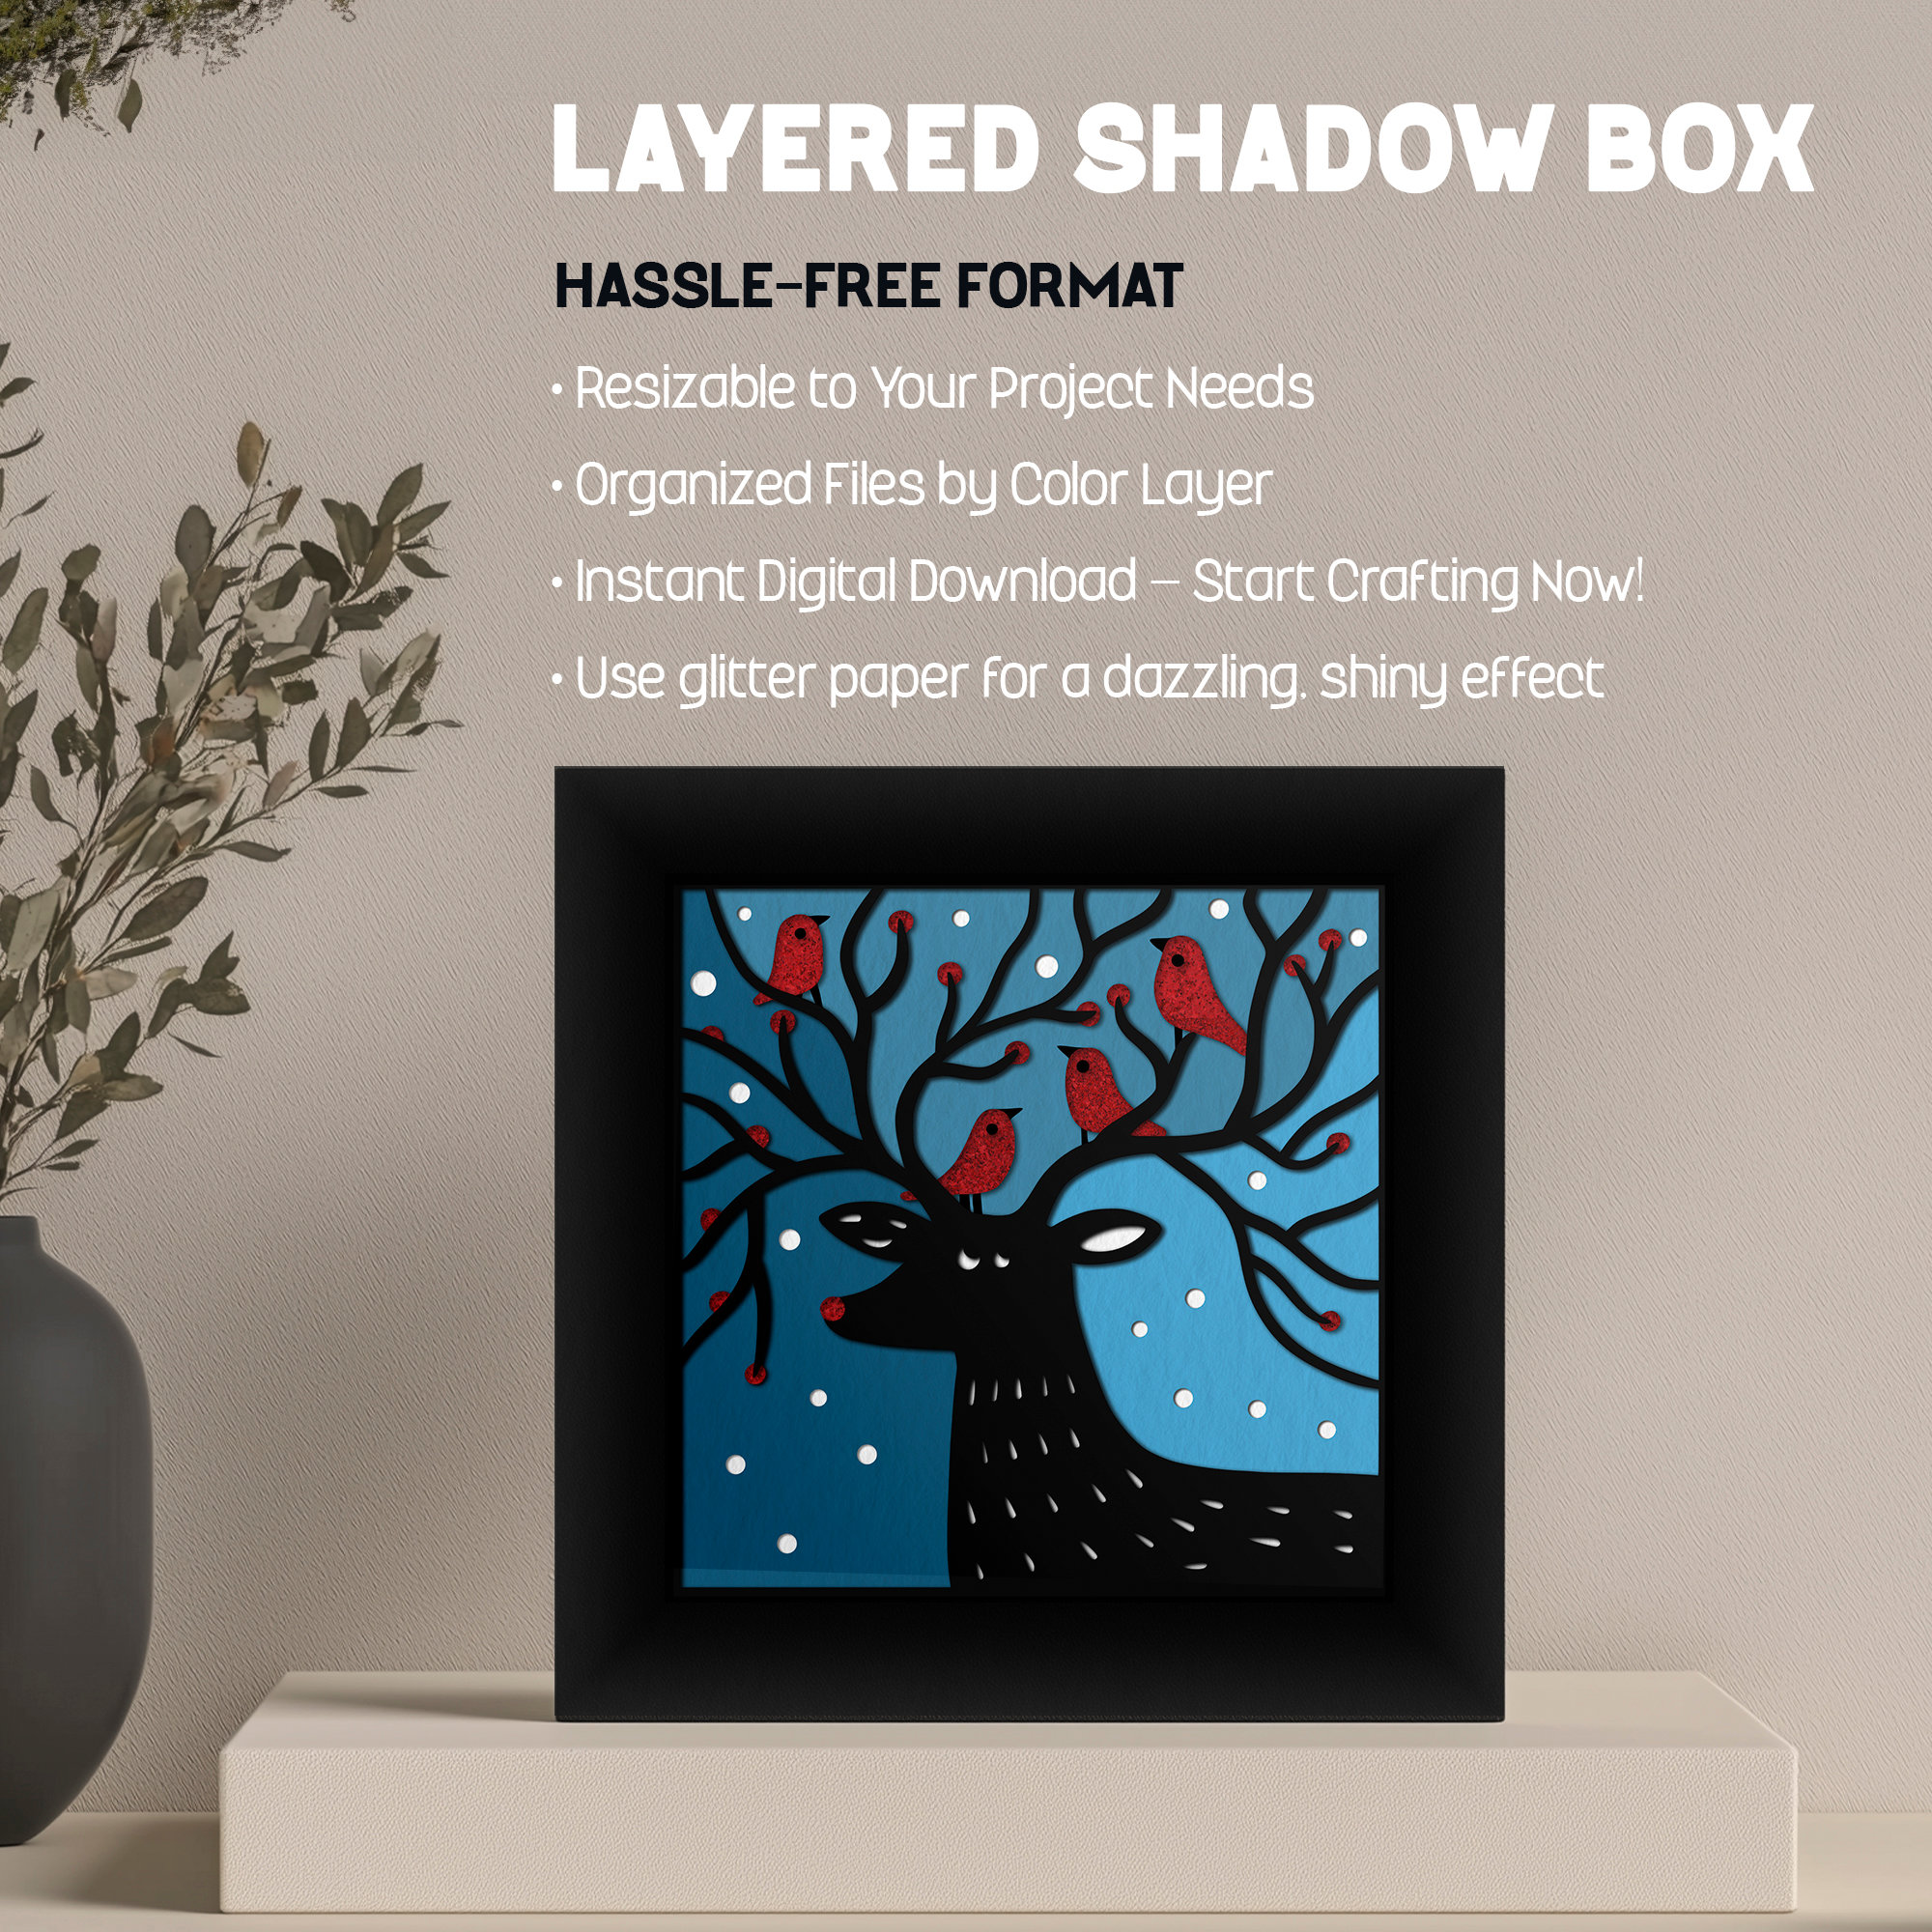
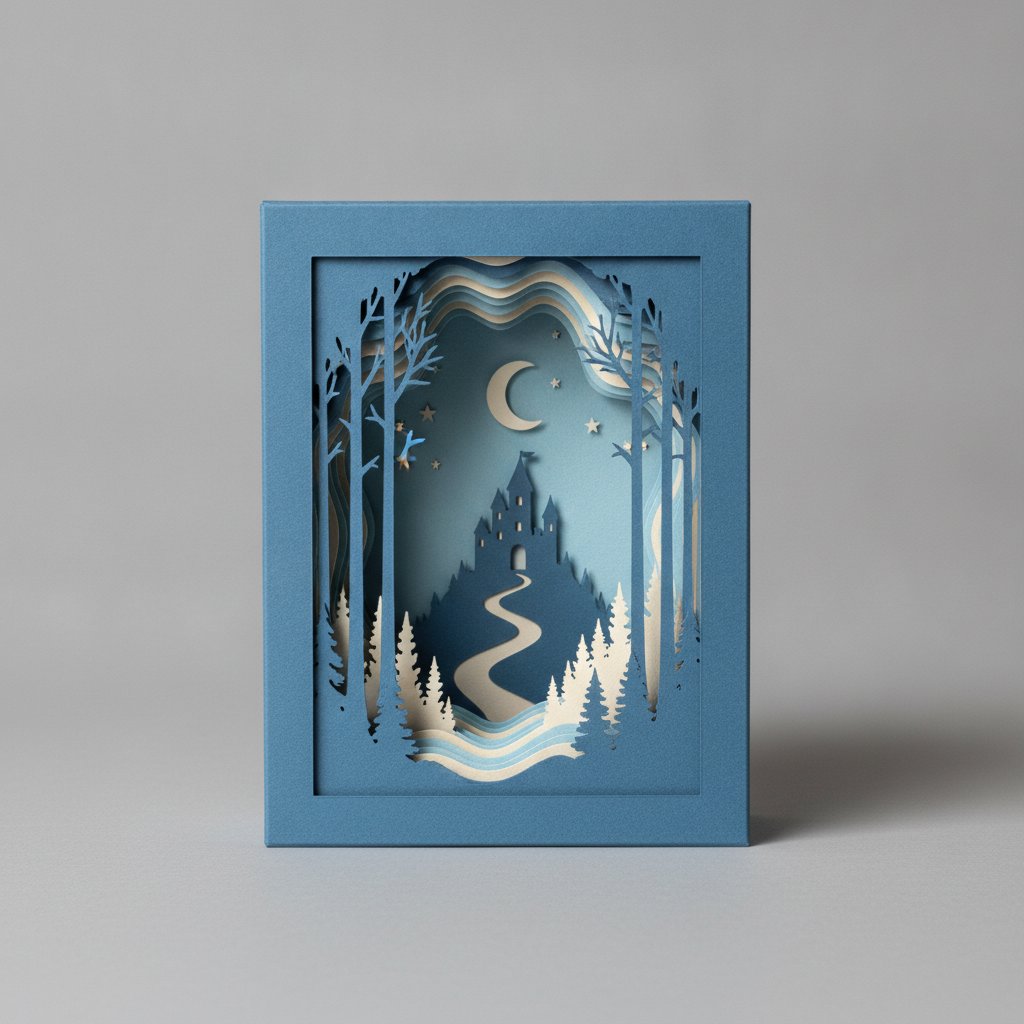
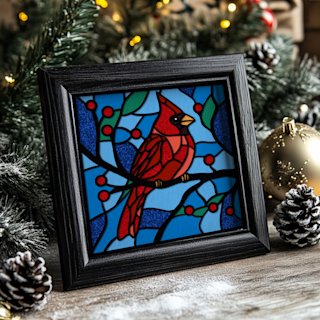
  • Floral & Botanical — hydrangeas, roses, lilies, and more - Animals & Fantasy — foxes, cats, dragons, and woodland scenes - Seasonal & Holiday — Christmas, spring, and year-round favourites - Architecture & Scenes — houses, cityscapes, and seaside views - Gifts & Milestones — weddings, anniversaries, and memorial pieces

Along the way I'll point you to the specific SVG templates I used so you can skip the guesswork and go straight to cutting. If you're brand new to shadow boxes, start with our complete beginner guide and come back here when you're ready to pick your first project.

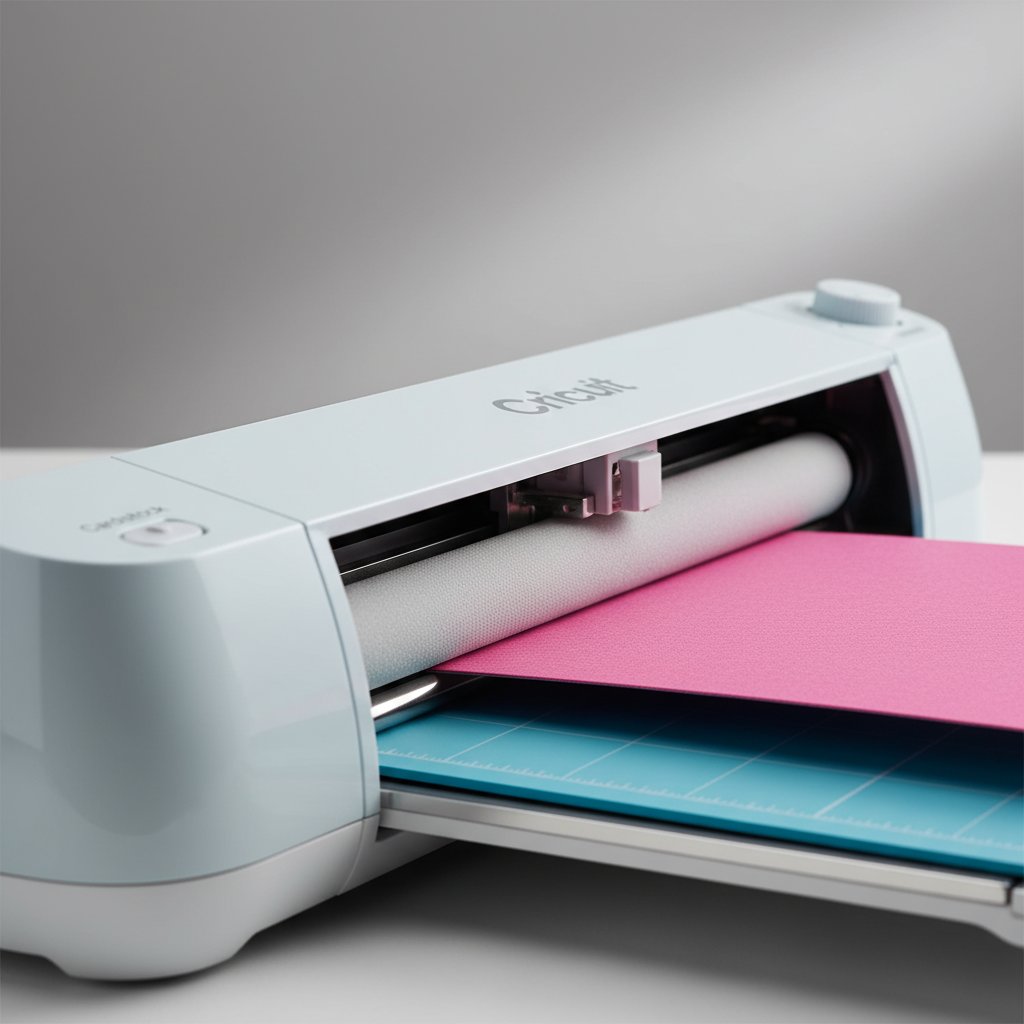
One more thing before we start: every shadow box in this list can be made with a Cricut Explore or Maker. You don't need the newest model or expensive accessories. A sharp blade, decent cardstock, and a deep frame are the only requirements. I've tested each design on my Cricut Maker using standard settings that work on the Explore series too, so you won't hit any compatibility surprises.

Quick Primer: What Makes a Good Shadow Box Project?

Layered paper cut shadow box nature scene with tree silhouettes showing dramatic depth through multiple layers

Before we dive in, three things separate a project that's fun to make from one that's frustrating:

  1. Layer count. Fewer layers (4-6) are easier for beginners. More layers (8-12) create stunning depth but demand patience and precise alignment. Our assembly guide walks you through the spacing step by step.

  2. Detail density. Intricate cuts with tiny bridges look incredible but need a sharp blade and the right cardstock settings. If you're just starting, choose designs with bolder shapes. Our Cricut cardstock settings guide has the exact numbers.

  3. Frame depth. A deeper frame (1.5-2 inches) gives your layers more room to breathe and is more forgiving of imperfect spacing. See our frame sizing guide for recommendations.

Now let's get into the projects.

Floral & Botanical Shadow Box Projects

Flower-themed shadow boxes are the most popular category by far. They're visually striking, they make beautiful gifts, and the organic shapes tend to cut cleanly on the Cricut. Here are my top picks.

Project 1: Hydrangea Bloom (Beginner)

Close-up of layered paper-cut flower shadow box showing depth between rose petal layers with soft shadows

Hydrangeas are the perfect first floral shadow box. The rounded petal clusters are forgiving to cut and assemble, and the layered effect of dozens of tiny circles building up into a full bloom is genuinely magical when you see it in the frame.

Difficulty: Beginner (5 layers, bold shapes)

Best cardstock: Soft blues, purples, and lavender tones. A pale green for the leaf layer.

Frame: 8×8 inch, 1.5 inch depth

My tip: Don't try to be precise with every tiny circle. The beauty of hydrangeas is that slight imperfections make them look more natural, not less. I learned this the hard way after spending two hours trying to get every circle perfectly aligned — it looked worse than the one I assembled casually.

Project 2: Romantic Rose (Intermediate)

Roses are trickier because the petal edges are thinner and more delicate. But the payoff is enormous — a well-executed rose shadow box has incredible depth, with each layer of petals creating real three-dimensional curvature.

Difficulty: Intermediate (7-9 layers, delicate edges)

Best cardstock: Deep reds, pinks, or even white-on-white for an elegant look.

Frame: 8×8 or 8×10 inch, 1.5-2 inch depth

My tip: Use 65 lb cardstock for the outer petal layers (they need to hold their shape) and switch to 80 lb for the inner detail layers. Our cardstock guide has specific recommendations.

Project 3: Elegant Lily (Intermediate)

Lilies have long, sweeping petals that create beautiful silhouette layers. The key is getting the stamen details right in the foreground layer — they're the element that makes the design recognisable.

Difficulty: Intermediate (6-8 layers)

Best cardstock: White, cream, or soft pink. Use a contrasting dark layer for the background.

Frame: 8×10 inch, 2 inch depth

My tip: The stamen pieces are tiny. Use tweezers and work slowly. I lost three stamen pieces to my carpet before I started working over a sheet of white paper.

Project 4: Pressed-Flower Garden (Advanced)

This design combines multiple flower types — daisies, poppies, and leaves — arranged as if pressed between pages. It's a statement piece that looks like real botanical art.

Difficulty: Advanced (10+ layers, fine detail)

Best cardstock: A mix of warm tones — yellow, orange, coral, soft green.

Frame: 10×10 or 12×12 inch, 2 inch depth

Project 5: Heart-Shaped Floral Wreath (Intermediate)

A heart-shaped arrangement of layered flowers and leaves, perfect for weddings, anniversaries, or Valentine's Day. The heart silhouette is bold and cuts cleanly.

Difficulty: Intermediate (7 layers)

Best cardstock: Red and pink flowers, green leaves, cream or gold background.

Floral Shadow Box Templates — Test-Cut and Ready
These flower-themed shadow box SVGs have been test-cut on Cricut machines. Each template includes pre-organised layers, clear cutting instructions, and guaranteed clean cuts. Pick your favourite bloom and start crafting today.

Animal & Fantasy Shadow Box Projects

Animal-themed shadow boxes are the biggest sellers in our shop, and for good reason. There's something about seeing a familiar creature emerge from layers of paper that makes people stop and stare. Here are the ones that consistently produce the best results on a Cricut.

Project 6: Woodland Fox (Beginner)

A layered papercut shadow box of a woodland fox curled under a tree with moonlight filtering through branches

The fox is our most popular design, period. It's beginner-friendly because the silhouette is bold and recognisable, the layer count is manageable (5-6 layers), and the scene — a fox curled beneath a tree with moonlight filtering through branches — is universally appealing.

Difficulty: Beginner (5-6 layers, bold silhouette)

Best cardstock: Orange, brown, white, dark blue or black for the sky layer.

Frame: 8×8 inch, 1.5 inch depth

My tip: The tree-branch foreground layer is the most delicate part. Cut it last, weed it carefully, and use a fresh blade for the cleanest cuts.

Project 7: Chill Cats (Beginner)

Two cats lounging together in a window scene. This is one of the easiest shadow boxes to assemble because the cat silhouettes are simple and bold. It's also a fantastic gift for cat lovers.

Difficulty: Beginner (4-5 layers)

Best cardstock: Black or grey for the cats, warm colours for the window and background.

Frame: 6×6 or 8×8 inch, 1-1.5 inch depth

Project 8: Majestic Dragon (Advanced)

The individual cut paper layers of a shadow box laid out in a row before assembly to review depth and detail

Dragons are the ultimate showpiece. The wing membranes, the scales, the fire — every layer adds drama. But this is not a beginner project. The wing details in particular require patience and a very sharp blade.

Difficulty: Advanced (10-12 layers, extremely fine detail)

Best cardstock: Greens, reds, or golds. Black background for maximum drama.

Frame: 8×10 or larger, 2 inch depth

My tip: Cut a test layer on plain paper first. If your Cricut struggles with the wing details, try our troubleshooting guide before committing to good cardstock.

Project 9: Crazy Dog Portrait (Intermediate)

A playful dog design that works brilliantly as a personalised gift. The bold outline makes it forgiving, but the expressive details in the face require careful weeding.

Difficulty: Intermediate (6-8 layers)

Best cardstock: Brown, black, white, or match the recipient's dog colour.

Frame: 8×8 inch, 1.5 inch depth

Project 10: Owl in Moonlight (Intermediate)

An owl perched on a branch against a full moon. The circular composition is naturally pleasing and the contrast between the dark owl silhouette and the glowing moon creates instant visual impact.

Difficulty: Intermediate (6-7 layers)

Best cardstock: Brown, cream, white, yellow or pale blue for the moon.

Animal Shadow Box SVGs — Our Best Sellers
From the beloved woodland fox to the dramatic dragon, these animal shadow box templates are our most popular designs. Each one is precision-tested for Cricut cutting and comes with layer-by-layer instructions. Perfect as gifts or statement home decor.

Seasonal & Holiday Shadow Box Projects

Christmas shadow boxes are what started this whole journey for me — my very first design was a simple layered Christmas tree, and I was hooked the moment I saw it lit up in a frame. Seasonal designs are also the most fun to give as gifts because they're timely and personal.

Project 11: Christmas Deer & Red Birds (Beginner)

Shadowbox Christmas Deer in a finished frame

A serene winter scene with a deer standing among red cardinals and snow-dusted branches. This is one of our most requested Christmas designs. The shapes are bold and natural, making it an excellent first holiday shadow box.

Difficulty: Beginner (5-6 layers)

Best cardstock: Brown, white, red, green.

Frame: 8×8 inch, 1.5 inch depth

Project 12: Christmas Gnome (Beginner)

Gnomes are irresistibly charming and surprisingly easy to cut. The round body and hat shapes are perfect for the Cricut, and the design works with or without LED lights behind it.

Difficulty: Beginner (5 layers)

Best cardstock: Red, white, grey, green.

Frame: 6×6 or 8×8 inch, 1-1.5 inch depth

Project 13: Red Cardinal in Winter (Intermediate)

A single cardinal perched on a snowy branch. The red-on-white contrast is stunning, and this design looks particularly beautiful with LED backlighting.

Difficulty: Intermediate (6-7 layers)

Best cardstock: Red, white, brown, green.

Frame: 8×8 inch, 1.5 inch depth

Project 14: Gingerbread House (Intermediate)

A whimsical gingerbread house with candy details and frosted roof. This design has more intricate small details (candy canes, gumdrops) that require careful cutting, but the result is worth every minute.

Difficulty: Intermediate (7-8 layers, small details)

Best cardstock: Brown, white, pastel pink, green, yellow.

Frame: 8×8 inch, 1.5 inch depth

Project 15: Snowman Scene (Beginner)

A cheerful snowman with a top hat, scarf, and falling snowflakes. Very forgiving design — the round shapes cut cleanly and the snowflake layer can be simplified if you're struggling with the detail.

Difficulty: Beginner (5 layers)

Best cardstock: White, black, red, orange, blue sky background.

Frame: 8×8 inch, 1.5 inch depth

Project 16: Cat by the Fireplace (Intermediate)

A cosy Christmas scene with a cat curled up by a fireplace, stockings, and a decorated tree. This one tells a story — it's the kind of piece that makes people smile when they see it on a mantle.

Difficulty: Intermediate (7-8 layers)

Best cardstock: Warm browns, reds, green, orange for the fire.

Frame: 8×10 inch, 1.5-2 inch depth

Project 17: Christmas Nutcracker (Intermediate)

A simple assembled papercut shadow box made from four to six paper layers showing modest depth

A traditional nutcracker design with bold, recognisable shapes. The symmetrical composition makes it look polished even if your spacing isn't perfect.

Difficulty: Intermediate (6-7 layers)

Best cardstock: Red, gold, black, white.

Frame: 8×8 inch, 1.5 inch depth

Project 18: Gingerbread Man Collection (Beginner)

A simpler gingerbread design featuring gingerbread men, candy, and icing details. Great for kids' rooms or as a fun holiday decoration.

Difficulty: Beginner (4-5 layers)

Best cardstock: Brown, white, pastel colours.

Frame: 6×6 or 8×8 inch, 1 inch depth

Project 19: Christmas Gift Card Set (Beginner)

Smaller shadow box designs specifically created as gift card presentations. These are quick to make (under an hour each) and double as both the card and the gift.

Difficulty: Beginner (3-4 layers each, small format)

Best cardstock: Festive colours — red, green, gold, white.

Frame: 5×7 inch or included card format

Seasonal & Nature Shadow Box Projects

Not every seasonal project has to be Christmas-specific. These designs work year-round or bridge the gap between holidays.

Project 20b: Spring Blossom Branches (Beginner)

Delicate cherry blossom branches stretching across the frame, with tiny petals falling through multiple layers. This is a beautiful spring decoration and one of the most zen projects to assemble — the repetitive petal placement is meditative.

Difficulty: Beginner (5 layers)

Best cardstock: Pink, white, pale green, light brown for branches.

Frame: 8×8 inch, 1.5 inch depth

My tip: Vary the pink tones across layers — darker pink in back, lighter pink in front — to create natural colour depth.

Project 20c: Autumn Forest (Intermediate)

Close-up of a Cricut machine loading a cutting mat with colored cardstock ready to cut

A dense forest scene in full autumn colour, with overlapping tree silhouettes in oranges, reds, and golds. The multiple tree layers create a stunning sense of depth — like looking into a real forest.

Difficulty: Intermediate (8-9 layers)

Best cardstock: Orange, red, gold, yellow, dark brown.

Frame: 8×10 inch, 2 inch depth

My tip: The foreground tree layer has the most detail. Cut it on 65 lb cardstock with a fresh blade and take your time weeding. The contrast between this layer and the warm background layers is what makes the design pop.

Project 20d: Sunburst Mandala (Intermediate)

A geometric mandala design where each layer adds radiating lines and shapes, building up to a sunburst pattern. Geometric designs like this are satisfying to assemble because each layer snaps perfectly into place.

Difficulty: Intermediate (7 layers, geometric precision)

Best cardstock: Gold, yellow, orange, white. Or try a rainbow gradient.

Frame: 8×8 inch, 1.5 inch depth

Project 20e: Underwater Scene (Advanced)

Fish, seaweed, coral, and bubbles arranged in layers that create an aquarium-like depth effect. This is one of the more creative designs — it looks incredible with blue-tinted LED lights behind it.

Difficulty: Advanced (10+ layers, organic shapes with fine details)

Best cardstock: Multiple blues, teal, green, coral, white.

Frame: 8×10 inch, 2 inch depth

My tip: Use vellum or translucent paper for the "water" layers closest to the back. When you add LED lights, the whole thing glows like a real aquarium. This technique is covered in our LED guide.

Christmas Shadow Box Bundle — Ready to Cut
Make this holiday season memorable with these Christmas-themed shadow box templates. From the classic deer and cardinal to the whimsical gnome and gingerbread house, each design is test-cut and includes step-by-step assembly instructions. Start with the free Christmas Village template and build from there.

Architecture & Scene Shadow Box Projects

These designs recreate buildings, cityscapes, and landscapes in layered paper. They tend to be more geometric than organic, which means cleaner cuts but more precise alignment requirements. If you enjoy precision work, this is your category.

Project 21: Mediterranean Seaside Houses (Intermediate)

Deep layered paper-cut shadow box viewed at an angle showing paper layers receding into depth 
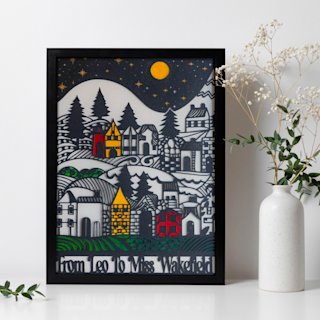
way that looks stunning with backlighting — the windows and doorways glow like real Mediterranean houses at sunset.

Difficulty: Intermediate (7-8 layers)

Best cardstock: White, blue, terracotta, sandy beige.

Frame: 8×10 or 10×10 inch, 2 inch depth

My tip: This design shines with lights behind it. See our LED lighting guide for the exact fairy light placement.

Project 22: Christmas Village (Beginner)

A charming row of village buildings with snow-covered roofs, trees, and street lamps. This is one of our free templates and it's the perfect starting point for anyone new to shadow box crafting.

Difficulty: Beginner (5 layers)

Best cardstock: White, grey, warm yellow for windows, green for trees.

Frame: 8×8 inch, 1.5 inch depth

Project 23: Mind Tree Landscape (Advanced)

A surreal tree growing from a human silhouette, with intricate root and branch systems spreading through multiple layers. This is one of our most artistic designs — it's the kind of piece that becomes a conversation starter on your wall.

Difficulty: Advanced (10+ layers, very fine detail)

Best cardstock: Black, white, or a monochrome gradient from dark to light.

Frame: 8×10 or larger, 2 inch depth

Scene & Architecture Templates
From Mediterranean seaside houses to surreal landscapes, these scene-based templates create stunning wall art. Each design uses geometric precision and negative space for maximum visual impact. Start with the free Christmas Village and work your way up.

Gifts & Milestone Shadow Box Projects

These are the projects that become keepsakes. Whether it's a wedding, anniversary, or memorial piece, these designs carry emotional weight that goes beyond decoration.

Project 24: Wedding Anniversary Flowers (Intermediate)

Shadowbox Wedding Anniversary

An elegant floral design with intertwined blooms symbolising a couple's journey. The centrepiece has space for personalisation — a date, initials, or a short message cut into the background layer. This is one of our most gifted templates.

Difficulty: Intermediate (7-8 layers)

Best cardstock: White, gold, cream, soft pink. Or match the couple's wedding colours.

Frame: 8×8 or 8×10 inch, 2 inch depth

My tip: Use a metallic or pearl cardstock for the foreground layer to give it a premium, gift-worthy finish. Our metallic cardstock guide covers the exact settings you need.

Project 25: Mother's Day / Memorial Flowers (Intermediate)

A gentle floral arrangement designed to honour mothers — whether celebrating Mother's Day or creating a lasting memorial tribute. The design is intentionally peaceful and elegant.

Difficulty: Intermediate (6-7 layers)

Best cardstock: Soft pink, white, cream, green.

Frame: 8×8 inch, 1.5 inch depth

Project 26: Heart with Birds (Beginner)

A heart-shaped design filled with flying birds and branches. Simple, elegant, and universally meaningful. This is our go-to recommendation when someone asks "which shadow box should I make for a gift?" because it works for almost any occasion.

Difficulty: Beginner (4-5 layers)

Best cardstock: White, grey, or any colour that matches the occasion.

Frame: 8×8 inch, 1.5 inch depth

Meaningful Gift Templates
These shadow box designs were created for life's important moments. From wedding anniversaries to memorial tributes, each template produces a handmade keepsake that means more than any store-bought gift. All designs are test-cut and include assembly instructions.

How to Choose the Right Project for You

Growing collection of handmade layered paper-cut shadow boxes on a gallery wall

With 25+ options it can still feel overwhelming. Here's my decision framework:

If you're a complete beginner, start with: - Chill Cats (Project 7) — fewest layers, boldest shapes - Christmas Gnome (Project 12) — fun, forgiving, and seasonal - Snowman Scene (Project 15) — classic and easy

If you've made one or two shadow boxes, try: - Woodland Fox (Project 6) — our most popular design for good reason - Romantic Rose (Project 2) — learn to work with more delicate cuts - Christmas Deer & Red Birds (Project 11) — beautiful gift potential

If you want to push your skills, go for: - Majestic Dragon (Project 8) — the ultimate showpiece - Pressed-Flower Garden (Project 4) — layer management challenge - Mind Tree Landscape (Project 22) — artistic and complex

If you're making a gift, consider: - Wedding Anniversary Flowers (Project 23) for couples - Mother's Day Flowers (Project 24) for mums - Heart with Birds (Project 25) for any occasion

Essential Supplies Checklist

Before you start any project, make sure you have:

Overhead flat lay of shadow box supplies including a frame colored cardstock foam dots and craft tools
  • Cricut machine — Maker, Explore Air 2, or Explore 3 all work. Maker gives you the most blade options. - Fine-point blade — sharp and relatively new. Replace it if you've cut more than about 50 mats worth of cardstock. See our blade comparison for specifics. - Cardstock — 65 lb is the sweet spot for most shadow box projects. Our complete cardstock guide covers weights and brands. - StandardGrip mat — for 65 lb cardstock. LightGrip for lighter papers. - Foam adhesive squares or dots — for spacing between layers. I use 2mm thick foam squares for most projects. 3mm gives more depth but uses up your frame space faster with 8+ layer designs. - Craft glue or double-sided tape — for permanent assembly. I prefer double-sided tape for the large background layer and foam squares for everything else. - Deep frame — 1.5 to 2 inch depth minimum. I get most of mine from IKEA (Ribba series) or Amazon. - Tweezers — for placing small pieces. Fine-tip craft tweezers are worth the investment. - Weeding tool — for removing tiny cutout pieces. The Cricut hook tool works, but a dedicated weeding pin is faster for delicate work. - Cutting mat protector (optional) — to keep your work surface clean. I use a large self-healing mat. - Ruler and pencil — for marking alignment points on your frame backing.

You don't need anything fancy. I made my first 20 shadow boxes with just the Cricut, cardstock, a glue stick, and foam squares from the pound shop. The fancy tools are nice-to-haves, not requirements.

Frame Size Guide by Project

| Frame Size | Projects | Notes | |------------|----------|-------| | 5×7 inch | Gift Card Set (19) | Small format, quick makes | | 6×6 inch | Chill Cats (7), Gnome (12) | Square formats work well for simple designs | | 8×8 inch | Most projects | The most versatile size — start here | | 8×10 inch | Lily (3), Cat Fireplace (16), Dragon (8) | Rectangular designs need this format | | 10×10 inch | Pressed-Flower Garden (4), Seaside Houses (20) | Larger, more detailed designs | | 12×12 inch | Mind Tree (22) | Statement pieces need room |

Adding Lights to Your Shadow Box

Tiny battery-operated fairy lights woven between the cut paper layers of a shadow box

Nearly every project in this list looks even better with LED backlighting. The warm glow transforms a paper craft into something that looks like stained glass. Our full LED lighting guide covers the process, but the short version:

  1. Choose warm white LED fairy lights (battery operated, copper wire) 2. Use a frame that's at least 1.5 inches deep 3. Place lights between the back layer and the second-to-back layer 4. Use a piece of vellum or tracing paper as a diffuser if the lights are too bright 5. Route the battery pack out the bottom or side of the frame

Common Mistakes to Avoid

Assembled layered paper-cut design held up against a bright light to check layer alignment through the cutouts

I've made every one of these mistakes so you don't have to:

  1. Cutting with a dull blade. If your cuts are tearing instead of slicing cleanly, change the blade. It's the single biggest factor in cut quality. Our troubleshooting guide has photos of what each problem looks like.

  2. Skipping the test cut. Always do a small test cut on the cardstock you plan to use. Different brands need different settings, even at the same weight.

  3. Assembling in the wrong order. Always work back to front — background layer first, foreground last. It sounds obvious, but I've mixed up layers more times than I care to admit.

  4. Using too much adhesive. Foam squares should be small and placed strategically (corners and centre). Big glue blobs warp the cardstock and are visible through the design.

  5. Forgetting to clean the mat. A sticky mat picks up cardstock fibres that interfere with the next cut. Wipe it with a lint roller between cuts. Our mat guide covers maintenance in detail.

For a full breakdown of shadow box pitfalls, see our common mistakes guide.

What's Next?

Pick one project from the list above and commit to making it this week. Don't overthink it — the beauty of shadow box crafting is that even your first attempt will look impressive in a frame. Here are the resources that will help you succeed:

The most important thing is to start cutting. Pick a project, load your cardstock, and press that Go button. Your first shadow box won't be perfect — mine certainly wasn't — but it will be yours, and that makes it special.

Displaying Your Finished Shadow Box

A finished illuminated paper-cut shadow box glowing warmly as a focal point on a dim room wall

You've made something beautiful — now show it off properly. Here are my top tips for displaying shadow boxes:

Wall mounting. Most deep frames come with built-in wall hangers. For heavier pieces (large frames with 10+ layers of cardstock), use two hooks instead of one to distribute the weight. A spirit level helps avoid the slightly-crooked shadow box that will bother you forever.

Shelf display. Shadow boxes look stunning on floating shelves, especially when grouped in threes. Try combining a floral design, an animal design, and a seasonal piece for variety. Leave about 3-4 inches between frames.

With lighting. If you added LED lights, display the piece where the lights have maximum effect — a dim hallway, a bedroom wall at night, or a mantlepiece. The warm glow transforms the piece from "nice papercraft" to "is that really made of paper?"

Rotation. I swap my seasonal shadow boxes throughout the year — Christmas designs in November-January, spring florals in March-May, and so on. It keeps the displays fresh and gives each piece a seasonal purpose. Our paper art preservation guide covers how to store pieces safely when they're not on display.

Grouping by colour. If you're displaying multiple pieces together, choose cardstock colours that complement each other. A set of three shadow boxes in a blue-white-grey palette looks cohesive and intentional. Three random colour schemes side by side looks cluttered.

Share Your Creation

If you make one of these projects, I'd love to see how it turns out. Tag @muralmoodsart on social media or send a photo to support[at]muralmoodsart.com. Every crafter's first shadow box is special, and yours deserves to be seen.

1.How many layers should a beginner shadow box have?
Start with 4-6 layers. This gives you enough depth to see the 3D effect without overwhelming you with alignment. Projects like the Chill Cats or Christmas Gnome in this list are perfect first choices.
2.Can I use a Cricut Joy for shadow boxes?
The Cricut Joy can cut shadow box layers, but its small mat size (4.5×6.5 inches) limits you to very small designs. The Explore or Maker series are much better suited for standard 8×8 inch shadow boxes.
3.What type of cardstock is best for shadow boxes?
65 lb solid-core cardstock is the sweet spot for most projects. It cuts cleanly, holds its shape, and is widely available. Heavier 80 lb cardstock works for simpler designs with fewer intricate cuts. See our [complete cardstock guide](/articles/best-cardstock-paper-cut-shadow-box-complete-guide/) for brand recommendations.
4.How long does a shadow box project take?
A beginner project (4-5 layers) takes about 1-2 hours from opening the SVG to hanging the finished piece. An advanced project (10+ layers) can take 3-5 hours. The cutting itself is fast — most of the time is spent weeding and assembling.
5.Do I need special software to use shadow box SVGs?
No. Cricut Design Space (free with any Cricut machine) opens SVG files directly. Just upload the file, size it to your frame, and cut. Our [Design Space import guide](/articles/import-multi-layer-shadow-box-svg-cricut-design-space/) walks you through it step by step.