Articles12 min read

Digital-Analog Hybrid Paper Cutting

A beginner-to-advanced workflow for blending Cricut precision cuts with hand-finished detail — the techniques that turn a machine-cut file into gallery-ready wall art no off-the-shelf design can match.

Three-step Cricut crafting process showing cardstock being cut with Cricut machine then assembled with glue

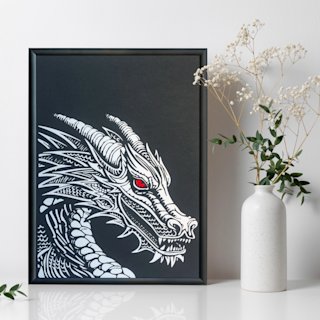
The first hybrid piece I sold was a seven-layer woodland fox shadow box for a friend's housewarming. I let the Cricut cut the six background silhouettes — trees, hills, moon, groundline — in about fourteen minutes of unattended machine time. Then I spent another hour hand-cutting the fox's fur texture, the whiskers, and a single hand-torn edge along the foreground grass so the bottom of the frame didn't read as laser-perfect. It sold for twice what my all-machine pieces went for, and the buyer specifically said the fur was why. That hour of handwork was worth more than the other six layers combined.

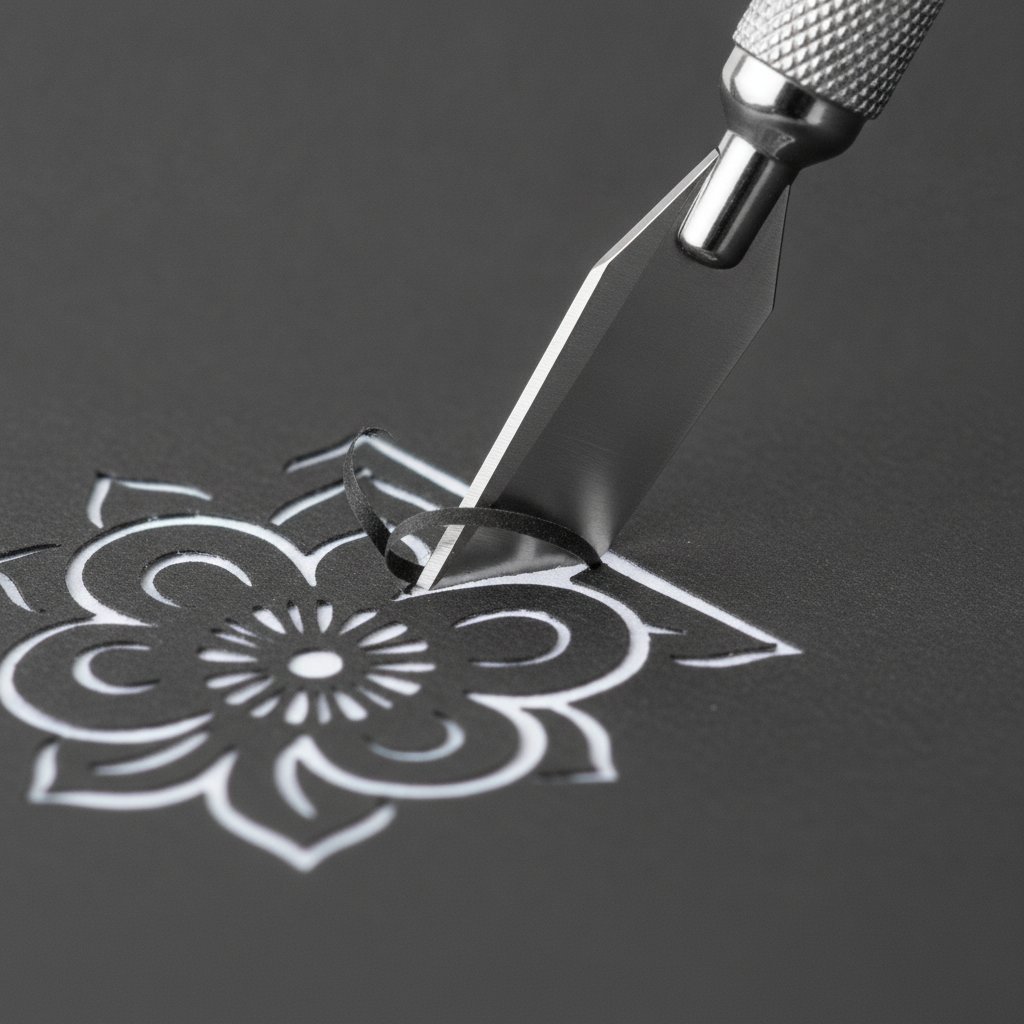
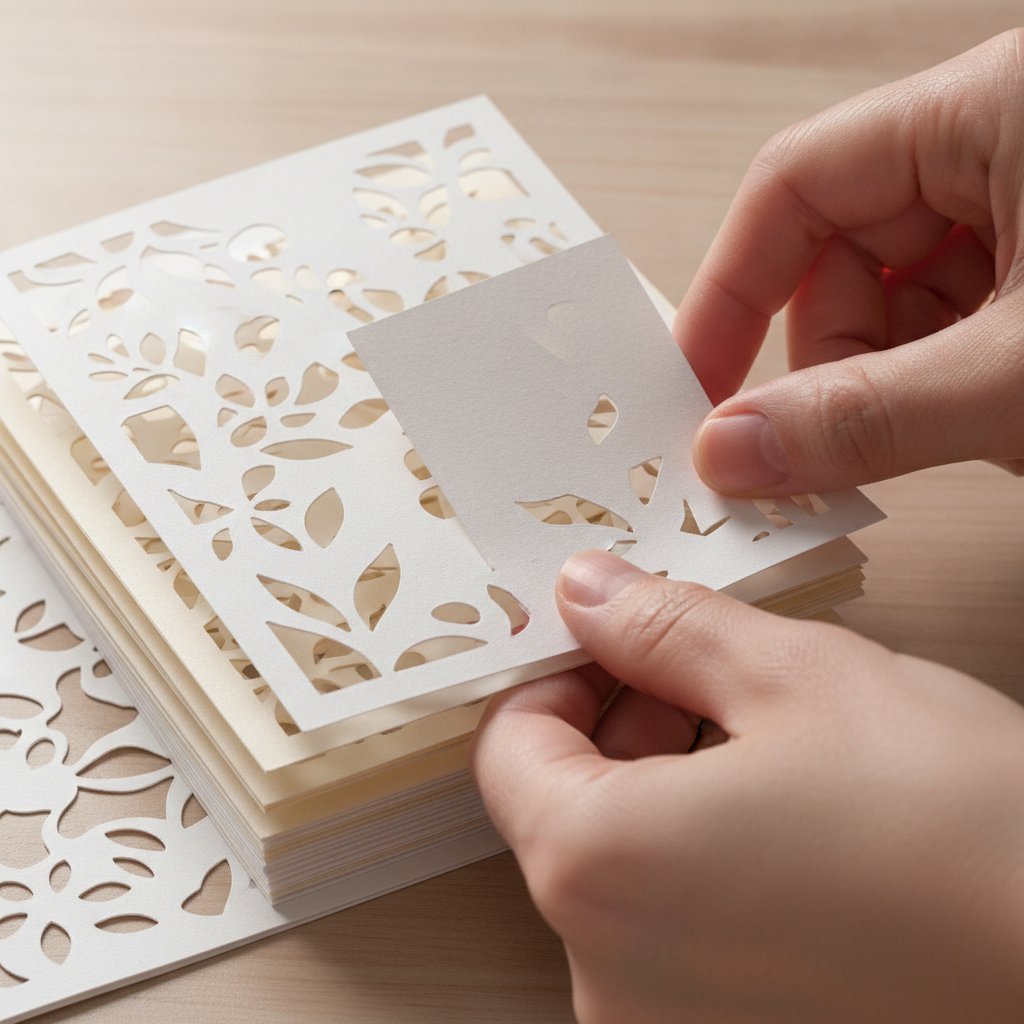
That gap — between a file a machine can cut and a piece a person will pay gallery prices for — is what digital-analog hybrid paper cutting fills. The machine handles the repetitive precision (base silhouettes, geometric layers, clean repeated cuts) and your hands handle the detail the machine can't (texture, fragile bridges, torn edges, hand-registered accents). Done badly, hybrid work looks like a machine cut with a few knife scratches added. Done well, it reads as crafted — a piece no off-the-shelf file can reproduce.

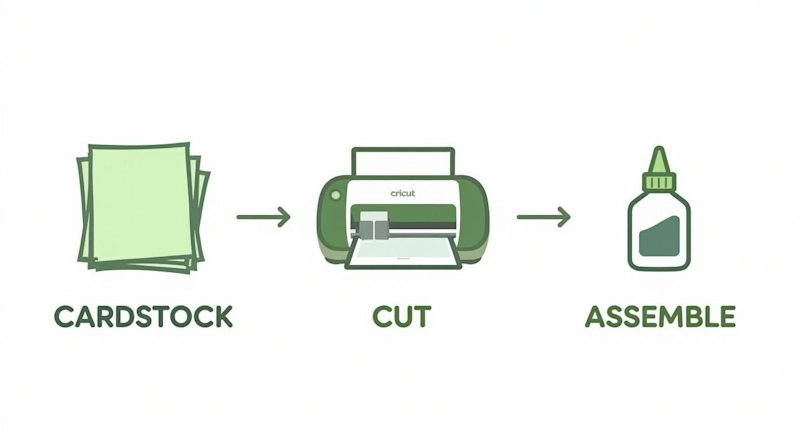
If you search "digital analog hybrid paper cutting" today, the results are almost all scrapbooking tutorials, Reddit threads, and academic papers — none of it aimed at fine-art wall decor, and almost none of it Cricut-specific. So I built the guide I wanted when I was staring at that fox file. This is a beginner-to-advanced workflow for hybrid paper cutting as fine art: shadow boxes, framed layered pieces, and statement wall art, cut on a Cricut (or Silhouette) and finished by hand.

A hand sketches a numbered layer-stack layout plan in pencil beside sheets of cardstock and a ruler — the planning step where the digital file meets analog execution

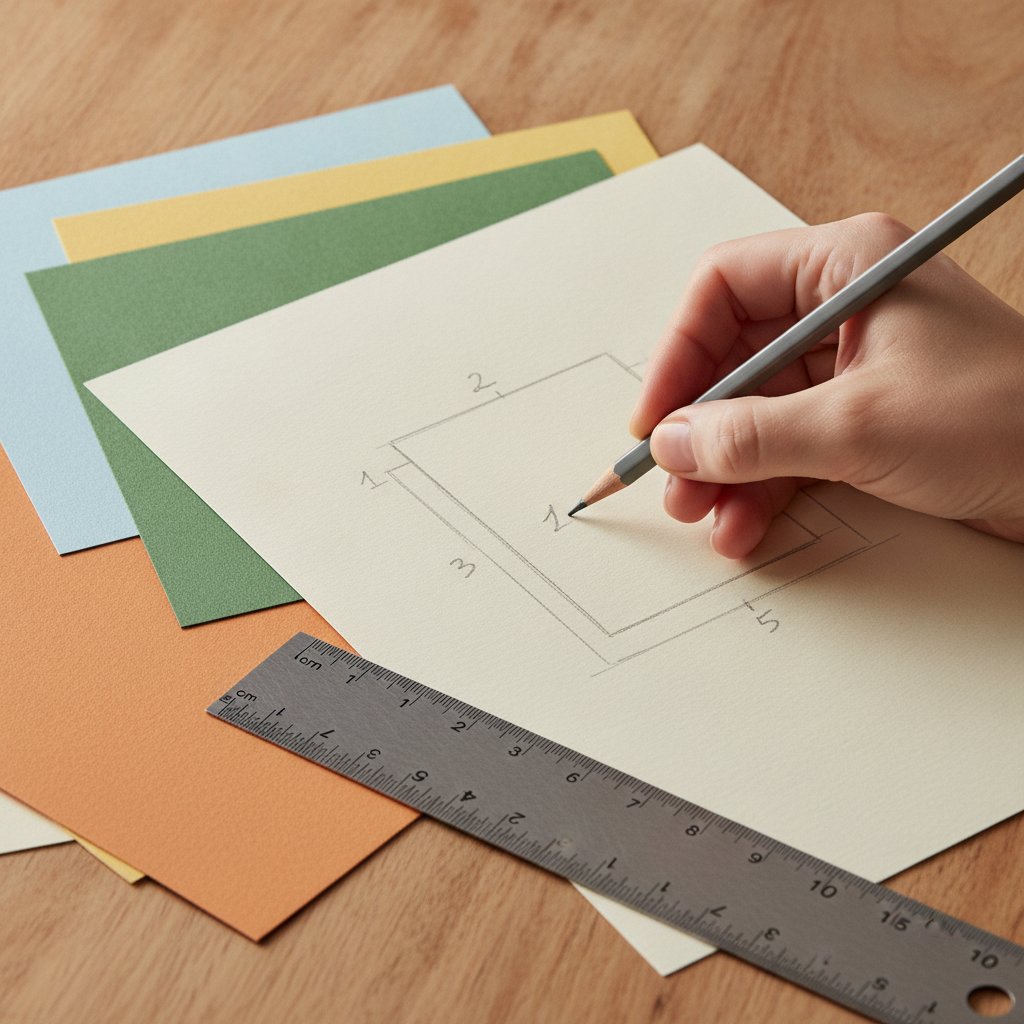
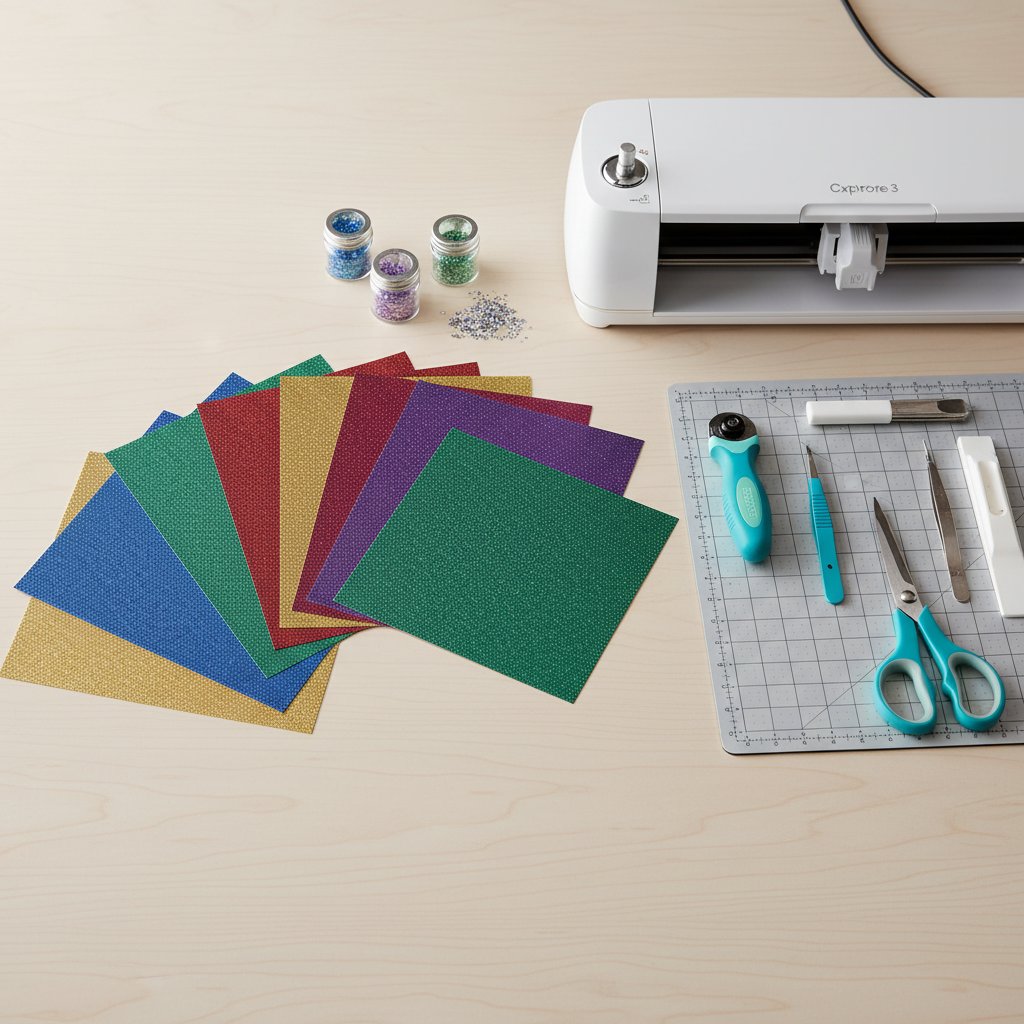
I'll cover what hybrid paper cutting actually is, the tools you need (digital and analog), a beginner workflow you can finish in an afternoon, registration and alignment fixes for when layers won't line up, advanced texture and finishing methods, Cricut-specific settings, and home-decor display. New to the machine itself first? Start with our Cricut paper cutting for beginners guide — this article assumes you can already get a clean cut.

What Hybrid Paper Cutting Is (and Isn't)

Hybrid paper cutting is the deliberate combination of digital cutting (a Cricut or Silhouette cutting a designed SVG) with traditional hand-cutting (a craft knife, scalpel, or scissors adding detail the machine either can't do or does badly). It's not "scan a drawing and cut it" and it's not "cut everything on the machine then call it handmade." The craft is in the split — deciding which parts of a design the machine owns and which parts your hands own.

Why hybrid, not all-machine or all-hand

Pure hand-cutting a ten-layer shadow box can take 8–12 hours and punishes any single slip — one torn bridge and the layer is scrap. Pure machine cutting is fast and repeatable but flattens texture: every edge is identical, every bridge is the same width, and the piece reads as printed up close. Hybrid splits the difference: the machine does the 80% that's repetitive and precise; your hands do the 20% that signals craft. In my fox piece that was the fur. In a floral piece it's usually the petal edges and stamen detail. In a geometric piece it's a single hand-scored fold or a torn accent layer.

The fine-art difference

Most hybrid content online is scrapbooking — flat, photo-based, functional. Fine-art hybrid paper cutting targets wall decor: layered shadow boxes, float-mounted papercuts, framed statement pieces. The bar is higher (people view wall art up close, under gallery lighting, for years) but so is the value. Our color theory for layered paper art guide covers the palette planning that separates fine-art pieces from craft projects — read it before you plan your first hybrid layer stack.

Start Your Hybrid Piece With a Tested SVG
The digital half of hybrid work lives or dies on the quality of the base file. The Rose Flower Shadowbox ships with clean separated layers, tested Cricut and Silhouette cut settings, and layer-by-layer assembly diagrams — so the machine cut is reliable and your hand-time goes into the petal-edge detail that sells the piece, not into cleaning up a messy file.

Essential Tools for Hybrid Paper Cutting

Hybrid work splits your tool kit into three: digital design, machine cutting, and hand finishing. You don't need everything on day one — start with the machine half and two hand tools.

Digital design tools

  • Cricut Design Space (free) — enough for beginner hybrid projects: layer separation, resizing, basic text. Start here. - Inkscape (free) — a real vector editor for cleaning up paths, merging shapes, and adding the hand-cut zones as a separate layer. - Adobe Illustrator / Affinity Designer (paid) — worth it once you're designing your own hybrid files from scratch. - Procreate (iPad) — for sketching the hand-detail zones by hand, then exporting as a reference overlay.

Machine cutting

  • Cricut Explore 3 or Maker 3 — either handles 65–80 lb cardstock cleanly. The Maker's additional tool slots matter less for paper than the stronger motor on intricate cuts. - Standard-grip (green) and light-grip (blue) mats — green for 80 lb cardstock, blue for delicate foils and 65 lb sheets that tear on removal. Our Cricut mat guide maps grip to paper weight precisely. - A fresh Fine-Point Blade — non-negotiable for the machine-cut layers; a dull blade tears the fine bridges hybrid detail depends on.
Flat-lay of cardstock sheets fanned beside a Cricut machine and crafting tools on a wood desk — the hybrid paper cutting toolkit

Hand-finishing tools

  • A sharp craft knife (X-Acto #11 or a swivel knife) — for the detail cuts and texture. This is the single most important hand tool. The paper cutting tools guide ranks the blades worth buying. - Precision tweezers and a bone folder — for layer placement and crisp folds. - Self-healing cutting mat — protect both the knife edge and your table. - Foam tape and acid-free adhesive — for the spacers and layer bonding. See our best glue and adhesive guide for which adhesive survives a decade on a wall.

Beginner Workflow: Your First Hybrid Piece

Build a four-layer botanical or geometric shadow box. The machine cuts all four base layers; your hands add one detail — a hand-cut vein texture on the front leaf layer, or a single torn-edge accent. That's enough hybrid to learn the workflow without a 12-hour commitment.

Step 1 — Design setup

Import your SVG into Cricut Design Space, ungroup it so every layer is separate, and decide your split: which layer gets the hand detail? Mark it. Export a screenshot of the layer stack as your reference. If you're new to Design Space, our Cricut Design Space tutorial for beginners walks through ungrouping and layer management.

Step 2 — Machine base cuts

Load the back three layers onto the green mat, run a test cut on a scrap of each color, then cut all three. Use the "Cardstock (for intricate cuts)" setting as your baseline and adjust pressure up for 80 lb sheets. Full settings live in our Cricut cardstock settings guide. Leave the hand-detail layer for last.

Step 3 — The hand-detail layer

Cut the hand-detail layer on the machine first as a blank silhouette, then add the texture by hand. For a leaf vein, lightly score the vein lines with the craft knife (don't cut through), then cut alternating V-shapes along the vein for a serrated organic edge. Work on the self-healing mat, blade almost parallel to the paper for texture, near-vertical for cut-throughs.

A fresh sharp craft knife making a clean precise cut through dark cardstock on an intricate floral papercut — the hand-detail step that defines hybrid work

Step 4 — Assembly

Dry-fit every layer back-to-front before any glue. Stack with foam spacers (3 mm for a 4-layer piece), check alignment against a light source, then bond with acid-free adhesive dots. Our layered paper cut shadow box tutorial covers spacer sizing and frame depth in depth.

The mistake that ends most first attempts

Skipping the test cut on the hand-detail layer. People test-cut the easy machine layers, assume the detail layer will cut the same, and ruin their good cardstock on a pressure setting that was tuned for plain cardstock but tears the textured sheet. Always test the exact sheet that gets the handwork.

A Layered Design That Rewards Hand-Finishing
The Magical Fox Shadow Box is the piece I learned hybrid technique on — six clean machine-cut layers that leave deliberate room for hand-cut fur texture on the fox layer. It ships with tested cut settings and an assembly guide, so you spend your hand-time on the craft, not on rescuing a sloppy file.

Registration and Alignment: Fixing Layers That Won't Line Up

Alignment is the single hardest skill in hybrid work, because you're matching a machine-cut edge to a hand-cut edge — two processes with different tolerances. Here are the four alignment failures I see most, and the fix for each.

Stacked layered papercut shadow box cardstock layers being aligned by hand, showing a slight registration offset — the exact moment hybrid alignment is won or lost

Failure 1 — The hand-detail layer sits 1–2 mm off from the machine layers

Cause: Hand-cutting shifts the paper slightly, or the silhouette you cut by hand isn't the same size as the machine silhouette. Fix: Don't hand-cut a separate layer blind. Instead, cut the detail layer on the machine as a full silhouette, then hand-cut the texture into that already-correct layer. The machine gives you the registration; your hands only add texture inside it.

Failure 2 — Layers drift between front and back

Cause: Foam spacers of inconsistent thickness, or adhesive applied unevenly so one side squashes flat. Fix: Use pre-cut foam tape strips of identical thickness, apply four dots per layer (corners, not center), and dry-fit against a light before bonding. A light source behind the stack instantly reveals drift you can't see in ambient light.

Failure 3 — The hand-textured layer warps after gluing

Cause: Wet adhesive on a thin hand-cut layer swells the paper fibers unevenly. Fix: Use dry adhesive (dots or tape) on hand-cut layers, never liquid glue. If you must use liquid, weight the layer flat under a book for an hour while it cures.

Failure 4 — Colors clash between the machine and hand elements

Cause: Designing the hand-detail color in software, where it looks right on a backlit screen, then cutting it on cardstock whose finish reads differently under gallery light. Fix: Always choose the hand-detail cardstock from physical swatches under the light the finished piece will hang in, not from a screen. Our how to cut different types of paper with Cricut guide covers how different cardstock finishes (matte, metallic, textured) read once cut and layered.

Advanced Hybrid Methods: Custom Textures and Finishes

Once registration is reliable, hybrid technique opens into territory no machine-only piece can reach.

Hand-painted paper, machine-cut

Paint a sheet of watercolor paper by hand (a gradient, a wash, a texture), let it dry flat under weight, then cut it on the Cricut as a single layer. The machine gives you the silhouette; the hand-painted surface gives you a color story no solid cardstock can match. This is the technique behind most gallery-priced hybrid pieces. Scan the painted sheet first so you can reprint and recut if a cut fails.

Embossing and debossing on the detail layer

After the machine cut, run an embossing stylus along the bridges of the front layer to add a subtle raised line the eye catches but the camera barely records — the kind of detail that makes a piece read as hand-finished in person.

Metallic and holographic accents

Reserve metallics for the hand-detail layer only. A machine-cut holographic layer reads as mass-produced; a single hand-cut metallic accent (a moon, a ring, a name) reads as intentional. Cut metallic sheets on a light-grip blue mat — the strong green mat tears the foil coating, which our how to cut different types of paper guide documents in detail.

Large-scale statement pieces

For 16×20" and larger, cut the machine layers in tiled sections and seam them on the backing board — most Cricut mats top out at 12×24". Plan the seam to fall behind a solid layer so it's invisible in the finished piece. Large pieces are where hybrid technique pays back fastest: the machine time on a big piece is trivial relative to the hand-finishing, which scales the perceived value.

An intricate premium papercut shadow box with ten finely detailed layers creating dramatic depth — the gallery-grade result advanced hybrid technique targets
Take On a Statement-Scale Hybrid Build
The Dragon Papercut SVG is the multi-layer build I point advanced makers toward — enough finely separated layers to plan real hand-texture zones (scales, whiskers, a torn fire edge) and a scale that rewards the painted-paper technique. Layer numbering and assembly diagrams are included so your time goes into the craft.

Cricut-Specific Hybrid Workflow

A few Design Space habits make hybrid work dramatically easier.

Name and color-code every layer

Before cutting, rename each layer in Design Space ("back-hills", "mid-trees", "front-fox-HANDDETAIL") and assign each a cut color. The "HANDDETAIL" tag in the layer name is your reminder to switch material settings and a light-grip mat for that layer. It sounds trivial; it prevents the most common hybrid mistake — cutting the detail layer on the wrong setting.

Use Print Then Cut for registration marks, not for the art

If you're hand-cutting against a printed guide, use Design Space's Print Then Cut to print faint registration crosshairs on the backing sheet only, then cut your layers separately and align them to those crosshairs during assembly. Don't Print Then Cut the art itself — inkjet ink on cardstock reads as cheap up close and fights the hand-crafted story.

Nest designs to minimize waste

Arrange the machine-cut layers to share a single mat pass where colors allow, nesting shapes to cut scrap. Hybrid projects use more cardstock per piece than all-machine work because of the hand-detail failures — every scrap you save lowers your material cost. Our paper cutting techniques guide covers nesting and waste-reduction in depth.

When the machine cut quality drops

Mid-project cut quality dropping almost always means a blade loaded with paper dust, not a dull blade. Run two cuts through aluminum foil to clean the edge before swapping blades — full troubleshooting in our Cricut cardstock settings guide.

Home Decor Applications: From Art to Display

How you finish and mount a hybrid piece changes how it reads almost as much as the cut.

Shadow boxes for depth pieces

Anything with five or more layers belongs in a shadow box with at least 1.5" depth. Warm-white LED backlighting (around 3000K) behind the back layer makes the hand-textured front layer glow against the silhouette layers — the effect that makes hybrid work photograph beautifully. Our guide to adding LED lights safely covers strip placement and heat safety.

Float frames for single-layer papercuts

A hand-detailed single-layer papercut (a silhouette with hand-cut texture, no stacking) belongs in a glassless float frame so the texture casts its own shadow on the backing. Glass flattens the texture that is the entire point of the handwork. Our how to frame paper art without glass guide walks through float-mounting.

On a gallery wall, the hybrid pieces should be the ones at eye level with direct lighting — that's where the hand detail is visible and earns its premium. Reserve the all-machine pieces for the periphery. For seasonal rotations (which hybrid pieces are perfect for — swap the hand-detail layer, keep the frame), our seasonal paper shadow box crafts guide maps motifs to seasons.

Start Your Hybrid Paper Cutting Project

Digital-analog hybrid paper cutting is the technique that closes the gap between a file a machine can cut and a piece a person will hang for a decade. The workflow is consistent: let the machine cut the repetitive precision layers, reserve one layer for hand-cut texture, fix alignment by cutting the detail into a machine-registered silhouette rather than beside it, and finish for the lighting the piece will actually live in.

If you're new to the machine, begin with our Cricut paper cutting for beginners guide. If you can already cut cleanly, the fastest path to your first hybrid piece is a tested layered SVG you can hand-finish — browse the shadow box SVG collection and the papercut SVG collection. For picking and preparing files, our papercut SVG guide covers what makes a file hybrid-friendly. And if minimal, modern wall art is more your direction, the minimalist paper wall art guide shows where hybrid restraint (one hand-detail, not ten) reads best.

Questions about where to put your hand-detail layer on a specific design? Comment on any product page — we answer every one.

1.What is digital-analog hybrid paper cutting?
Digital-analog hybrid paper cutting is the deliberate combination of machine cutting (a Cricut or Silhouette cutting a designed SVG) with traditional hand-cutting (a craft knife adding texture, fragile bridges, or torn edges the machine can't do well). The machine handles the repetitive, precise base layers and your hands add the detail that signals craft. It is not scanning a drawing and cutting it, and it is not cutting everything on the machine and calling it handmade — the craft is in deciding which parts of the design each process owns.
2.Do I need a Cricut and hand-cutting tools to do hybrid paper cutting?
Yes — hybrid paper cutting requires both a digital cutting machine and hand tools. The Cricut (Explore 3 or Maker 3) handles the base layers; a sharp craft knife, precision tweezers, and a self-healing mat handle the detail. You can start with one good craft knife and the machine you already own; expand the hand kit as your detail work gets more ambitious.
3.How do I fix alignment when my hand-cut layer doesn't line up with the machine-cut layers?
The most reliable fix is to cut your hand-detail layer on the machine first as a full silhouette, then hand-cut the texture into that already-registered layer rather than hand-cutting a separate layer beside it. The machine gives you the correct outer registration; your hands only add texture inside it. For drift between layers, use identical-thickness foam spacers, four adhesive dots per layer (corners), and dry-fit against a light source before bonding.
4.Which layer should get the hand detail in a hybrid piece?
Put the hand detail on the single front-most focal layer — the one the eye lands on first. In a floral piece that's usually the front petals and stamen; in an animal piece it's the fur or feather texture; in a geometric piece it's one torn or hand-scored accent. Resist hand-detailing more than one layer: the impact comes from one obvious craft signal, not from handwork scattered across every layer.
5.What paper weights work best for hybrid paper cutting?
Use 65–80 lb (176–216 gsm) cardstock for the machine-cut base layers — it cuts cleanly and holds its shape in a frame. For the hand-detail layer, a slightly heavier 80 lb sheet tolerates the scoring and texture cuts better. Avoid anything under 65 lb (tears in the machine) or over 100 lb (may not cut cleanly and fights hand detail). Test any new sheet with a small test cut before committing. Our how to cut different types of paper with Cricut guide covers finishes and weights in detail.
6.Can I sell hybrid paper cutting pieces, and how do I price them?
Under the standard license, MMA's papercut templates are for personal use only — you can cut and craft them for yourself or as gifts, but selling physical or digital versions of our designs isn't allowed. If you want to sell pieces made from an MMA template, contact us to discuss commercial licensing options. For hybrid work you've designed yourself (your own original SVGs, which you own outright), price to reflect the hand-time, not just materials: a common formula is (materials plus machine-time cost) times three, plus your hourly rate for the design and hand-finishing. Hand detail commands roughly a 40–60 percent premium over equivalent all-machine pieces because no two are identical.
7.Is hybrid paper cutting good for beginners?
Yes, if you can already cut cleanly on a Cricut. Start with a four-layer shadow box where the machine cuts all four base layers and you add hand texture to just the front layer — a single vein pattern or torn edge. That's enough to learn the full hybrid workflow (design split, machine cut, hand detail, registration, assembly) in an afternoon without a 12-hour commitment.