Articles15 min read

Wedding Shadow Box SVGs

Turn digital SVG templates into a personalized wedding keepsake — names, dates, vows, venue silhouettes, and your exact wedding colors, cut on a Cricut or Silhouette and built to last decades.

Shadowbox Wedding Anniversary - Image 06

When a friend asked me to make her wedding gift, I did what most crafters do first: I looked up "wedding shadow box SVGs." What I found was eight pages of marketplaces — Design Bundles, Etsy, Creative Fabrica — all selling files, none of them teaching how to turn a generic SVG into something that actually looked like her wedding. No guidance on adding their names. No help matching her sage-and-gold palette. Nothing on which cardstock would still look good in 2046.

That gap is the reason this guide exists. In our own Search Console data, the query wedding shadow box SVGs sits at position 38 — we rank for it as a side keyword on a flower article, but we have zero dedicated coverage. So I built one. This is the wedding-specific personalization guide I wanted when I was staring at a rose SVG wondering how to add "Sarah & James · 09.14.2026" without it looking glued on.

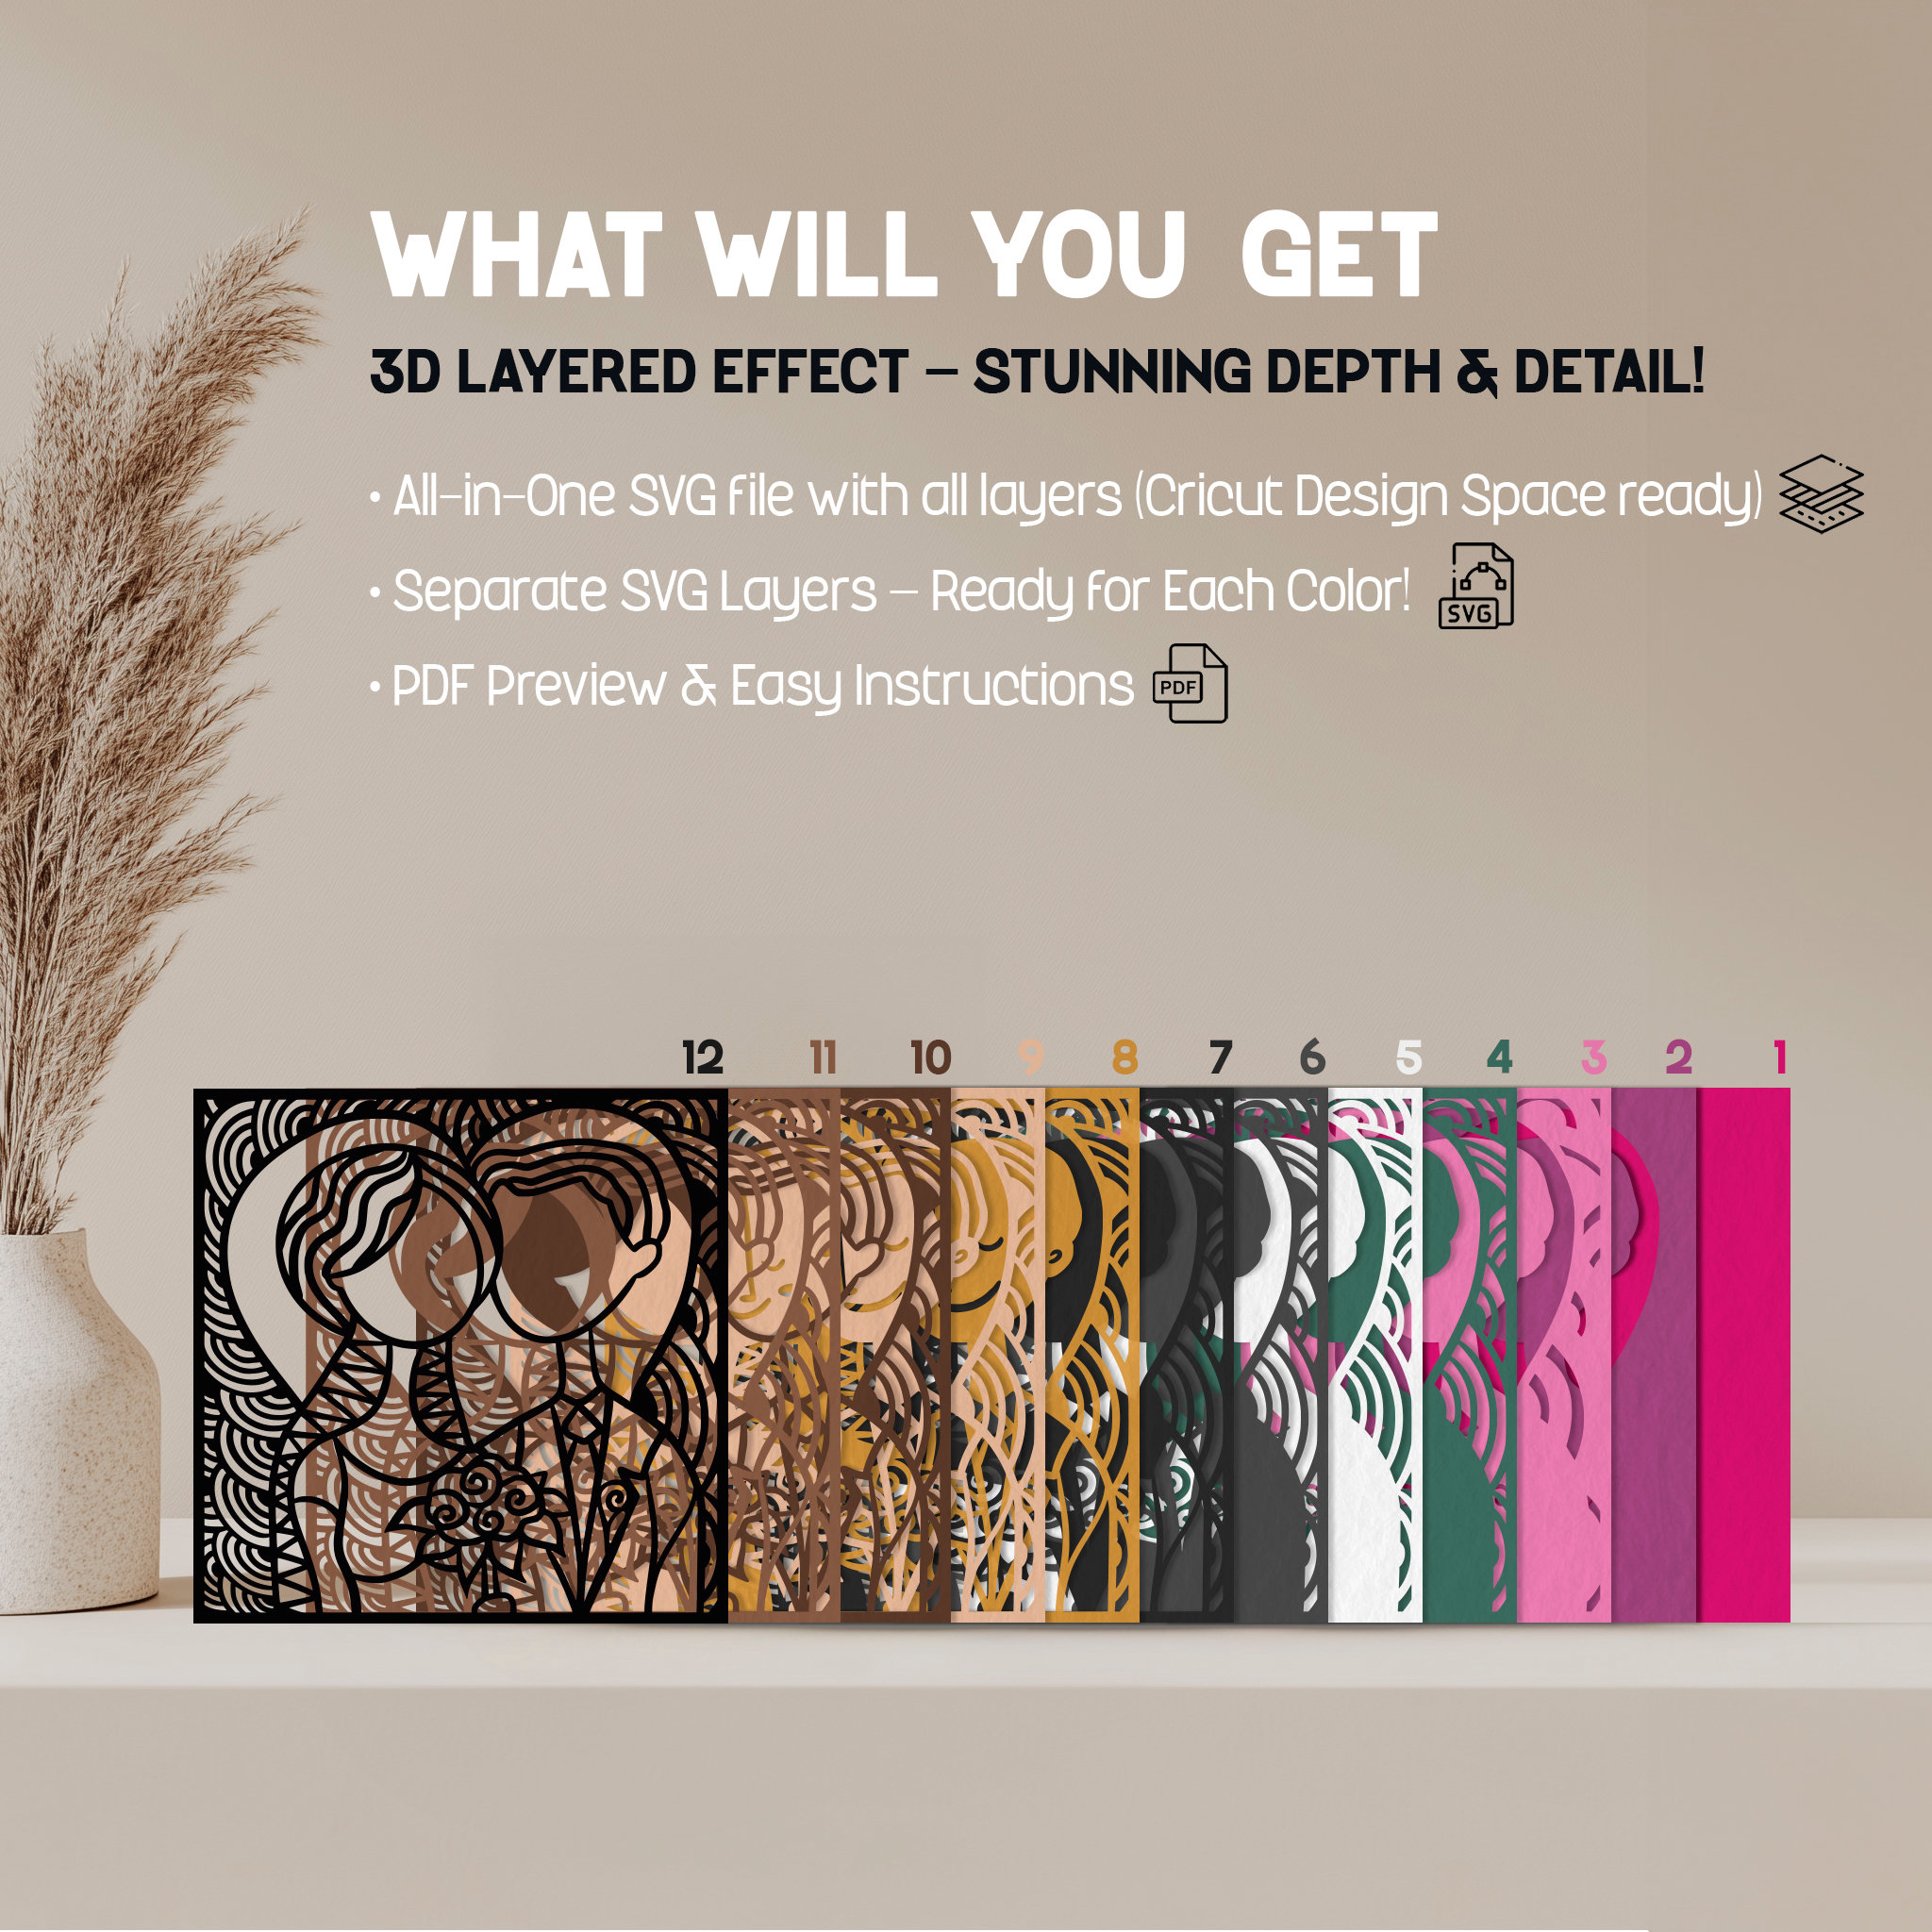
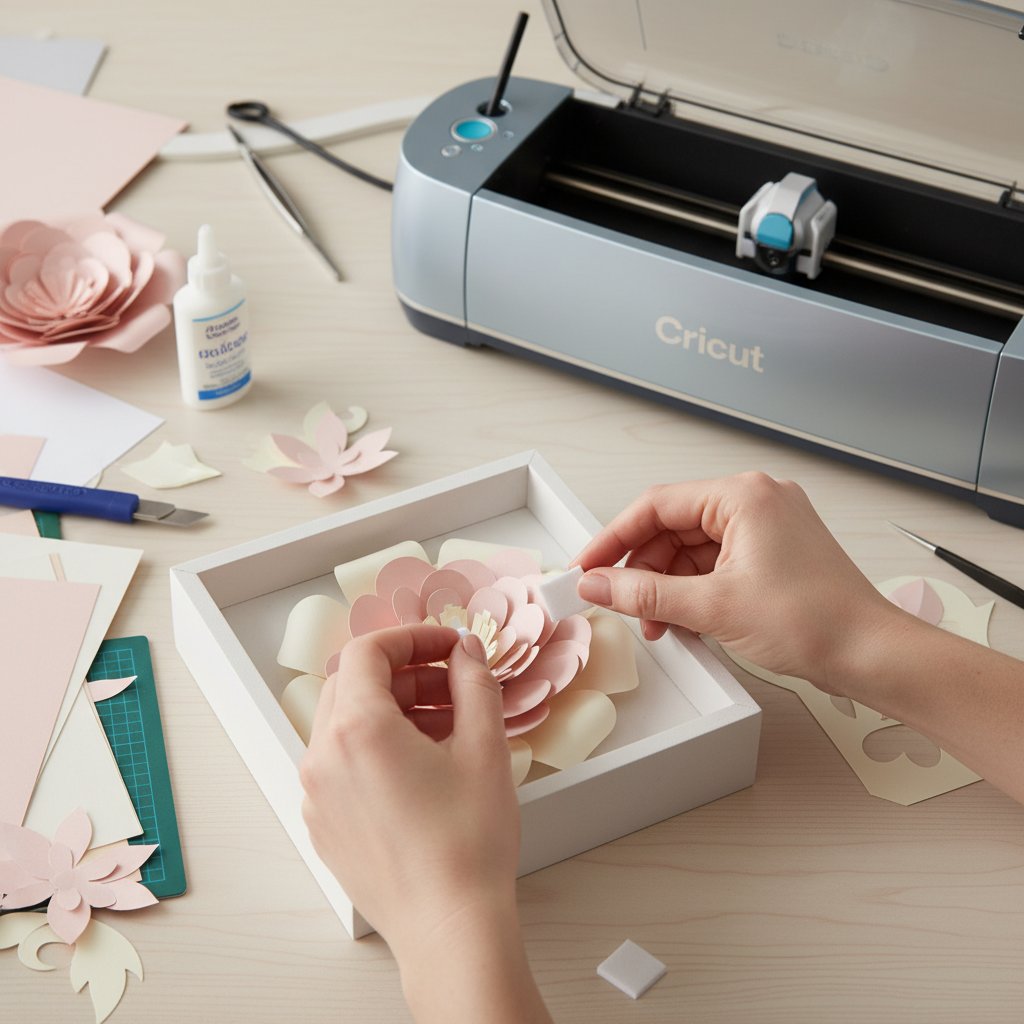
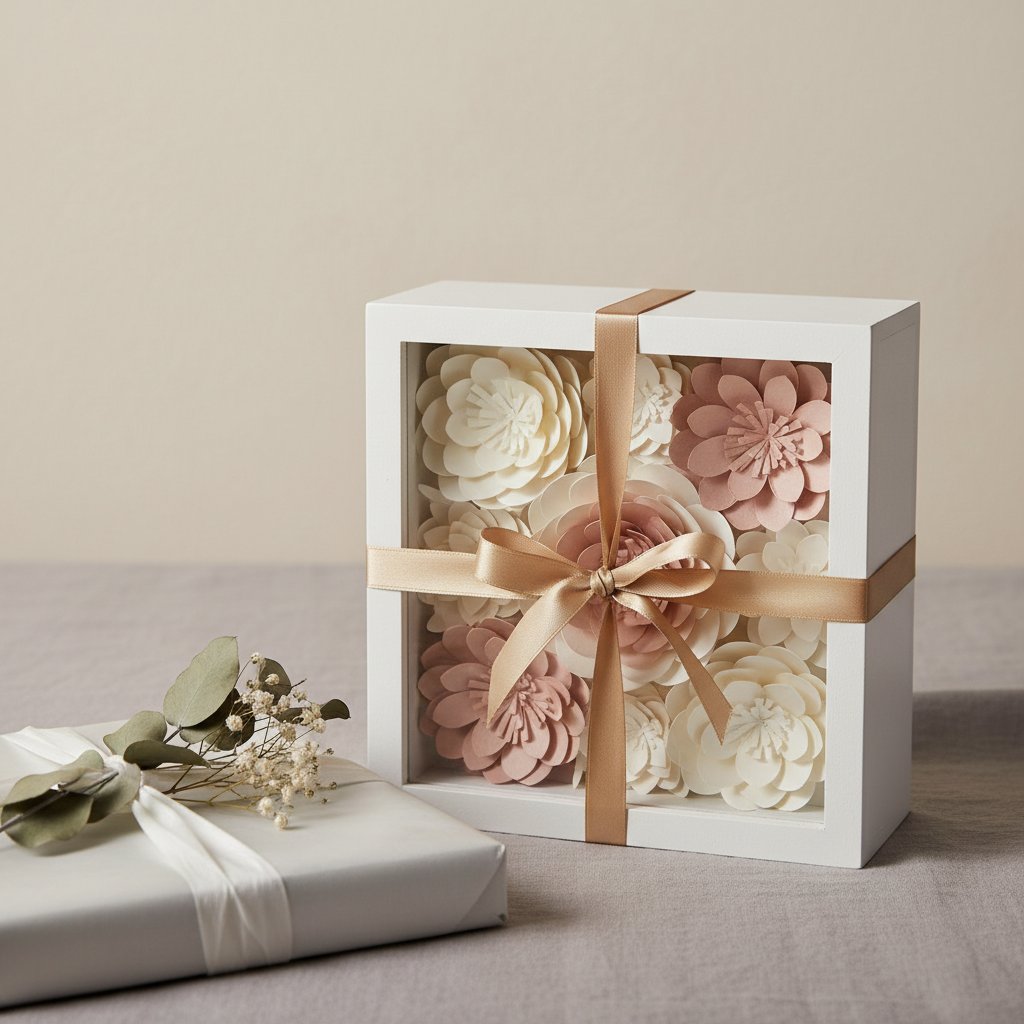
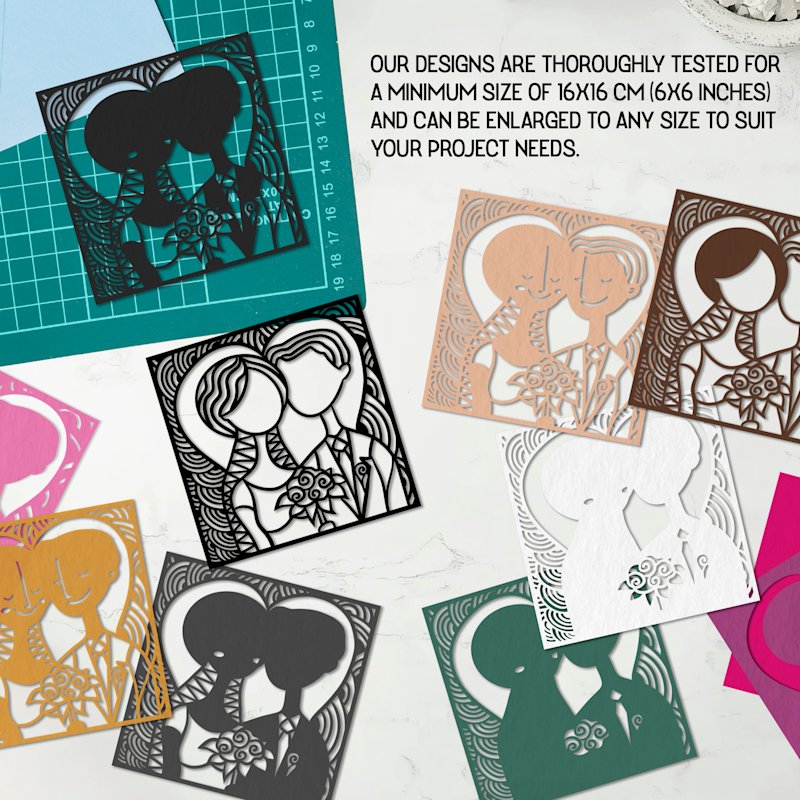
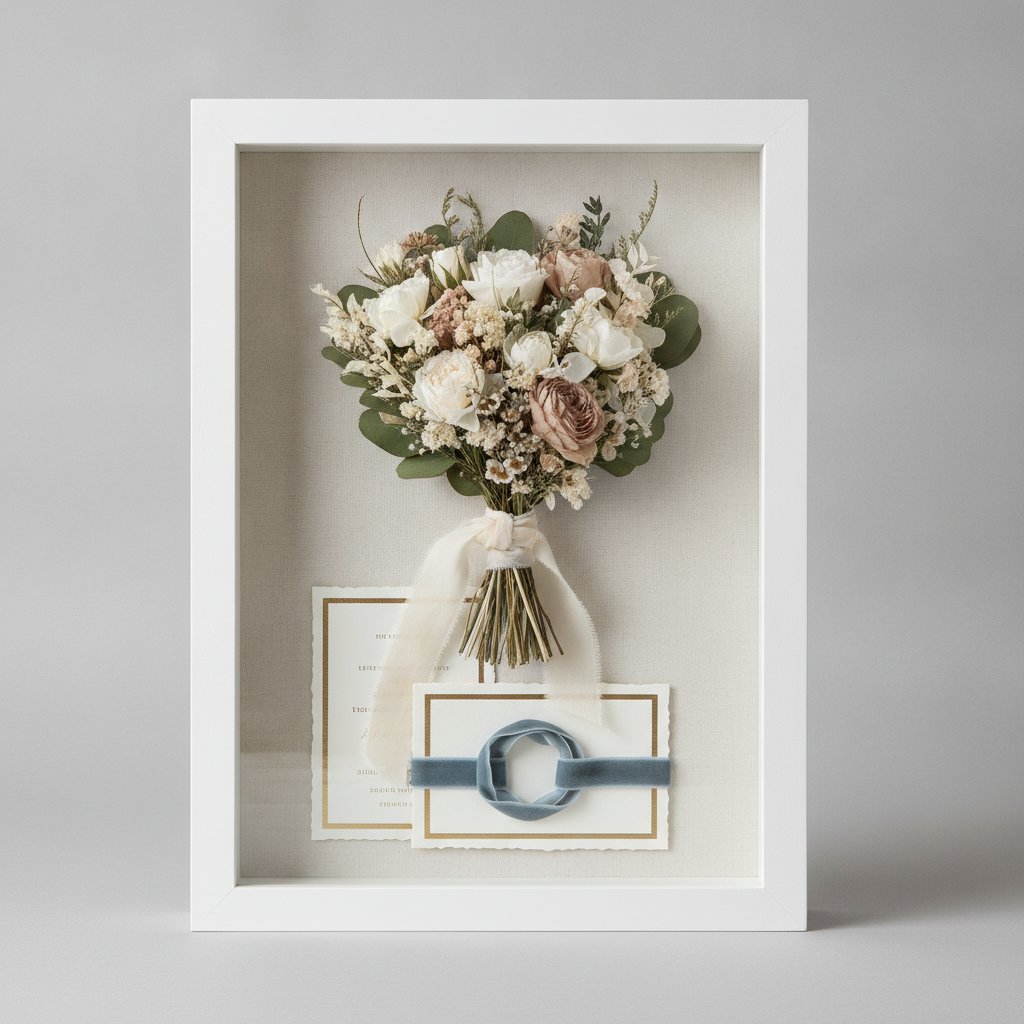
A wedding shadow box SVG is a layered, cuttable template you personalize for a couple — names, wedding date, vows, venue silhouettes, or wedding colors mapped layer-by-layer — then cut on a Cricut or Silhouette, stack with foam spacers, and frame. Done well, it's an heirloom: archival cardstock, acid-free adhesive, UV-protective glass. Done generically, it's just another shadow box.

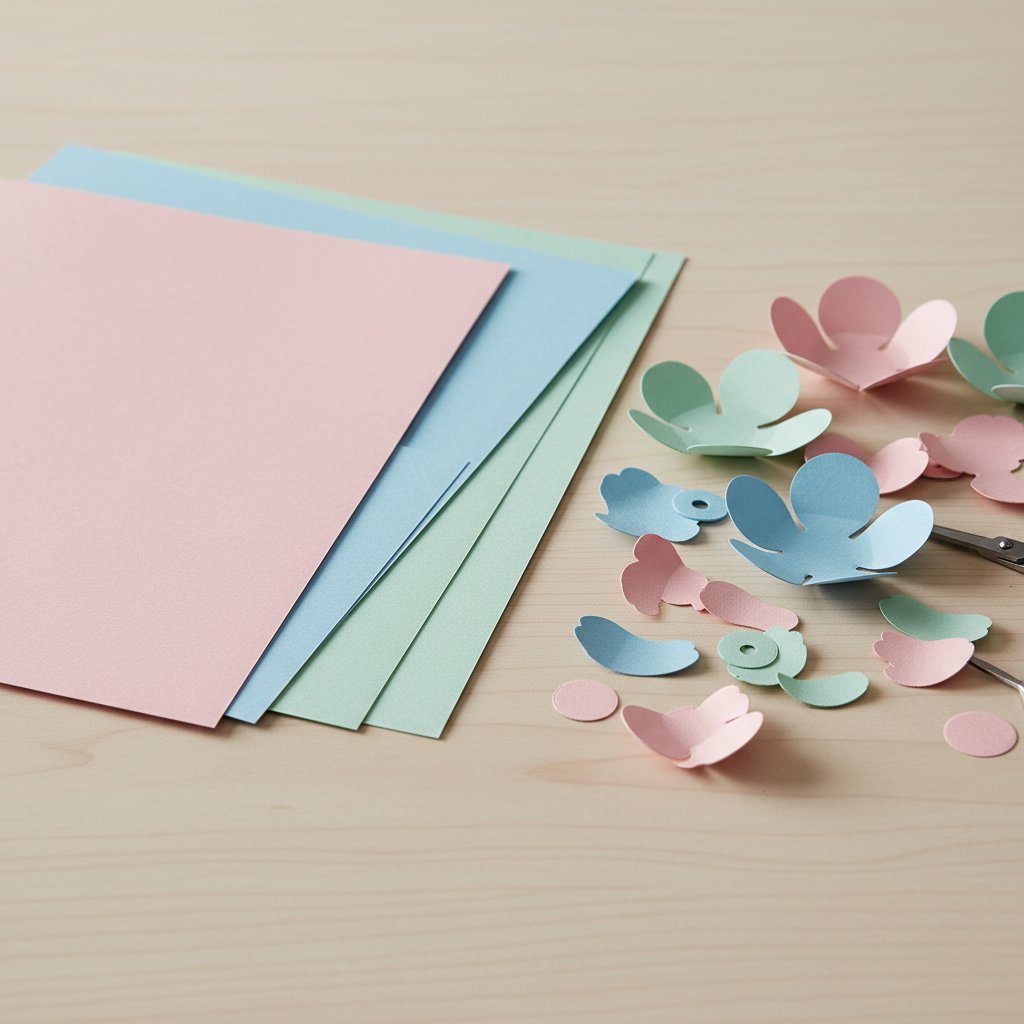
Here's the case for paper over the obvious alternative. Professional dried-flower preservation runs $200–$500, ships heavy, and the blooms still brown within a few years no matter the sealant. The wedding shadow box I built cost me under $30 in cardstock and frame, weighs ounces, and the colors are exactly the couple's palette because I chose every sheet. 2026 wedding trend reports (The Knot's "fine-art-inspired details," Studio Gail's paper-goods aesthetic) are pulling hard toward exactly this kind of tactile, personalized paper craft.

Traditional shadow box displaying wedding keepsakes including a dried flower bouquet and ribbon — the preservation style a paper-cut wedding shadow box is designed to outlast

In this guide I'll walk through the types of wedding shadow box SVGs, how to choose the right one for a venue and theme, how to map wedding colors to SVG layers, step-by-step personalization (names, dates, vows, venue silhouettes, monograms), wedding-grade cutting and assembly, and gift ideas for every wedding occasion. If you want the flower-specific companion, our wedding & anniversary paper cut flower shadow box guide goes deep on rose, lily, and hydrangea motifs — this article is the broader SVG-personalization playbook.

Types of Wedding Shadow Box SVGs

Not every wedding shadow box is flowers. After designing and gifting maybe two dozen of these, I sort wedding SVGs into five families — and most great wedding pieces blend two or three of them.

Floral wedding shadow boxes are the most-requested. Roses carry romantic symbolism and have enough petal complexity to build genuine depth in 5–7 layers. Lilies read as purity and devotion and their sweeping petals create dramatic layer-to-layer depth in white-on-white. Hydrangeas are trending hard in 2026 pastel palettes — the clustered tiny blooms cut almost lace-like. These floral motifs are the backbone of our flower shadow box collection.

Monogram and initial designs make the couple the focal point. Two intertwined first-initial letters, or a shared last-name initial, either as a standalone centerpiece or framed inside a botanical wreath. These are the pieces that end up in the couple's entryway or above the bed.

Date and anniversary designs lean on typography. The wedding date in elegant script, "Est. 2026," or milestone-anniversary pieces (1st paper, 25th silver, 50th gold). Date-led designs are the most universally gift-able because you don't need to know the couple's taste — just the date.

Venue and theme-inspired designs translate a place into paper. A simplified barn silhouette for a rustic wedding, palm fronds and a sunset gradient for a beach ceremony, a botanical wreath for a garden venue, or ornate damask frames for a formal ballroom. Tracing a photo of the actual venue into a back-layer silhouette is one of the most emotional customizations you can do.

Vow and quote shadow boxes layer meaningful text — a line from the vows, first-dance lyrics, a religious passage — into the design, often as a faint back layer that glows when backlit. This is the technique that gets the strongest reactions at bridal showers.

The line between these families is where the personalization lives. A floral piece with the date embedded, or a monogram inside a venue silhouette, is what turns a file into a wedding gift.

Start With a Wedding-Ready SVG
Two of our most-gifted designs for weddings and anniversaries. The Wedding Anniversary Shadowbox (groom-and-bride silhouettes in a stained-glass style) and the Rose Flower Shadowbox both ship with tested Cricut and Silhouette cut settings, layer-by-layer assembly guides, and frame-size recommendations — then you recolor and personalize them for the couple.

Choosing the Right Wedding Shadow Box SVG

The right SVG is the one that matches three things: the venue and theme, the number of layers you're willing to assemble, and the frame depth you have.

Match the SVG to the venue and theme

  • Rustic barn: wood-grain back layer, wildflower silhouettes, a barn outline. Warm neutrals — kraft, cream, sage. - Beach wedding: wave layers, shell motifs, a sunset gradient from coral back to cream front. Add a simplified shoreline or palm silhouette. - Garden wedding: botanical wreath framing the couple's names, vines and small blooms, romantic pastels. - Formal / ballroom: ornate symmetrical frames, elegant serif or script type, damask patterns, classic white-and-metallic.

Pick a layer count you'll actually finish

Layer count is the single biggest factor in how the piece reads — and how long it takes to assemble. From cutting and assembling dozens of these:

  • 3–4 layers: subtle depth, beginner-friendly, faster to assemble. Ideal for smaller frames (8×8") and time-pressed gifts. - 5–7 layers: the sweet spot for wedding pieces. Enough depth to look professional, not so many that alignment becomes punishing. This is where most of our templates live. - 8+ layers: maximum, dramatic depth. Advanced assembly, best in larger frames or backlit designs where the extra spacing pays off.

More layers means more foam spacers and a deeper frame — your frame depth has to match your layer count, which brings us to the next variable.

Frame depth has to match the design

  • Standard shadow box (1.5–2" depth): fine for 3–5 layer designs with 3mm spacers. - Deep shadow box (2.5–3" depth): what you want for 5–7 layer designs and any piece with 5mm spacers for a "focal pop." - Backlit shadow box: needs extra depth to hide the LED strip behind the back layer — budget at least 2" plus the strip thickness. Our frame size and depth guide walks through measuring this precisely.

Evaluate SVG quality before you commit

A wedding gift deserves a clean file. Before cutting your good cardstock, check the SVG for: clean, closed paths (no stray nodes that tear on the blade), proper layer numbering back-to-front so assembly is unambiguous, scalability without quality loss (it's vector — it should resize to any frame), and clear space or instructions for adding names and dates. If a file is a flattened single layer sold as "layered," walk away. Our papercut SVG guide covers how to read a well-built SVG, and our guide to sizing shadow box SVGs for any frame handles resizing without breaking layers.

Mapping Wedding Colors to Your Shadow Box SVG

This is the part the marketplaces never teach, and it's the single biggest upgrade from "generic shadow box" to "obviously a wedding gift." You map the couple's wedding palette onto specific layers — and the order you stack those colors controls the depth.

Fanned stack of colored cardstock sheets beside cut paper flower petals — choosing wedding palette colors layer by layer

Classic white wedding palette

Pure white, cream, ivory, and champagne. Layer lightest at the back, darkest (or warmest) at the front so each layer reads against the one behind it. Use matte white cardstock — glossy white reflects the LED strip and kills the depth effect. This is the timeless bridal look and it photographs cleanly in any reception lighting.

Blush pink and sage green

The romantic pastel palette dominating spring and summer 2026 weddings. Blush layers toward the back, sage accents (leaves, stems) toward the front, with gold or copper foil on one focal element — the names or a heart. The warm metallic against cool sage is what makes this palette sing.

Fall and winter wedding colors, and they create the most dramatic depth of any palette because the values are so dark. Burgundy back layers, navy in the middle, white or cream front layer so the detail reads. A single gold accent layer adds warmth and stops the piece from looking heavy. This palette is where backighting really earns its keep — the dark layers frame the glow beautifully.

Metallic accents and glitter

Gold, silver, and rose gold metallic cardstock — use them strategically, not on every layer. Reserve metallic for key elements: the couple's names, the date, a heart, or the top 1–2 detail layers. Mixing one metallic layer into an otherwise matte palette creates the visual interest. One warning: metallic and glitter cardstock glare under LEDs, so test your lighting before final assembly. Our metallic and pearl cardstock cutting guide covers the pressure settings these heavier sheets need.

A practical color-matching workflow

Use the wedding invitation as your reference — it's the couple's palette already chosen by a designer. Order small cardstock swatch samples and lay them next to the invitation under the same light you'll display the piece in. Photograph the stack; colors read differently on camera than to the eye. For the full cardstock weight and brand breakdown (65–80 lb / 176–216 gsm is the wedding-grade range), see our complete cardstock guide.

Floral Templates for Any Wedding Palette
The Lily and Hydrangea shadow box SVGs are two of our most flexible wedding designs — the lily's sweeping petals build dramatic depth in classic white, and the hydrangea's clustered blooms are perfect for pastel 2026 palettes. Recolor either one to the couple's exact wedding colors.

Personalizing Wedding Shadow Box SVGs

This is the heart of a wedding shadow box — turning a template into their piece. I'll walk through the four personalizations that matter most. All of these happen in Cricut Design Space or Silhouette Studio after you import the SVG. Our guide to importing multi-layer shadow box SVGs into Cricut Design Space (or the Silhouette Studio version) covers the import and ungroup steps.

Close-up of the layered stained-glass papercut design showing how detail layers sit above framing layers — where names and dates get placed

Adding names and the wedding date

In Design Space, ungroup the SVG so each layer is editable. Select Text, and choose a wedding-appropriate font — script for romance, serif for formality. Type the names and the date, then size them into open areas of the design where they won't fight the main motif. Two rules I follow every time: make the names larger than the date for clear visual hierarchy, and use the same font family for both so they read as one design. Group everything before you cut. One hard-won tip: script fonts below about 1 inch tall don't cut cleanly on cardstock — the counters close up. Scale up or switch to a simpler face for small text.

Incorporating wedding vows or lyrics

This is the personalization that gets the most gasps. Take a meaningful line — a vow, a lyric, a reading — and set it in a light cardstock as the back layer in a low-contrast color (pale grey on white, or cream on ivory). When the LED backlighting hits it, the text glows softly through the floral layers above it. Keep the font legible (thin, clean sans-serif at a readable size) — decorative script defeats the purpose because it has to be legible as a glow, not a cut. Convert the text to a path and weld it to the back layer so it cuts as one piece.

Adding a venue silhouette

If the couple married somewhere recognizable — their venue, a city skyline, a chapel — trace a simplified photo into a silhouette SVG and drop it in as the back or second layer. The key word is simplified: collapse complex architecture into 3–6 clean shapes. Too much detail and it reads as noise behind the foreground layers; just enough and the floral or monogram layers frame it beautifully. You can trace from a photo using Design Space's or Silhouette's image-trace tools, then delete the intermediate nodes until only the silhouette outline remains.

Creating a custom monogram

Design the monogram (two intertwined initials, or a shared last-name initial) as its own layer, then decide whether it sits behind the design (framed by florals) or within it (as the focal center). Pair a decorative script initial with a clean serif partner for a classic look, or two matching sans-serif letters for modern. If you're layering the monogram inside a wreath or floral ring, keep the letters solid — outlines get lost at small sizes.

Hands attaching foam spacers to layered paper flower shadow box layers beside a Cricut machine — the precision assembly wedding pieces demand

For the full spacer, adhesive, and alignment workflow, our assembly guide for layered papercut shadow boxes is the deep dive. Wedding pieces get the "focal pop" treatment: 3mm spacers between the back layers and 5mm between the top two, so the detail layers appear to float.

Color-Match These Templates to the Couple's Wedding
The Rose, Lily, and Hydrangea shadow box SVGs each cut cleanly in under an hour and recolor to any wedding palette — classic white, blush and sage, or navy and burgundy. Add the couple's names and date in Design Space and you have a personalized wedding gift that looks far more complex than the assembly time suggests.

Cutting and Assembling Your Wedding Shadow Box

A wedding piece should outlast the marriage's first decade on the wall. That comes down to three things: wedding-grade cardstock, precision cutting, and archival assembly.

Glowing backlit layered paper-cut flower shadow box hanging on a wall — the warm-white LED effect that elevates a wedding shadow box

Wedding-grade cardstock selection

Use archival, acid-free cardstock in the 65–80 lb (176–216 gsm) range. Acid-free matters because acidic paper yellows and becomes brittle within a few years — fine for a holiday craft, unacceptable for a wedding heirloom. Choose solid-core cardstock (color goes all the way through) so no white edge shows on a cut. For framed display near windows, ask for UV-resistant options. Metallic and glitter sheets go on the focal layers only.

Precision cutting for clean edges

Start every wedding project with a fresh Fine-Point Blade — a dull blade tears intricate petal details and there's no recovering torn wedding cardstock. Use the "Cardstock (for intricate cuts)" setting on Cricut as your baseline, and adjust pressure up for heavier 80 lb sheets or down for delicate foil paper. Always run a test cut on a scrap before committing your good sheets. For the full settings matrix and troubleshooting, see our Cricut cardstock settings guide and our paper cutting techniques guide.

Archival assembly techniques

  • Acid-free foam spacers (not regular craft foam, which off-gases and yellows). - Even spacing — measure or use a spacer jig so the depth is consistent layer to layer. - Layer alignment — dry-fit every layer before any glue, photograph the stack as a reference, then work back-to-front. Wedding guests view these up close; misalignment reads instantly. - Archival adhesive — acid-free adhesive dots or a pH-neutral spray adhesive. Avoid standard glue sticks, which go brittle and yellow. Our best glue and adhesive guide ranks adhesives by permanence and archival quality.

Adding backlighting for the wedding glow

Warm-white LED strips (around 3000K) create the romantic glow that makes wedding shadow boxes feel alive in evening reception light. Battery-powered strips let you hang the piece anywhere; hide the pack behind the frame backing with heavy-duty double-sided tape, and notch a small channel for the wire so the frame sits flat. Color-changing LEDs are fun but can fight a wedding palette — I default to warm white and only go color-changing for a couple who specifically wants it. Always test the lighting before final framing. Our guide to adding LED lights safely covers strip placement, battery concealment, and heat safety in depth.

Wedding Shadow Box Gift Ideas

Once you can personalize a wedding SVG, the gift occasions multiply. Here's how I've used them — and where each lands best.

Paper-cut flower shadow box presented as a gift with ribbon and gift wrap — the finished, giftable wedding keepsake

Bridal shower gift. A floral design with the couple's monogram in a wreath, in the wedding palette if you know it or classic ivory-and-gold if you don't. The shower is early enough that you can ask the bride's palette without spoiling the surprise.

Wedding day gift. The venue silhouette as the back layer, with floral foreground and the wedding date. If you don't know the venue, our Wedding Anniversary Shadowbox groom-and-bride design works as a ceremony gift — just recolor to the couple's palette.

First anniversary (the paper anniversary). This is the occasion paper cut shadow boxes were made for — paper is the traditional first-anniversary gift. Customize with the wedding colors, the date, and one of their wedding flowers. The Rose template in the couple's palette is the most popular first-anniversary choice.

Milestone anniversaries. Match the colors to the year — silver holographic for a 25th, genuine gold metallic for a 50th, ruby burgundy for a 40th. Include a small tag explaining the traditional symbol and your color choice.

The couple's first home. A last-name or "Est." date shadow box for the entryway, or a venue silhouette for the living room. These are the pieces that become permanent fixtures — design them for the room's lighting, not a gift table.

For makers selling wedding shadow boxes, the key pricing insight from our experience: personalization commands a 40–60% premium over non-customized designs, and lifestyle photos of the finished piece in a styled wedding setting sell far better than flat product shots. Our layered paper projects inspiration guide has more display and styling ideas.

The Most-Gifted Designs for Weddings & Anniversaries
The Wedding Anniversary Shadowbox and the Rose Flower Shadowbox are our two most-gifted wedding and anniversary designs. Each includes tested Cricut and Silhouette cut settings, layer-by-layer assembly diagrams, and frame recommendations — download, recolor to the wedding palette, add the names and date, and gift something unforgettable.

Where to Find Wedding Shadow Box SVGs

MMA's wedding shadow box collection

Start with designs built and test-cut for wedding-quality results: the Wedding Anniversary Shadowbox, plus our Rose, Lily, and Hydrangea floral templates. Each ships with layer numbering, tested cut settings, and commercial-use licensing so you can sell finished wedding pieces. Browse the full shadow box SVG collection for more designs.

Free wedding shadow box SVG resources

Cricut Design Space ships free layered designs, and there are seasonal wedding SVG collections shared in crafting communities. Two cautions: always check the license (many "free" files are personal-use only), and free files often skip layer numbering and clean paths — budget time to clean them up before cutting wedding-grade cardstock. Our free shadow box SVG templates guide lists vetted free sources.

Premium wedding SVG marketplaces

Design Bundles, Creative Fabrica, and Etsy custom designers all sell wedding SVGs. The trade-off: huge selection, but inconsistent quality and licensing. Read reviews, inspect the preview images for clean paths and visible layer separation, and confirm the license covers your intended use before buying.

Evaluating wedding SVG licensing

  • Personal use: make the piece for yourself or as a one-off gift. You cannot sell it. - Commercial use: you may sell finished shadow boxes made from the file. You may not redistribute the SVG itself. - Credit requirements: some designers require attribution on listings or photos. - Wedding vendors: if you're selling custom wedding pieces at scale, confirm the license covers commercial production — many Etsy SVGs are limited to a small number of finished sales.

MMA's wedding templates include commercial-use licensing so you can build and sell wedding shadow boxes without ambiguity.

Start Your Wedding Shadow Box Project

Wedding shadow box SVGs are where personalized papercraft meets heirloom gifting. Pick a template that matches the couple's venue, map their wedding palette onto the layers, add names and a date, cut on wedding-grade archival cardstock, and assemble with acid-free spacers — the result is a piece that sits on their wall for decades instead of browning in a preservation box.

For the flower-specific companion (rose, lily, hydrangea motifs in depth), see our wedding flower shadow box guide. For general shadow box SVG fundamentals, start with our shadow box SVG guide, and for full step-by-step assembly, our layered paper cut shadow box tutorial. Questions about which template fits a specific couple? Leave a comment on any product page — we answer every one.

1.What is a wedding shadow box SVG and how is it different from a regular shadow box SVG?
A wedding shadow box SVG is a layered, cuttable template designed specifically for wedding keepsakes — with space and structure for adding the couple's names, wedding date, vows, venue silhouettes, and romantic floral or monogram motifs. A regular shadow box SVG is a generic layered design (seasonal, animal, abstract) with no built-in personalization. Wedding-specific SVGs come pre-planned for elegant fonts, wedding-appropriate layouts, and the layer space to add dates and names cleanly, so you start from a polished foundation instead of forcing a generic design into a wedding context.
2.Can I use any shadow box SVG for a wedding, or do I need a wedding-specific design?
You can technically use any shadow box SVG, but a wedding-specific design saves time and looks more intentional. A generic SVG — say, a Christmas or animal theme — needs heavy customization (new fonts, new motifs, palette swap) to read as a wedding piece, and the layout often isn't built to hold names and dates. Starting with a wedding-specific SVG gives you the romantic floral framing and the personalization space already designed in, so you only add the couple's details rather than rebuilding the whole concept.
3.How do I add our wedding date and names to a shadow box SVG?
In Cricut Design Space (or Silhouette Studio), import and ungroup the SVG so each layer is editable. Use the Text tool to add the names and date in a wedding-appropriate font — script for romance, serif for formality. Place them in open areas of the design, make the names larger than the date for visual hierarchy, and use the same font family for both. Group everything before cutting. Keep script fonts above roughly 1 inch tall so the letter shapes cut cleanly on cardstock.
4.What cardstock colors work best for wedding shadow boxes?
Match the couple's wedding palette. The four palettes that consistently look great: classic white (pure white, cream, ivory, champagne, layered lightest-back to warmest-front in matte cardstock); blush pink and sage green (blush back layers, sage accents, one gold or copper focal element); navy and burgundy (burgundy back, navy middle, white front, one gold accent — the most dramatic depth); and metallic accents (gold, silver, or rose gold reserved for names, dates, or the top detail layers). Use the wedding invitation as your color reference and order small cardstock swatches to test before committing.
5.How many layers should a wedding shadow box have?
5–7 layers is the sweet spot for wedding pieces — enough depth to look professional without making alignment punishing. 3–4 layers gives subtle depth and is beginner-friendly for smaller frames; 5–7 layers is ideal for most wedding shadow boxes; 8+ layers creates maximum, dramatic depth for advanced makers and large or backlit frames. Match the frame depth to the layer count: at least 1.5" depth for 5–7 layers, deeper for backlit designs.
6.Can I make a wedding shadow box if I'm a beginner?
Yes. Start with a simpler 3–4 layer design from a wedding collection that includes layer numbering and instructions, use 65–80 lb cardstock for the best balance of stability and clean cuts, and take your time on alignment — that's the single step that separates a professional-looking piece from an amateur one. Always dry-fit every layer before gluing, photograph the stack as a reference, and work back-to-front. Even experienced makers dry-fit first; rushing assembly is the most common reason a shadow box looks off.
7.How do I add backlighting to a wedding shadow box?
Use warm-white LED strips (around 3000K) for the romantic glow that suits wedding themes. Place the strip behind the back layer or weave it between layers for more dimension. For battery-powered LEDs, hide the pack behind the frame backing with heavy-duty double-sided tape and notch a small channel for the wire so the frame sits flat. Warm white is the safe default; color-changing LEDs can clash with a wedding palette. Always test the lighting before final framing so it enhances rather than overwhelms the design.
8.Can I sell wedding shadow boxes made from SVG files?
It depends on the SVG's license. A personal-use license lets you make pieces for yourself or as gifts but not sell them. A commercial-use license lets you sell finished shadow boxes made from the file (you still can't redistribute the SVG itself). Always check each file's specific terms before selling. MMA's wedding shadow box SVG templates include commercial-use licensing, so you can build and sell finished wedding pieces without ambiguity; files from Etsy, Design Bundles, or Creative Fabrica vary widely and must be read individually.