Articles16 min read

Cricut Shadow Box Projects for Beginners

A complete first-project guide — what to buy, how to set up Design Space, where to find SVGs, a step-by-step build you can finish in an afternoon, the mistakes that ruin first attempts, and how to keep the whole hobby under $30 to start.

Hands holding up a finished first illuminated layered papercut shadow box with a softly glowing floral scene

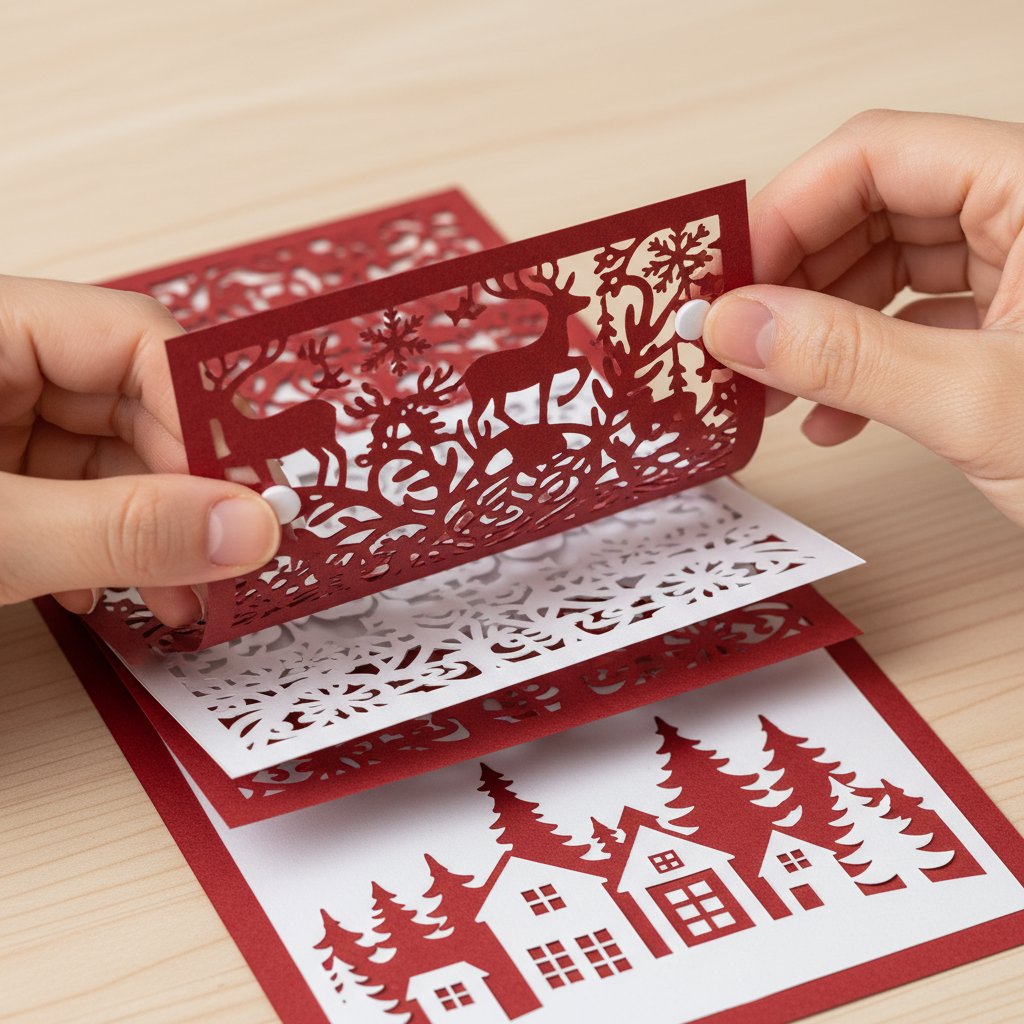
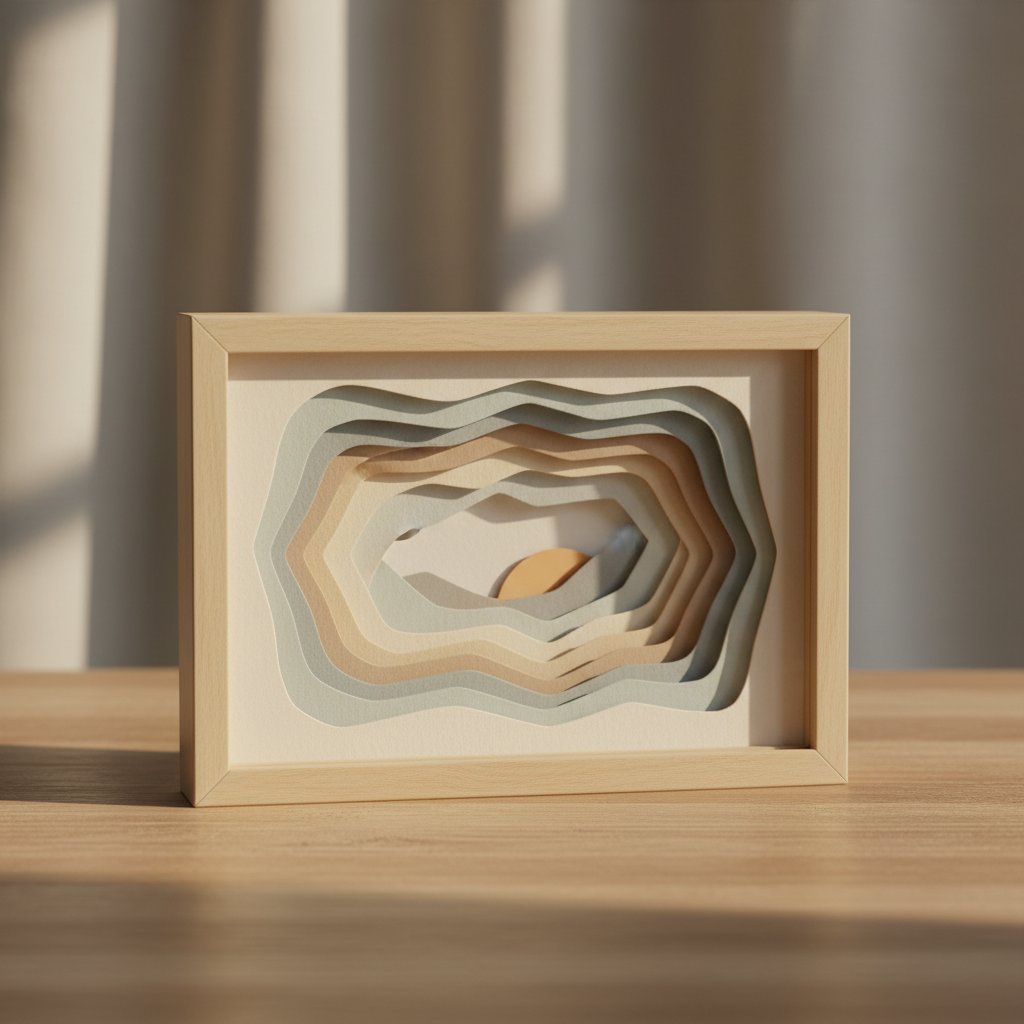
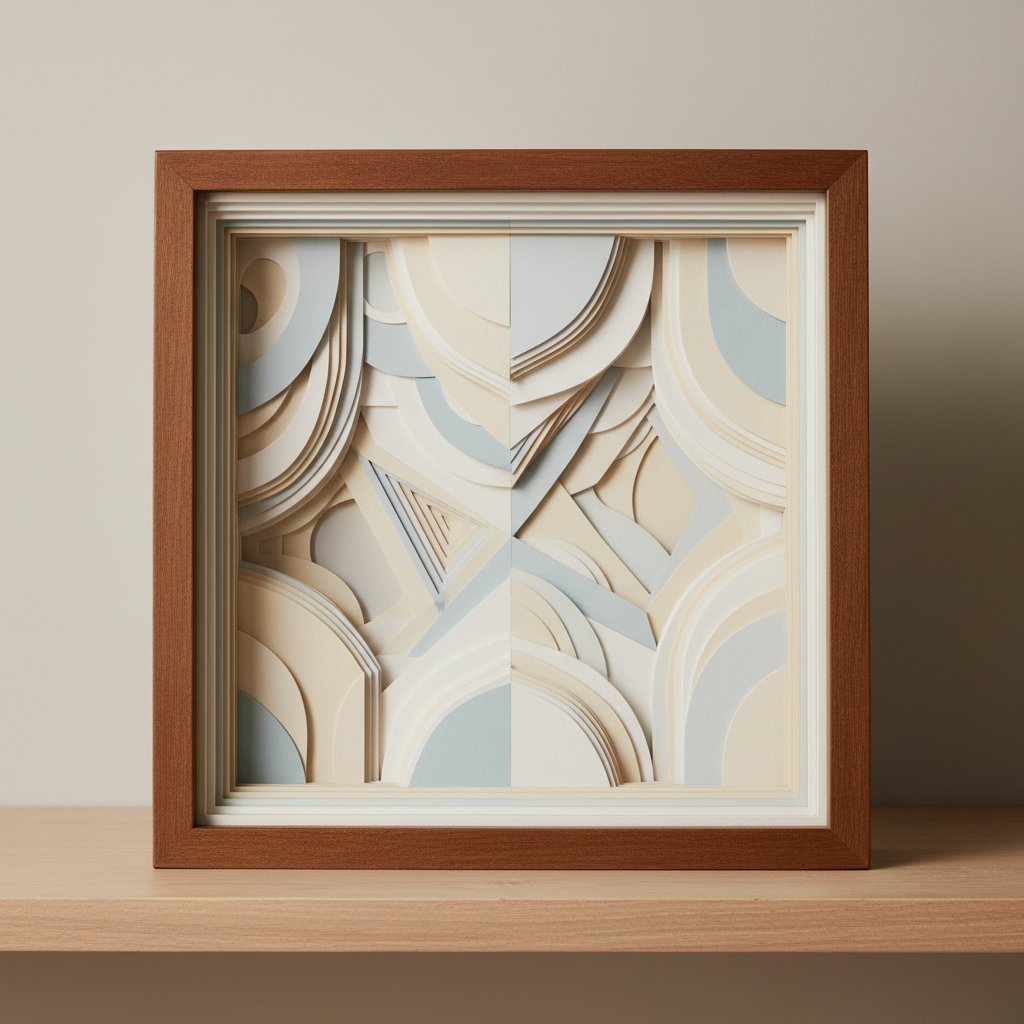
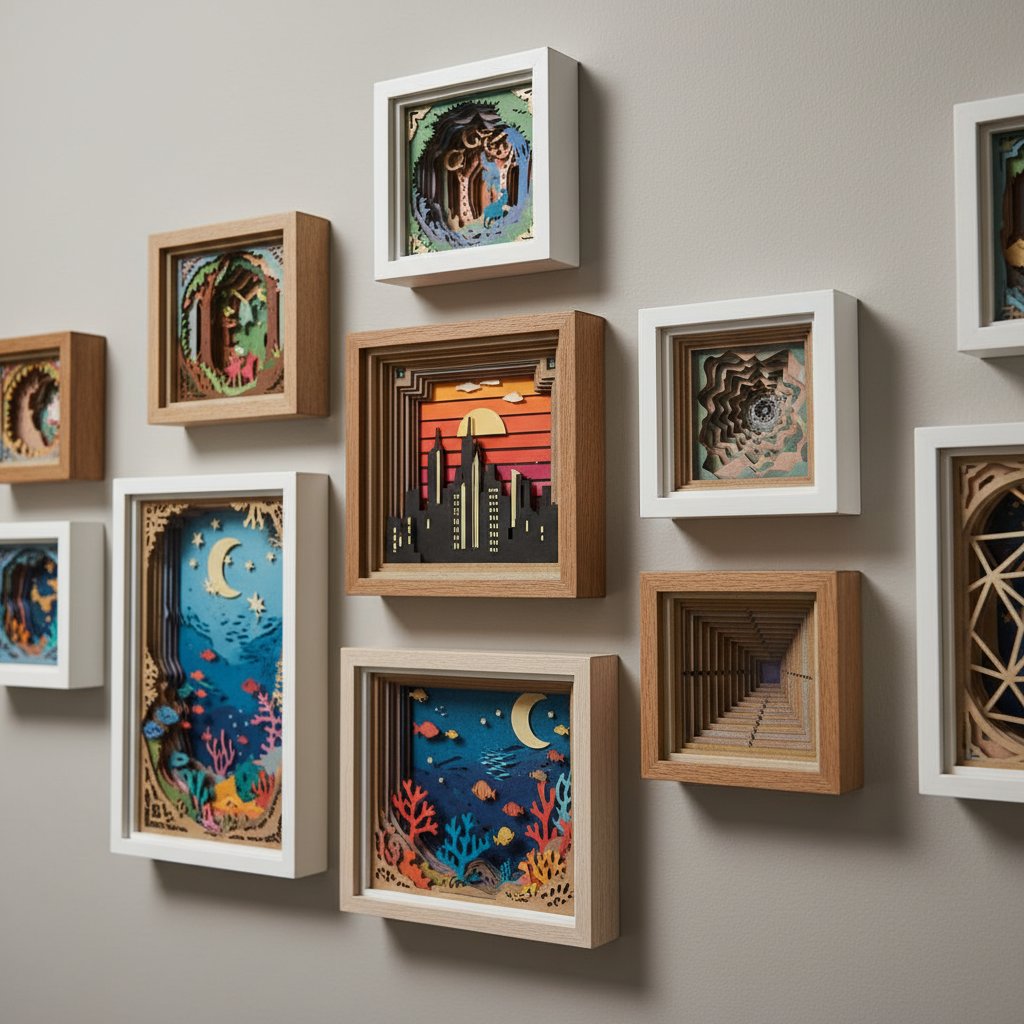
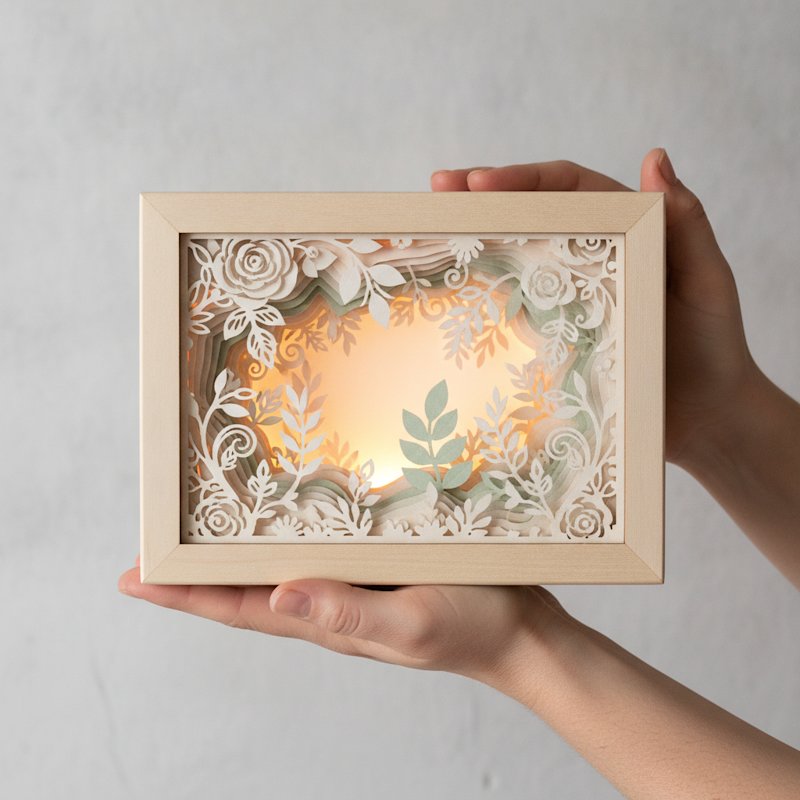
A Cricut shadow box is a piece of layered paper art: several sheets of cardstock, each with part of a scene cut out of it, stacked on top of each other inside a deep frame. Add a strand of LED lights behind the layers and the cutouts glow, giving a flat sheet of paper real depth. It is one of the most satisfying things a Cricut can make, and contrary to how the finished pieces look, it is genuinely beginner-friendly.

I built my first Cricut shadow box in early 2024 — a simple 5-layer floral scene on an 8×8 inch frame. It took me 3 hours and 20 minutes start to finish, I tore two layers before I worked out my blade pressure, and I hung it on the wall the same evening. My second project, two weeks later, took 55 minutes. That jump — from a slow, mistake-heavy first build to a confident second one — is exactly the curve this guide is built to flatten for you.

This is a complete beginner's guide to Cricut shadow box projects for beginners. It is deliberately structured as an overview hub: I cover what you actually need to buy, how to set up Cricut Design Space, where to find SVG cut files (free and paid), a full first-project walkthrough, the mistakes that derail most newcomers, five project ideas ranked by difficulty, pro finishing touches, budget-saving swaps, and gift ideas. Where a topic deserves its own deep dive, I link out to the specialised tutorial so you can go further without this page becoming overwhelming.

What You'll Be Able to Do After This Guide

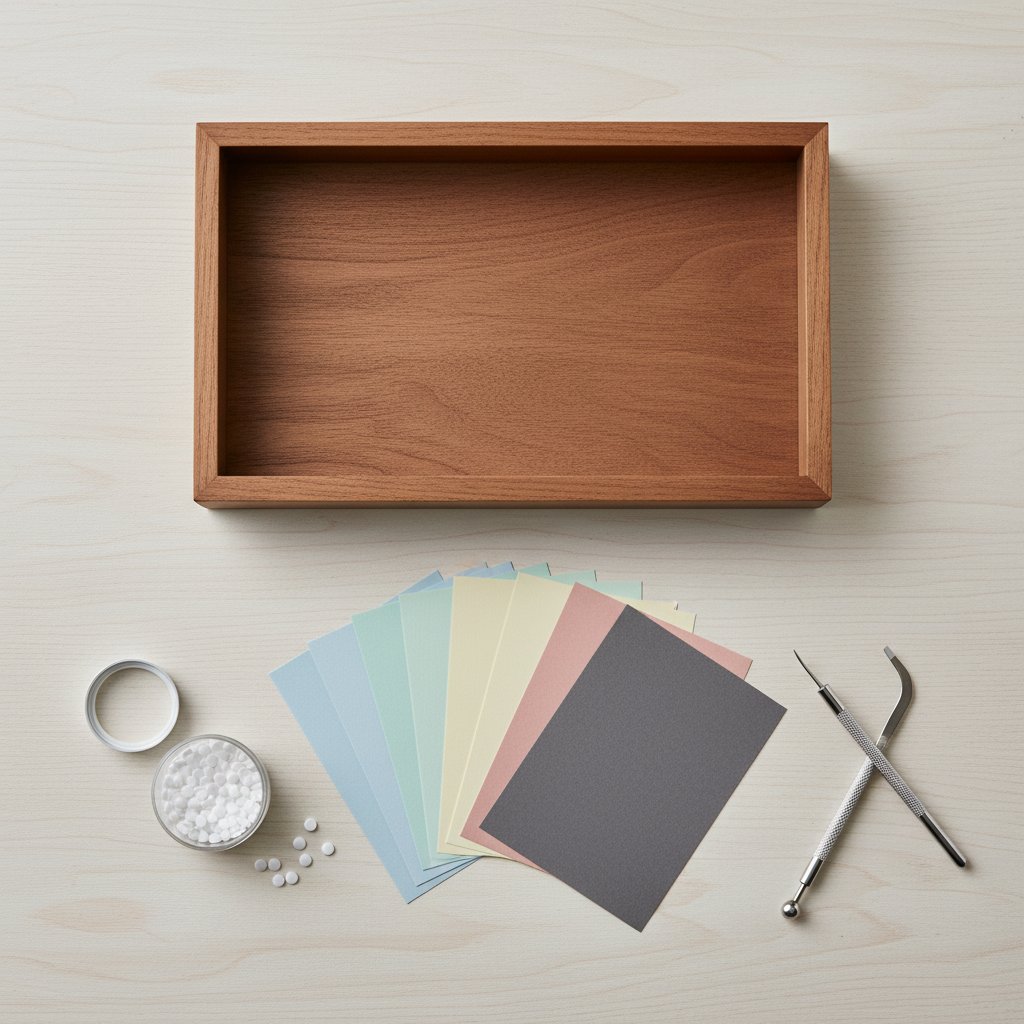
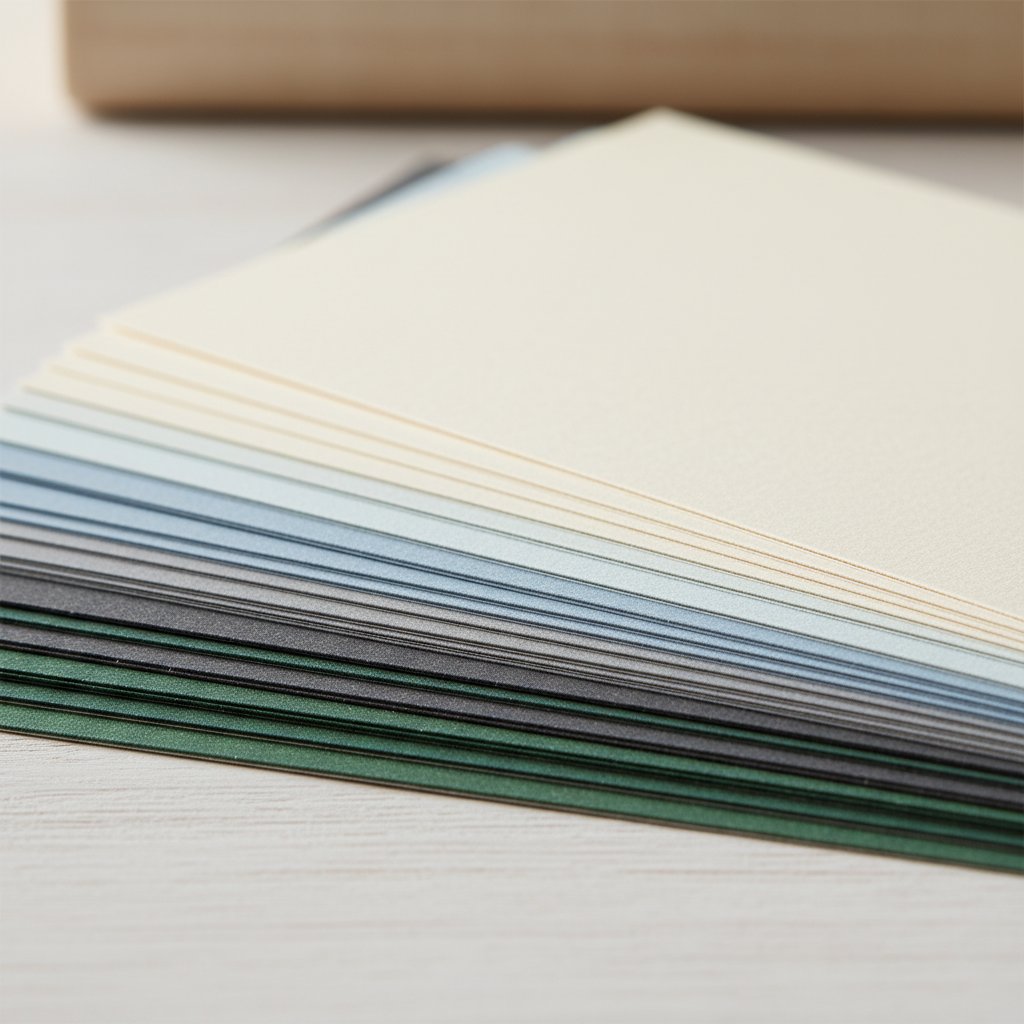
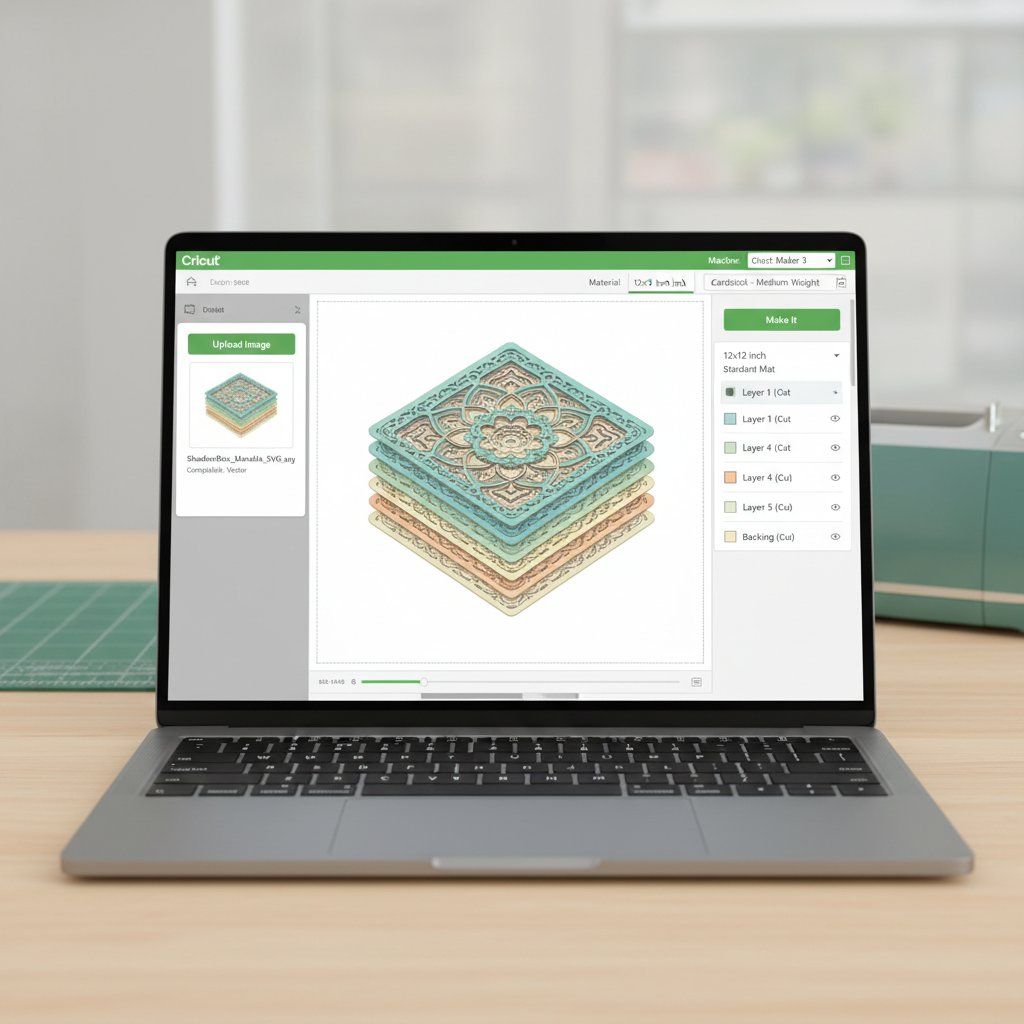
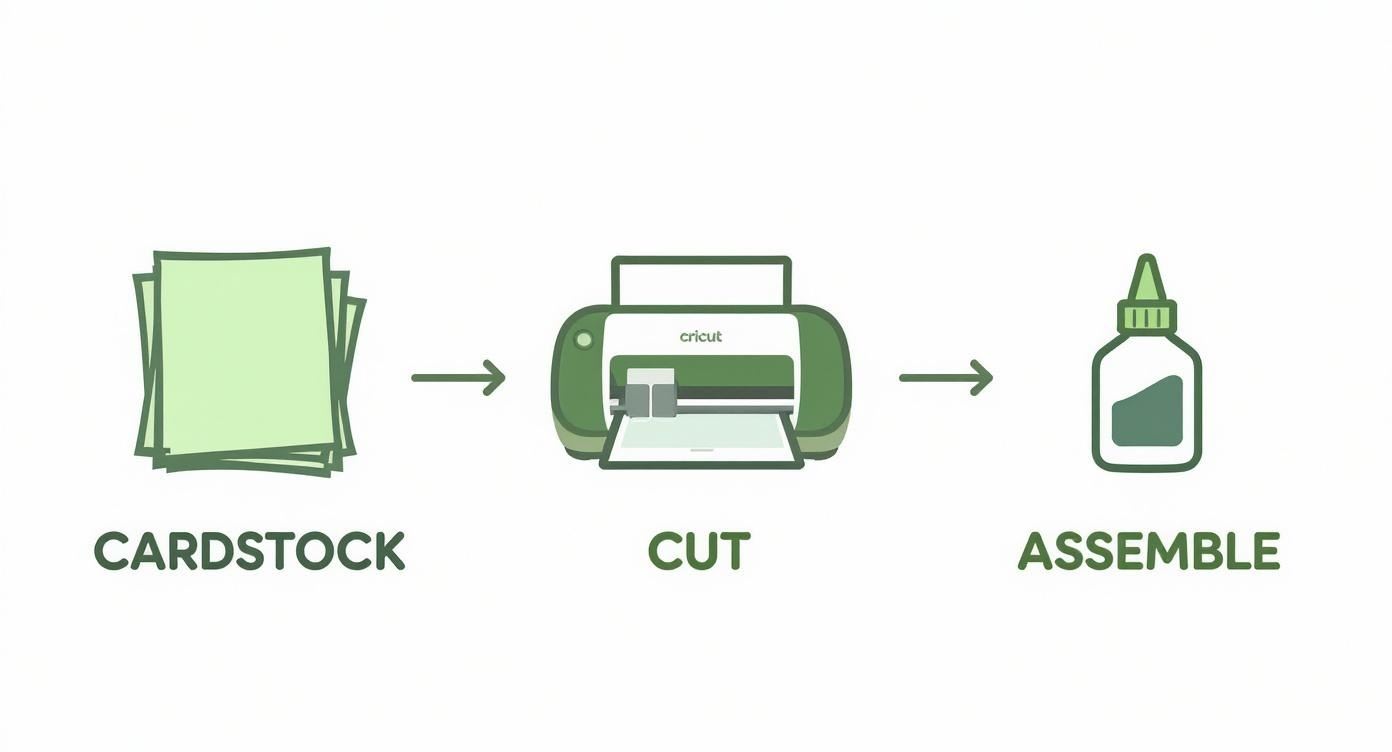
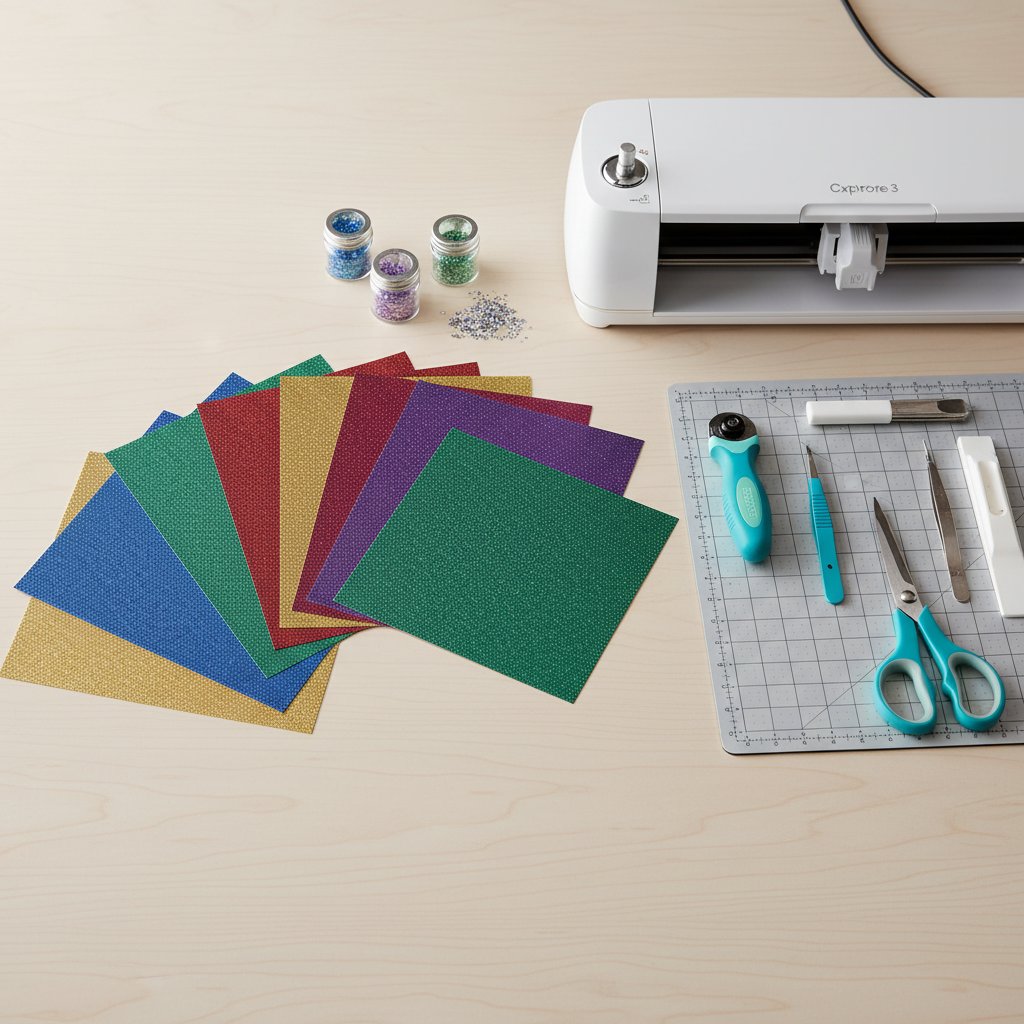
  • Pick the right cardstock, mat, blade, and frame for a first project without guessing - Import and organise a layered SVG in Design Space and resize it to fit your frame - Cut, stack, and glue the layers in the correct order for clean depth - Avoid the five mistakes that cause torn paper, misaligned layers, and wasted cardstock - Finish a glowing, gift-ready shadow box for $20–$30 in materials

If you have never opened Design Space before, start here, then follow the links to the deeper tutorials. If you have already cut a project or two, jump straight to the step-by-step layered shadow box tutorial or the five easy beginner projects.

The Mind Tree Papercut SVG is the kind of single, clean design I wish I had started with. Few fiddly details, satisfying depth when lit from behind, and a forgiving layout that hides first-attempt glue wobbles. It is an ideal first Cricut shadow box project.

The Complete Materials Guide (With Budget Options)

Overhead flat lay of shadow box supplies including a frame colored cardstock foam dots and craft tools

Most "what do I need" lists for shadow boxes are either too vague or push you toward premium gear you do not need yet. Here is exactly what I use, split into essentials and upgrades, with realistic prices.

Essentials (the $20–$30 starter kit)

  • A Cricut cutting machine. Any current model works for cardstock — Maker, Maker 3,
    Explore 3, or Explore Air 3. The Maker's Adaptive Tool System helps with very thick
    cardstock, but standard 200–216 gsm shadow-box cardstock cuts cleanly on any of them.
    The Cricut Joy and Joy Xtra can make smaller designs but their narrow mat limits frame
    size, so I do not recommend them as your only machine for shadow boxes.
  • Cardstock, 200–216 gsm, in 4–6 colours. This is the soul of the project. A 50-sheet
    multipack of 8.5×11 or 12×12 cardstock in a coordinated palette costs about $10–$14 and
    covers several projects. Avoid anything labelled "cover weight" above 250 gsm for your
    first build — it is harder to cut and wastes material while you learn.
  • A StandardGrip (green) machine mat. One mat is fine to start. A LightGrip (blue)
    mat is gentler on lighter paper but the green mat handles 200+ gsm cardstock reliably.
  • Fine-Point blade. This comes with every Cricut and handles cardstock up to ~230 gsm.
    Only buy a Deep-Point blade later if you move to 250+ gsm specialty cardstock.
  • Foam adhesive squares or dots, ~3 mm thick. These create the gap between layers
    that produces the 3D effect. A box of 200+ costs around $4–$6.
  • A shadow box frame, 8×8 inch or larger, 1.5–2 inches deep. Look for the
    "floating frame" style with a removable back. Craft-store shadow box frames run $8–$15.
  • LED fairy lights, warm white, battery-powered. A 2-metre copper-wire strand is
    about $5. USB-powered strands are brighter if you want to plug in.

Nice-to-have upgrades (later, not day one)

  • A brayer (roller) to press cardstock flat onto the mat — saves tearing ($8) - A spatula tool to lift delicate cuts off the mat without bending them ($7) - Tweezers for placing small detail pieces (~$5) - A second mat so you can load the next colour while the first cuts
Fanned stack of cardstock sheets in graduated weights and colors showing varying thickness

The one thing beginners overspend on

Do not buy premium "shadow box cardstock kits" at $25–$35 before your first project. A standard multipack plus a frame and foam dots gives you a complete first build for under $30, and you will learn which weights and colours you prefer before committing to a fancy palette. For a full breakdown of true project costs, see the cost analysis guide, and for cardstock specifics read the cardstock buying guide.

Cricut Design Space Setup and SVG Organisation

Cricut Design Space interface showing a shadow box template being imported and prepared for cutting

Design Space is the free software that drives your Cricut, and for shadow boxes the workflow is the same whether you use a Maker or an Explore. The single most useful habit you can build on day one is organising your layers by colour before you cut.

Here is the setup sequence I use for every project:

  1. Open a new project and click Upload in the left panel, then Upload Image,
    and select your layered SVG file. Most shadow-box SVGs arrive as one file with every
    layer grouped together.
  2. Insert the design onto the canvas. You will see all layers stacked on top of each
    other. Select everything, right-click, and choose Ungroup so each layer becomes
    individually selectable.
  3. Colour-code each layer to match the cardstock you will use. Click a layer, then
    click the colour square next to "Operation: Basic Cut" and pick a colour. When you
    send the project to cut, Design Space groups layers by colour, so it tells you exactly
    which cardstock sheet to load for each cut — this is the trick that stops you cutting
    the wrong colour.
  4. Resize all layers together. Select every layer, lock the aspect ratio, and set the
    width to roughly 1 cm less than your frame's internal opening. Resize as a group, not
    one at a time, or your layers will not line up.

Resize to your frame, not to the SVG

A common first-timer trap: SVGs download at whatever size the designer saved them, which is rarely your frame size. An 8×8 inch frame has an internal opening of about 19×19 cm, so I size my design to 18 cm wide. Always resize every layer by the same proportion so the scene keeps its shape. For the full resizing method, including how to handle SVGs saved on separate artboards, see the guide to sizing and resizing shadow-box SVGs, and for the import workflow read importing multi-layer SVGs into Design Space.

Cut settings: start middle-of-the-road

For 200–216 gsm cardstock, use the built-in Cardstock (for intricate cuts) setting with the Fine-Point blade and a StandardGrip mat. Default pressure is usually right. If your cuts tear on the first try, drop the pressure by 10–15 units rather than raising it — tearing almost always means too much pressure or a dull blade, not too little. The cardstock settings mastery guide has a full pressure table by paper weight.

SVG Resources: Free vs Paid

You do not need to design your own files to start. The shadow-box community runs almost entirely on ready-made SVGs, and the quality difference between free and paid is smaller than you might think — what you pay for is usually layer count, clean vector paths, and licensing, not raw beauty.

Free SVG sources (good for first projects)

  • Designers' freebie pages. Many paid designers release a free sample design — these
    are the best free files because the paths are cut-clean. They are often single-scene
    florals or simple landscapes.
  • Community craft blogs. Free shadow-box SVGs circulate on craft blogs, though file
    quality varies. Test-cut a small corner before committing a full sheet of cardstock.
  • Our own free templates. We keep a curated set of
    free shadow-box SVG templates for Cricut and Silhouette
    and seasonal files like
    free Christmas SVGs for Cricut.

When paid is worth it

  • Higher layer counts (8–16 layers) create more dramatic depth but need cleaner vector
    work to avoid tearing. Paid designers invest in this.
  • Commercial licensing. If you want to sell finished shadow boxes, you need a
    commercial-use licence — most free files are personal-use only.
  • Tested cut files. Good paid designers list the cardstock weight, blade, and pressure
    they cut with, which removes the guesswork for beginners.

How to spot a bad free SVG before you cut it

Zoom into a cutout edge at 400%. If the edge is jagged, pixellated, or full of tiny floating "islands" of paper that will fall out, skip the file — it will waste cardstock. Clean vector paths look smooth and continuous even when magnified. For evaluating file quality in depth, read the shadow-box SVG mastering guide
and the wider
papercut SVG guide.

Your First Project: A Step-by-Step Walkthrough

Three-step Cricut crafting process showing cardstock being cut with Cricut machine then assembled with glue

Let's build a 5-layer floral shadow box on an 8×8 inch frame. This is close to my own first project, and at 5 layers it is complex enough to teach the real workflow without overwhelming you. Budget about 90 minutes for a first attempt.

Step 1 — Prep the file (10 min)

Import your SVG, ungroup, colour-code each layer, and resize the whole group to 18 cm
wide as described above. You should now see five distinct layers in the layers panel,
each a different colour.

Step 2 — Cut each layer (25–35 min)

Click Make It. Design Space arranges your layers onto mats grouped by colour. Load your first cardstock sheet onto the mat, press it flat with your hands (or a brayer), and load the mat. The machine cuts, then prompts you for the next mat. Repeat for all five colours.

Use the spatula tool to lift each finished cut off the mat from the centre outward — pulling from the edge curls fine details. Set each layer face-down on a clean surface in cutting order (background layer first, front frame last).

Step 3 — Dry-fit the stack (5 min)

Before any glue, lay all five layers on top of each other on the frame's back panel. This dry fit catches sizing errors while they are still fixable. If a layer overhangs, trim it now with sharp scissors.

Step 4 — Assemble with foam spacers (20–30 min)

Hands adding foam adhesive dots between layers of a Christmas paper-cut shadow box

Place foam adhesive squares around the back edges of the front frame layer, then press it onto the layer behind it. Repeat, working from the front layer toward the background. The 3 mm foam gap between each layer is what creates the depth — keep the spacer thickness consistent on every layer or the depth looks uneven.

Two alignment tricks: line up the top edge first, then the left edge. Once those two are flush, the rest follows because every layer was cut to the same size. Shadow boxes are forgiving — depth hides small misalignments — but edges should sit within 1–2 mm.

Step 5 — Add lights and frame (10 min)

Drape a strand of warm-white LED fairy lights across the back, between the background layer and the frame's back panel, so the lights sit behind the paper. Tuck the battery pack into the bottom corner. Close up the frame. For safe, tidy wiring and brightness tips, follow the LED lighting guide for shadow boxes.

That is a finished, glowing shadow box. For an even more detailed, screenshot-heavy version of this exact workflow, the layered shadow box step-by-step tutorial walks through every Design Space click.

Ready for a floral build with real wow factor? The Rose Flower Shadowbox SVG layers sculpted petals that glow beautifully from behind — a satisfying second project that rewards the cutting and stacking skills you pick up on your first build.

Common Mistakes (and How to Prevent Them)

A badly curled and warped sheet of colored cardstock with lifting edges pulled from a drawer onto a craft table

Almost every first-project problem traces back to one of five causes. Here they are, with the fix that works most often.

1. Torn or fuzzy cut edges. The cause is almost always a dull blade or pressure that is too high, not too low. Replace the blade first (it fixes about 80% of tearing). If it persists, drop pressure by 10–15 units. A blade lasts roughly 15–25 cardstock projects before it dulls — if yours has done more, swap it.

2. Cardstock curling or lifting off the mat mid-cut. This is humidity and ageing mat adhesive. Flatten curled sheets under heavy books for 30 minutes before cutting, and use a brayer to press the sheet firmly onto the mat. If the mat has lost its tack, restore it — the mat restoration guide shows how to make mats sticky again instead of replacing them.

3. Layers that do not line up. You resized layers individually instead of as a group. Re-import the SVG, select all, and resize together. For a project already cut, trim the overhanging layer with scissors along the edge — depth hides the fix.

4. Uneven depth between layers. You mixed spacer thicknesses. Standardise on 3 mm foam squares for every layer. Consistent spacing is the single biggest factor in a professional-looking result.

5. Lights barely glowing through the layers. Either the layers are stacked too close or the cardstock is too opaque. Dark colours block light — for maximum glow-through, use lighter tones on the middle layers and reserve the darkest sheet for the background only. If a layer tears during your fix-up, the emergency shadow-box repair guide covers patching without starting over.

For the full diagnostic list, read the common beginner mistakes article and the Cricut cardstock troubleshooting bible.

Five Beginner Project Ideas (Ranked by Difficulty)

Finished layered paper-cut shadow box beginner project on a wooden table

Once your first floral build is on the wall, here are five directions to grow in, ordered from easiest to most challenging. Each one teaches a specific new skill.

1. A single-scene landscape (easiest). Three to five layers, no intricate detail — a mountain and moon scene or a simple tree silhouette. Teaches the basic cut-and-stack rhythm. The five easy beginner projects list is full of these.

2. A botanical or floral piece. Five to eight layers with petal and leaf detail. Builds your layer-alignment confidence and your eye for colour contrast. See the flower shadow-box ideas
and
botanical and tree light-box designs.

3. An animal silhouette. Think a fox in a forest or a cat on a windowsill. Animal shapes are forgiving because they read clearly even with slightly imperfect edges, and the animal papercut SVG ideas cover cat, dog, fox, and dragon templates.

4. A seasonal or holiday piece. Christmas, autumn, or spring scenes layer beautifully and make great gifts. The seasonal shadow-box crafts guide walks through all four seasons, and free Christmas SVGs for Cricut covers the holiday rush.

5. A geometric mandala (most challenging beginner build). Mandala layers are symmetrical and any misalignment is obvious, so this one sharpens your precision. The payoff is a striking, modern piece — see more ideas in the 25 layered paper projects you can actually cut
and the broader
shadow-box ideas gallery.

Across all five, the principles are identical: clean file, right pressure, consistent spacers, careful stacking. Difficulty is mostly about layer count and intricacy, not new techniques.

Animal silhouettes are perfect confidence-builders because the shape reads clearly even when a cut is not perfect. The Magical Fox Shadow Box SVG layers a fox among trees and glows beautifully at dusk — a rewarding step up from a simple floral.

Professional Finish Tips

Beautifully finished layered paper-cut shadow box with crisp clean layers displayed on a wood shelf

The difference between "homemade" and "handmade-looking-professional" is in five small finishing moves. None of them cost much.

  • Clean the glass last. Wipe the inside of the frame glass with a microfibre cloth
    just before you close the frame. A single cardstock fibre on the glass shows up under
    LED light and is annoying to fix later.
  • Hide the battery pack. Tape the LED battery box to the bottom-inner corner of the
    frame with double-sided tape so it cannot shift and cast a shadow. A USB-powered strand
    run through a small drilled notch in the frame edge looks even cleaner.
  • Burnish the cut edges. Run the flat of a bone folder or the back of a fingernail
    along each cut edge to press down any fuzzy fibres. It takes two minutes and makes
    edges read as crisp from across the room.
  • Use a backing layer. A plain black or dark-navy sheet behind your background layer
    deepens the contrast and hides the frame's back panel.
  • Choose frame depth on purpose. More depth=more dramatic shadow. A 1.5 inch frame
    suits 4–5 layers; push to 2–2.5 inches for 8+ layers. The
    frame size and depth guide
    has a depth-to-layer-count table.

For glue and spacer specifics — which adhesives stay invisible and which yellow over time — read the glue and adhesive guide
and the
assembly, spacers, and alignment guide.

Budget-Saving Alternatives

Flat-lay of jewel-tone glitter cardstock sheets fanned beside a Cricut machine and crafting tools on a wood desk

Shadow boxing does not have to be expensive, and several "upgrades" are easy to fake on a budget. Here is where to save and where it is worth spending.

Save on cardstock. Standard multipacks from craft stores cut just as well as boutique cardstock for 200–216 gsm weights. Buy a neutral palette (black, navy, grey, cream, white) and add one or two accent colours — neutrals get reused across many projects, so waste drops sharply. Store sheets flat, not in a drawer where they curl — the paper storage guide shows cheap flat-storage setups.

Save on mats. Mats are the single biggest consumable cost. Wash a mat with warm water and dish soap, let it air-dry, and re-tack it with a light repositionable adhesive to get months more life. The mat restoration guide pays for itself in one read.

Save on frames. Craft-store shadow-box frames go on sale constantly. Stock up during seasonal sales. Thrift-store deep frames work too if you clean the glass and replace the backing.

Fake the premium look for less. A single sheet of glitter or metallic cardstock on the front frame layer only gives a high-end look without buying a full premium pack — see the glitter cardstock cutting guide
and the
metallic and pearl cardstock guide for the right cut settings on these trickier sheets.

Spend where it counts. A sharp blade and good foam spacers are not the place to economise. A dull blade wastes more cardstock in one torn project than three new blades cost.

Gift and Personalisation Ideas

Finished handmade Christmas paper-cut shadow box wrapped as a personal gift with ribbon

A finished shadow box is a genuinely memorable gift — it is handmade, personal, and looks far more expensive than it is. A few angles that work especially well:

  • New-home gift. A layered scene of the recipient's new house, city skyline, or local
    landmark. Housewarming gifts that glow are conversation pieces.
  • Wedding and anniversary. Layered initials, the wedding date, or a floral piece in
    the couple's colours. The
    wedding anniversary shadow-box guide
    covers date and initial layouts.
  • New baby or nursery. Soft, glowing animal or cloud scenes double as a nightlight —
    see the
    nursery decor guide.
  • Memorial pieces. A favourite flower or landscape that meant something to the person,
    often the most treasured gift you can make. The
    memorial flower shadow-box guide
    handles sensitive personalisation thoughtfully.
  • Seasonal and holiday. Christmas, Halloween, and autumn-fall pieces make excellent
    annual traditions — make one each year and start a collection.

Personalisation tactics that cost nothing

Swap the colour palette to the recipient's favourites, add a hidden initial or date on the background layer, or choose a scene tied to a shared memory. These small choices turn a generic template into something that feels commissioned.

Display and gift as a wall collection

Growing collection of handmade layered paper-cut shadow boxes on a gallery wall

Once you have two or three pieces, group them on one wall at matching heights. A small cluster reads as a curated gallery and is one of the most satisfying DIY wall-art looks you can build — browse the DIY paper wall-art ideas
for arrangement inspiration.

1.How long does a first Cricut shadow box project take?
Plan for 2 to 4 hours on your very first build — about 10 minutes to import and organise the SVG, 25–35 minutes to cut all layers, 20–30 minutes to assemble with foam spacers, and the rest on sizing decisions, dry-fitting, and fixing first-attempt mistakes. My first took 3 hours 20 minutes; my second dropped to under an hour.
2.What is a realistic budget to start making Cricut shadow boxes?
About $20–$30 covers a complete first project if you already own a Cricut: a cardstock multipack ($10–$14), a StandardGrip mat if you don't have one, foam adhesive squares ($4–$6), an 8×8 inch shadow-box frame ($8–$15), and warm-white LED fairy lights ($5). Avoid premium cardstock kits until you know which weights and colours you prefer.
3.Can I make shadow boxes with the Cricut Joy or Joy Xtra?
Yes, but with limits. The Joy's narrow mat restricts you to small designs, so it works for mini shadow boxes or single-layer pieces rather than full 8×8 inch multi-layer builds. For standard beginner projects, a Maker, Maker 3, Explore 3, or Explore Air 3 is the better choice because of the larger 12×12 cutting area.
4.Why is my cardstock tearing when the Cricut cuts it?
Tearing almost always means a dull blade or pressure that is too high — not too low. Replace the Fine-Point blade first (it fixes most cases), then reduce pressure by 10–15 units in custom settings if tearing continues. Also press the cardstock flat onto the mat with a brayer, and flatten curled sheets under heavy books before cutting.
5.How do I keep my layers properly aligned when stacking?
Resize all layers together as a group so they stay proportional, then assemble from the front layer toward the back using a consistent 3 mm foam spacer on every layer. Line up the top edge first, then the left edge — once those two are flush the rest follows. Shadow-box depth hides small misalignments, but edges should sit within 1–2 mm.